
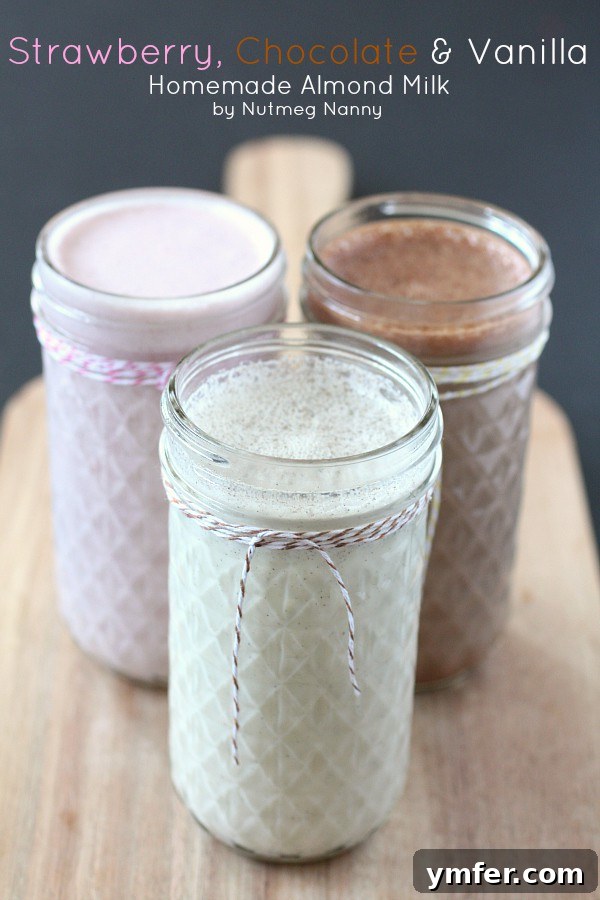
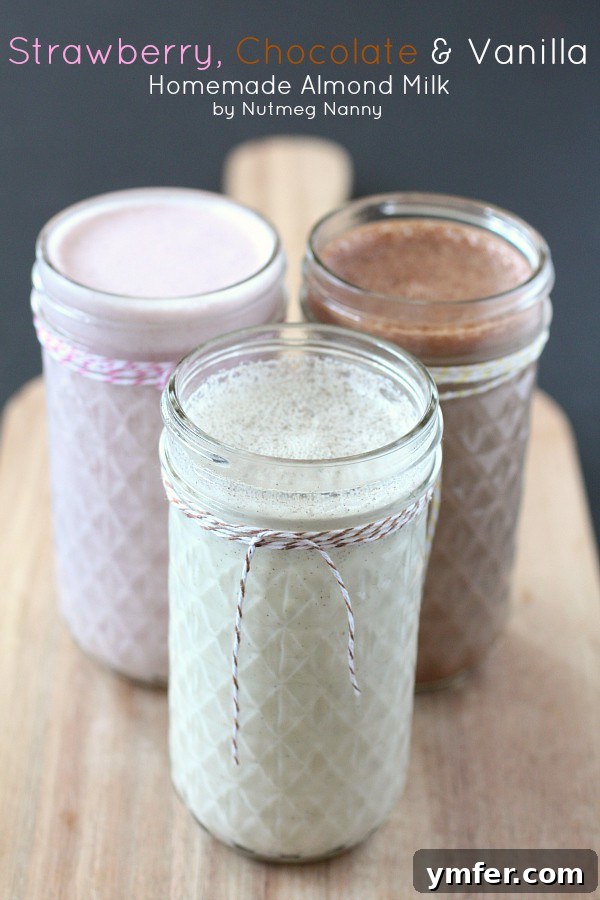
This comprehensive guide will show you how to effortlessly create delicious homemade almond milk, complete with irresistible variations like creamy vanilla bean, rich chocolate, and sweet strawberry. Fresh, wholesome, and surprisingly simple to make, this recipe is a fantastic way to utilize your high-powered blender and elevate your daily dairy-free choices. Say goodbye to store-bought additives and hello to pure, customizable goodness!
Disclosure: I am working with Fisher to share Chef Alex Guarnaschelli’s recipes and create my own original recipe using Fisher Nuts and tools they provided. However, my opinions are entirely my own and I have not been paid to publish positive comments.
The Simple Joy of Homemade Almond Milk: Fresh Flavors & Easy Steps
In a world increasingly embracing plant-based diets and dairy-free alternatives, the quest for the perfect milk substitute has led many to explore the wonders of nut milks. My own journey into this realm was largely influenced by my younger brother, a dedicated vegan. Our conversations often veer into the wonderfully quirky aspects of his dietary choices, like whether yeast (a living organism!) makes the cut (it does, apparently!). As someone who primarily enjoys bacon and eggs, the nuances of veganism are a fascinating, often humorous, learning curve for me.
Beyond the amusing questions, my brother and I share a genuine passion for cooking and baking. This shared interest frequently leads to detailed discussions about ingredients, techniques, and, inevitably, milk alternatives. After countless taste tests and informal analyses of various store-bought nut milks, we unanimously agreed that homemade almond milk, alongside coconut milk, stood head and shoulders above the rest. While certainly not a rigorous scientific study of every nut milk on the planet, our palates don’t lie – the fresh, clean taste of homemade truly makes a difference.
Why Choose Homemade Almond Milk? Benefits Beyond Taste
Opting to make your own almond milk offers a plethora of advantages over its store-bought counterparts. For starters, you have complete control over the ingredients. This means no unnecessary thickeners, emulsifiers, added sugars, or preservatives often found in commercial brands. The result is a purer, cleaner-tasting milk that’s also typically more nutritious and easier for your body to digest.
Furthermore, homemade almond milk is incredibly fresh. You’ll notice an immediate difference in flavor and texture compared to shelf-stable options. It’s also often more cost-effective in the long run, especially if you regularly consume almond milk. By selecting high-quality almonds, you ensure a superior product tailored precisely to your preferences. The process itself is surprisingly simple and incredibly rewarding, transforming basic almonds and water into a versatile kitchen staple.
My Journey to Making the Best Almond Milk
When the opportunity arose to experiment with Fisher Nuts once again (after creating some truly decadent brown sugar pecan toffee), my mind immediately jumped to perfecting homemade almond milk. There’s something inherently satisfying about crafting your own pantry essentials from scratch. I confess, I felt a slight surge of “DIY pride” – perhaps even a touch of that “hipster, vegan-like” vibe I joked about with my sister-in-law. I’m fairly certain she, and my brother, likely responded with a playful eye-roll, but secretly, I knew they’d appreciate the effort and the delicious outcome.
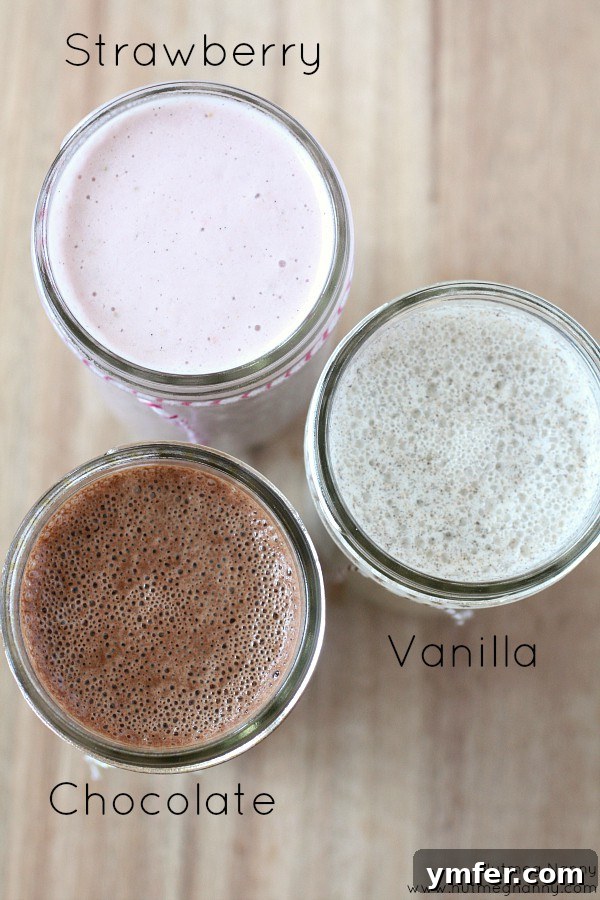
Making almond milk from scratch is remarkably straightforward, and while its original, pure form is utterly delightful, I couldn’t resist the urge to infuse it with exciting flavors. Drawing inspiration from classic Neapolitan ice cream, I decided to create vanilla bean, chocolate, and strawberry variations. And oh, what a delicious decision that was! The resulting milks were rich, creamy, and utterly delightful – truly reminiscent of a melted milkshake, but with significantly fewer calories. This texture is largely thanks to my trusty Vitamix high-powered blender, which effortlessly processes the almonds to an incredibly smooth consistency. If you prefer your nut milk unflavored, simply stop after the initial blending and straining, then chill it in the refrigerator.
Unlocking Incredible Flavors: Vanilla, Chocolate & Strawberry
Transforming basic almond milk into these delightful flavored versions is where the real fun begins. Each variation offers a unique taste experience:
- Vanilla Bean Almond Milk: My absolute favorite, this version incorporates high-quality vanilla bean paste, which I swear by for its intense, authentic vanilla flavor. The tiny specks of vanilla bean add a gourmet touch and aroma that plain vanilla extract simply can’t match. It’s perfect for coffee, smoothies, or enjoying on its own.
- Chocolate Almond Milk: Indulgent and comforting, the chocolate variation is made with natural cocoa powder and a touch of agave syrup. This creates a balanced sweetness and deep chocolatey goodness that rivals any store-bought chocolate milk, but without the artificial ingredients. It’s a fantastic treat for kids and adults alike, or a delightful base for a healthy mocha.
- Strawberry Almond Milk: Bursting with fresh fruitiness, the strawberry version uses either fresh or frozen strawberries. The natural sweetness and vibrant color make it incredibly appealing. This is a refreshing option for breakfast, an after-school snack, or blended into a vibrant smoothie.
The beauty of these flavors is their versatility. You can adjust the sweetness and intensity to your liking, ensuring every batch is perfectly suited to your taste buds.
Creative Ways to Enjoy Your Homemade Almond Milk
Beyond sipping it straight, homemade almond milk is an incredibly versatile ingredient in the kitchen. It’s a wonderful substitute for dairy milk in a myriad of recipes. Here are some fantastic ideas to get you started:
- Start your day with my energizing cranberry smoothie bowl or a comforting apple pie smoothie bowl.
- Whip up a batch of my savory dairy-free avocado ranch dressing for a healthy salad topping.
- Add a creamy touch to dinner with my cream of roasted asparagus soup.
And for even more inspiration, check out these amazing recipes from my fellow food blogger friends:
- A festive low carb almond milk eggnog for the holidays.
- A comforting slow cooker light almond milk tapioca pudding.
- Or these irresistible chocolate-covered almond overnight oats for a quick and delicious breakfast.
Homemade Almond Milk {Strawberry, Chocolate and Vanilla Flavor}
This homemade almond milk recipe includes variations for vanilla bean, chocolate and strawberry. Fresh, delicious and ready in no time! Plus it’s a great use for your high powered blender!
Yield: 4 cups almond milk
Prep Time: 30 min
Cook Time: 5 minutes
Total Time: 35 minutes
Ingredients:
For the Basic Homemade Almond Milk:
- 1 cup raw slivered almonds (or whole raw almonds, blanched)
- 3 cups hot tap water (for soaking)
- 3-1/2 cups cold tap water (for blending)
For Strawberry Almond Milk (Yields approx. 1 ½ cups):
- 1-1/2 cups prepared basic almond milk
- 5 medium-sized fresh or frozen strawberries
- 1 teaspoon agave syrup (optional, adjust to taste)
For Chocolate Almond Milk (Yields approx. 1 ½ cups):
- 1-1/2 cups prepared basic almond milk
- 3 tablespoons unsweetened cocoa powder
- 2 teaspoons agave syrup (or other natural sweetener like maple syrup, adjust to taste)
For Vanilla Almond Milk (Yields approx. 1 ½ cups):
- 1-1/2 cups prepared basic almond milk
- 2 teaspoons vanilla bean paste (recommended for rich flavor)
- 2 teaspoons agave syrup (optional, adjust to taste)
Directions:
Step 1: Soak the Almonds
In a large bowl, place 1 cup of slivered almonds. Pour 3 cups of hot tap water over them, ensuring they are fully submerged. Let the almonds soak for a minimum of 30 minutes. Soaking helps soften the almonds, making them easier to blend and resulting in a creamier milk. If you’re using whole almonds, soaking them overnight in cold water can also work wonders.
Step 2: Blend the Almonds
Carefully drain the soaked almonds and rinse them thoroughly under cold running water. Transfer the rinsed almonds to a high-speed blender along with 3-1/2 cups of fresh cold tap water. For this recipe, I used my powerful Vitamix blender to achieve an exceptionally smooth consistency.
Step 3: Achieve Smoothness
Begin blending on a low speed (I typically use setting 2 on my Vitamix) and continue for 3 minutes. This gradual blending helps break down the almonds without overheating the mixture. After 3 minutes, increase the blender speed to high and blend for another 1 minute. The goal is a completely smooth, uniform mixture.
Step 4: Strain (Optional, but Recommended for Smoothness)
My Vitamix typically produces a milk so smooth that straining isn’t strictly necessary for a fine texture. However, if your blender leaves any noticeable pulp or you prefer a perfectly smooth, pulp-free milk, you can strain the mixture. Place a nut milk bag or a fine-mesh sieve lined with cheesecloth over a large bowl. Pour the blended almond mixture into the bag/sieve and gently squeeze or press down on the almond pulp to extract all the liquid. Discard the pulp (or save it for other recipes, see tips below!). Congratulations, you have now made delicious homemade basic almond milk!
Step 5: Flavor Your Almond Milk (Optional)
If you wish to create flavored almond milk, rinse out your blender thoroughly. Select your desired flavoring variation (strawberry, chocolate, or vanilla) from the ingredient list above. Add 1-1/2 cups of your freshly made basic almond milk to the blender along with the specified ingredients for your chosen flavor. Blend on medium speed for approximately 30 seconds, or until all ingredients are well combined and smooth.
Step 6: Serve and Store
Your homemade almond milk is now ready to enjoy! You can drink it immediately, or for a refreshingly chilled experience, transfer it to an airtight container or bottle and refrigerate for at least an hour. Some natural separation is normal; simply give it a good shake before each use. Homemade almond milk typically stays fresh in the refrigerator for about 3 days. Always smell and taste a small amount to check for freshness beyond this period.
Tips for Success & Beyond:
- Almond Quality: For the best flavor, use high-quality raw almonds. Blanched slivered almonds can create an even smoother milk with less need for straining.
- Sweetener Adjustments: The amount of agave syrup (or other sweeteners) is entirely optional and can be adjusted to your personal preference. Taste and add more in small increments if desired.
- Nut Milk Bags: Investing in a good quality nut milk bag can make the straining process much easier and more efficient, yielding a smoother milk.
- Using Leftover Almond Pulp: Don’t throw away the almond pulp! It’s a fantastic byproduct that can be repurposed. You can dehydrate it to make almond flour, add it to smoothies for extra fiber, or incorporate it into energy bites, crackers, or even baked goods.
- Spice it Up: Experiment with other flavorings like a pinch of cinnamon, cardamom, or a dash of nutmeg for unique twists on your basic almond milk.
Embracing the simplicity of making your own almond milk is a game-changer for anyone seeking healthier, tastier dairy-free alternatives. With just a few ingredients and the power of your blender, you can enjoy a fresh, pure, and customizable beverage that far surpasses anything you’d find on store shelves. So go ahead, give it a try – your taste buds, and your body, will thank you!