
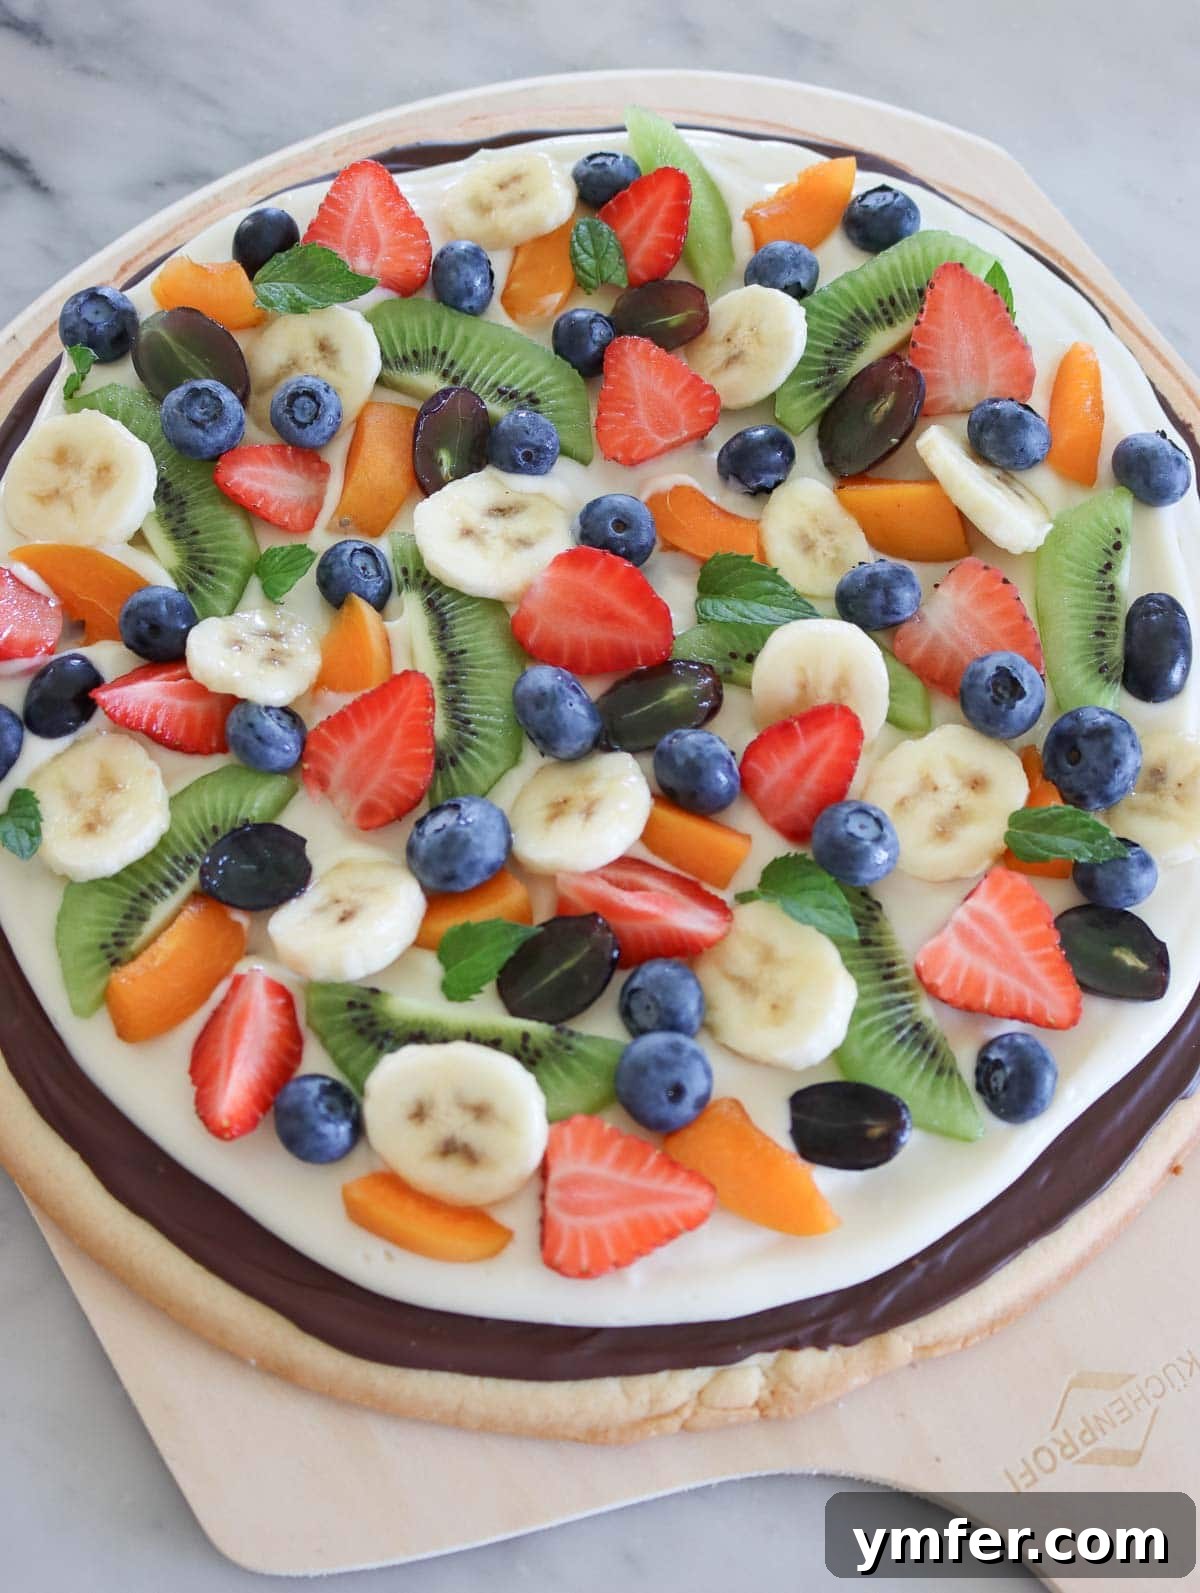
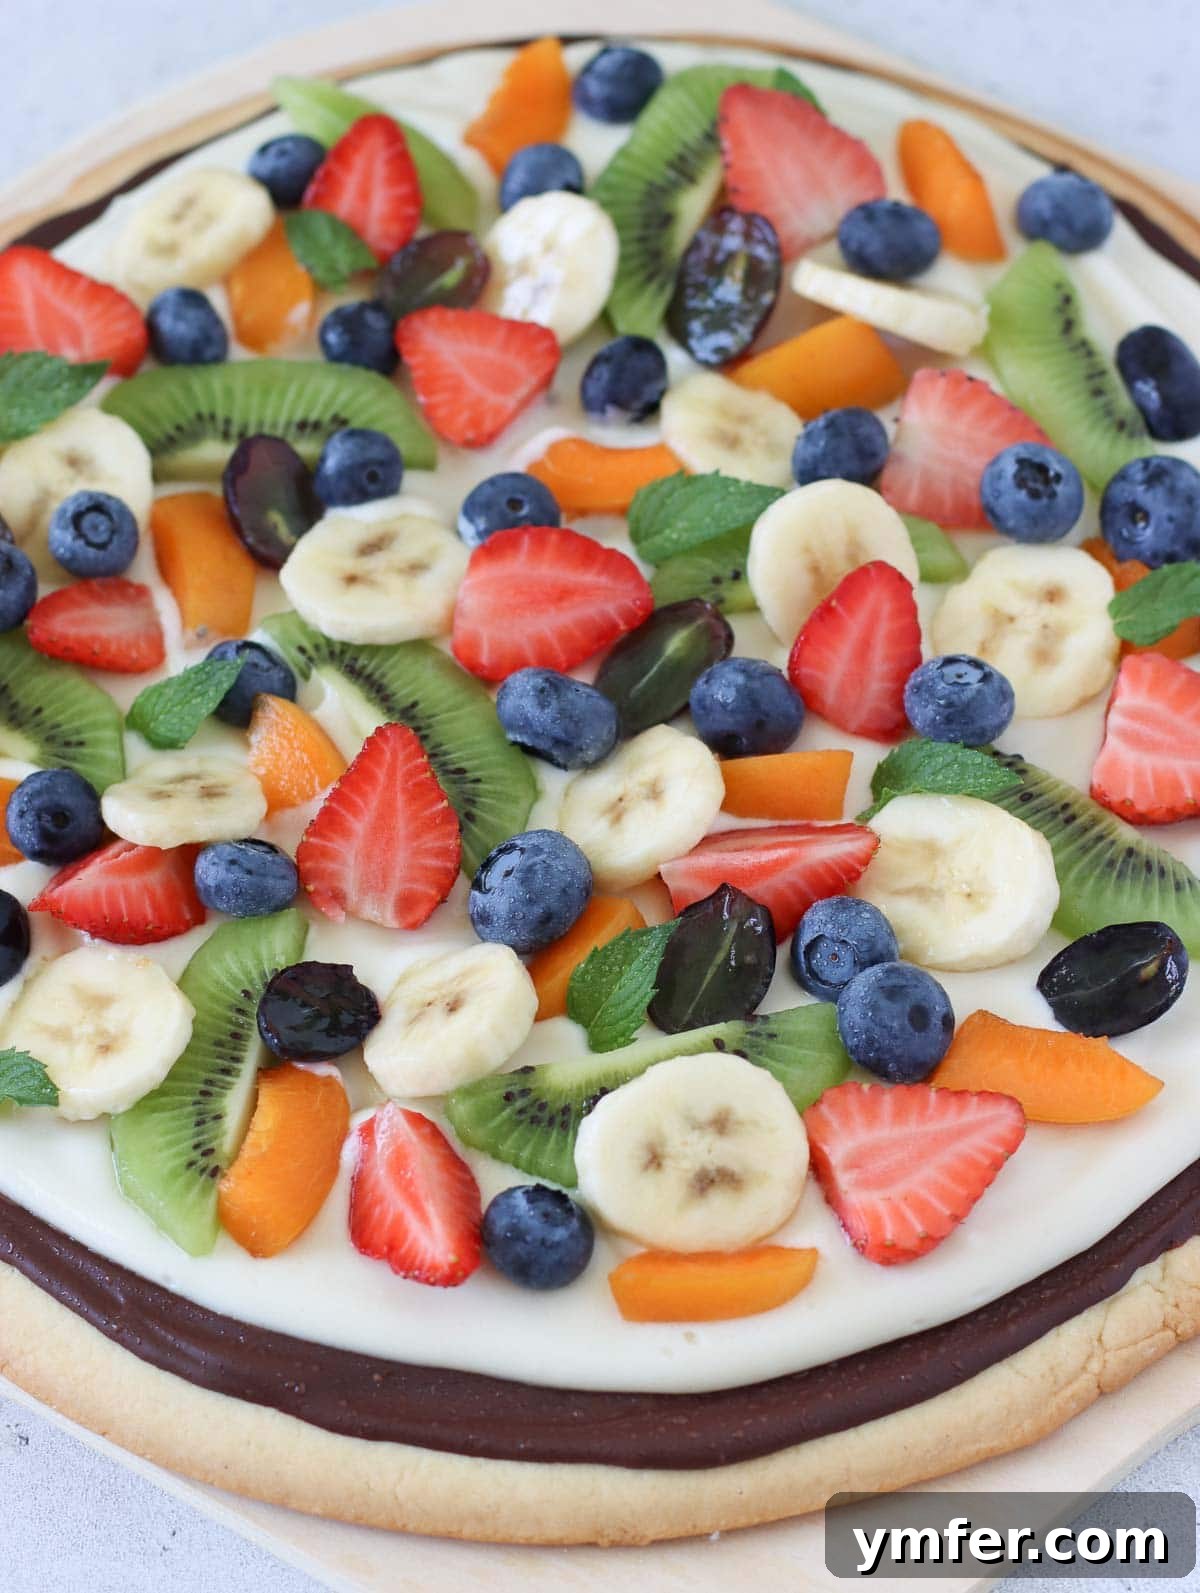
Fruit pizza stands out as a wonderfully easy, incredibly fun, delightfuly crunchy, and utterly refreshing dessert that’s perfect for any occasion. This beloved treat is crafted with a quick, homemade sugar cookie pie crust base, generously topped with a rich dairy-free cream cheese frosting, and adorned with a vibrant mix of fresh seasonal fruits. It’s a dessert that not only tastes incredible but also looks like a work of art.
What truly sets our fruit pizza apart is a strategic layer of melted dark chocolate applied directly onto the baked pie crust. This ingenious step is key to preventing the base from becoming soggy, acting as a moisture barrier between the crust and the creamy topping. Beyond its functional benefit, this chocolate layer also infuses the fruit pizza with an extra dimension of flavor, making each bite even more delicious and satisfying. Prepare to impress your family and friends with this show-stopping, yet surprisingly simple, vegan fruit pizza recipe!
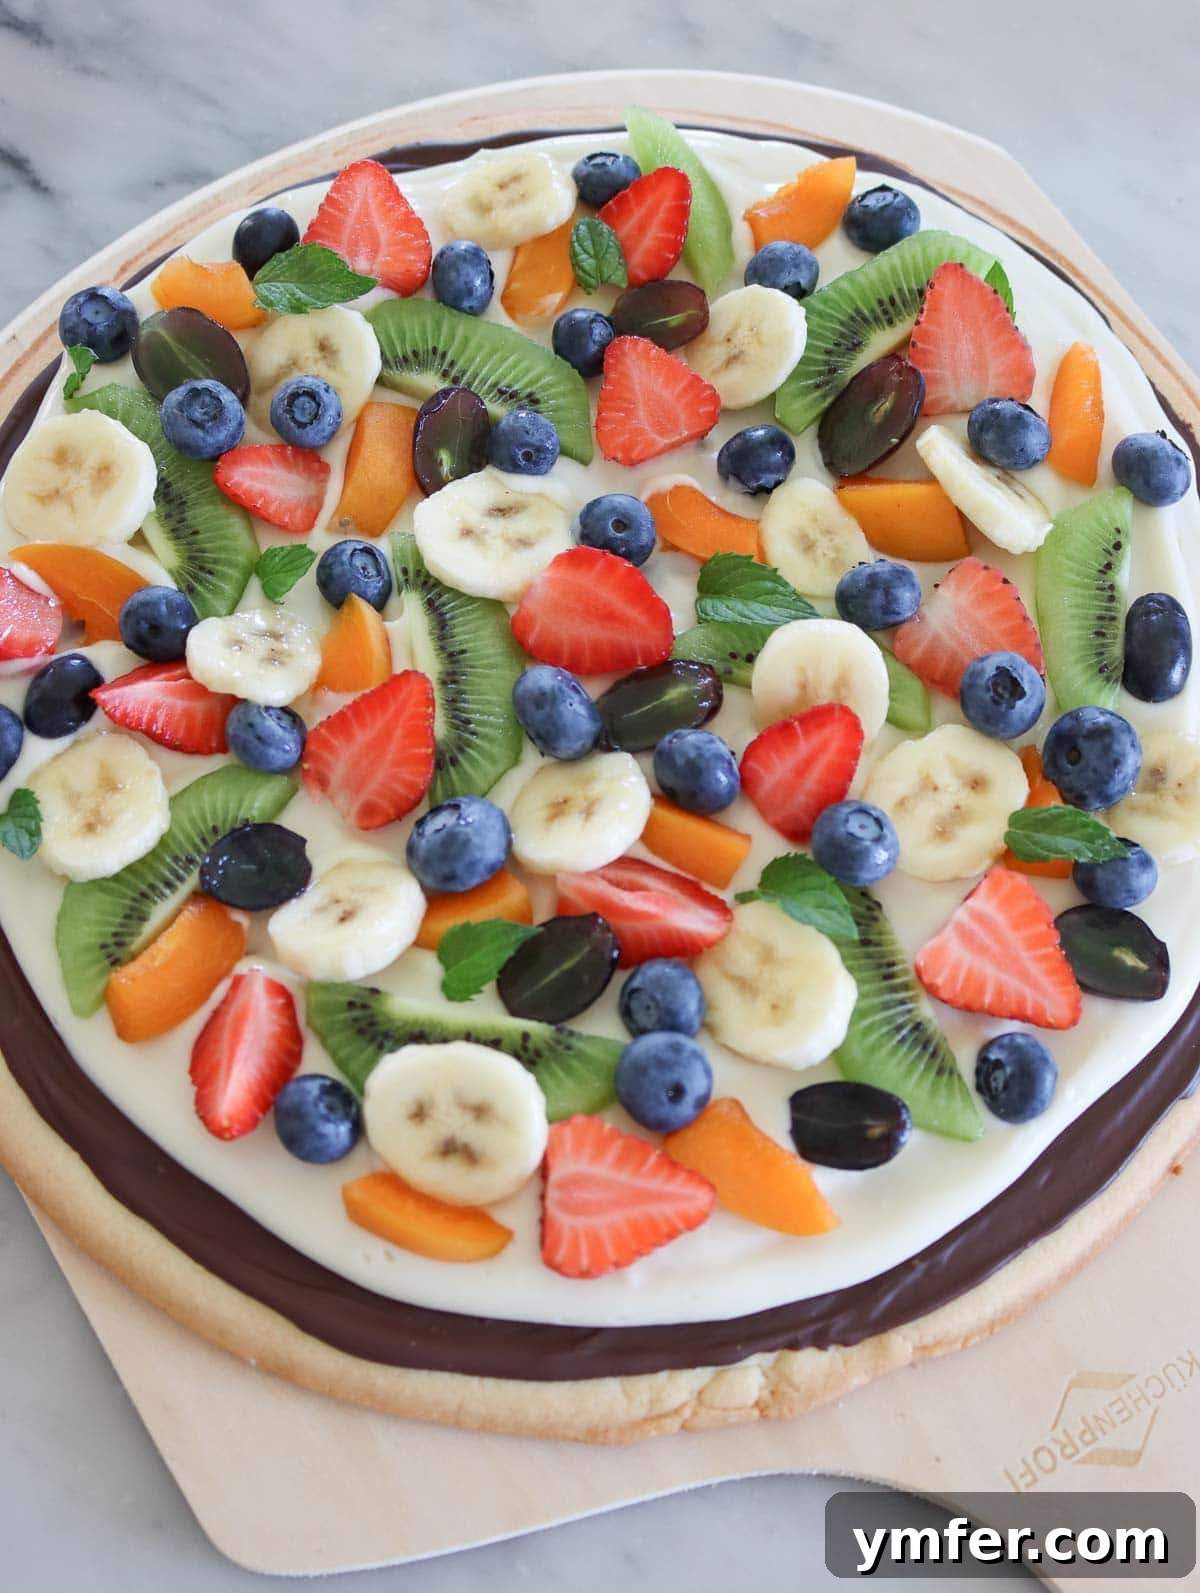
Table of Contents
- What is Fruit Pizza? An Irresistible Dessert
- Essential Ingredients & Smart Substitutions for Fruit Pizza
- Essential Equipment for Your Fruit Pizza
- Step-by-Step Guide: How to Make the Perfect Fruit Pizza
- Pro Tips for a Flawless Fruit Pizza
- Frequently Asked Questions About Fruit Pizza
- Achieving a Beautiful Glossy Finish (Optional)
- Exciting Fruit Pizza Variations
- Storage Solutions & Making Fruit Pizza in Advance
- Explore More Delicious Vegan Desserts
- Printable Fruit Pizza Recipe Card
Don’t miss our incredible collection of vegan summer recipes for more refreshing ideas!
What is Fruit Pizza? An Irresistible Dessert
At its heart, a fruit pizza is a vibrant and cheerful dessert that ingeniously combines the best elements of a cookie and a fresh fruit tart. It features a delightful sugar cookie pie crust base, which provides a satisfyingly crunchy foundation. This base is then generously slathered with a smooth and tangy layer of cream cheese, expertly mixed with powdered sugar to achieve the perfect balance of sweetness and richness. The grand finale is a colorful mosaic of fresh seasonal fruit, creating a visually stunning and palate-pleasing treat.
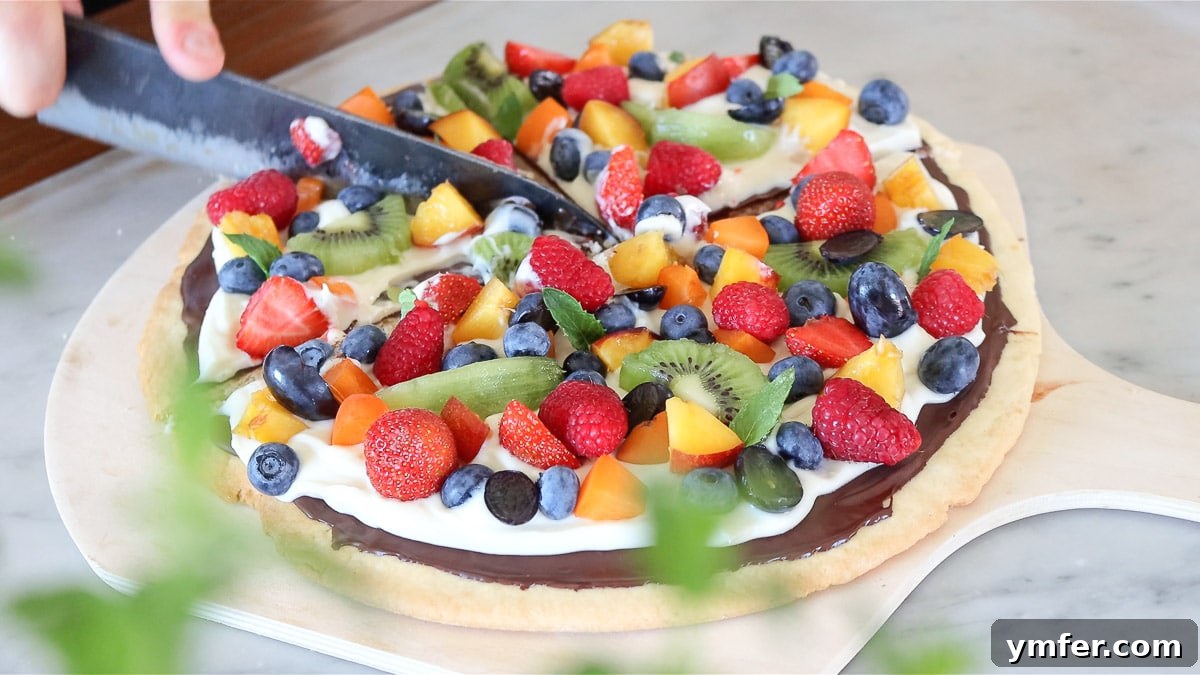
While sharing similarities with an Italian fruit tart, our fruit pizza distinguishes itself by typically having no raised rim and, crucially for our vegan version, no traditional custard filling. Instead, it offers a lighter, more approachable, and undeniably fun dessert experience that everyone will adore. Its simplicity makes it a fantastic recipe for both seasoned bakers and beginners alike.
To ensure that every slice of your homemade fruit pizza remains perfectly crunchy and never soggy, we incorporate a clever secret: a thin layer of melted dark chocolate applied directly over the baked pie crust. Once it cools and solidifies, this chocolate creates an effective barrier, protecting the cookie base from any moisture released by the cream cheese topping and fresh fruits. This not only maintains the desired texture but also adds an unexpected depth of flavor that elevates the entire dessert. It’s a small step that makes a huge difference in the overall enjoyment and longevity of your fruit pizza.
Essential Ingredients & Smart Substitutions for Fruit Pizza
Crafting the perfect fruit pizza begins with selecting the right ingredients. Our vegan recipe uses plant-based alternatives to create a dessert that is both delicious and accessible to everyone. Here’s a detailed look at what you’ll need and how you can make smart substitutions:
For the Sugar Cookie Pie Crust
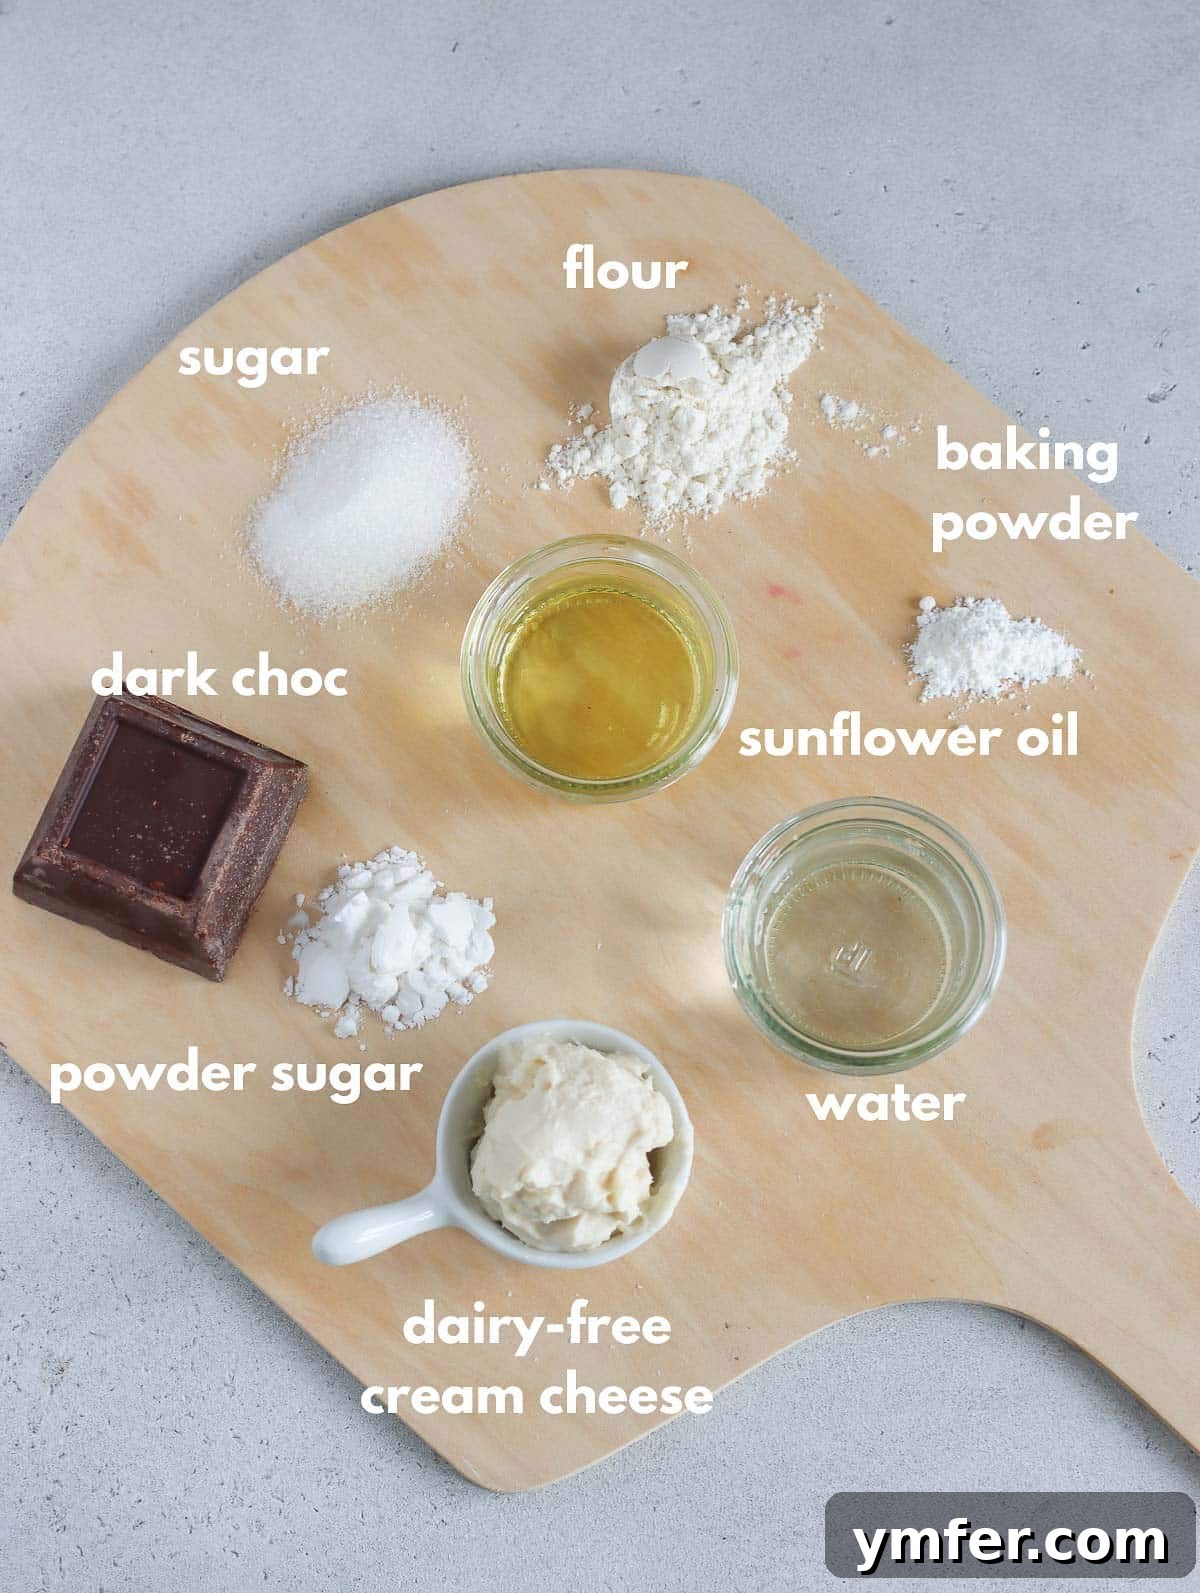
- Flour: All-purpose flour is our go-to for its consistent results and widely available nature, yielding a tender yet crisp crust. For those looking for a healthier twist, we’ve successfully used whole wheat flour and first-clear flour, both producing delicious outcomes with a slightly nuttier flavor. If you require a gluten-free option, a good quality gluten-free flour blend designed for baking pies and tarts is highly recommended. Ensure it contains a mix of starches and gums for optimal texture.
- Sugar: White granulated sugar is used to achieve the classic sweet flavor and a golden-brown crust. For those preferring less refined options, unrefined cane sugar or even coconut sugar can be used. Coconut sugar will lend a subtle caramel note and a slightly darker color to your crust.
- Water: Simple cold tap water works perfectly here. Its role is to bind the ingredients together, forming a cohesive dough without developing too much gluten, which would result in a tough crust.
- Oil: We recommend a neutral-flavored vegetable oil, such as sunflower oil, to allow the other flavors to shine. Other refined vegetable oils like canola oil or grapeseed oil are also excellent choices. Avoid strong-flavored oils like olive oil, as they can impart an undesirable taste to your dessert. For a richer crust, you can substitute vegetable oil with vegan butter or margarine. When making this substitution, increase the quantity of the fat by 1.3 times the original oil measurement (e.g., if the recipe calls for 55g oil, use approximately 71-72g vegan butter/margarine). This accounts for the higher water content in butter/margarine compared to pure oil.
- Baking powder: This acts as a leavening agent, contributing to the crust’s crumbly texture and crispness. It helps create a slightly open structure, ensuring the cookie base isn’t too dense.
For the Topping
- Dark chocolate: Any dark chocolate with a cacao content above 50% will be suitable for the protective layer. Dark chocolate chips are particularly convenient as they melt easily and spread smoothly. The chocolate layer is crucial for both flavor and preventing the crust from becoming soggy.
- Cream cheese: For a fully vegan fruit pizza, dairy-free cream cheese is essential. The market now offers an impressive array of high-quality non-dairy cream cheese brands. In the US, popular and reliable choices include Tofutti, Trader Joe’s, Daiya, and Follow Your Heart. For our European readers, excellent dairy-free options are available from brands like Violife, Simply V, Val Soia, and Oatly, among many others. These brands typically use a base of soy, cashews, or oats to achieve a remarkably similar taste and texture to traditional cream cheese.
- Powdered sugar: Also known as confectioners’ sugar, this ingredient is vital for sweetening the dairy-free cream cheese and providing a smooth, lump-free frosting. Its fine texture helps it dissolve effortlessly, and it also contributes to the frosting’s structure and stability.
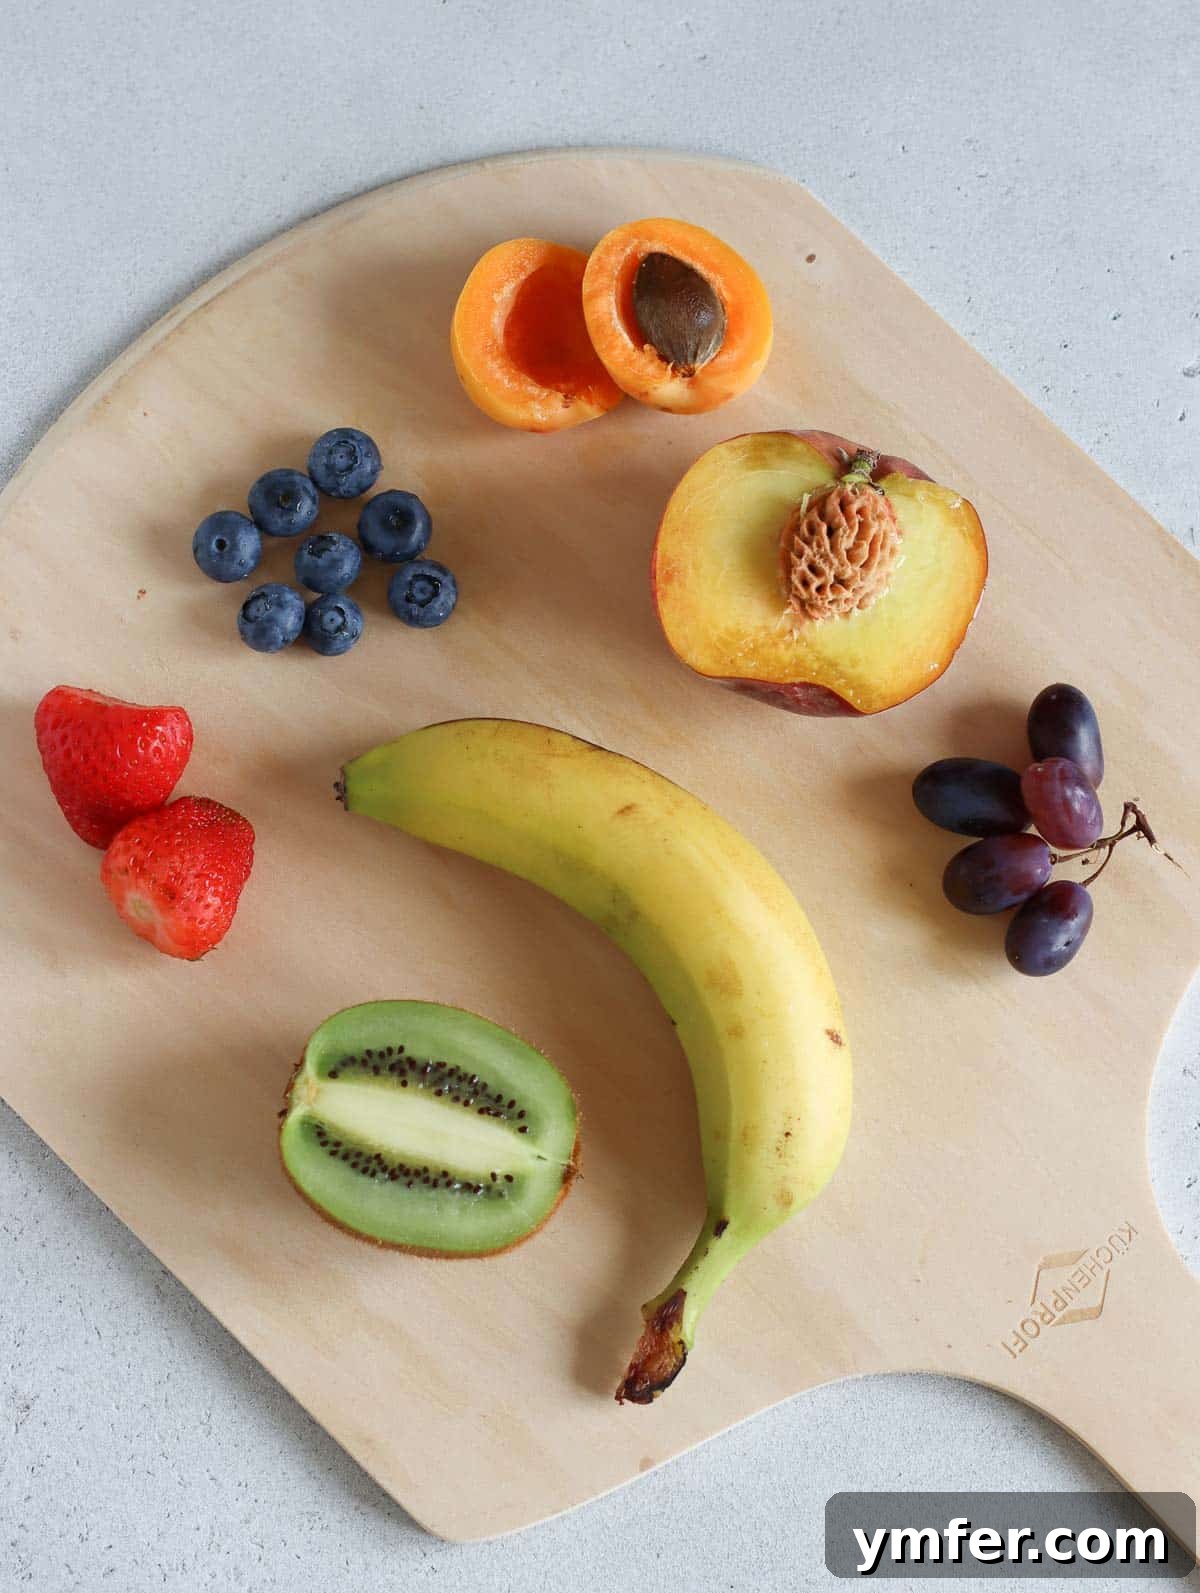
- Fresh fruit: This is where you can truly let your creativity shine! Select any fruits you adore, focusing on a variety of colors, textures, and flavors for a visually appealing and delicious result. However, it’s wise to avoid overly watery fruits like watermelon, honeydew melon, or some types of pears, as they can quickly make the pizza soggy despite the chocolate barrier. Popular choices include strawberries, blueberries, raspberries, kiwi, nectarines, apricots, grapes, peaches, and mangoes. To enjoy the freshest and most economical options, prioritize local and seasonal fruit. You can even create a stunning monochromatic fruit pizza with just one type of fruit, such as a vibrant green kiwi pizza or a classic strawberry arrangement. For our demonstration, we used a delightful mix of strawberries, blueberries, kiwi, nectarines, apricots, grapes, raspberries, and a touch of fresh mint leaves for garnish, showcasing the beautiful diversity possible.
Essential Equipment for Your Fruit Pizza
Making a homemade fruit pizza is surprisingly straightforward and doesn’t require an extensive array of specialized kitchen tools. With just a few basic items, you’ll be well on your way to creating this delightful dessert. Here’s a closer look at what you’ll need and why each piece is important:
- Rolling pin: This is perhaps the most crucial tool for achieving a perfectly flat and evenly thin cookie crust. A good rolling pin allows you to spread the dough consistently, which is essential for uniform baking and a crisp texture. Whether you use a classic French pin or a standard baker’s pin, ensure it’s comfortable to handle.
- Large mixing bowl: You’ll need a spacious bowl for combining the ingredients for both the cookie dough and the cream cheese frosting. A medium to large-sized bowl ensures ample room for mixing without spills, making the process cleaner and more efficient.
- Spatula: A sturdy rubber or silicone spatula is ideal for mixing the dough ingredients, ensuring everything is well combined without overworking the gluten. It’s also perfect for spreading the melted chocolate and the cream cheese frosting smoothly over the crust.
- Oven’s baking tray: Any standard baking sheet will work. Its purpose is to support the parchment paper and cookie dough during baking.
- Parchment paper: This is a baker’s best friend! Lining your baking tray with parchment paper prevents the cookie crust from sticking, making transfer a breeze. More importantly, it provides a non-stick surface that’s perfect for rolling out the dough directly, simplifying cleanup and ensuring a perfectly round shape if desired.
- Measuring cups and spoons: Accuracy in baking is key. Ensure you have a reliable set of measuring cups for dry ingredients and spoons for smaller quantities like baking powder.
- Optional: Whisk or electric beater: While a spatula works for the cream cheese frosting, a whisk can help eliminate lumps more quickly, and an electric hand mixer will create an exceptionally smooth and airy frosting with minimal effort.
- Optional: Pizza wheel or knife: For neatening the edges of your baked cookie crust and achieving a perfectly round “pizza” shape, a pizza wheel or a sharp knife comes in handy.
With these simple tools, you’re fully equipped to embark on your fruit pizza making adventure!
Step-by-Step Guide: How to Make the Perfect Fruit Pizza
Creating this delightful fruit pizza is a rewarding process, broken down into two main parts: preparing the crunchy sugar cookie base and then assembling the creamy, fruity topping. Follow these detailed steps for a truly irresistible dessert.
For the Pie Crust Base
- Prepare the Oven and Baking Tray: Begin by preheating your oven to 350°F (180°C). While the oven heats, line a standard baking tray with parchment paper. Keep the lined tray out of the oven for now. This parchment paper will be your secret weapon for easy rolling and transfer.
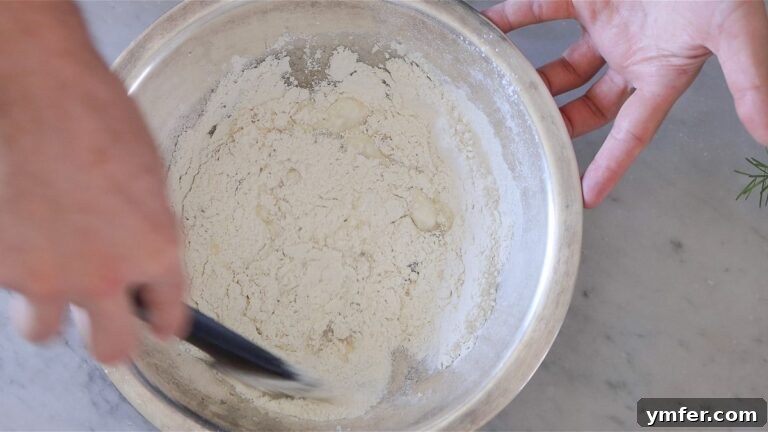
- Mix Wet Ingredients: In a large mixing bowl, combine the sugar, oil, and cold water. Use a spatula to mix these ingredients for about a minute, just until some of the sugar begins to dissolve into the liquid. This initial mixing helps ensure an even distribution of sweetness and moisture.
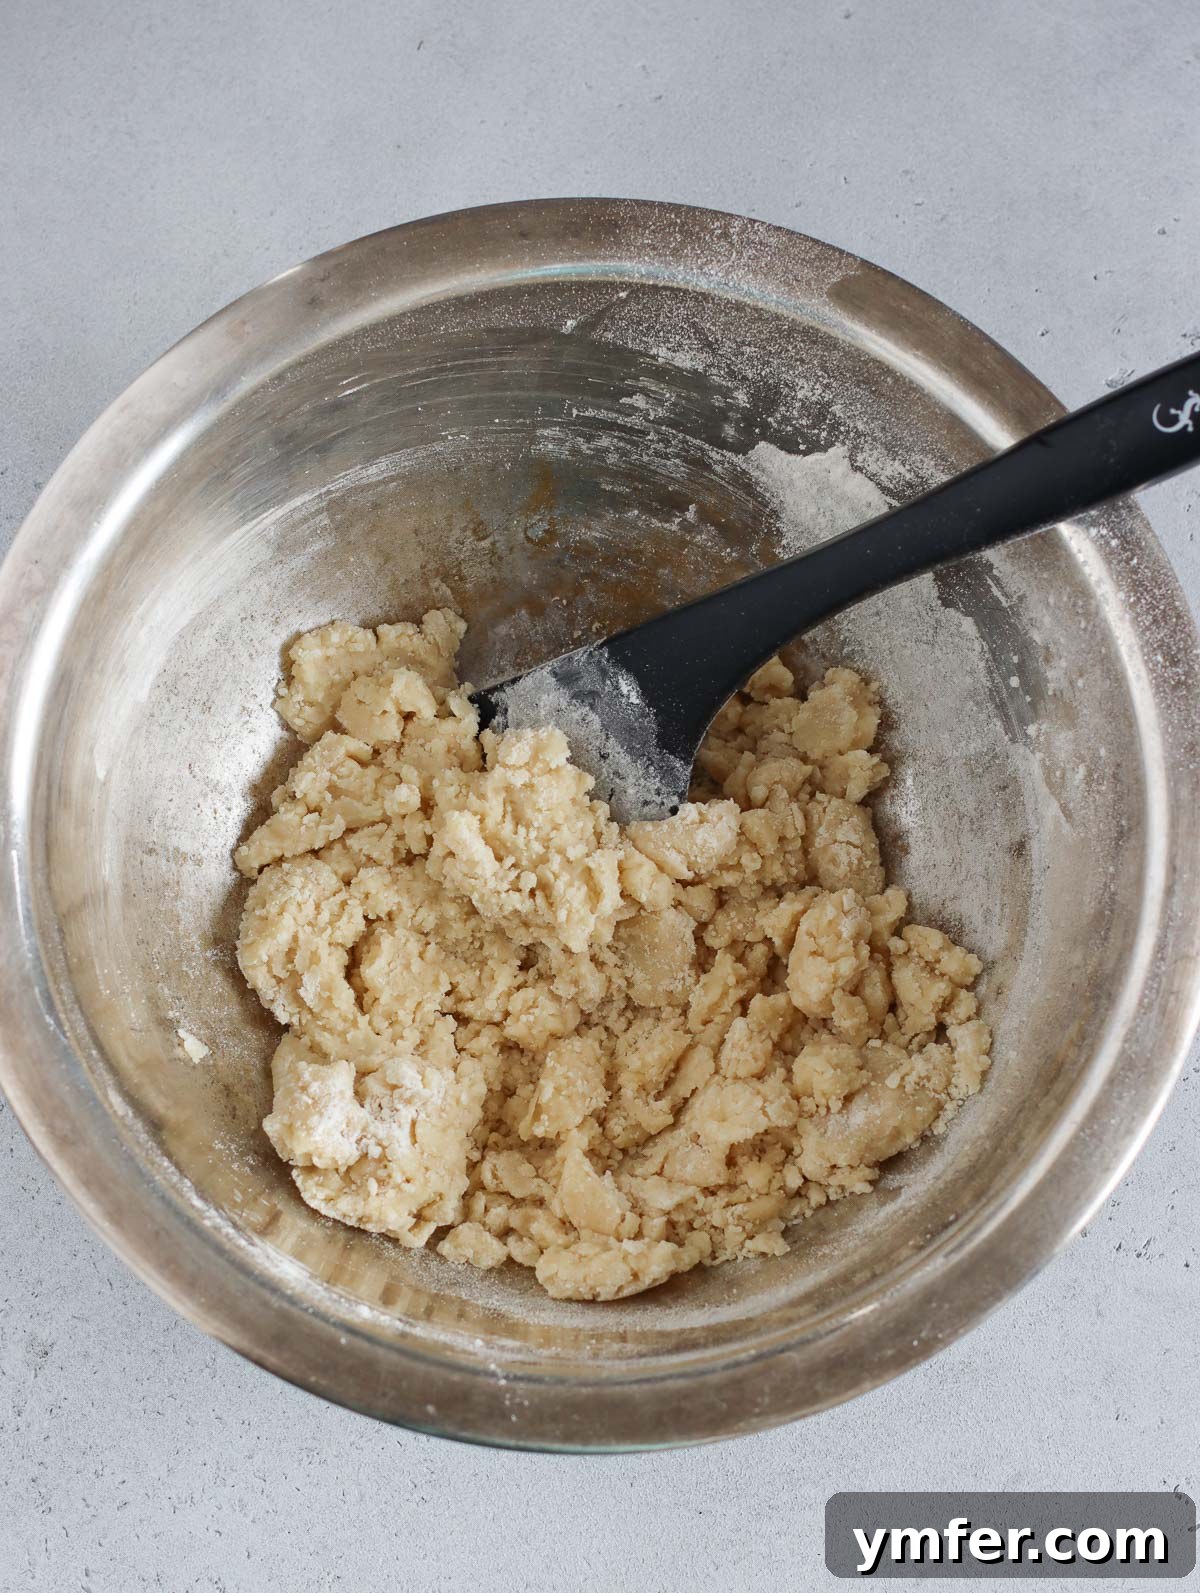
- Incorporate Dry Ingredients: Add the flour and baking powder to the wet mixture. Stir gently with your spatula until the flour has completely absorbed the liquids and a shaggy dough forms. Be careful not to overmix at this stage.
PRO TIP: To ensure the baking powder is evenly distributed throughout the dough, which is essential for a consistent texture, I prefer to sift it together with the flour before adding them to the wet ingredients. Alternatively, you can mix the flour and baking powder in a separate bowl first, then add this dry blend to your liquids.

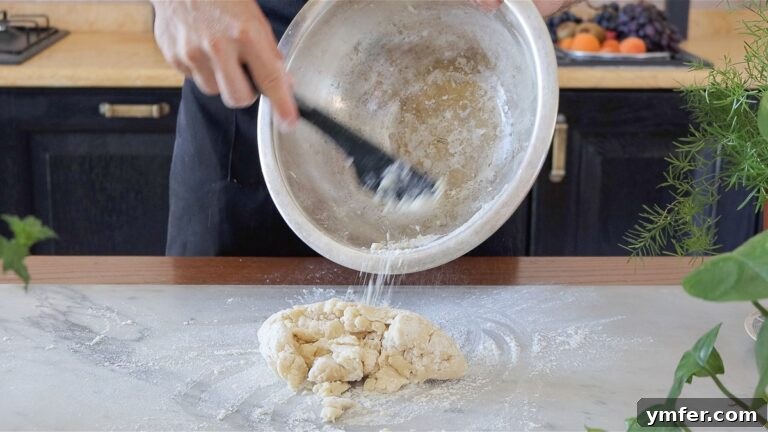
- Gentle Kneading: Transfer the shaggy dough to a clean worktop. With your hands, gently knead the dough for a very short minute—just enough time to bring all the ingredients together and form a cohesive dough ball. The key here is to avoid over-kneading, which can develop the gluten in the flour, resulting in a tough, less crunchy crust.
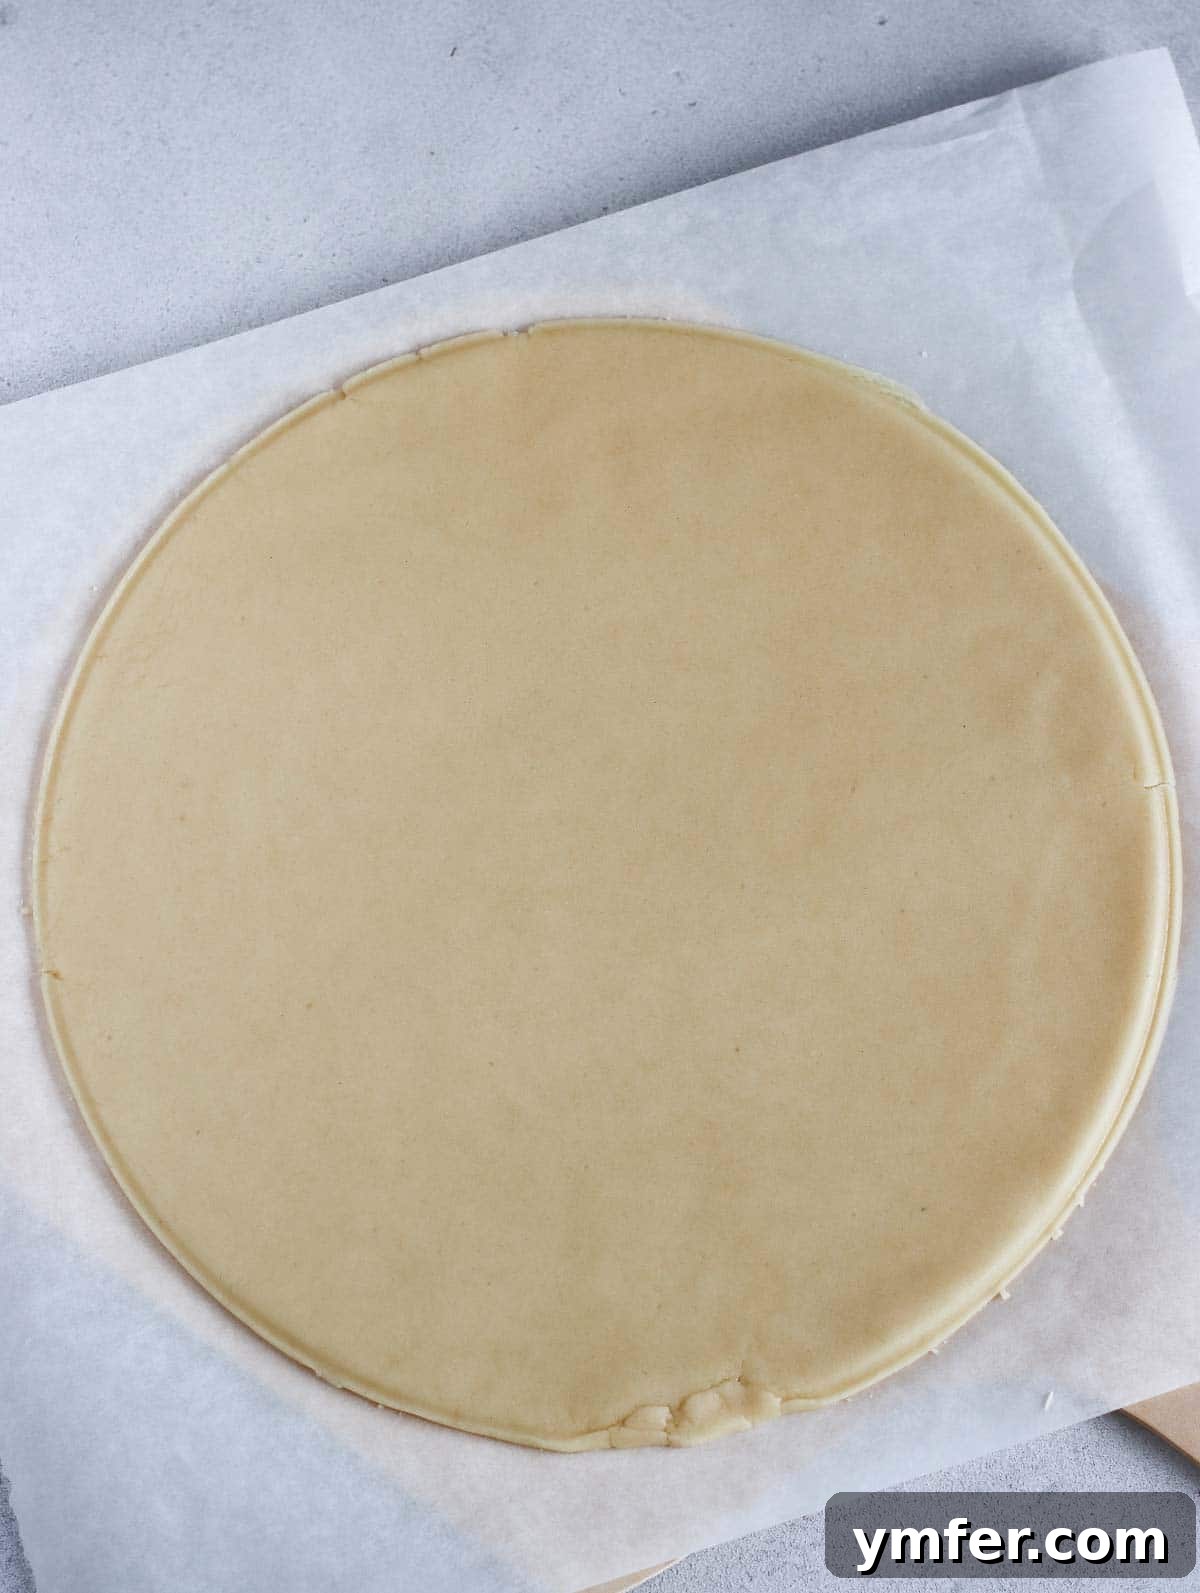
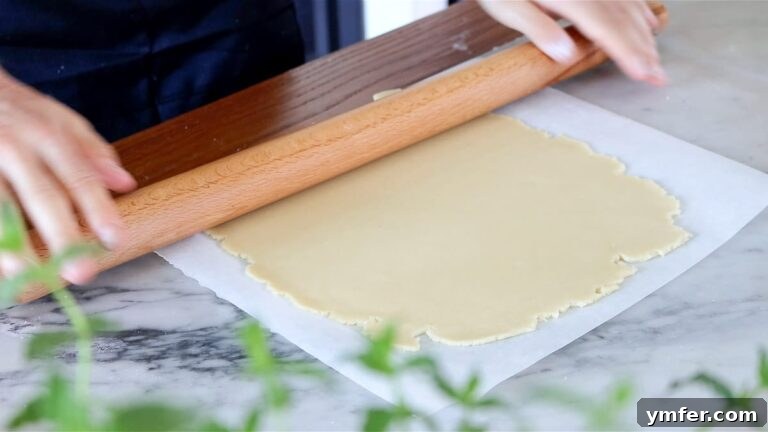
- Roll Out the Dough: Place the dough ball directly onto the parchment paper you prepared earlier. Using a rolling pin, flatten the dough into an even disc, aiming for a shape that resembles a pizza base. To help maintain a round shape, rotate the disc frequently after each roll.
For a beautifully thin and crisp fruit pizza, we recommend rolling the dough down to approximately 1/8 of an inch (3 to 4 mm) in thickness. A thinner crust bakes more evenly and provides a satisfying crunch.
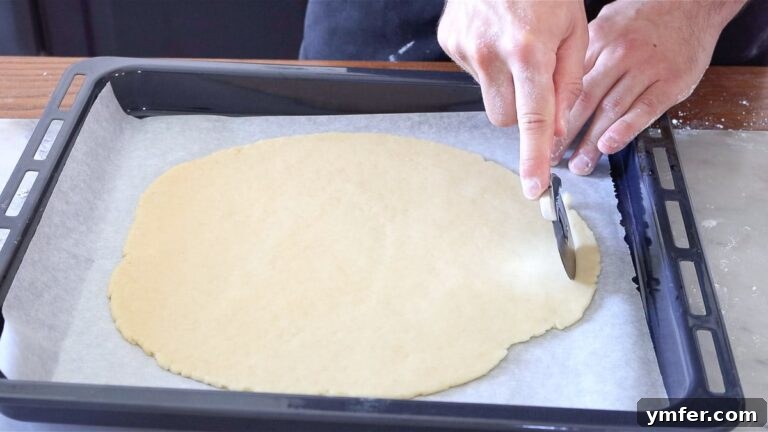
- Shape and Bake: Carefully transfer the parchment paper with the rolled-out dough onto your baking tray. If you desire a perfectly circular fruit pizza, you can use a pizza wheel or a sharp knife to trim the edges, making them neat and round.
Bake in the preheated oven for approximately 15 minutes, or until the crust is golden brown and firm to the touch. Once baked, remove it from the oven and allow it to cool completely on the baking tray. Cooling is essential before adding toppings to prevent melting and sogginess.
For the Topping
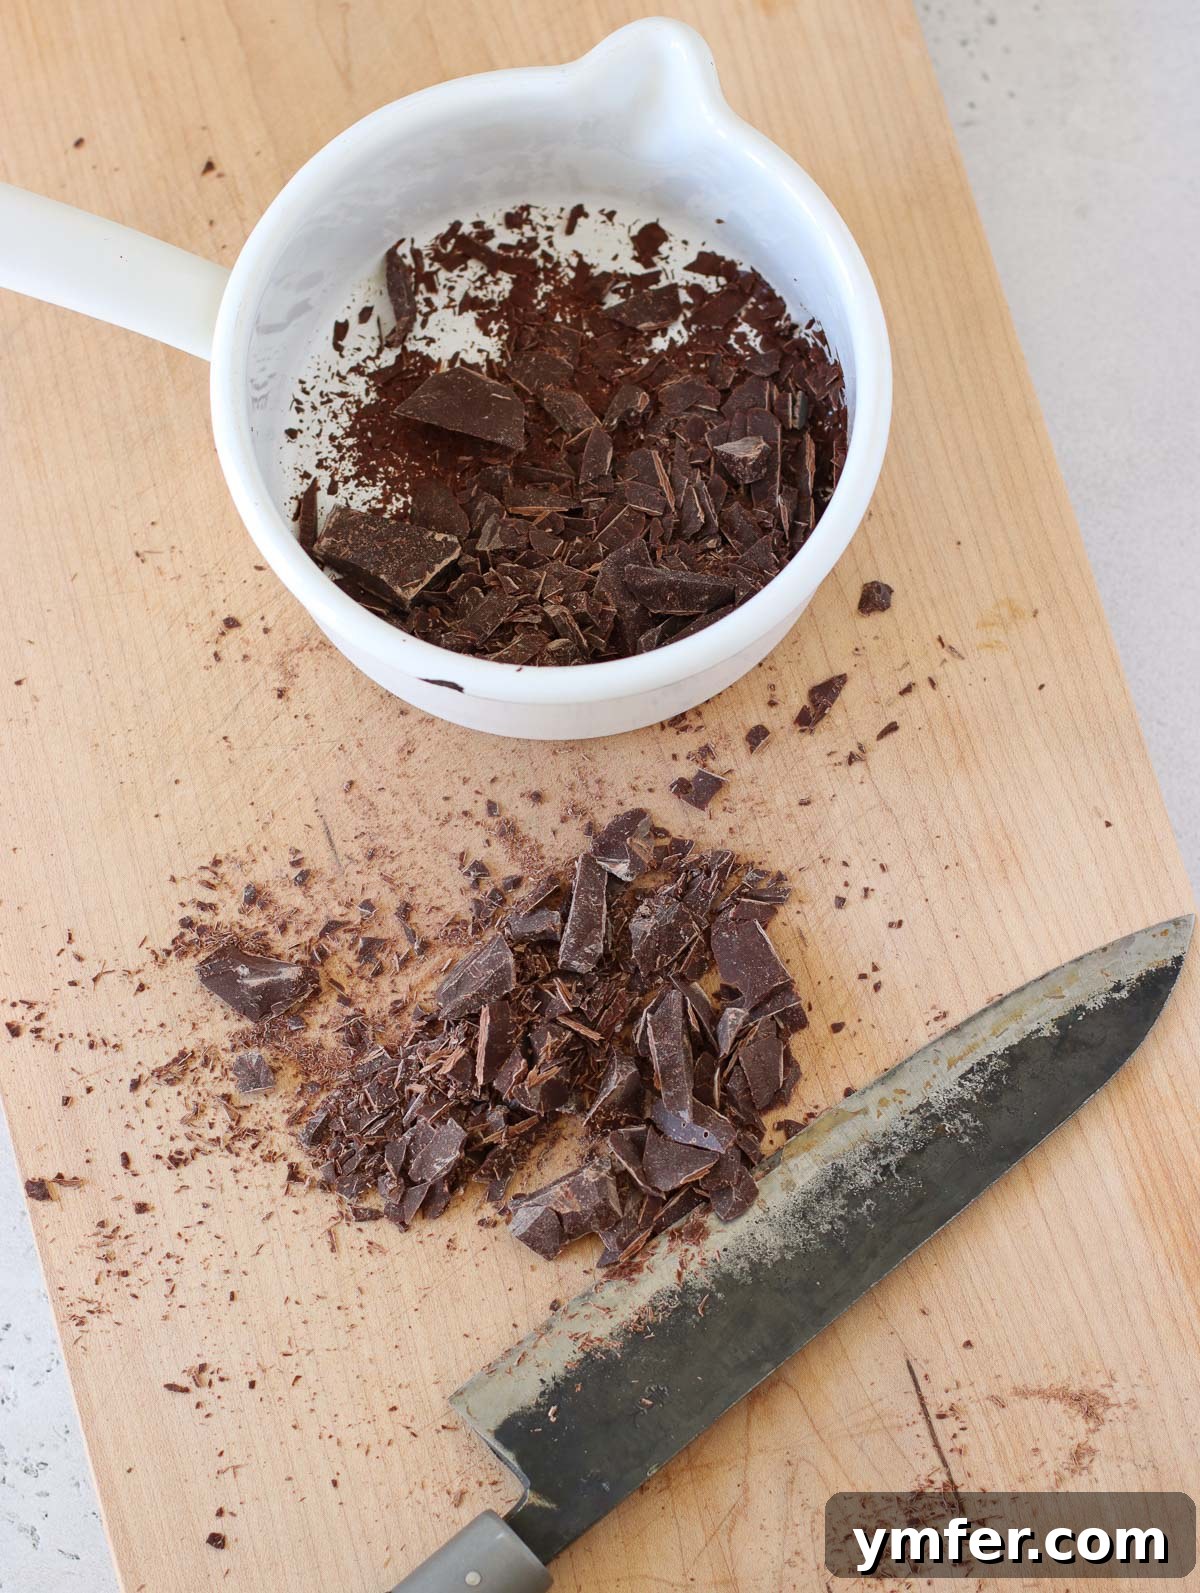
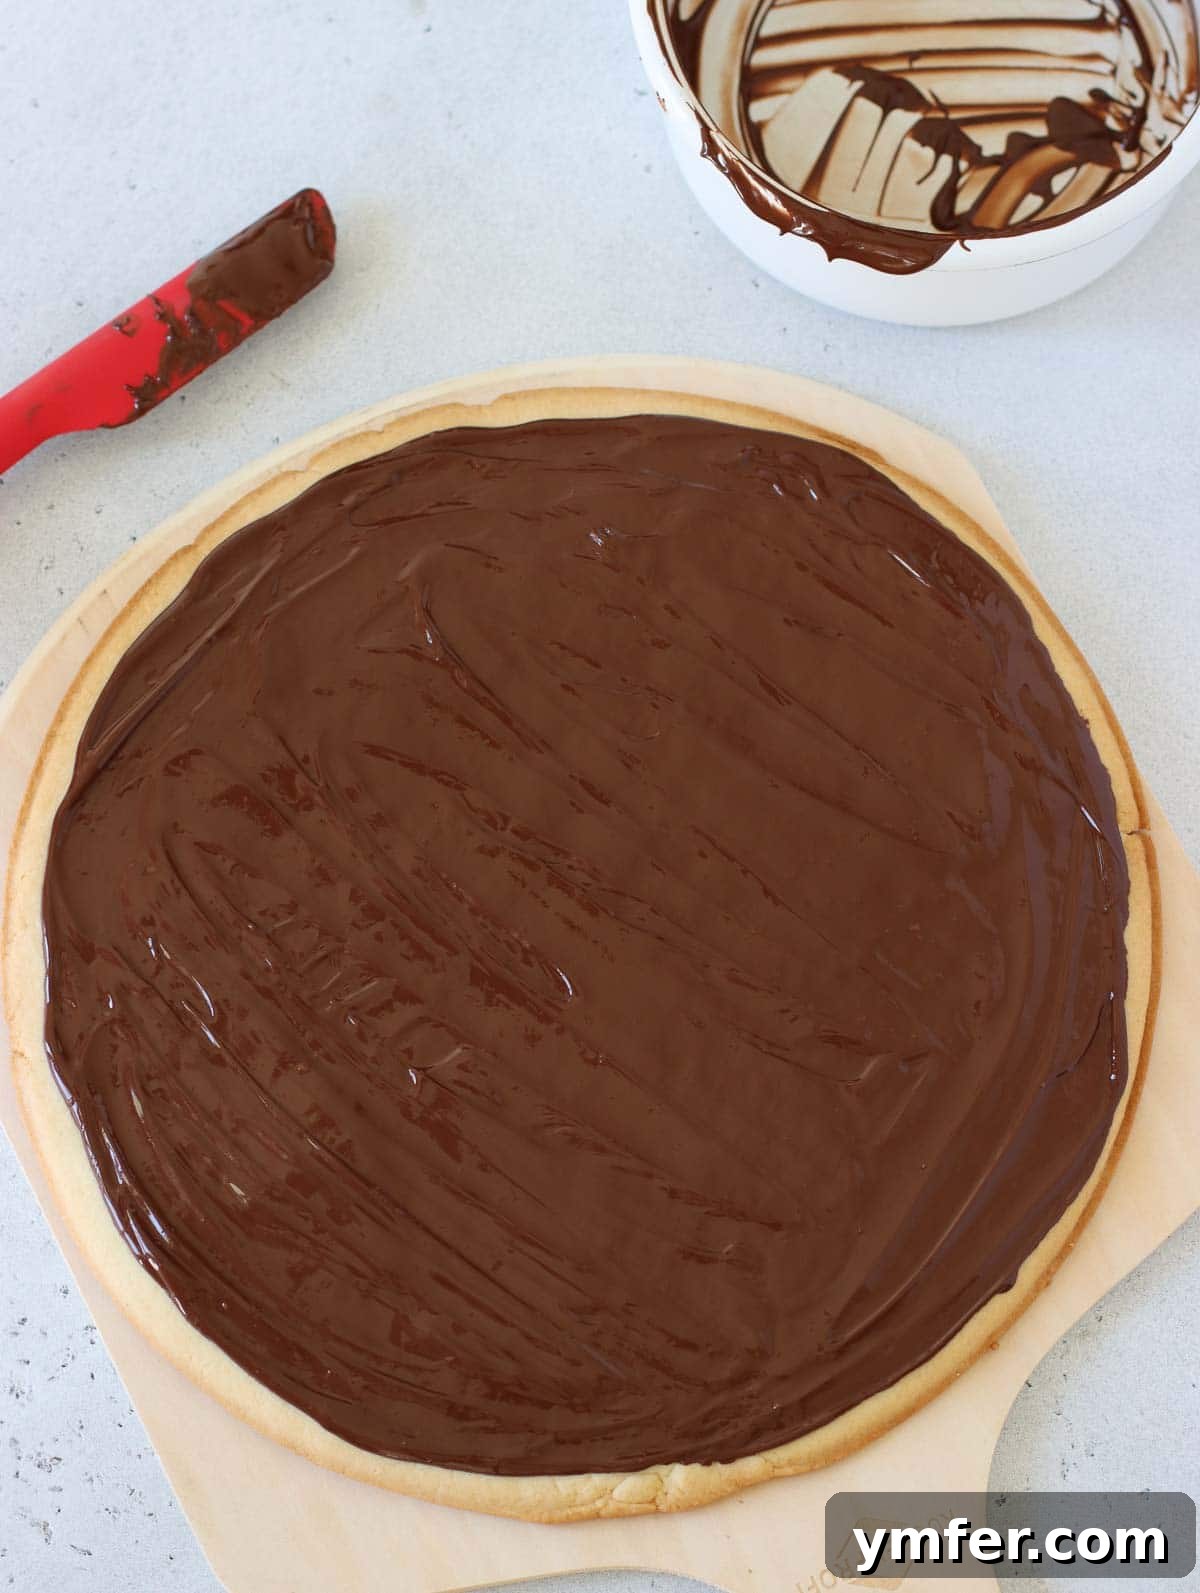
- Prepare the Chocolate Layer (Optional, but Recommended!): This step is a game-changer for taste and texture. Begin by shredding your dark chocolate, if it’s not already in chip form. Then, melt the chocolate.
You can do this easily in a microwave-safe bowl, heating the chocolate in short bursts (15-30 seconds), stirring after each interval until smooth. Alternatively, use the bain-marie method: place the bowl with chocolate over a larger pot of simmering hot water, ensuring the bottom of the chocolate bowl doesn’t touch the water. Stir until melted.
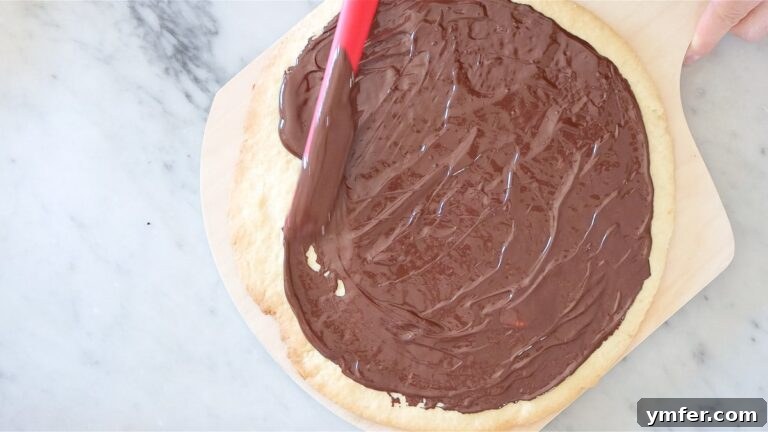
Once melted, spread a thin, even layer of chocolate over your completely cooled fruit pizza base. Allow this chocolate layer to cool and harden completely. If you’re in a warm climate, or just want to speed things up, you can pop the chocolate-covered crust into the refrigerator for about 15 minutes.
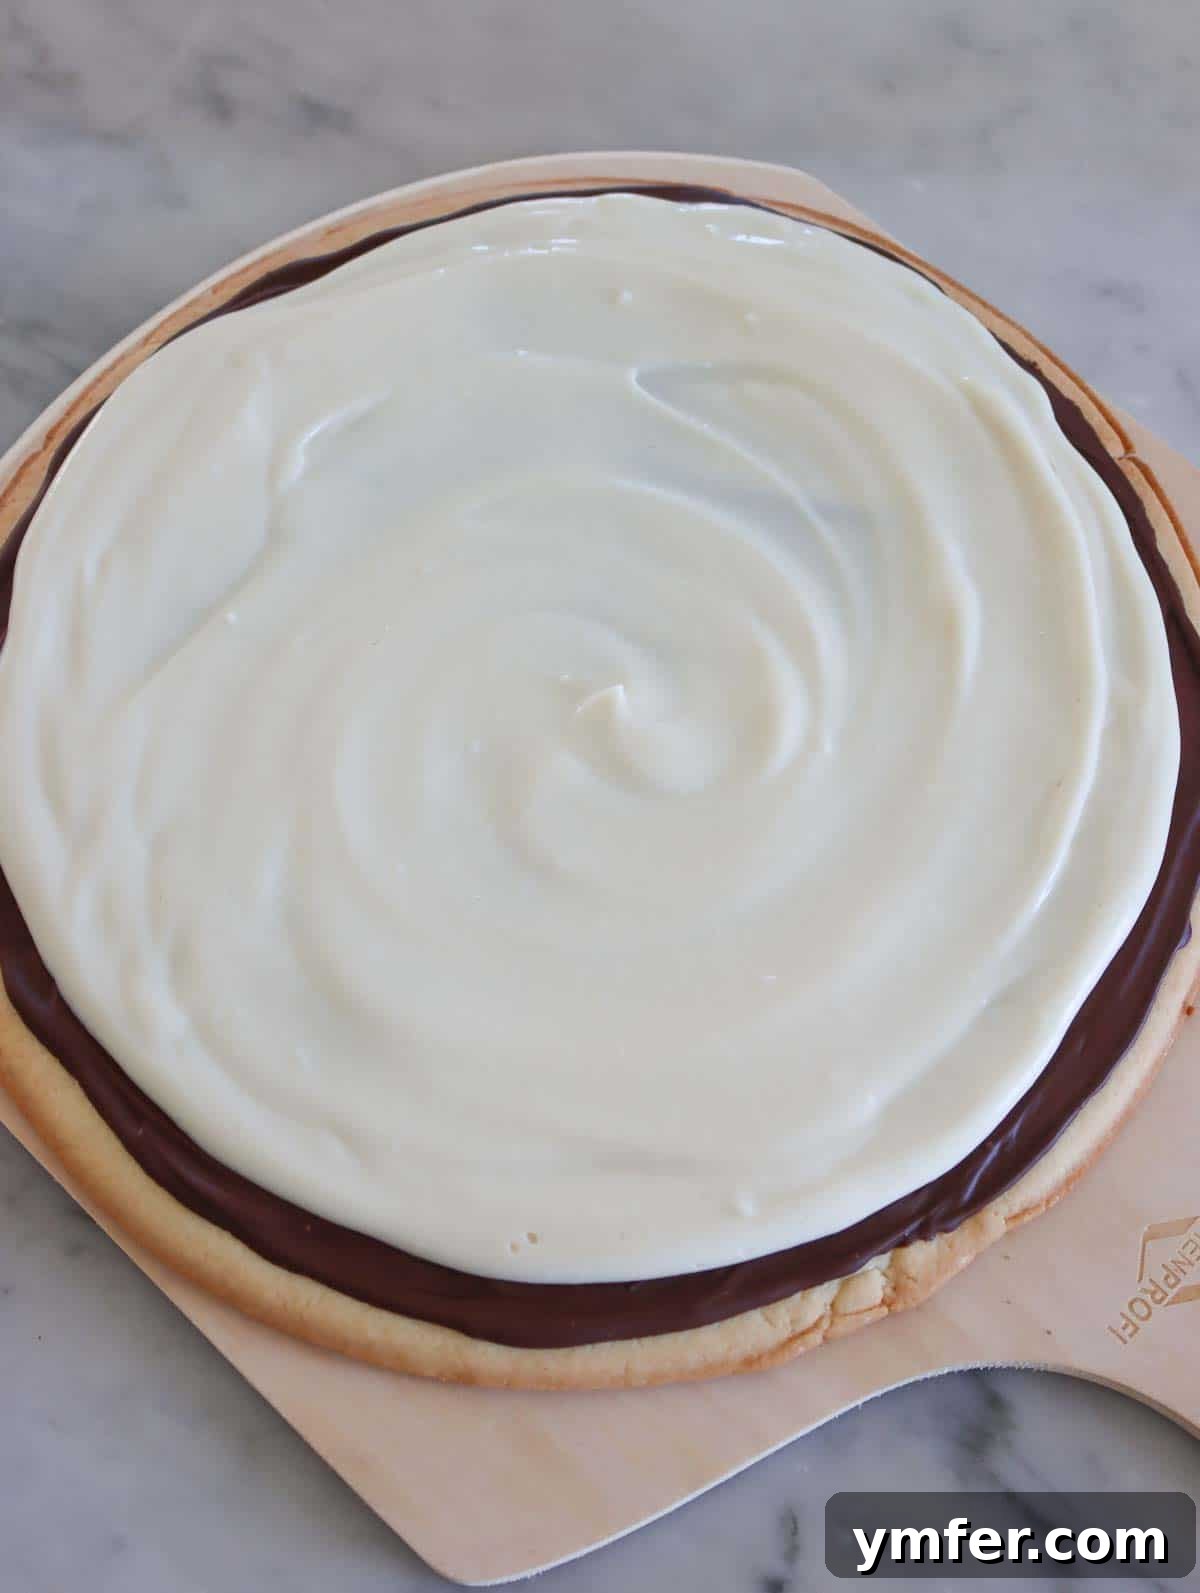
- Prepare the Cream Cheese Frosting: In a clean bowl, combine the dairy-free cream cheese and powdered sugar. Mix thoroughly with a spatula or a whisk until the mixture is smooth and most lumps are gone. For an extra velvety, lump-free frosting, a quick blend with an immersion blender works wonders.
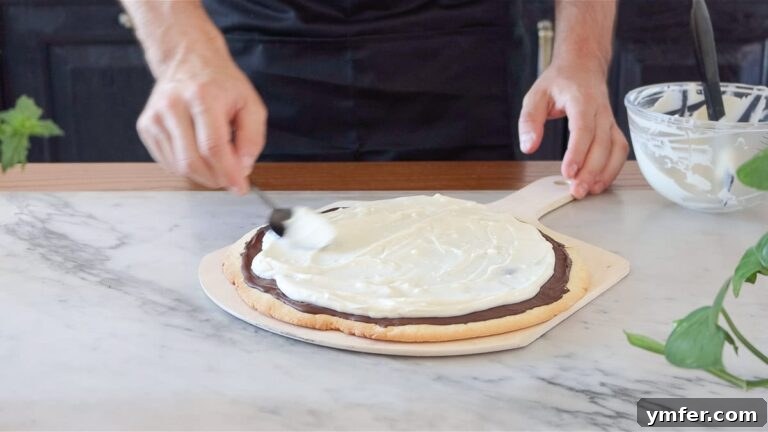
Once the chocolate layer on your pizza base is firm and hard, evenly spread the prepared cream cheese mixture over it, leaving a small border if desired.
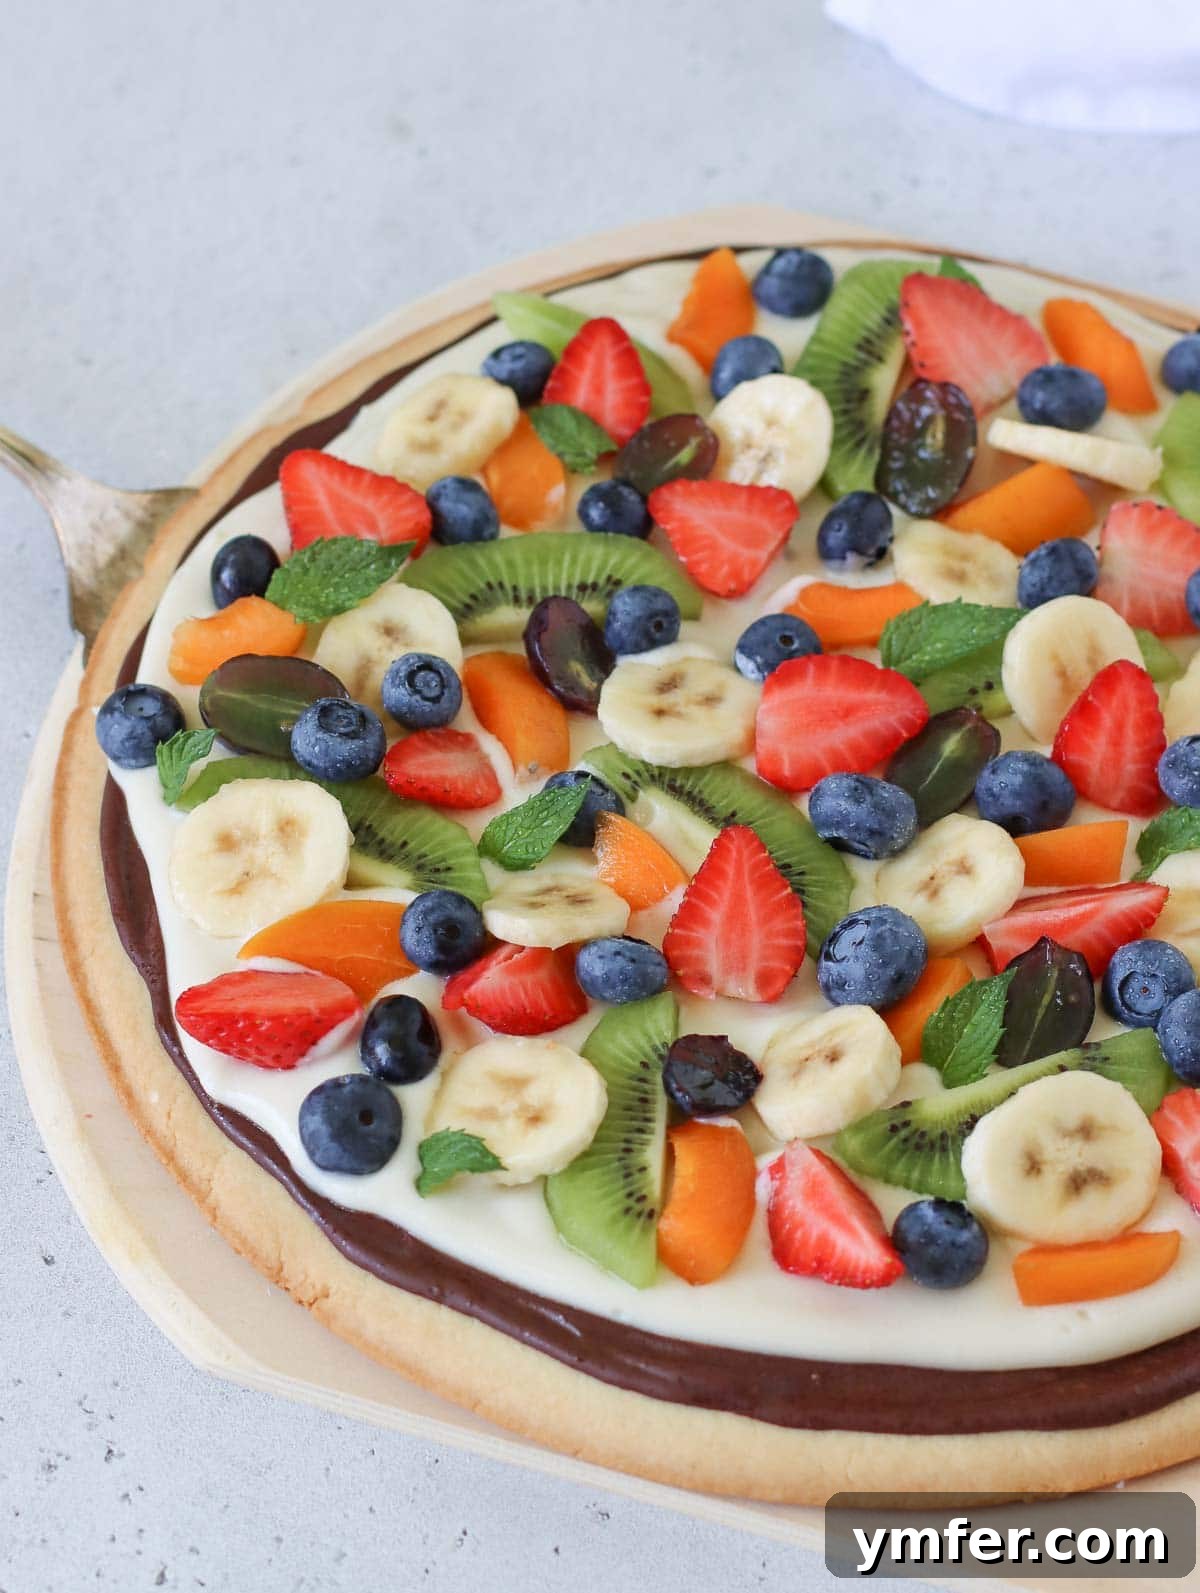
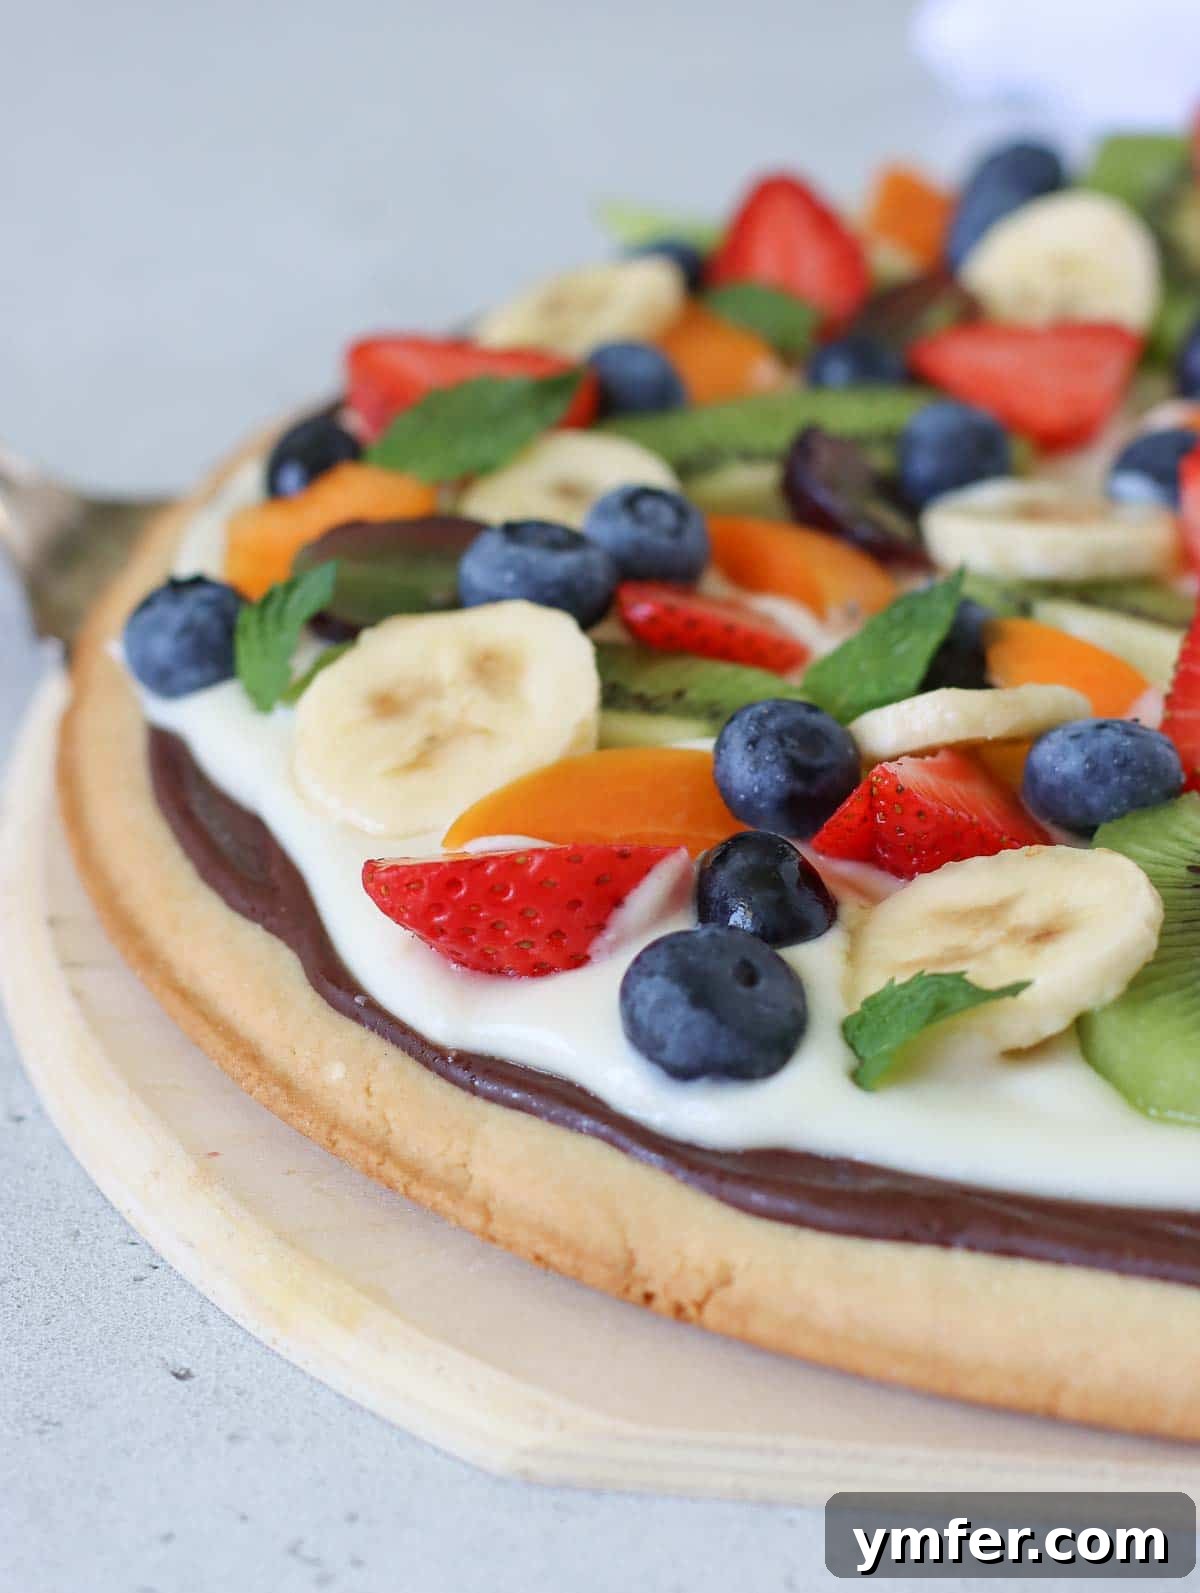
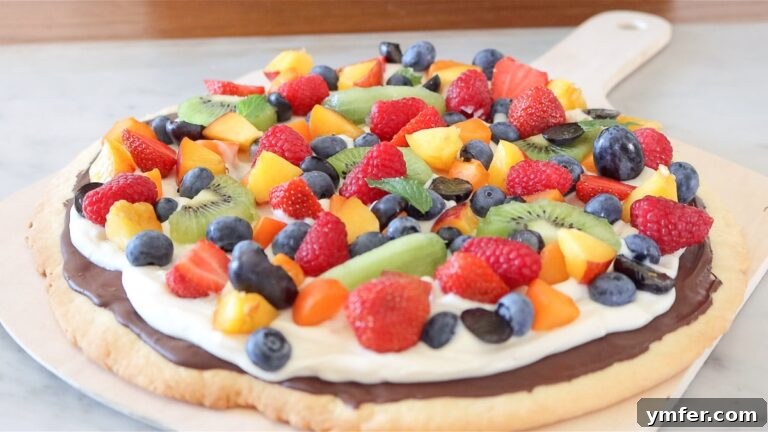
- Decorate with Fresh Fruit: Now for the most exciting part – adding the fresh fruit! Slice or chop your chosen fruits into small, manageable pieces. Get creative with your arrangement; you can create a beautiful pattern or simply scatter the fruits randomly for a delightful, organic look. The variety of colors and textures will make your fruit pizza pop!
- Serve and Enjoy: Once all the fruit is arranged to your liking, your fruit pizza is ready to be admired, sliced, and devoured! Serve immediately for the best crunchy-creamy-refreshing experience.
Pro Tips for a Flawless Fruit Pizza
Achieving a perfect fruit pizza every time is easier with a few expert tricks up your sleeve. These tips will help you navigate common challenges and ensure your dessert is crunchy, creamy, and bursting with flavor:
- Mindful Kneading: This is a critical step for your sugar cookie pie crust. Remember, the goal is to bring the ingredients together to form a dough, not to develop gluten. Over-kneading will activate the gluten in the flour, resulting in a tough, dense, and less crumbly crust. Instead, knead gently and only for a short minute until just combined. The dough should feel soft and pliable, not elastic.
- Optimal Rolling Thickness: Your pie crust will expand slightly as it bakes. To ensure a perfectly crisp and satisfyingly thin base, aim to roll the dough out to a maximum thickness of 1/8 of an inch, or approximately 3 to 4 millimeters. A thinner crust also cooks more evenly and allows the flavors of the toppings to shine without being overwhelmed by a thick cookie.
- The Parchment Paper Advantage: Rolling dough can sometimes be a sticky and challenging task. To simplify the process and minimize mess, roll your dough directly onto a sheet of parchment paper. This clever technique means that once your dough is perfectly shaped, all you have to do is lift the parchment paper and transfer it to your baking tray. No more wrestling with sticky dough or trying to peel it off the work surface!
- Mastering the Round Shape: For a fruit pizza that looks as good as it tastes, a round base is key. Start by forming your dough into a neat ball before you begin rolling. As you roll, consistently rotate the dough a few degrees after each pass with the rolling pin. This technique helps maintain a circular shape. If, after all your efforts, your base isn’t perfectly round, don’t fret! A pizza cutter or a sharp knife can be used to trim the edges post-baking, creating a beautifully uniform circle.
- The Power of Chocolate (Highly Recommended!): While technically optional, adding a thin layer of melted dark chocolate over your baked cookie crust is a secret weapon we wholeheartedly endorse. This small extra effort yields a significantly more delicious fruit pizza with enhanced flavor. Crucially, as the chocolate cools and hardens, it forms an impermeable protective layer. This barrier prevents moisture from the creamy filling and fresh fruit from seeping into the sugar cookie crust, ensuring your fruit pizza remains wonderfully crunchy for much longer. It’s the ultimate defense against sogginess!
Frequently Asked Questions About Fruit Pizza
Here are some common questions about making and enjoying fruit pizza, with expert answers to help you perfect your dessert:
The most effective way to prevent your fruit pizza from getting soggy is by incorporating a crucial step: add a thin, even layer of melted dark chocolate directly on top of your baked and cooled cookie crust, before applying the cream cheese frosting. As the chocolate cools and hardens, it forms a protective shell that acts as a moisture barrier, effectively separating the wet ingredients (cream cheese and fresh fruit) from the crisp cookie base. This ensures your fruit pizza remains crunchy for a longer period. Additionally, for the absolute best texture, it’s always advisable to assemble your fruit pizza as close to serving time as possible.
For an optimal fruit pizza experience, select fruits that are vibrant, flavorful, and not excessively watery. Excellent choices include: juicy strawberries, sweet blueberries, tangy raspberries, succulent blackberries, vibrant kiwi, ripe bananas (add last minute to prevent browning), tender apricots, crisp grapes, fragrant peaches, tropical mango, and smooth nectarines. It’s best to avoid fruits with high water content like watermelon, cantaloupe, and some varieties of melon or pears, as these can release too much moisture and potentially compromise the texture of your pizza.
Absolutely! Making a gluten-free fruit pizza is quite simple. You can effortlessly replace the all-purpose flour in the pie crust recipe with a high-quality gluten-free flour mix specifically formulated for baking pies and tarts. These blends typically contain a combination of different flours and starches, along with binders like xanthan gum, to mimic the texture and structure of traditional wheat flour. Always follow the manufacturer’s recommendations on the gluten-free flour blend for best results.
While fruit pizza is a dessert, it can be a healthier option compared to many other sweets, especially with our vegan and fruit-loaded approach. It’s packed with vitamins and antioxidants from fresh fruits. You can further enhance its health profile by using whole wheat flour for the crust, substituting some sugar with natural sweeteners like coconut sugar, and opting for a low-fat dairy-free cream cheese or even a plant-based yogurt for the topping. The natural sweetness of the fruit often means less added sugar is needed.
We highly recommend using fresh fruit for fruit pizza. Frozen fruits, when thawed, release a significant amount of water, which can quickly make your pizza soggy, even with the chocolate barrier. If you absolutely must use frozen fruit, thaw it completely, drain it thoroughly, and pat it very dry with paper towels before placing it on the cream cheese layer. However, for the best texture and visual appeal, fresh is always superior.
Achieving a Beautiful Glossy Finish (Optional)
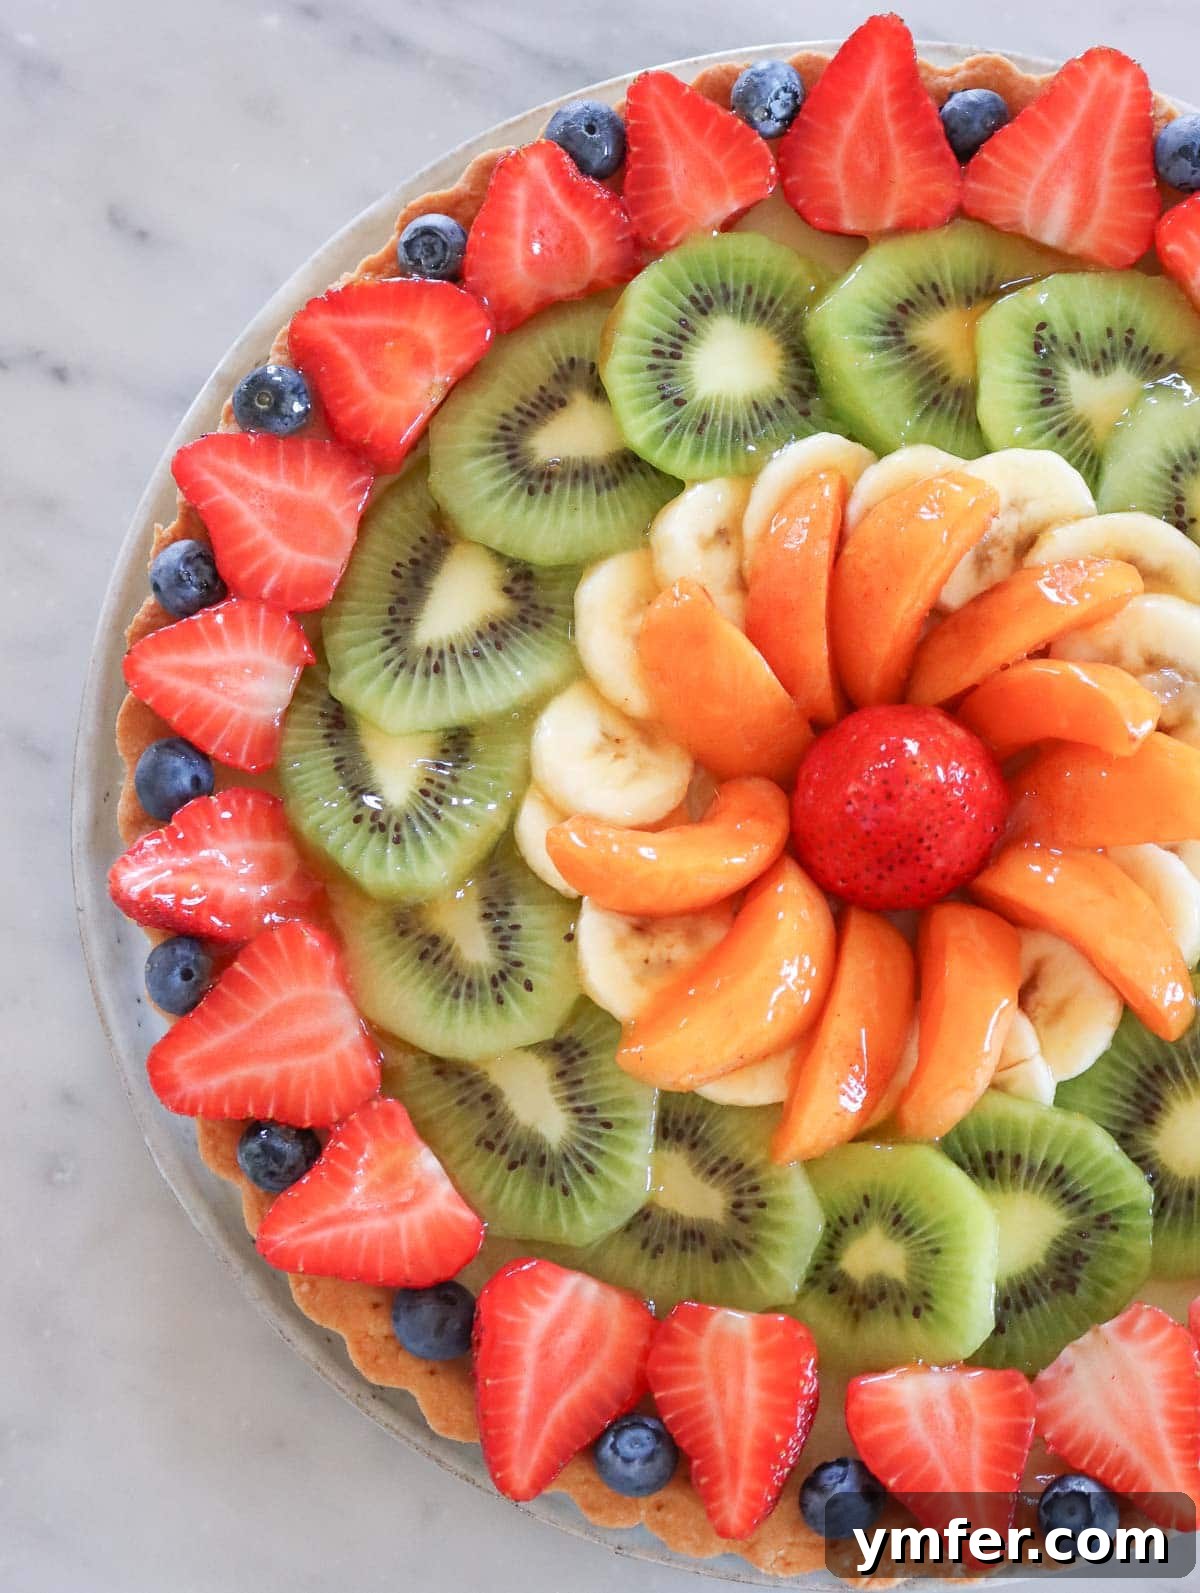
You may have noticed some fruit pizzas and fruit tarts boasting a beautiful, shiny, and glossy finish. This lustrous glaze isn’t just for aesthetics; it primarily serves a functional purpose: to protect the fresh fruit on top of the pizza from oxidation, which can cause it to turn dark and lose its vibrant appeal. Traditionally, this glossy layer is often made with gelatin, creating a protective shield against air.
However, since traditional gelatin is typically derived from animal products (fish or pork remains), we prefer a simple, equally effective, and entirely plant-based alternative that maintains the vegan integrity of our fruit pizza. Our secret ingredient? A delightful combination of apricot jam and water.
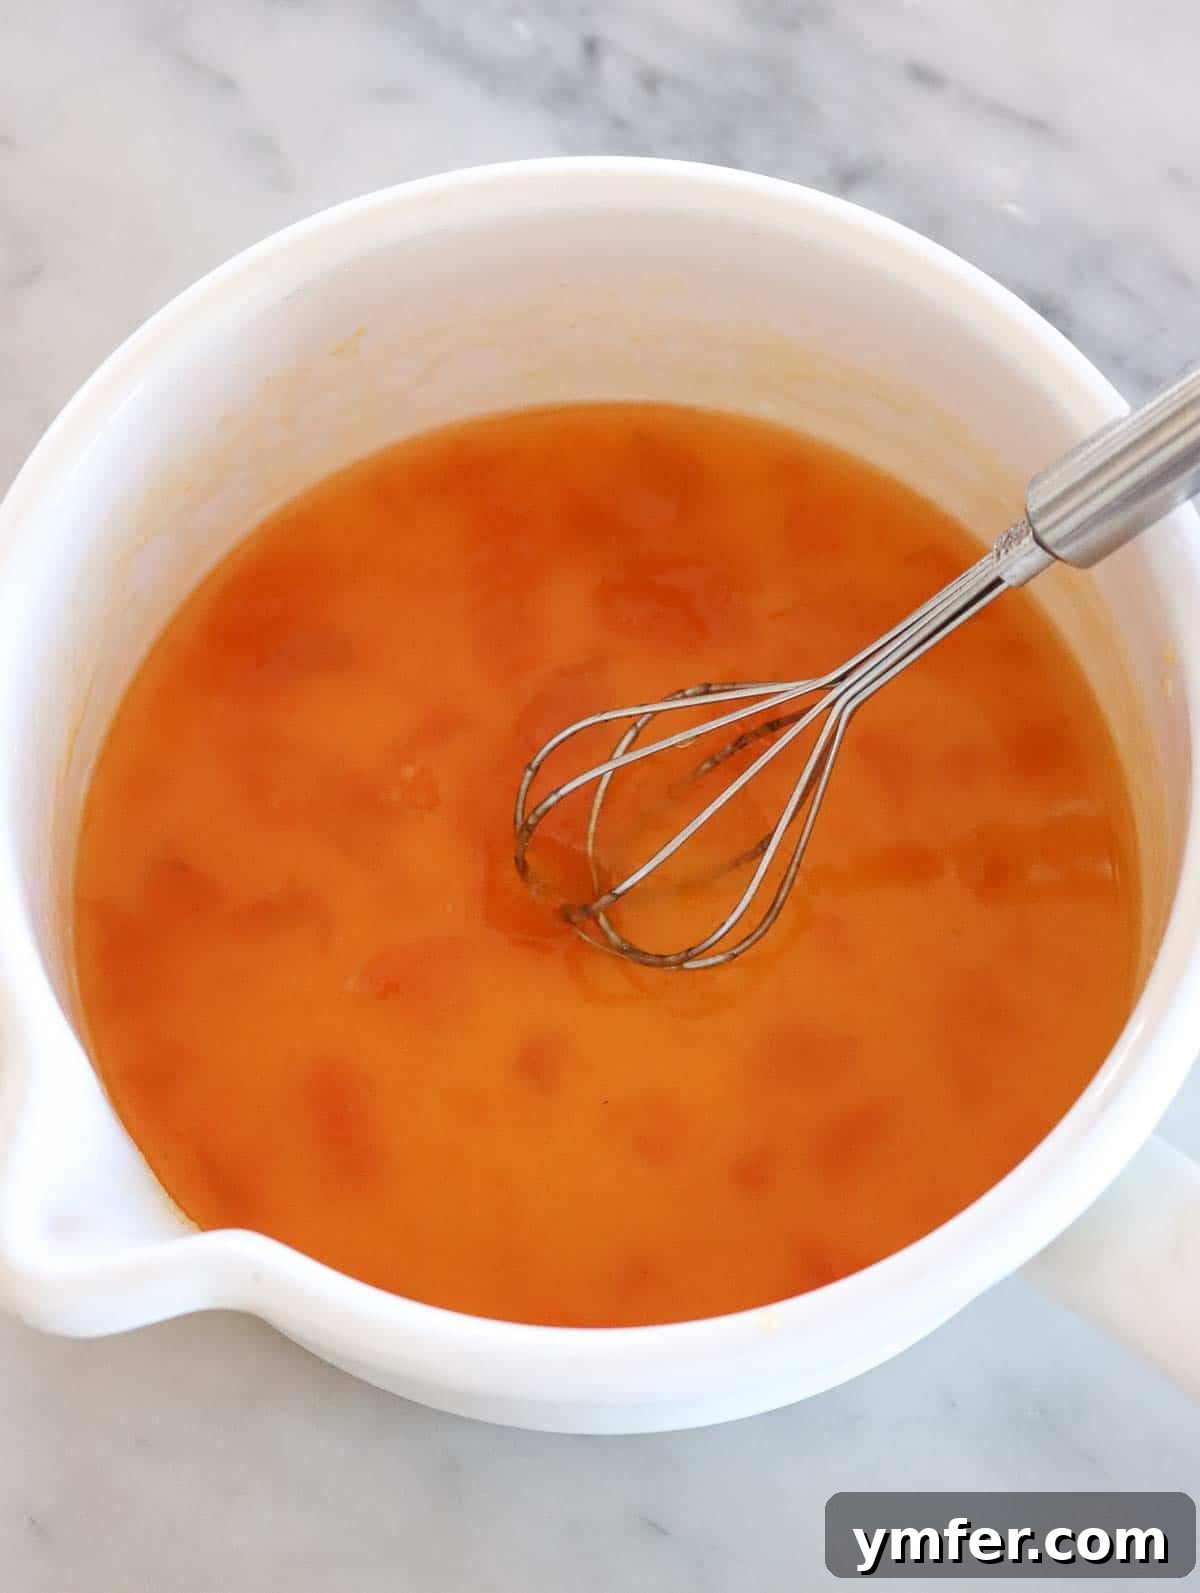
To create this gorgeous glaze, simply warm up three tablespoons of apricot jam (preferably a smooth variety without large fruit pieces) with a couple of tablespoons of water in a small saucepan over low heat or in the microwave. Stir the mixture gently until the jam is completely liquefied and has a smooth, syrupy consistency. Be careful not to overheat it; it should be warm enough to be liquid but not boiling hot.
Once the fruit pizza is fully assembled with all its fresh fruit, allow the apricot glaze to cool slightly so it’s warm but not hot. Then, using a pastry brush, gently apply a thin, even layer of this glossy mixture over the fruit. This will instantly create a beautiful, shiny sheen that mimics the effect of gelatin. As the jam cools down on the pizza, its natural pectin will cause it to thicken slightly, forming a delicate protective layer. Not only will this glaze keep your fruit looking fresh and vibrant by preventing browning, but it also adds an extra hint of fruity sweetness and a sophisticated touch to your homemade masterpiece.
Exciting Fruit Pizza Variations
One of the best things about fruit pizza is its incredible versatility. Once you’ve mastered the basic recipe, you can easily adapt it to suit your tastes, dietary needs, or simply to try something new. Here are some inspiring variations to get you started:
- Fitness Fruit Pizza: For those looking for a healthier dessert option, a fitness fruit pizza is a fantastic choice. Simply replace the all-purpose flour in the crust with hearty whole wheat flour, which adds fiber and a nutty flavor. Swap white sugar for natural sweeteners like coconut sugar or a reduced amount of maple syrup (adjusting liquids as needed). For the cream cheese topping, opt for a lower-fat dairy-free cream cheese or even a thick soy or coconut yogurt (strained to remove excess liquid) mixed with a smaller amount of sweetener. The quantities for the crust generally remain similar, but you’ll enjoy a dessert with more whole grains and natural goodness.
- One-Fruit Wonder Fruit Pizza: Sometimes, simplicity is perfection. You can create an incredibly delicious and visually striking fruit pizza using just a single type of fruit. This approach highlights the individual fruit’s flavor and color. We highly recommend a vibrant green kiwi fruit pizza, where you arrange thinly sliced kiwi in concentric circles for a stunning effect, or a classic strawberry fruit pizza, with beautifully fanned or halved strawberries covering the top. For a single-fruit pizza, you’ll typically need about 4 to 5 medium-sized kiwis or approximately 1.5 cups (around 250g) of sliced strawberries to cover the entire surface generously.
- Mini Fruit Pizzas: For individual servings or a party platter, turn your fruit pizza into delightful mini versions! Simply roll out the dough and use a round cookie cutter (about 3-4 inches in diameter) to create small cookie bases. Bake them as directed, then apply the chocolate and cream cheese toppings, and finish with a small cluster of colorful fruits on each. These are perfect for entertaining and portion control.
- Citrus Zing Fruit Pizza: Add a zesty twist to your cream cheese frosting by incorporating a teaspoon of fresh lemon or orange zest and a tablespoon of juice. This brightens the flavor profile and complements a variety of fruits, particularly berries and stone fruits.
- Nut Butter & Banana Fruit Pizza: For a protein-packed and slightly richer variation, consider a thin layer of almond or peanut butter (ensure it’s smooth and spreadable) under your cream cheese frosting, then top with sliced bananas, a sprinkle of chopped nuts, and a drizzle of melted chocolate. This creates a more substantial dessert, perfect for a hearty snack.
- Classic Vegan Fruit Tart: If you enjoy the concept of fruit pizza but crave a more traditional, perhaps richer, dessert experience, explore our delicious vegan fruit tart recipe. It features a similar delectable pie crust but is often filled with a luscious plant-based custard and adorned with an abundance of fresh fruit, presenting a slightly more elaborate yet equally satisfying treat.
Storage Solutions & Making Fruit Pizza in Advance
To enjoy your fruit pizza at its absolute best – crisp crust, creamy topping, and fresh fruit – it’s ideal to serve it shortly after assembly. However, sometimes you need to prepare ahead or store leftovers. Here’s how to manage it:
- Optimal Storage Time: We highly recommend consuming this fruit pizza within a maximum of 24 hours after it has been fully assembled. Beyond this timeframe, the moisture from the cream cheese and especially the fresh fruit will inevitably start to soften the cookie crust, even with the protective chocolate layer, leading to a less desirable soggy texture.
- Refrigeration: If you have leftovers or need to store your assembled fruit pizza overnight, it must be kept in the refrigerator. Cover it loosely with plastic wrap or aluminum foil to prevent it from absorbing refrigerator odors and to help maintain freshness.
Can I make fruit pizza in advance?
Yes, you can certainly prepare individual components of the fruit pizza in advance, which makes assembly on the day of serving much quicker and stress-free. However, for the best quality, it is always best to assemble the full fruit pizza shortly before you plan to serve it.
Here’s how to prepare each element:
- Fruit Preparation: Be aware that some fruits, such as bananas, sliced peaches, nectarines, apples, and even strawberries (especially if cut), are prone to oxidizing and turning brown when cut too far in advance. For these fruits, we highly recommend prepping them at the last minute, just before assembly. For fruits less prone to browning, like whole blueberries or raspberries, you can wash and dry them a few hours ahead and store them in an airtight container in the refrigerator.
- Cream Cheese Filling: The dairy-free cream cheese and powdered sugar mixture can be prepared up to 1-2 days in advance. Store it in an airtight container in the refrigerator. Before spreading, give it a good stir to ensure it’s smooth and creamy again.
- Pie Crust Base: The sugar cookie crust offers the most flexibility for advance preparation. You have several convenient options:
- Refrigerate the Dough: You can prepare the dough ball and store it tightly wrapped in plastic film in the refrigerator for up to a couple of days. When you’re ready to bake, allow the dough to sit at room temperature for about 15-20 minutes to soften slightly, making it easier to roll out.
- Freeze the Dough: For longer storage, the unbaked dough can be wrapped meticulously in plastic film and then in aluminum foil, and frozen for up to 3 months. When you need it, thaw the dough completely in the refrigerator overnight before rolling and baking.
- Bake and Store the Crust: You can bake the sugar cookie crust completely and let it cool. Once cooled, store the plain, un-topped crust at room temperature in a dry, cool corner of your kitchen for up to 2 days. Ensure it’s not exposed to humidity. When ready to serve, apply the chocolate layer (if using), then the cream cheese and fresh fruit. This is often the most convenient “make-ahead” method for the crust.
By staggering your preparation, you can enjoy a fresh, vibrant, and perfectly textured fruit pizza with minimal last-minute fuss!
Explore More Delicious Vegan Desserts
If you’ve fallen in love with the refreshing simplicity and delightful flavors of this fruit pizza, you’re in for a treat! We have a wide array of other incredible vegan desserts that we think you’ll adore. Perfect for any sweet craving or occasion, these recipes offer diverse textures and tastes:
- Easy Vegan Coffee Mousse: A light, airy, and intensely flavored dessert for coffee lovers.
- Dreamy Vegan Panna Cotta: A silky-smooth, elegant Italian classic, reimagined without dairy.
- No-Bake Vegan Cheesecake: A rich and creamy cheesecake that’s surprisingly easy to make, no oven required!
- Classic Vegan Fruit Tart: For a more traditional, custard-filled fruit dessert with a similar delightful crust.
- Apricot Tart with Frangipane: A sophisticated and flavorful tart featuring sweet apricots and a rich almond filling.
- Zesty Vegan Lemon Tart: A wonderfully tangy and refreshing tart, perfect for citrus enthusiasts.
Did you make this fabulous fruit pizza? We’d absolutely love to hear about your experience! Please leave us a comment below – your feedback not only makes us incredibly happy but also helps us continuously improve our recipes and serve our community better. Happy baking!
Printable Fruit Pizza Recipe Card
Fruit Pizza
Share
Equipment
-
Rolling pin
Ingredients
For the pie crust
- 65 g sugar
- 55 g sunflower oil
- 60 g water
- 230 g flour all-purpose or wholewheat
- 6 g baking powder
For the topping
- 230 g dairy-free cream cheese tofutti, daya, trader joes, violife
- 30 g powdered sugar
- 100 g dark chocolate or dark chocolate chips
- 250 g mixed fresh fruit of choice* we usually use strawberries, blueberries, raspberries, peach, apricot, kiwi, banana
Instructions
For the pie crust base
-
Preheat the oven to 350F (180C). Line your baking tray with parchment paper, and keep it our of the oven while the oven preheats.
In a bowl, add sugar, oil, water, and mix with a spatula for just a minute, to dissolve some of the sugar in the liquid. Add the flour and the baking powder and stir with a spatula till the flour absorbs the liquids.
TIP: to distribute the baking powder evenly, I like to sift it with the flour while adding them to the liquids Alternatively, you could first mix flour and baking powder into a separate bowl, then add them to the liquids.
-
Now on a worktop, knead with your hands, gently, for a short minute. Just the time to bring all the ingredients together and form a dough ball. Do not over-knead.
-
Take the sheet of parchment paper and with a rolling pin, flatten the dough ball into a disc on top of it. It should look like a pizza base. To make sure it turns out round, rotate the disc often while you flatten it.
We like our fruit pizza quite thin so we flatten it down to ⅛ of an inch, or 3 to 4 mm.
-
Transfer the parchment paper with the pizza onto the baking tray. Trim the edges to make it rounder if you want. I use a pizza wheel to do that.
Bake in the oven for about 15 minutes. Take out of the oven and let it cool down.
For the topping
-
This step is optional: shred the chocolate, then melt it. Spread a thin layer of melted chocolate on top of the baked fruit pizza base, then let it cool down till it’s hard.
If you live in a hot climate, you can refrigerate the pizza base with the chocolate on it for 15 minutes to speed things up.
TIP: You can melt the chocolate in a bowl in the microwave, heating the chocolate a few seconds at a time. Or you can do it bain-marie, that is, pur the bowl with the dark chocolate into a larger pot, filled with hot water. The heat of the water will melt the chocolate.
-
In a bowl mix the cream cheese with the powdered sugar. You can do that with a spatula or with a whisk by hand, or whit an electric beater. Just make sure to get rid of most lumps. You can even blend it with an immersion blender to make it lump-free.
When the chocolate is hard, spread the cream cheese mix on top of the fruit pizza.
-
Now you just have to add the fruit on top, cut a slice, and eat it. We like to slice or chop the fruit in small pieces, and add it randomly, without a pattern, on top of the fruit pizza.
Notes
* Where we live fruit is very cheap in summer, so we went for a mix of seasonal fresh fruit that included: 8 strawberries, 8 raspberries, 8 grapes, 20 blueberries, 1 green kiwi, 1 apricot, 1 nectarine, and some mint leaves on top. You can make a delicious fruit pizza even with just strawberries, and blueberries. Or even one with just one fruit, for example just green kiwi, or just strawberries.
Nutrition
If you liked this recipe you might also like our other sweet treats:
- 65 Best Vegan Italian Recipes
- 43 Best Plant-Based Desserts
- Scrumptious Vegan Strawberry Tart
- Elegant Vegan Fruit Tart