
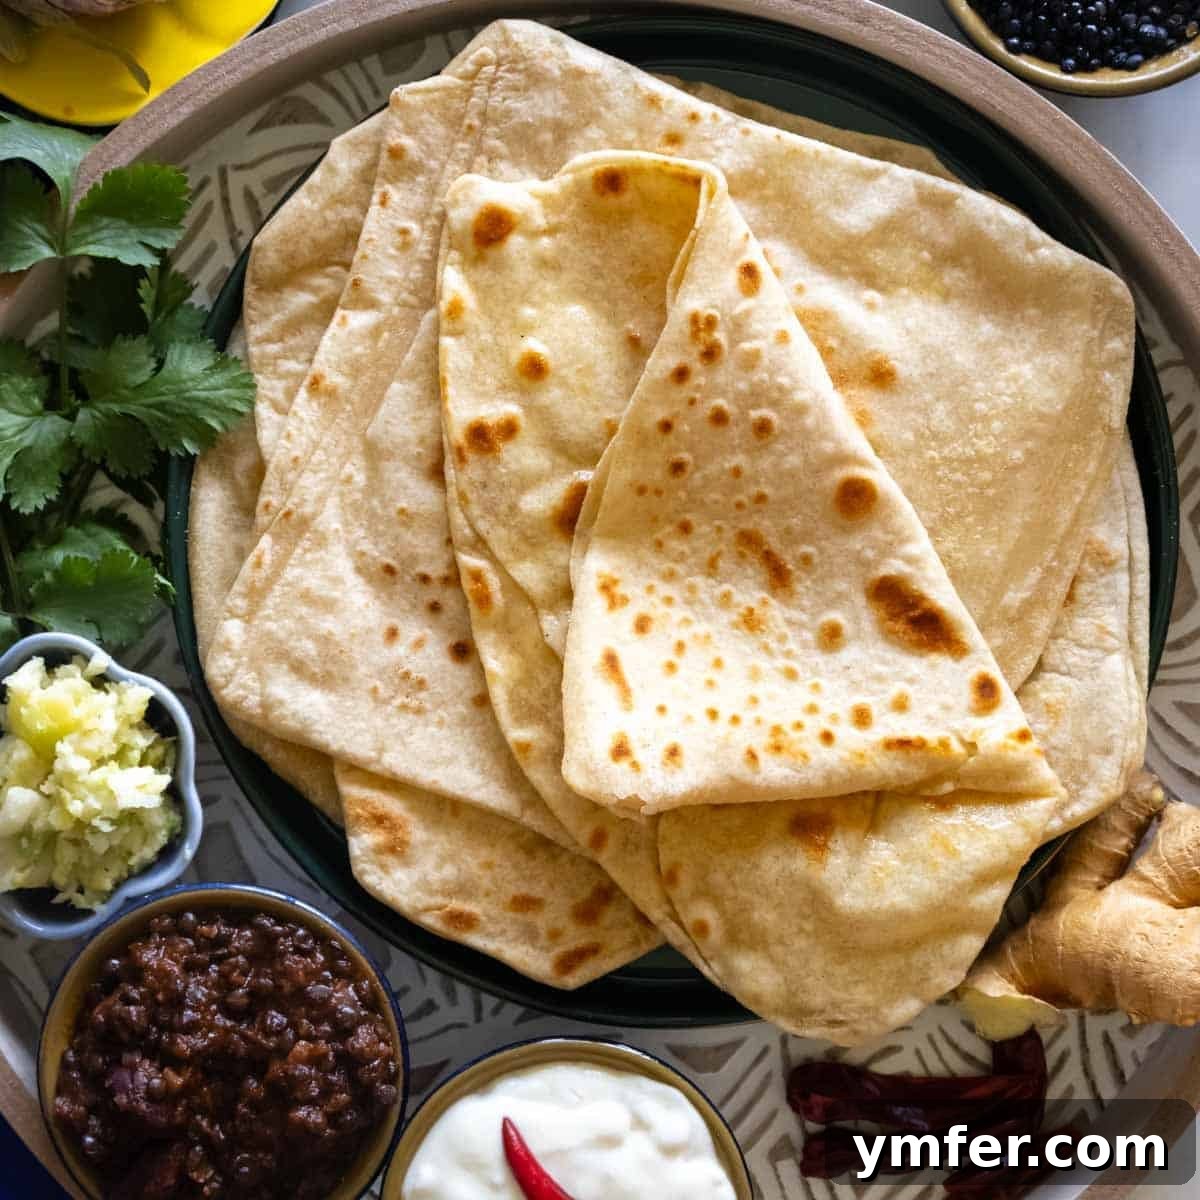
Flaky Indian Paratha: A Complete Guide to Making the Best No-Yeast Flatbread
Discover the delightful world of Paratha, a beloved Indian flatbread renowned for its incredible flakiness and rich, buttery layers. Unlike its leavened cousin naan, paratha is a simple, no-yeast bread that comes together quickly on a skillet, offering a perfect balance of crispiness and tenderness. Whether you prefer it plain, served with a dollop of butter, or bursting with savory fillings like spiced potatoes or gooey cheese, paratha is a versatile culinary masterpiece that brings warmth and comfort to any meal.
Embark on a culinary journey to master this essential Indian bread. We’ll guide you through every step, from preparing the perfect dough to achieving those signature flaky layers and even crafting delicious stuffed variations. If you appreciate the art of homemade bread, explore our other easy and quick recipes for Naan, Pita, Focaccia, and Flatbread Pizza.
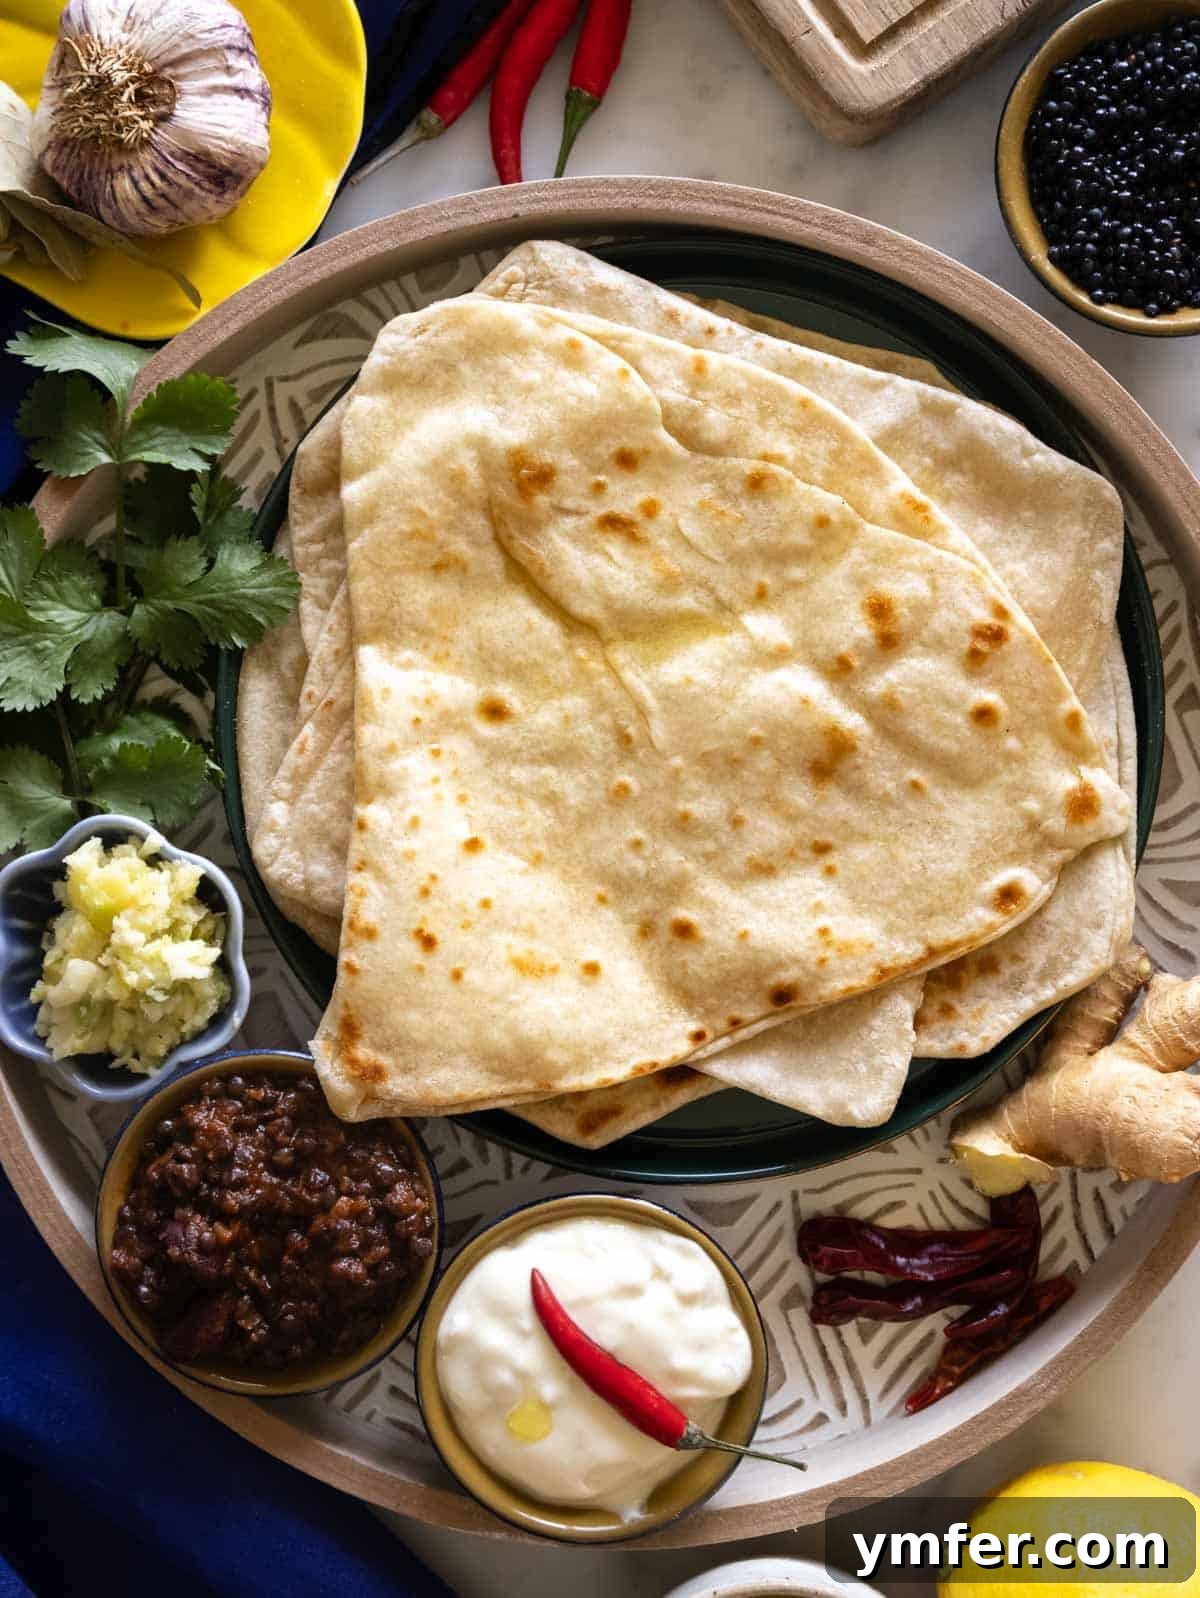
Why You’ll Fall in Love with Homemade Paratha
There’s an undeniable magic to warm, homemade flatbreads, and paratha truly embodies this charm. What makes paratha so special? It’s not just its incredible flavor and texture, but also its surprising simplicity and speed. You can have these delectable flatbreads ready in just over 30 minutes, cooked to perfection right on your stovetop skillet.
Quick, Easy, and Incredibly Delicious
The beauty of paratha lies in its straightforward dough. Made from just four essential ingredients—flour, water, salt, and a touch of oil—this simple mixture transforms into a culinary delight. The magic happens through a specific rolling and folding technique that creates multiple thin layers. When cooked, these layers puff up, resulting in parathas that are consistently flaky, wonderfully soft, and beautifully golden-brown every single time. It’s an accessible recipe that even novice bakers can master, yielding impressive results without the fuss of yeast or complex techniques.
Unmatched Versatility for Any Meal
Parathas are not only a breeze to prepare but also exceptionally versatile. In India, they are a breakfast staple, often enjoyed plain or with a pat of butter, perfectly complemented by a steaming cup of aromatic masala chai. Beyond breakfast, they can be transformed into a hearty meal by stuffing them with a myriad of fillings, offering a delightful surprise with every bite.
Our kitchen experiments have led us to some truly crave-worthy combinations. Imagine a paratha generously filled with creamy feta and vibrant spinach, creating a tangy and savory delight. Or perhaps a more substantial option featuring tender potatoes, sweet sautéed leeks, and melty cheese, a true comfort food masterpiece. These stuffed variations elevate the humble flatbread into a satisfying and flavorful main dish.
The Perfect Companion to Indian Cuisine
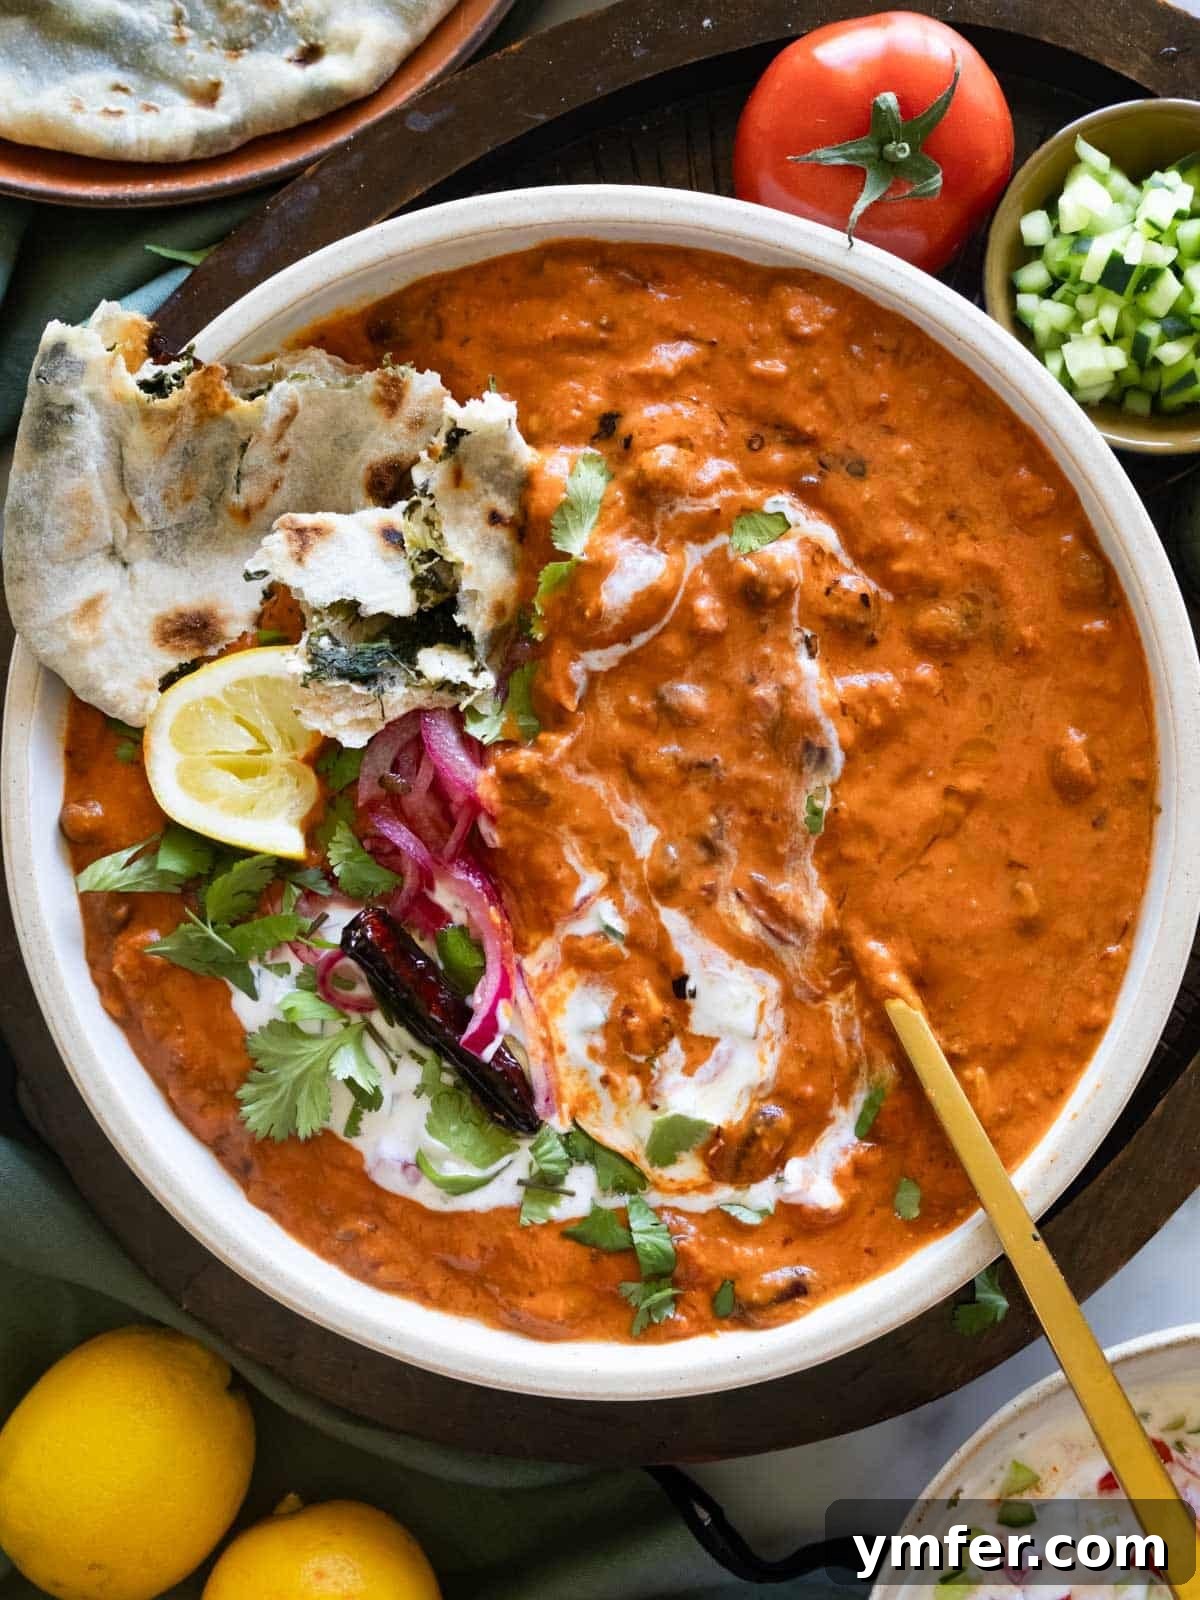
While delicious on their own, our absolute favorite way to savor paratha is 🥘 alongside a rich, aromatic Indian curry or dal. The flaky texture and subtle flavor of the paratha make it an ideal vehicle for soaking up the delicious sauces and spices of classic Indian dishes. Some of our top pairings include a vibrant chana masala, a comforting dal, a hearty chickpea curry, the creamy richness of dal makhani, an opulent navratan korma, a spicy rajma, or a warming lentil curry.
No matter how you choose to enjoy it, paratha delivers 100% comfort in every single bite. 🫓🤤 It’s more than just bread; it’s an experience, a taste of tradition, and an invitation to explore the rich tapestry of Indian flavors.
Essential Ingredients for Perfect Paratha
Crafting the perfect paratha requires just a handful of staple ingredients. While simple, the quality and type of each component play a crucial role in achieving that desirable soft, tender, and flaky texture. Below, we’ll dive into the specifics, offering insights and tips for selecting the best ingredients. For a complete list of quantities and specific substitutions, please refer to the detailed recipe box at the bottom of this page.
- Flour: The Foundation of Flakiness
Many traditional paratha recipes suggest using whole-wheat flour, and while it certainly has its place, our extensive testing has revealed a secret to truly superior parathas. For the absolute best parathas—those that are exquisitely soft, effortlessly flaky, and incredibly tender—we highly recommend using all-purpose flour. Alternatively, a blend of 75% all-purpose and 25% whole-wheat flour can also yield excellent results, offering a slight nutritional boost without compromising texture. Our strongest advice? For maximum tenderness and pliability, skip the whole-wheat flour entirely and opt for all-purpose or even pizza flour.
Why this preference? Whole-wheat flour tends to absorb more water, leading to a dough that can be dry, less elastic, and ultimately produce parathas that are tougher and overly chewy. This is precisely what we want to avoid in a comforting flatbread. We’ve meticulously tested thousands of variations, and the unparalleled texture and pliability achieved with all-purpose or pizza flour are simply unmatched. Trust us, your taste buds will thank you for this choice.
- Water: The Hydrating Element
Water is crucial for bringing the dough together and hydrating the flour. The temperature of the water can influence the dough’s consistency and ease of kneading. We recommend using warm water as it helps the flour absorb more readily and can contribute to a softer dough. Add it gradually to achieve the right consistency – a soft, pliable, and non-sticky dough.
- Salt: The Flavor Enhancer
A pinch of salt is vital not just for seasoning the paratha but also for strengthening the gluten structure in the dough, which contributes to its elasticity. Don’t underestimate its importance; it enhances the overall flavor profile, making your parathas truly delicious.
- Oil, Butter, or Ghee: For Richness and Flakiness
The fat you choose significantly impacts the flavor and texture of your parathas. For everyday cooking, we often stick with a neutral olive oil. It’s a healthy, light, and reliable choice that helps create soft, flexible dough and adds a subtle sheen during cooking. However, for those special occasions or when you crave an extra layer of richness and an utterly irresistible aroma, reach for melted butter or traditional Indian ghee. Both butter and ghee impart a deeper, more complex flavor and contribute to those desirable crispy, buttery layers that make parathas so heavenly. You’ll use fat in the dough, for brushing between layers, and during cooking on the skillet for ultimate flavor and browning.
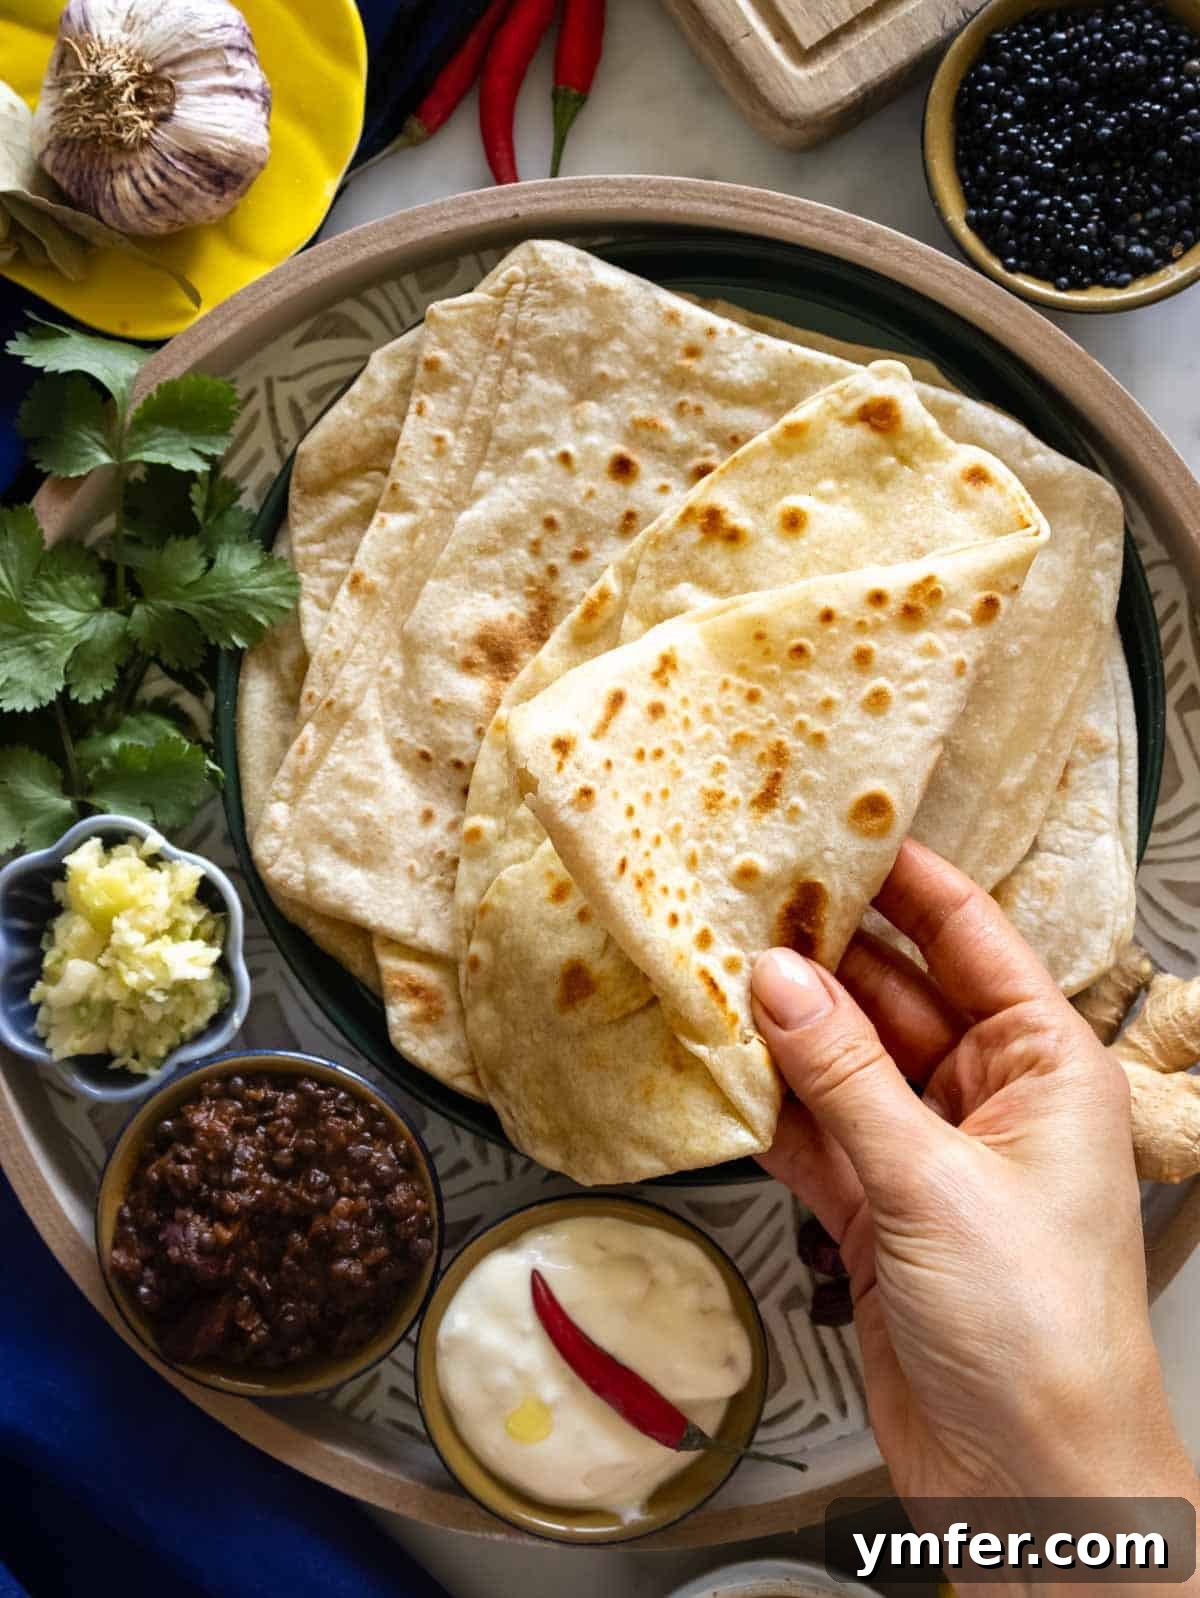
Mastering the Art: How to Make the Best Flaky Parathas
Making flaky parathas might seem intricate, but with these clear steps and expert tips, you’ll be creating perfect, layered flatbreads in no time. The key lies in the dough preparation and the unique folding techniques that build those signature layers.
Step 1: Preparing the Perfect Dough
The foundation of any great paratha is a well-made dough. It needs to be soft, smooth, and elastic to allow for easy rolling and to develop those wonderful layers.
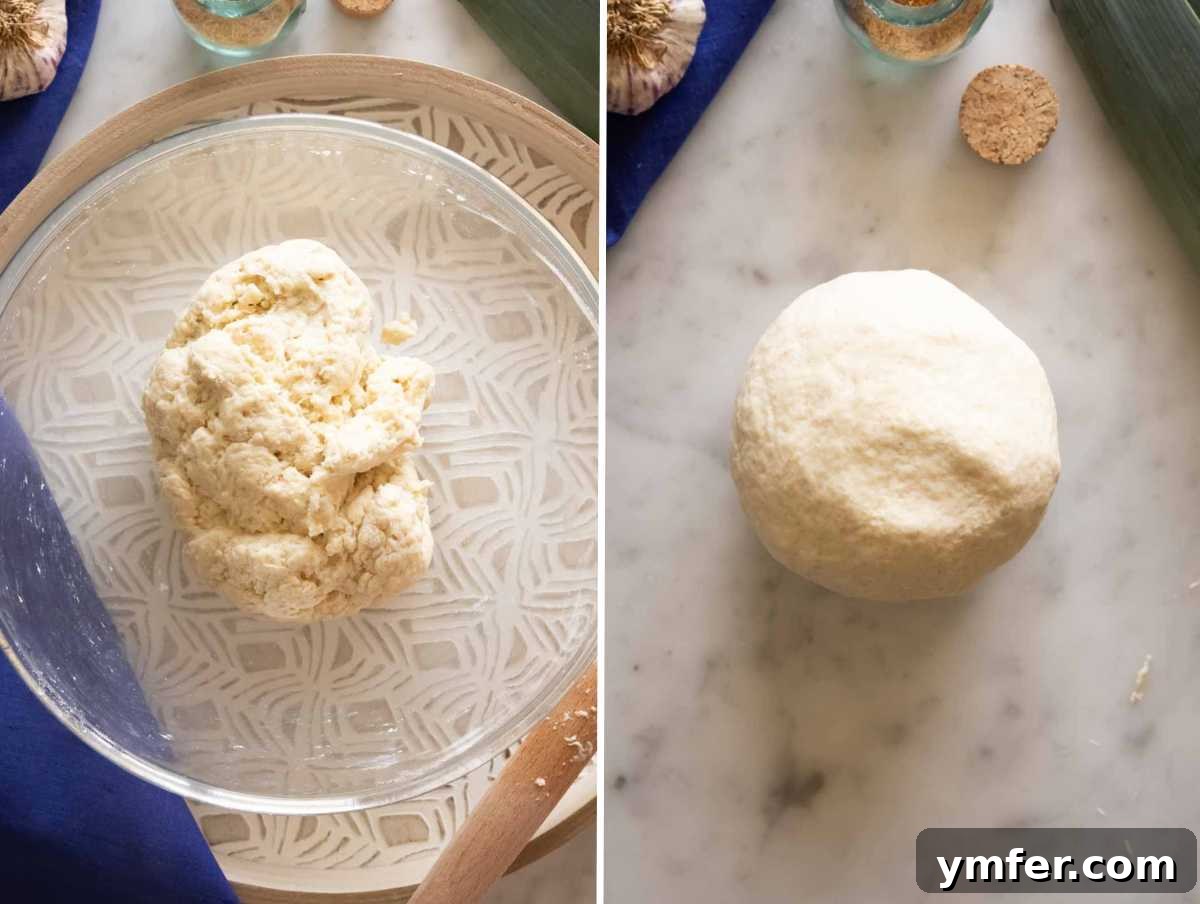
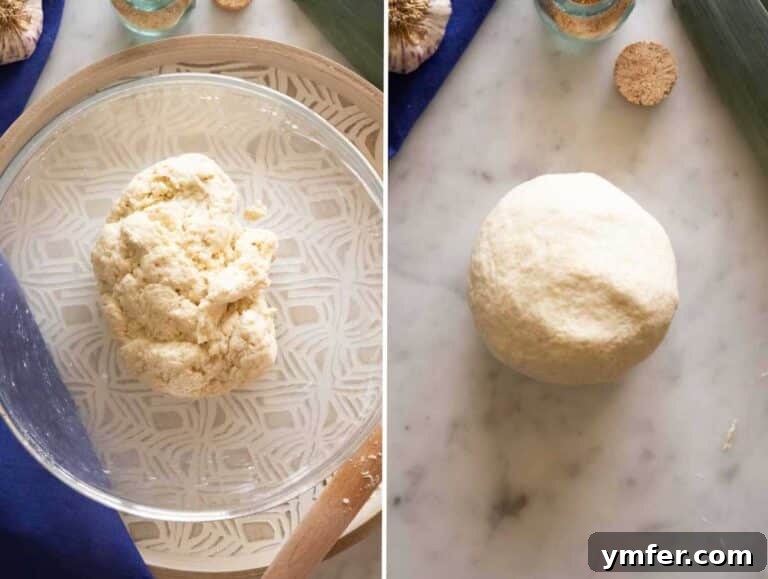
- In a spacious mixing bowl, combine your chosen flour, warm water, salt, and oil or melted butter/ghee. Begin by stirring these ingredients with a sturdy wooden spoon or a spatula. Continue mixing until all the flour has absorbed the liquid, and the mixture comes together to form a shaggy, cohesive dough.
- Once the dough has mostly come together, transfer it to a clean, lightly floured work surface. Now, it’s time for kneading. Knead the dough vigorously for approximately 2 minutes. You’ll notice the dough transforming under your hands, becoming progressively soft, smooth, and elastic. Crucially, it should no longer be sticky to the touch. If you prefer, a stand mixer fitted with a dough hook can also achieve this consistency in a similar timeframe.
- After kneading, wrap the dough tightly in plastic wrap or cover it with a damp cloth. Allow it to rest for a minimum of 30 minutes at room temperature. This resting period is not merely a suggestion; it’s a critical step that allows the gluten to relax, making the dough much easier to roll out thinly without resistance. This relaxation also contributes significantly to a more tender final texture, preventing tough parathas.
Step 2: Dividing and Initial Rolling
Once your dough has rested and is perfectly pliable, it’s time to prepare it for its layered transformation.
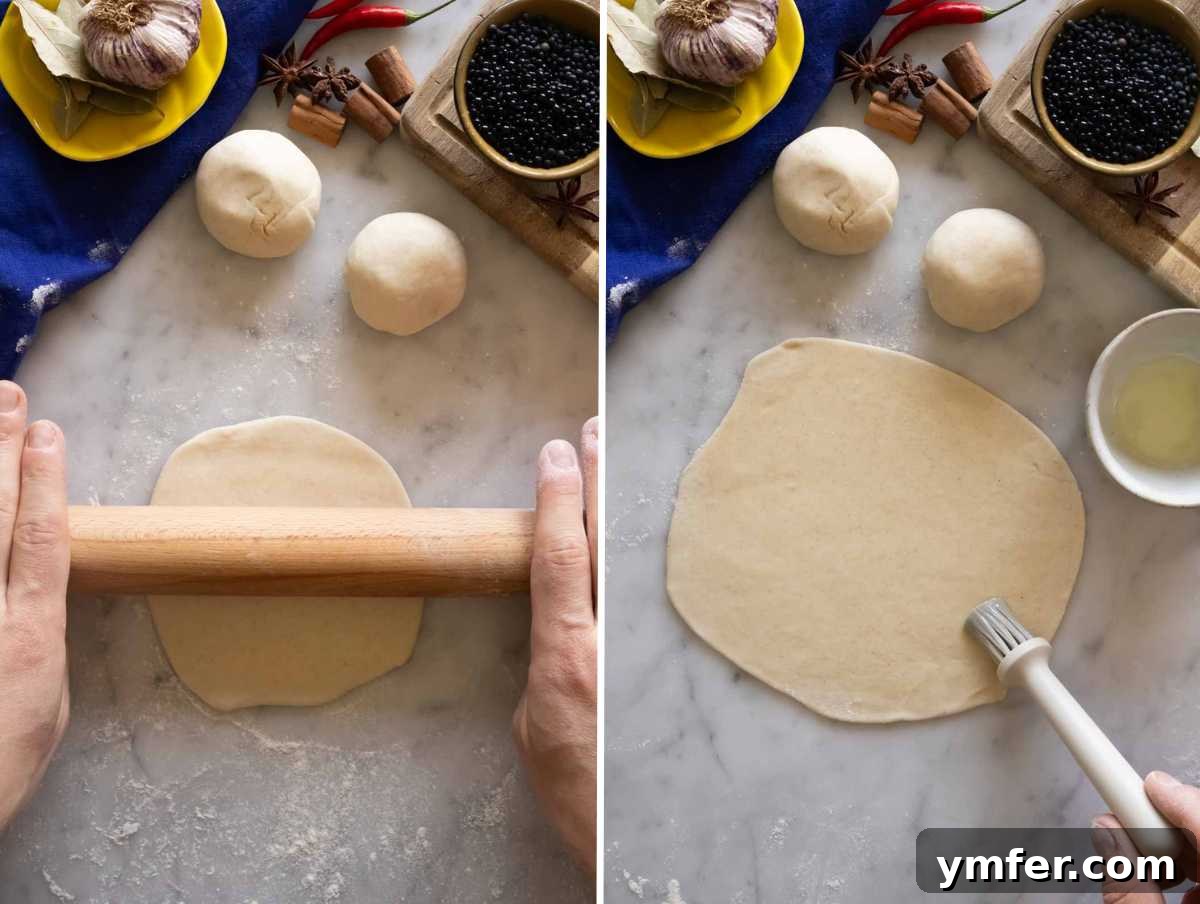
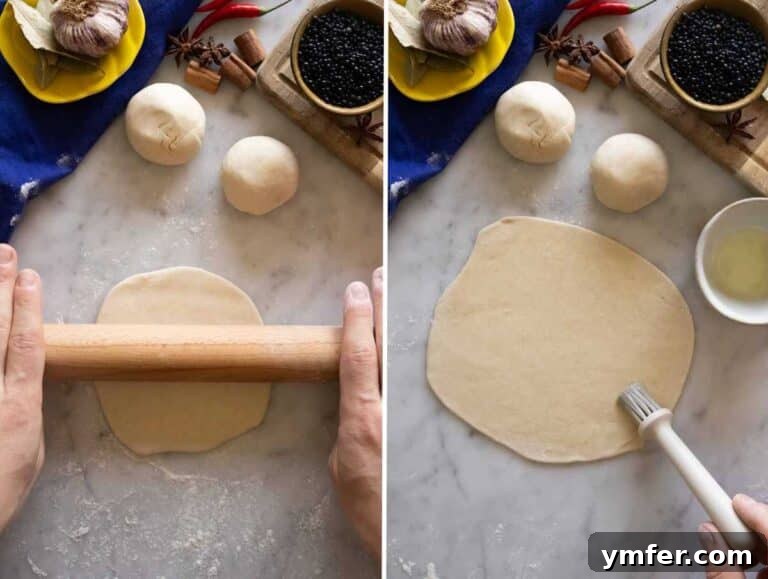
- Gently unwrap the dough. On a lightly floured surface, divide the dough into 6 equal pieces. Each piece should be roughly the size of a golf ball. Roll each piece into a smooth ball.
- Take one dough ball at a time and, on your lightly floured surface, roll it out into a thin, even circle. Aim for a diameter of about 6-8 inches (15-20 cm). The thinner you roll it, the flakier your paratha will be, but ensure it doesn’t tear.
- Once rolled into a circle, brush the entire surface generously with olive oil, melted ghee, or butter. This fat layer is key to creating separation between the dough layers, which then puff up during cooking to give paratha its signature flaky texture.
Step 3: Crafting Flaky Layers with Folding Techniques
This is where paratha gets its characteristic layers. There are several popular folding methods, each creating a slightly different look and feel, but all contributing to that coveted flakiness. Choose the method you find easiest or most appealing:
- Triangle Fold:
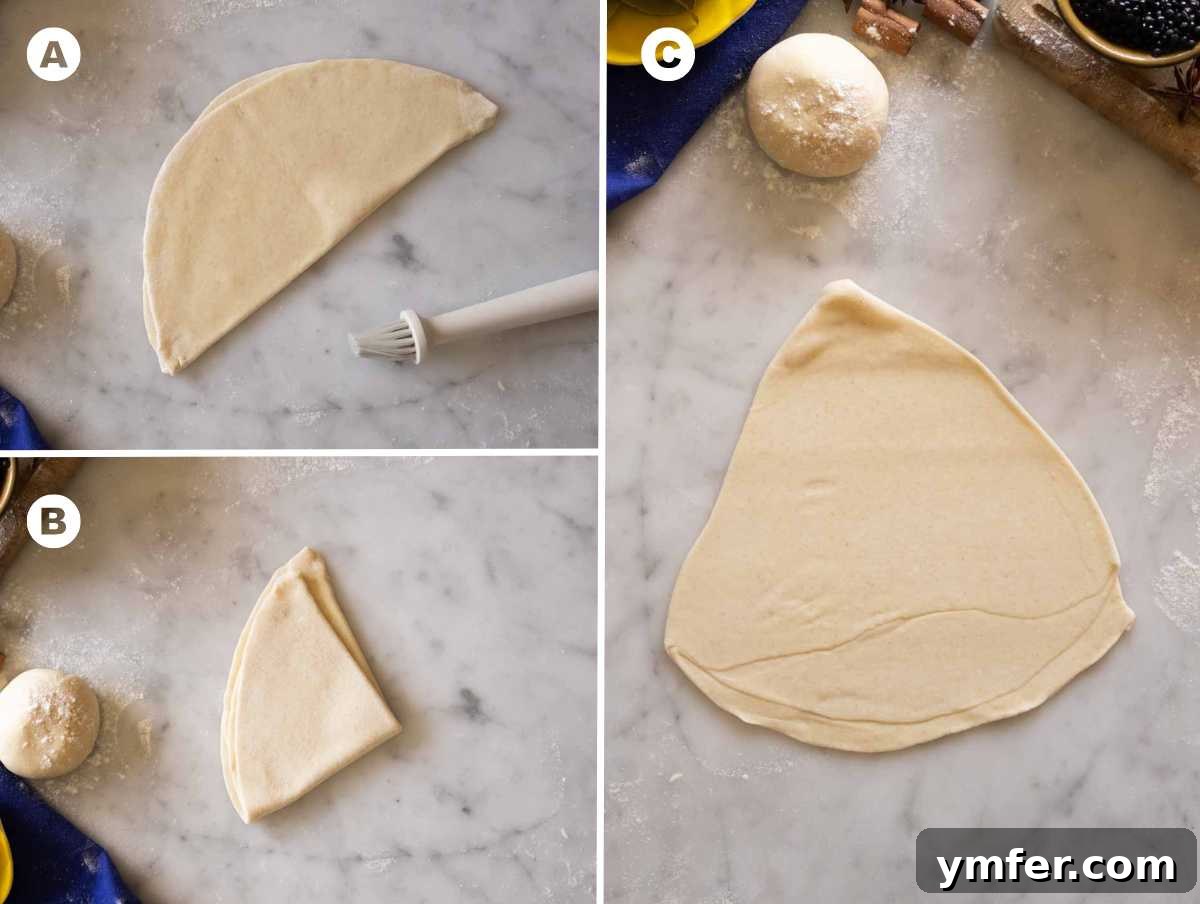
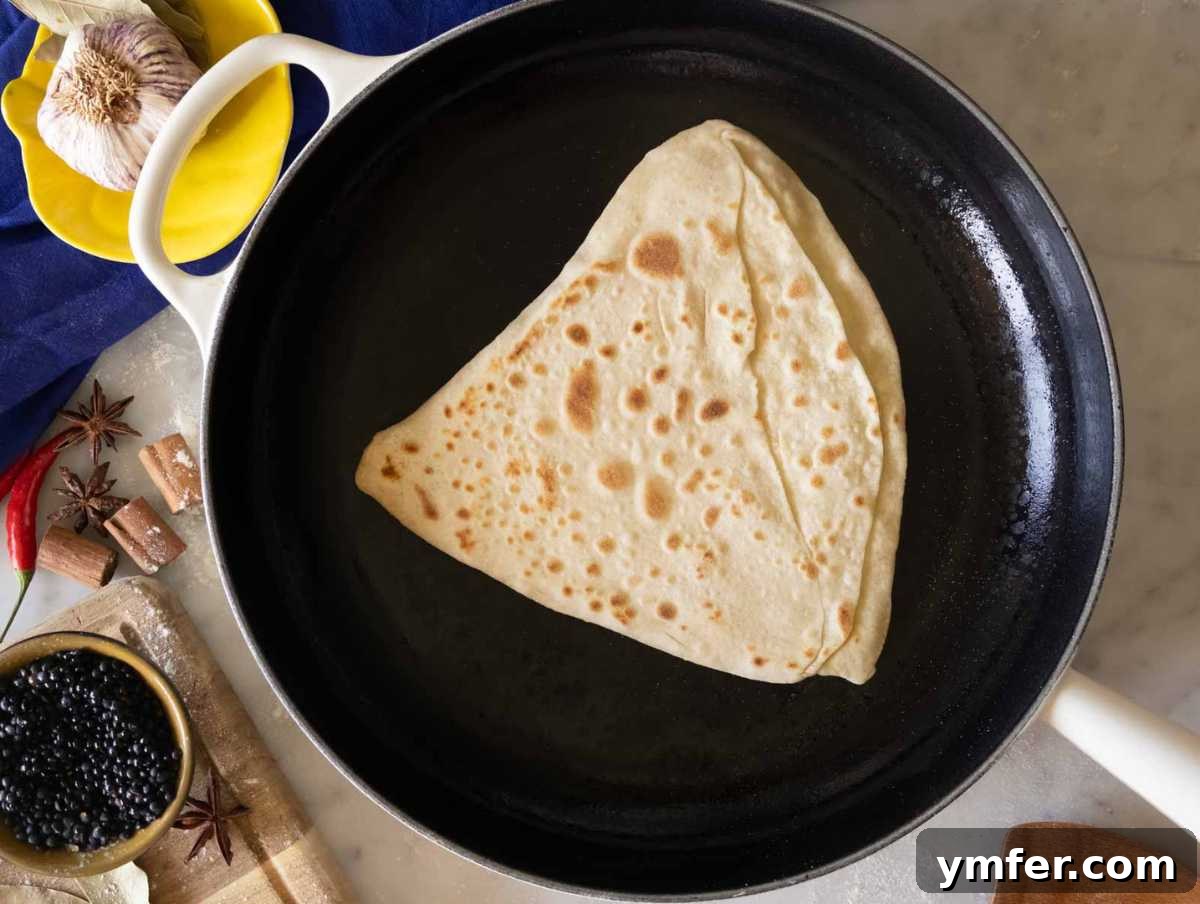
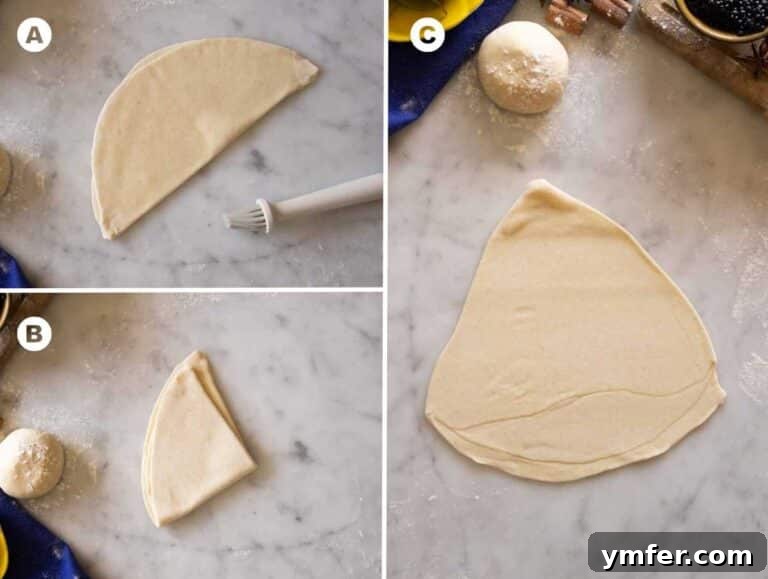
This is a classic and relatively simple method. After brushing the rolled circle with oil, fold it in half to create a semi-circle. Brush this folded surface with more oil. Then, fold it in half one more time to form a quarter-circle or a triangle shape. Gently roll this triangle out again into a thin, uneven triangle, being careful not to press too hard and seal the layers. This method results in beautifully layered edges.

- Spiral Fold (Cinnamon Roll Style):
For this method, after oiling the circle, fold the dough back and forth like a paper fan, creating a long, pleated strip. Once pleated, coil this strip tightly into a spiral, resembling a cinnamon roll. Gently flatten the spiral and then roll it out again into a thin circle. This technique creates numerous concentric layers, leading to an incredibly flaky and airy texture.
- Square Fold:
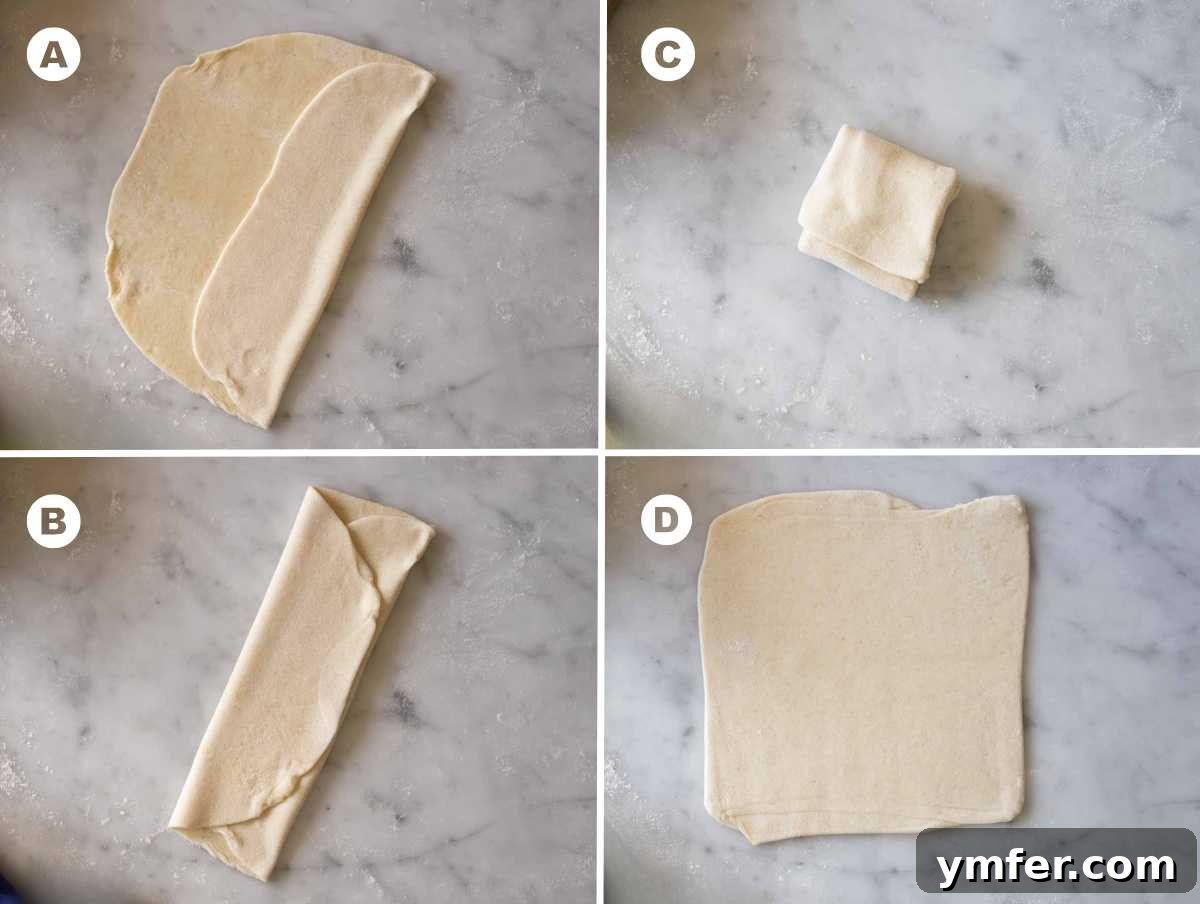
This method yields a neatly square-shaped paratha. After brushing the circular dough with fat, fold one edge towards the center, then the opposite edge, creating a rectangle. Brush with more fat. Now fold the two remaining sides towards the center, as if folding an envelope, to form a square. Brush with fat again if desired. Finally, gently roll this square out into a thin square shape. This is excellent for uniform presentation and provides satisfyingly crisp edges.
Important Note: While folding is technically optional for a plain flatbread, it is the fundamental step that creates those beautifully flaky, buttery layers that elevate parathas from simple bread to an irresistible delicacy. Don’t skip it if you’re aiming for that classic paratha texture!
Step 4: Cooking Your Flaky Paratha to Perfection
The final step brings your carefully prepared dough to life, transforming it into a golden, flaky masterpiece. Proper cooking is essential for achieving the best texture and flavor.
- Heat a heavy-bottomed cast iron skillet or a good quality stainless steel pan over medium heat. It’s crucial for the skillet to be adequately hot before you place the paratha. While non-stick pans can be used, a hotter surface on cast iron or stainless steel often yields superior browning, a more desirable crisp texture, and faster cooking.
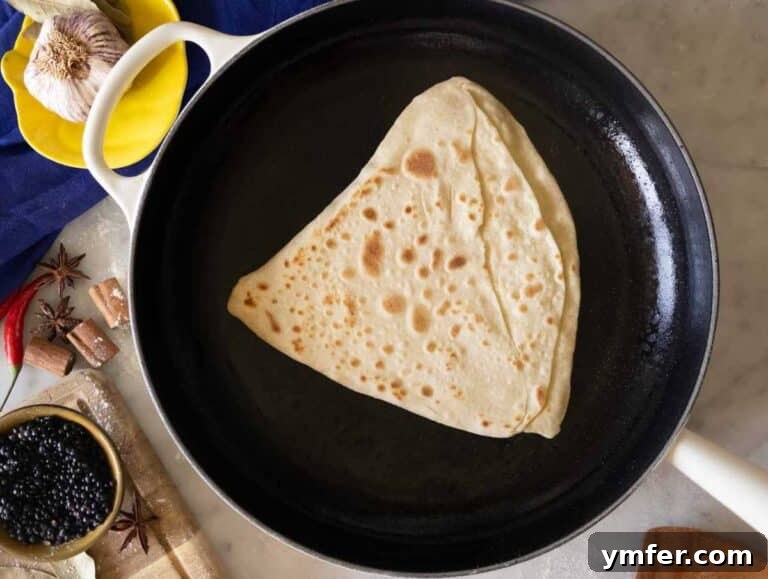
- Once the skillet is hot, carefully place one rolled-out paratha onto the dry surface. Cook for approximately 30–60 seconds per side. You’ll know it’s time to flip when you see small bubbles beginning to form on the surface and golden-brown spots appearing on the underside.
- After the first flip, brush the top surface of the paratha generously with ghee, melted butter, or oil. Flip again and brush the other side. Continue to cook, flipping every 30-60 seconds, pressing gently with a spatula, until both sides are deeply golden-brown and the paratha is fully cooked through. The layers should visibly puff up and separate during this process, a clear sign of success.
- Immediately transfer the hot paratha to a plate. Serve it piping hot with your favorite accompaniments. Whether it’s a zesty chutney, cooling yogurt, a rich curry or dal, or simply a luxurious pat of butter melting on top, parathas are best enjoyed fresh off the skillet. Be warned: one is rarely enough, so be prepared to make many!
How to Create Delicious Stuffed Parathas
Stuffed parathas are a delightful variation, turning a simple flatbread into a satisfying meal. The process involves enclosing a flavorful filling within the dough before rolling and cooking. Here’s how to do it effectively and some of our most cherished filling ideas.
General Technique for Stuffed Paratha
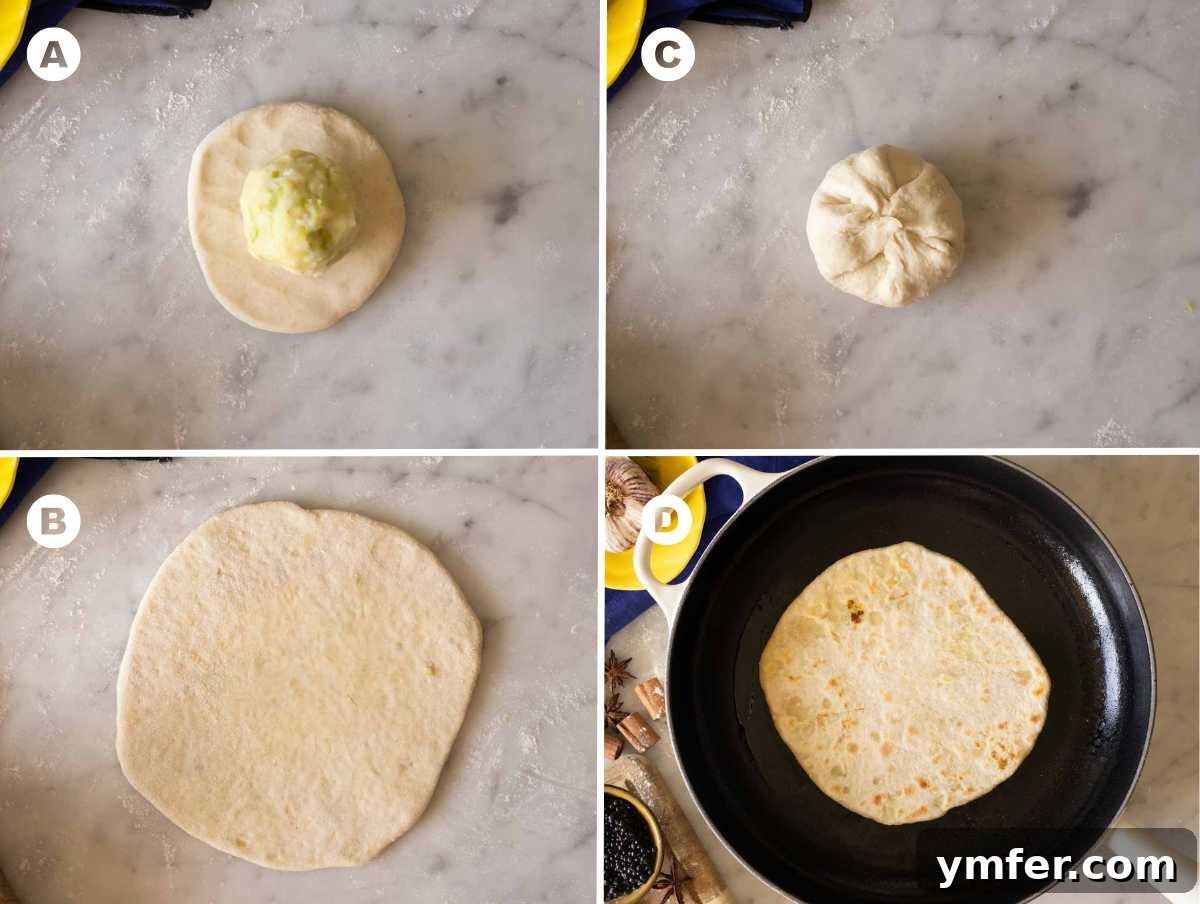
When making stuffed parathas, the technique differs slightly from plain parathas, as you’re encasing a filling within the dough. Begin by rolling out a smaller disc of dough, about 4-5 inches in diameter. Form your prepared filling mixture into small, compact portions. Place one portion of the filling directly in the center of the rolled-out dough disc. Then, carefully gather the edges of the dough upwards, like you would a dumpling, bringing them together over the filling. Pinch the gathered edges tightly closed at the top to completely seal the filling inside.
Once sealed, gently flatten the dough ball with your palm and then carefully roll it out again into a thin disc or desired shape. It’s crucial to apply gentle, even pressure to prevent the filling from tearing through the dough. To ensure your masterpiece doesn’t spill its delicious contents, make sure the edges are sealed very tightly after nesting the filling inside. And perhaps the most important tip of all: avoid overstuffing! A little filling goes a long way, and too much will make rolling difficult and prone to ruptures.
Our Favorite Stuffed Paratha Fillings:
Feta & Spinach Paratha
This Mediterranean-inspired filling offers a wonderful tangy and savory contrast to the buttery paratha. To prepare, sauté fresh or frozen spinach in a skillet until wilted. If using frozen, ensure it’s thoroughly thawed. Transfer the cooked spinach to a colander and vigorously squeeze out all excess moisture. This step is crucial to prevent the paratha from becoming soggy. Finely chop the squeezed spinach and place it in a mixing bowl. Add crumbled feta cheese and thinly sliced scallions (green onions) for a fresh bite. Mix these ingredients thoroughly until well combined.
Spoon 1–2 tablespoons of this flavorful mixture into your rolled-out paratha dough before folding and cooking as described above. The result is a vibrant, tangy, and incredibly savory paratha packed with flavor. For a more traditional Indian twist, you can easily substitute paneer (Indian cottage cheese) for the feta.
Hearty Potato, Leek, & Cheese Paratha
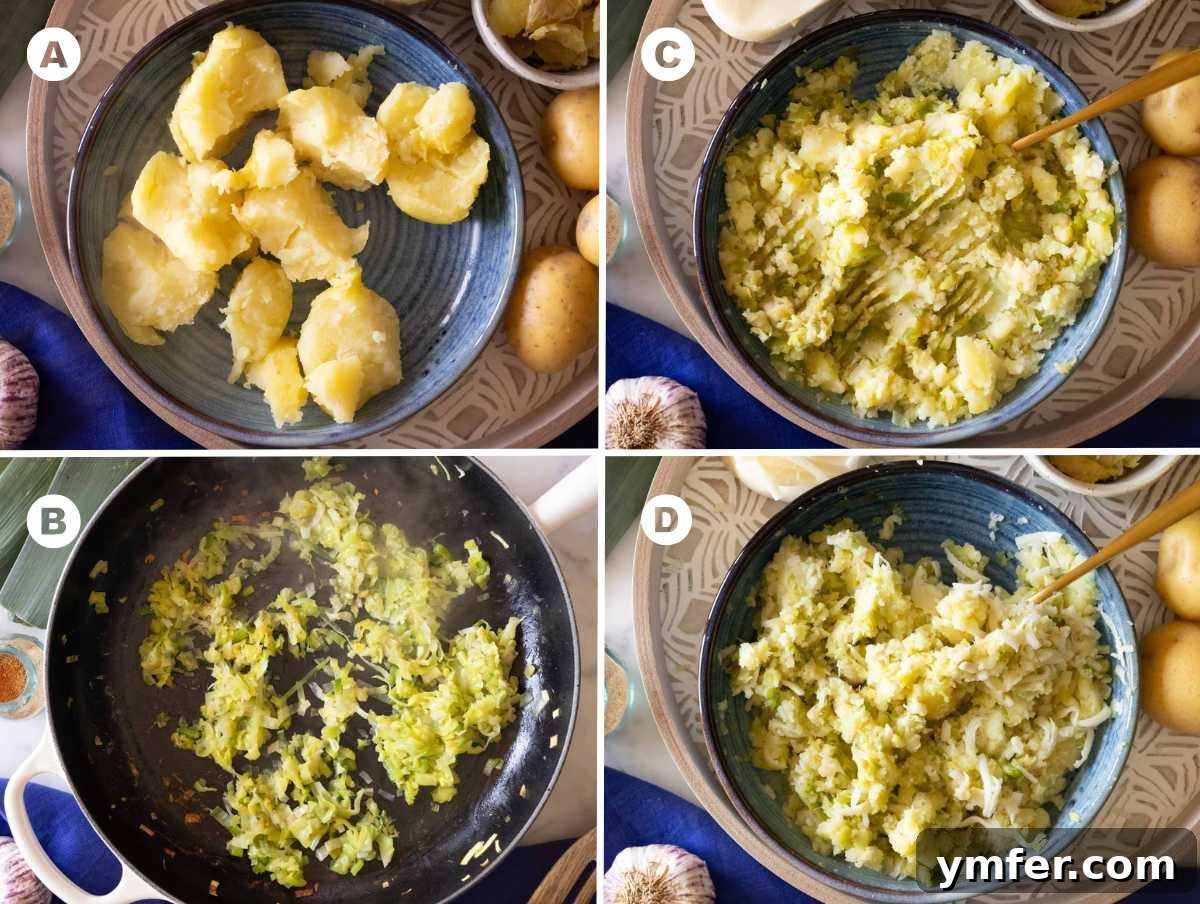
Our take on the classic Indian Aloo Paratha, this filling is rich, creamy, and wonderfully comforting. Begin by preparing your potatoes: microwave 2 medium whole potatoes for 5-10 minutes, or until they are perfectly fork-tender. Once cooked, peel them while warm and mash them in a mixing bowl until smooth. For an extra creamy texture, you can add a tablespoon of milk or dairy-free alternative.
Meanwhile, prepare the leeks. Thinly slice 1 large leek, focusing on the white and light green parts. Sauté the sliced leeks in a touch of olive oil with a pinch of salt and black pepper over medium heat until they become soft, sweet, and lightly golden (this usually takes about 5-10 minutes). Add these fragrant cooked leeks to your mashed potatoes.
Finally, mix in a generous handful of your favorite melty cheese. Excellent choices include scamorza, Monterey Jack, Colby, Pepper Jack, low-moisture mozzarella, or Fontina. The cheese adds an incredible depth of flavor and gooey texture when melted. This filling is a perfect blend of earthy, savory, and cheesy notes, making for an utterly satisfying and cozy flatbread experience.
Frequently Asked Questions About Paratha
The primary difference between paratha and naan lies in their leavening agents and cooking methods. Naan is traditionally made with yeast, which gives it a soft, fluffy, and slightly chewy texture, and it’s typically cooked in a high-heat tandoor oven. In contrast, paratha is a no-yeast flatbread. Its signature flakiness and crisp layers are achieved through a specific rolling and folding technique, and it’s cooked on a flat griddle or skillet (tava). As a result, naan is generally taller and fluffier, while paratha is thinner, richer, and distinctly flaky.
While oil or ghee are traditionally used to enhance flakiness and flavor, you can absolutely make parathas without them for a lighter version. The core recipe for the dough remains the same (flour, water, salt). When rolling and folding, you can simply omit brushing with fat between layers. The parathas might be less intensely flaky and rich, but they will still be a delicious flatbread. For cooking, you can dry roast them on the skillet or use a minimal amount of cooking spray if you prefer to avoid oil completely.
If your parathas are turning out tough and chewy instead of soft and flaky, there are typically two main culprits: the type of flour used and insufficient resting time for the dough.
- Flour Type: Many recipes call for whole wheat flour, but as we emphasized in the ingredients section, we strongly advocate for using all-purpose flour or pizza flour. Whole wheat flour absorbs more water and has a higher gluten content that can become overly developed, leading to a drier, tougher dough that resists stretching and results in a dense, chewy paratha. All-purpose flour, on the other hand, creates a more pliable, tender dough that yields perfectly soft and flaky results.
- Insufficient Rest: This step is absolutely non-negotiable! Kneading the dough activates and develops the gluten proteins in the flour. While some gluten development is good for structure, too much can make the dough very elastic and difficult to roll, causing it to snap back. Allowing the dough to rest for at least 30 minutes gives the gluten strands time to relax. This relaxation is crucial; it makes the dough significantly easier to roll out thinly without tearing and is fundamental to achieving a light, airy, and tender paratha. Skipping or shortening the rest time is a common reason for tough parathas.
By paying close attention to these two aspects—using the right flour and ensuring adequate rest—you’ll notice a remarkable difference in the tenderness and flakiness of your homemade parathas.
Storing parathas correctly ensures you can enjoy their deliciousness for longer:
- Room Temperature: Cooked parathas can be stored wrapped in an airtight container or plastic bag at room temperature for 2 to 3 days. To reheat, simply warm them up in an air fryer for a few minutes until crisp, or on a dry skillet over medium heat until softened and heated through.
- Freezer: For longer storage, you can freeze either the uncooked dough balls or fully cooked parathas.
- Dough: Divide the dough into individual balls, lightly coat with oil, and store them in a freezer-safe bag or container. Thaw them overnight in the refrigerator before rolling out and cooking as usual.
- Cooked Parathas: Allow cooked parathas to cool completely. Stack them with parchment paper between each paratha to prevent sticking, then wrap the stack tightly in plastic wrap and aluminum foil, or place in a freezer-safe bag. They can be frozen for up to 2-3 months. Reheat directly from frozen on a hot skillet or in the oven until warmed through and crispy.
Paratha’s versatility means it pairs beautifully with a wide array of dishes. For breakfast, serve plain parathas with a simple pat of butter, a side of scrambled eggs, or a flavorful potato curry (aloo sabzi). For lunch or dinner, they are the ideal accompaniment to virtually any Indian curry or dal, such as Chana Masala, Dal Makhani, Palak Paneer, or Rajma. They also work wonderfully with savory pickles (achaar), fresh yogurt, raita (cucumber yogurt dip), or a spicy chutney. Stuffed parathas are often a meal in themselves, but can be served with a side of plain yogurt or a simple salad.
Explore More Easy Bread Recipes
If you’ve enjoyed making paratha and have discovered a love for homemade bread, be sure to check out our other fantastic and simple bread recipes:
- Vegan Piadina (Italian Flatbread)
- Schiacciata (Tuscan Flatbread)
- Homemade Corn Tortillas
- Quick Pizza Dough
More Delicious Bread Creations
Bread Recipes
Authentic Neapolitan Pizza Dough
Bread Recipes
Ooni Pizza Dough Recipe for Perfect Home Pizza
Bread Recipes
Soft and Fluffy Naan Bread
Bread Recipes
Easy Homemade Pita Bread
If you tried this Paratha recipe or any other recipe on our blog, please leave a 🌟 star rating and let us know how it goes in the comments. We love hearing from you!
Paratha (Flaky and Stuffed) Recipe
Print Recipe
Share on Facebook
Video
Ingredients
- 2 cups all-purpose flour
- ½ cup + 2 tbsp water warm
- 2 tablespoons oil or melted butter/ghee – we use a light olive oil
- 1 teaspoon salt
Instructions
-
Make the Dough: In a mixing bowl, combine 2 cups all-purpose flour, ½ cup + 2 tbsp warm water, 2 tablespoons oil, and 1 teaspoon salt. Stir with a wooden spoon until the flour absorbs the water and comes together.
Transfer the dough to a clean work surface and knead vigorously for about 2 minutes, until it’s soft, smooth, and elastic, but not sticky.
Wrap in plastic wrap or cover with a damp cloth and let it rest for 30 minutes. This makes the dough easier to roll and helps create a tender texture.
-
Divide and Roll: Divide the dough into 6 equal pieces, each slightly larger than a golf ball.
Lightly flour your work surface and roll out one dough ball at a time into a thin circle.
Brush the surface with olive oil, ghee, or melted butter, then choose one of the folding methods described in the article above.
-
Fold for Layers: Choose your preferred folding method from the options above (Triangle, Spiral, or Square fold). Each method involves brushing with fat between folds to create distinct layers.
-
Cook the Paratha: Heat a cast iron or stainless steel skillet over medium heat.
Place one paratha on the hot skillet. Cook for 30–60 seconds per side, flipping as bubbles form and golden spots appear.
Brush with ghee, butter, or oil as it cooks for extra flavor and shine. Continue flipping and cooking until both sides are golden brown and the paratha is fully cooked.
Serve hot with chutney, yogurt, curries and dals, or just a pat of butter on top.
Notes
To make stuffed paratha, roll out a small disc of dough. Place your chosen filling in the center, gather the edges like a dumpling, and pinch closed tightly. Gently roll out the stuffed dough again to form your desired shape. Avoid overstuffing to prevent tearing.
Our favorite fillings include:
Feta & Spinach
Sauté fresh or frozen spinach until wilted, then squeeze out all excess moisture and chop finely. Mix with crumbled feta and thinly sliced scallions. Spoon 1–2 tablespoons into your dough before sealing and rolling.
Potato, Leek, & Cheese
Microwave 2 whole potatoes until fork-tender, then peel and mash. Sauté 1 thinly sliced leek in olive oil with salt and pepper until soft and golden. Combine leeks with mashed potatoes and a generous handful of melty cheese (Scamorza, Monterey Jack, Colby, Pepper Jack, low-moisture mozzarella, or Fontina). Use 1–2 tablespoons of filling per paratha.