
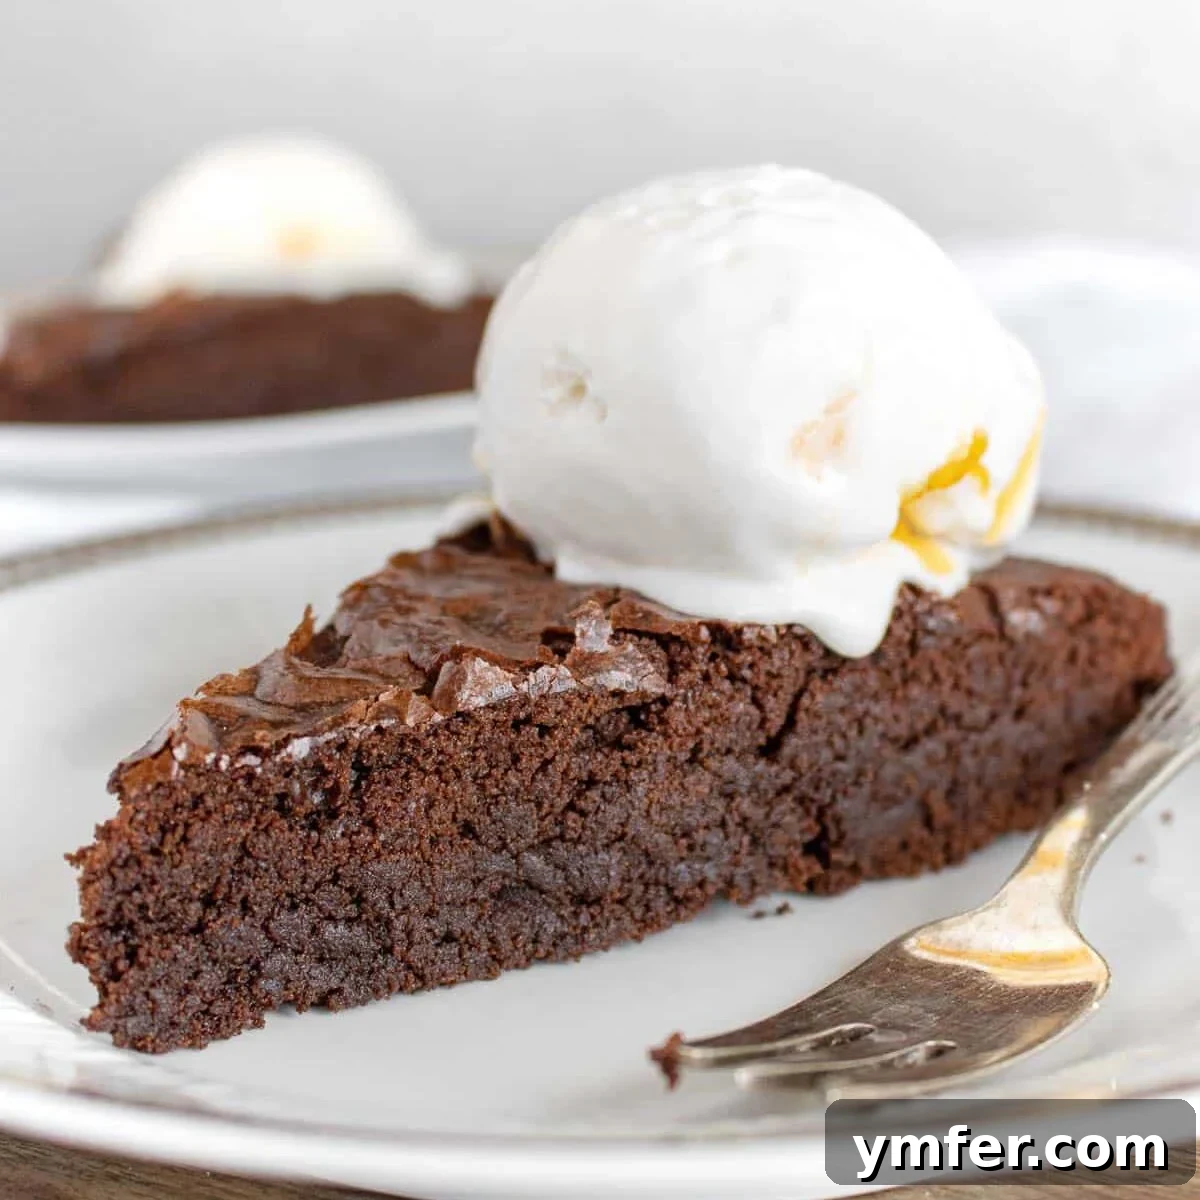
Easy 5-Ingredient Vegan Chocolate Brownie Cake: Fudgy, Moist & Plant-Based Perfection
Craving an incredibly rich, moist, and fudgy chocolate dessert that’s also remarkably simple to make? Look no further than this sensational vegan chocolate brownie cake! Crafted with just 5 simple ingredients, this easy recipe guarantees a deep, intense chocolate flavor that will satisfy even the most discerning sweet tooth. Serve it warm with a scoop of vegan ice cream, a dollop of whipped cream, or at room temperature alongside your favorite hot beverage for a truly versatile treat.
This recipe is a testament to how simple ingredients can create extraordinary flavors. It’s perfect for busy weeknights, impromptu gatherings, or whenever a serious chocolate craving strikes. Prepare to be amazed by its effortless preparation and irresistible taste!
For those who adore chocolate as much as we do, be sure to explore our other delightful plant-based chocolate creations, including our chocolate banana bread, luscious chocolate custard, and classic egg-free brownies. Each recipe offers a unique way to enjoy the magic of chocolate, all while being completely plant-based and delicious.
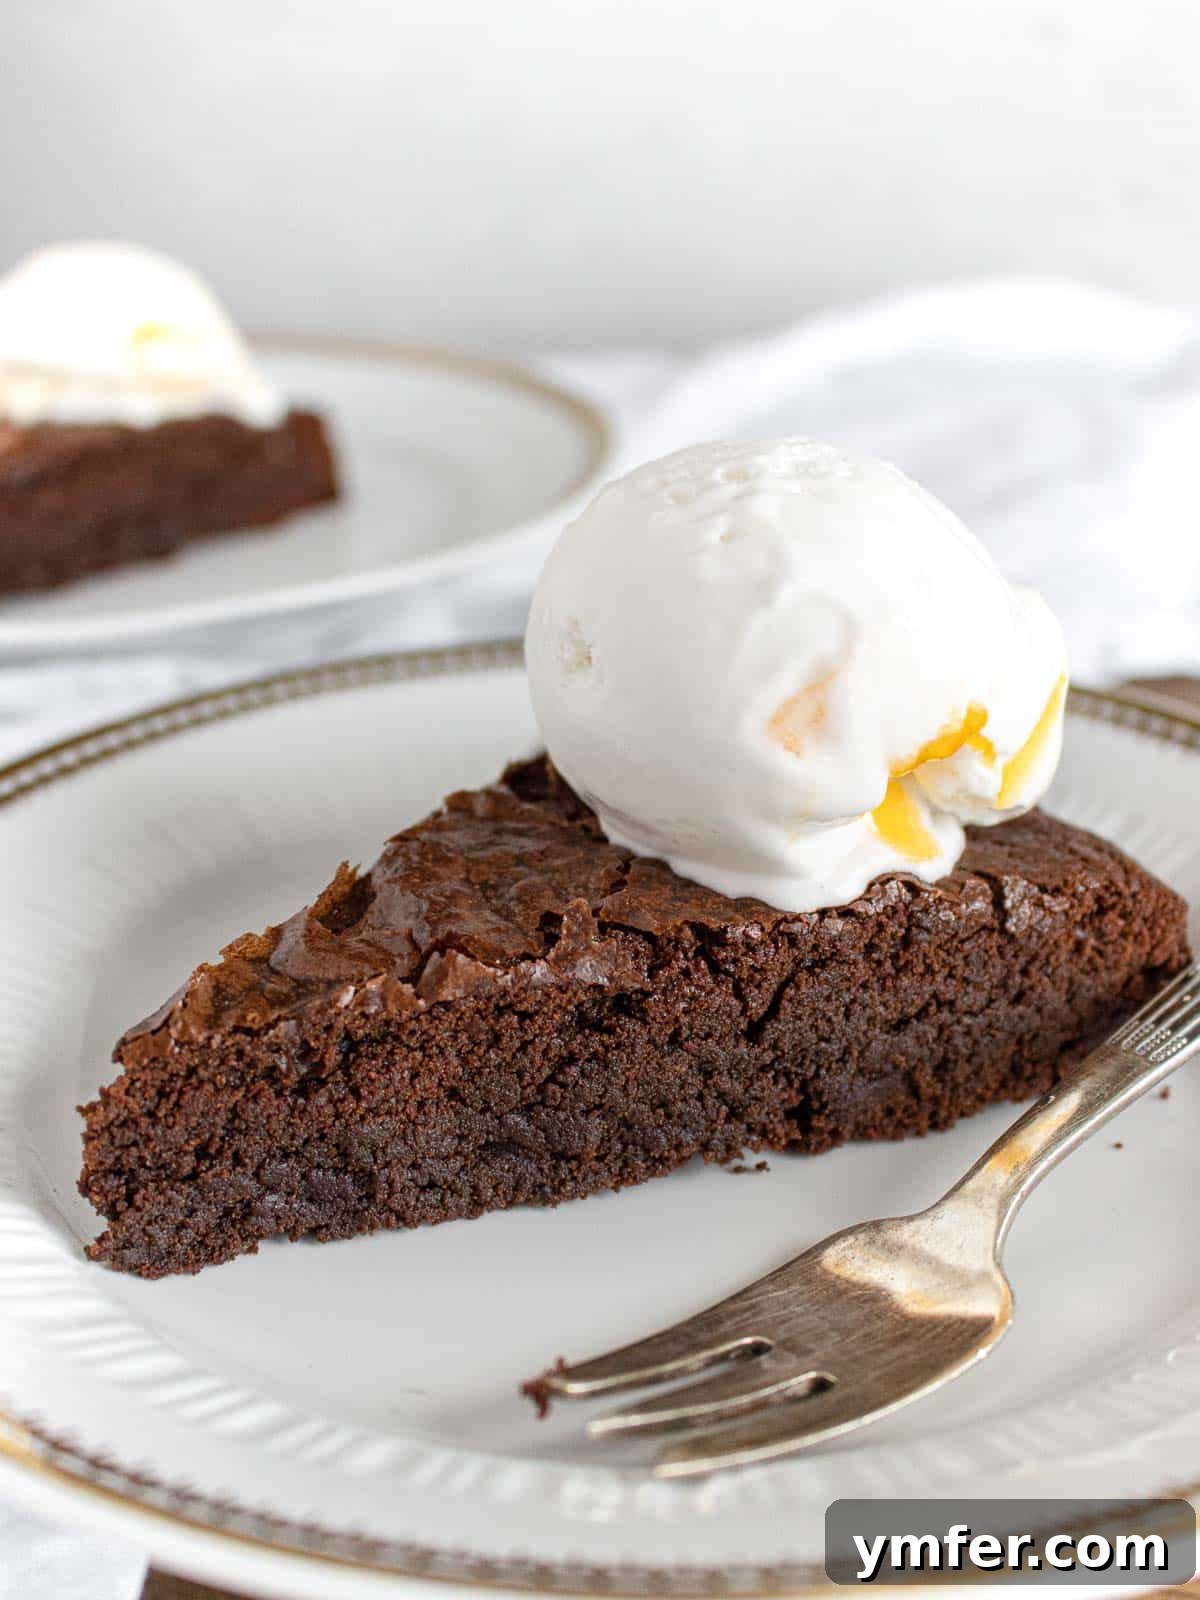
Table of Contents
- What to Expect from This Vegan Brownie Cake
- Essential Ingredients & Smart Substitutions
- Recommended Equipment
- Step-by-Step Baking Instructions
- How to Easily Scale This Recipe
- Storage & Freezing Tips
- Frequently Asked Questions (FAQ)
- Full Vegan Chocolate Brownie Cake Recipe Card
Explore our finest selection of plant-based dessert recipes for more sweet inspiration!
What to Expect from This Vegan Brownie Cake
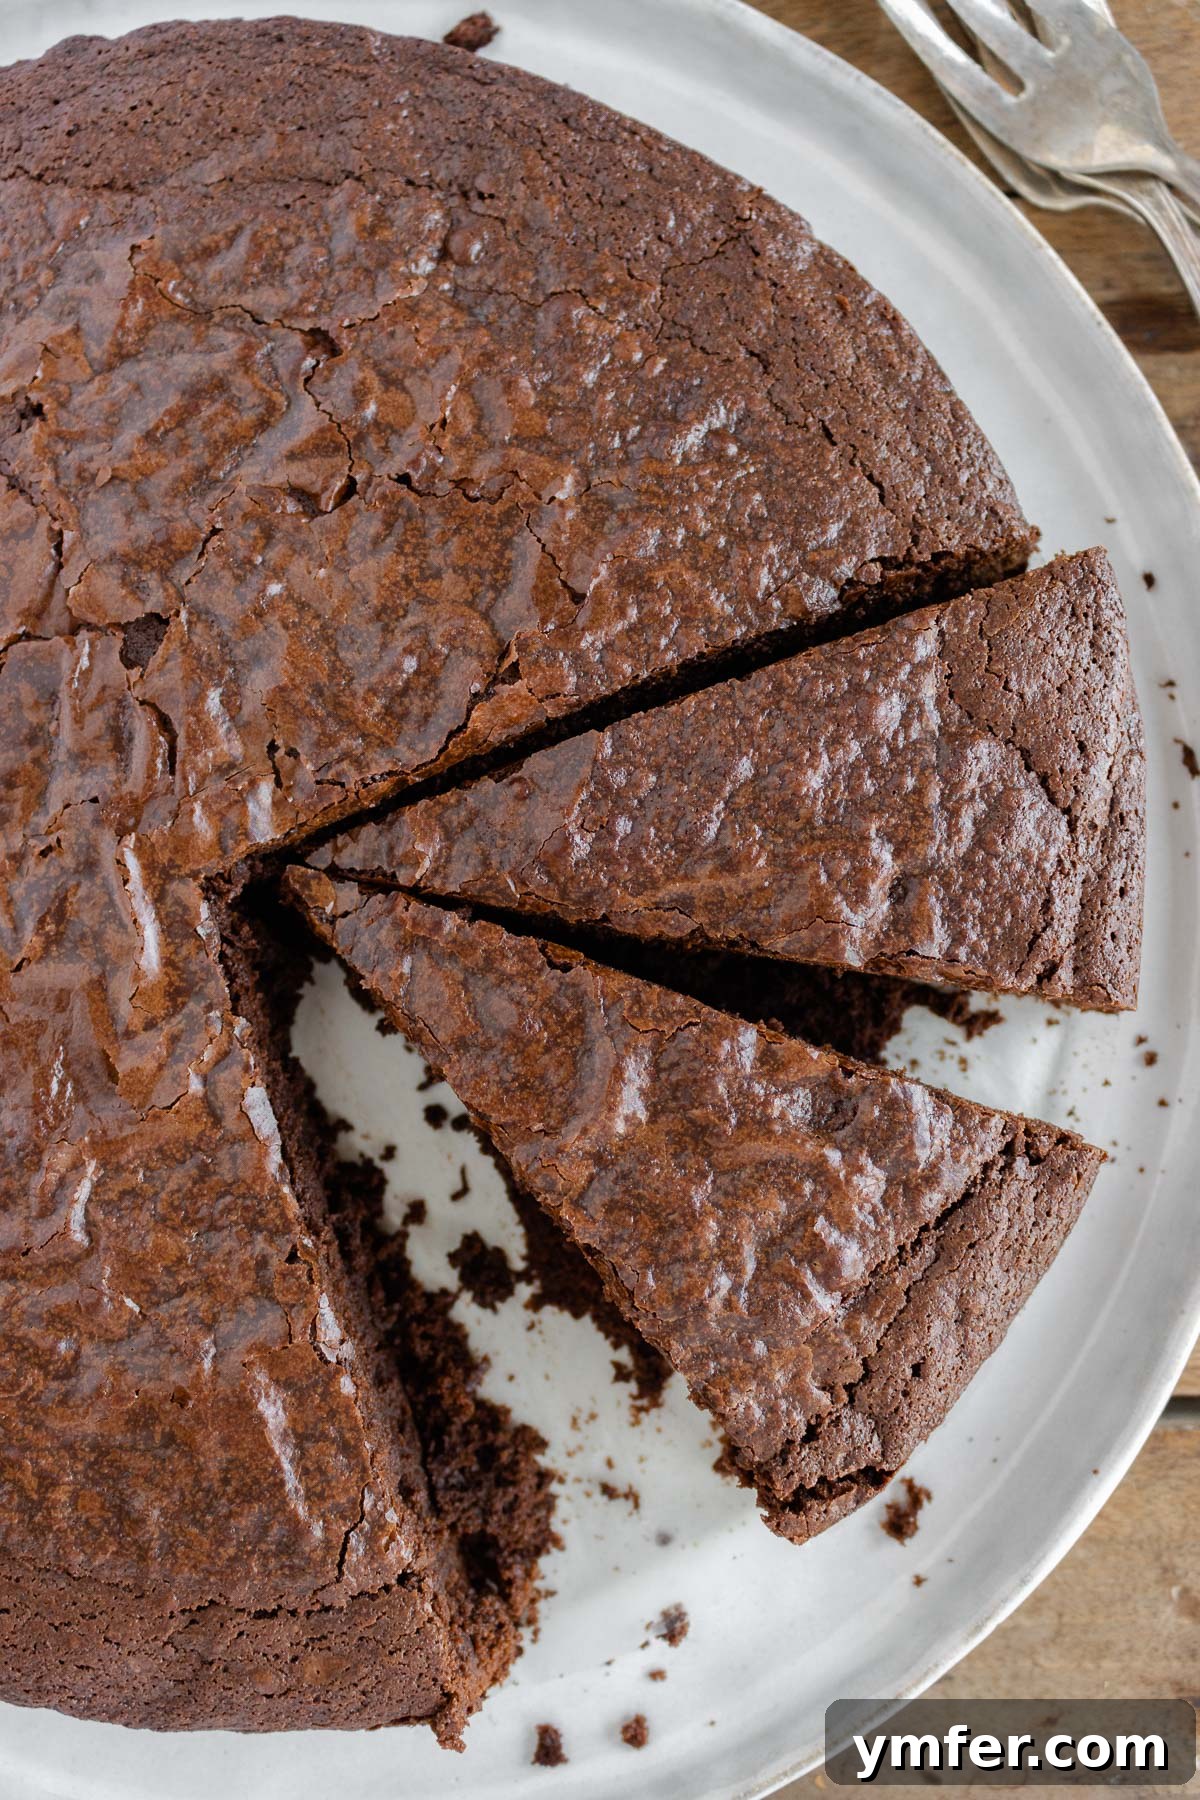
My culinary journey in creating this recipe was driven by a single purpose: to develop a plant-based brownie cake that didn’t just imitate but truly excelled in taste and texture. The vision was clear – a 100% vegan dessert that was effortlessly easy to prepare, relying solely on simple, readily available ingredients that wouldn’t break the bank. Forget about fancy, hard-to-find ingredients; you won’t need expensive extracts, artificial aromas, specialized espresso powders, or multiple types of gourmet chocolate for this recipe. Its beauty lies in its elegant simplicity.
Beyond convenience, my paramount goal was for this cake to taste absolutely delicious. I wanted it to rival, if not surpass, any great non-vegan brownie cake. This meant no compromises on the fudgy texture, the deep chocolate flavor, or the overall indulgence. The ultimate seal of approval came from my close-to-80-year-old, famously particular Italian father, whose discerning palate is a true test for any dessert. His enthusiastic approval speaks volumes about the authentic, comforting, and utterly satisfying flavor profile of this vegan creation.
So, if you’re a devoted fan of rich, decadent chocolate and the irresistible chewiness of fudgy brownies, prepare to fall head over heels for this vegan brownie cake. It delivers a profound, dark chocolate flavor that’s intensely satisfying without being overly sweet, and the cake itself remains remarkably light yet incredibly moist. Each bite offers a sensation that literally melts in your mouth, leaving you with a wonderfully tender and rich crumb that lingers pleasantly.
The versatility of this cake makes it perfect for any occasion. Enjoy it warm, straight from the oven (after a brief cooling period, which is essential), paired with a generous scoop of creamy vanilla vegan ice cream or a cloud of light plant-based whipped cream. The warmth enhances its gooey, fudgy center, creating an almost molten experience. Alternatively, it’s equally delightful served at room temperature, offering a slightly firmer but still wonderfully moist slice that pairs perfectly with a calming cup of tea, a robust coffee, or a glass of plant-based milk. It’s ideal for a quick indulgence, a casual family dessert, or an impressive offering for guests, proving that vegan baking can be both easy and luxurious.
A little piece of inspiration for this recipe comes from an exquisite Italian chocolate cake called “torta tenerina,” which literally translates to “tender cake.” This beloved classic from Ferrara, Italy, is renowned for its incredibly fudgy, melt-in-your-mouth interior and delicate, slightly crackled crust. I aimed to capture that same magical essence and perfect it in this easy-to-make, completely vegan version, bringing a taste of Italian tradition to the plant-based kitchen.
Essential Ingredients & Smart Substitutions
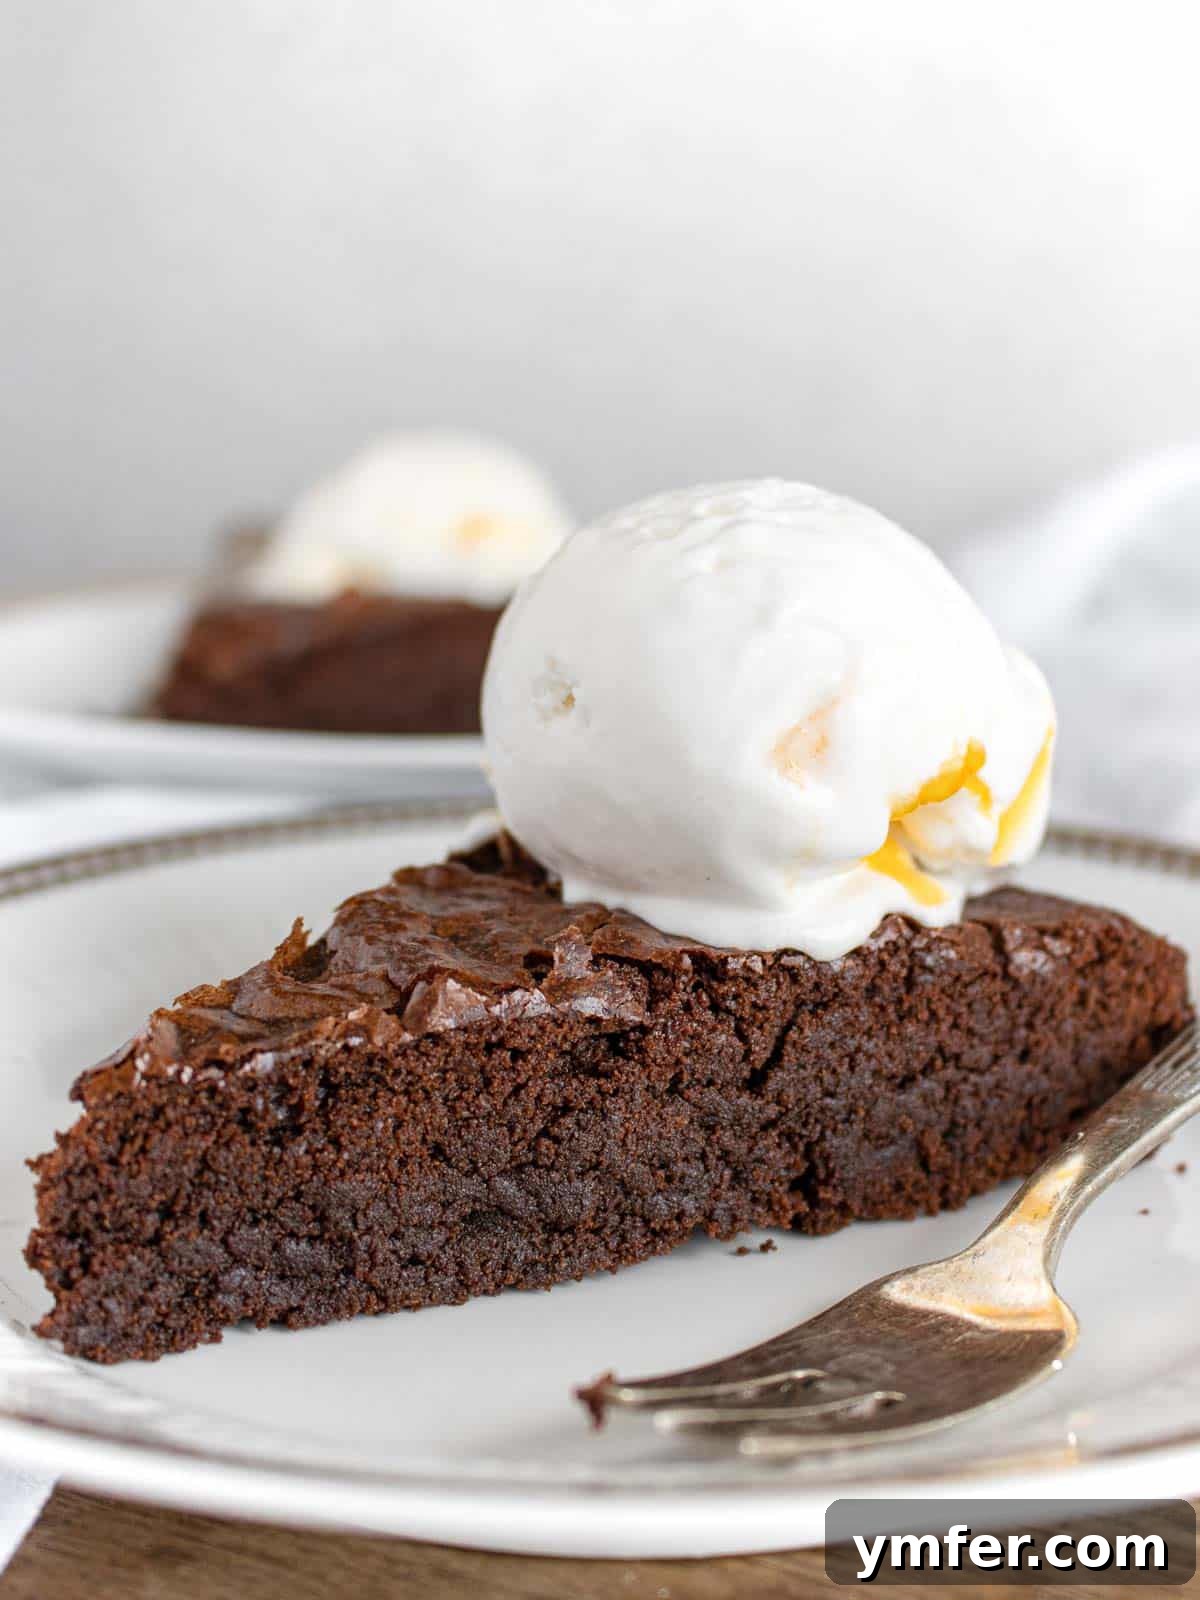
Creating this level of decadence with minimal ingredients is surprisingly straightforward. Here’s a closer look at the five core components that make this vegan chocolate brownie cake so special, along with tips for choosing the best quality and potential substitutions:
- Dark Chocolate: The quality and cocoa percentage of your dark chocolate are paramount, as it is the undisputed star and primary flavor driver of this cake. I highly recommend using a high-quality dark chocolate bar with at least 70% cocoa content. This percentage ensures a deep, rich, and complex chocolate flavor without being overly bitter. Choose a brand whose taste you genuinely enjoy on its own. While convenient, chocolate chips often contain stabilizers that can affect melting consistency and the final fudgy texture of the cake, so a good quality bar is preferred and should be finely chopped for even melting.
- Vegan Butter or Vegan Margarine: Both plant-based butter sticks and vegan margarine will work beautifully in this recipe, contributing essential fat for moisture, richness, and a tender crumb. Look for brands that are known for their smooth texture and a relatively neutral flavor profile that won’t compete with the chocolate. If you are not strictly vegan, you can certainly use regular dairy butter as a direct 1:1 substitute, but I wholeheartedly encourage everyone to try a good quality vegan alternative. You might be pleasantly surprised by how seamlessly the swap works, and it makes the cake accessible to more people.
- Sugar: Simple granulated white sugar is my preferred choice for this cake. It dissolves easily into the aquafaba, contributing to the cake’s desirable tenderness and its perfectly moist, fudgy crumb. While other sugars like light or dark brown sugar could be used, they might introduce a different molasses-like depth of flavor and could slightly alter the cake’s texture and moisture level. For the classic brownie cake consistency and balanced sweetness, stick to granulated sugar.
- Aquafaba: This is the incredible liquid found in a can of chickpeas, and it’s a true revelation in vegan baking! Aquafaba serves as a phenomenal egg replacement, acting as an efficient binder and contributing significantly to the cake’s moist, “melty” texture and delicate structure. When whipped with sugar, it incorporates air, mimicking the function of whipped egg whites to create a lighter yet still fudgy cake. Rest assured, you will not taste any chickpea flavor in the finished cake; it’s a truly magical and flavor-neutral ingredient. You can use aquafaba from either salted or unsalted canned chickpeas; I often use the liquid from salted chickpeas without any noticeable impact on the cake’s sweetness.
- All-Purpose Flour: Standard all-purpose (plain) flour provides the necessary structure for the cake. For optimal results and to prevent lumps, it’s beneficial to sift the flour before incorporating it into the wet ingredients. If you’re looking to add a little more fiber and a subtle nutty undertone, you can easily substitute all-purpose flour with semi-whole wheat flour (sometimes labeled as light whole wheat flour) without significantly altering the final product’s texture. The key is to avoid overmixing once the flour is introduced to the batter.
Recommended Equipment
While this 5-ingredient recipe is incredibly simple, having the right tools can make the baking process even smoother and more enjoyable, ensuring consistent, professional-level results:
- Electric Hand Mixer (or Electric Whisk): This is an essential piece of equipment for this recipe. It’s crucial for properly beating the aquafaba and sugar mixture to achieve the desired foamy, aerated consistency. This step is vital as it incorporates air into the batter, which contributes significantly to the cake’s light yet wonderfully fudgy and tender texture. A stand mixer fitted with a whisk attachment also works perfectly.
- Cake Pan (9 inches – 23 cm) with Removable Bottom (Springform Pan): A springform pan is highly recommended for this recipe. Its removable sides make unmolding the delicate, fudgy cake incredibly easy once it’s baked and cooled, preventing any breakage or sticking. A standard 9-inch (23 cm) round cake pan can also be used, but in that case, ensure you line it very thoroughly with parchment paper on both the bottom and sides to ensure effortless removal.
- Heat-Resistant Bowl and Saucepan (for double boiler method): If opting for the double-boiler method to melt your chocolate and butter, you’ll need a medium-sized saucepan and a heat-resistant bowl that can sit snugly on top without touching the water below.
- Microwave-Safe Bowl: If you prefer to melt the chocolate and butter in the microwave, a sturdy microwave-safe bowl is necessary.
- Sifter or Fine-Mesh Sieve: While optional, a sifter or fine-mesh sieve is highly recommended for sifting the all-purpose flour into your wet ingredients. This simple step helps to remove any lumps from the flour and aerates it, ensuring a smoother batter and a more uniform, tender crumb in the finished cake.
Step-by-Step Baking Instructions
Follow these straightforward steps to effortlessly create your perfect, melt-in-your-mouth vegan chocolate brownie cake:
Preparation: Preheat Oven & Prepare Pan
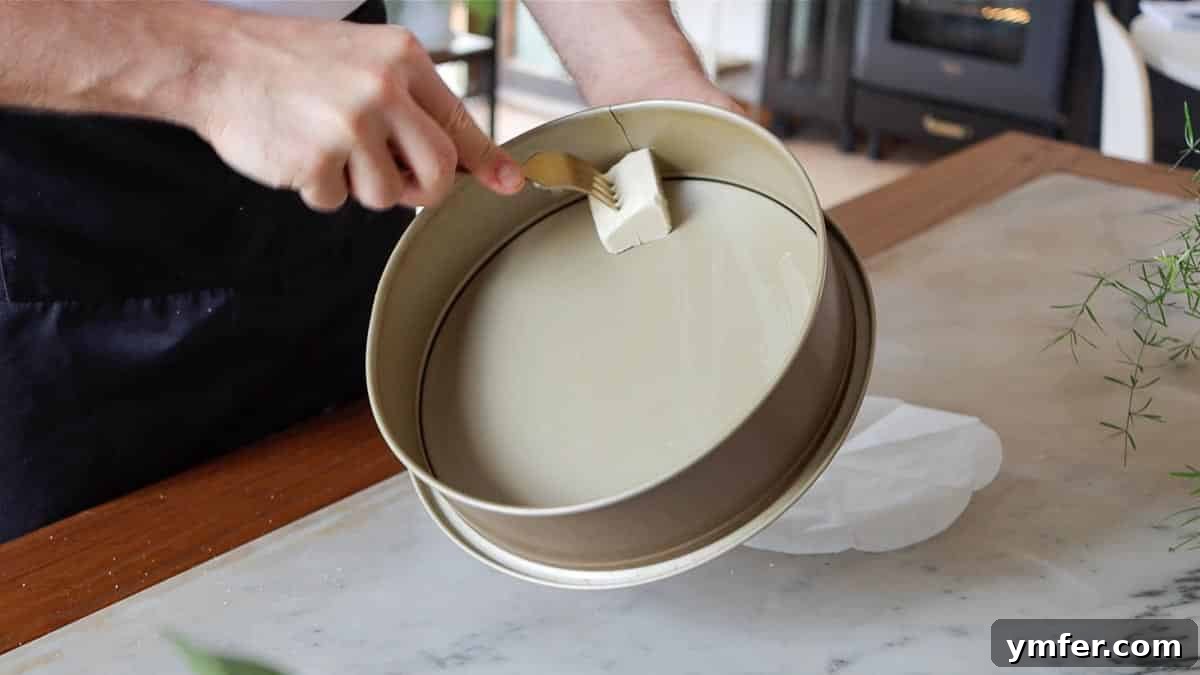
Begin by preheating your oven to 350°F (180°C). Ensuring the oven is at the correct temperature before the batter goes in is crucial for even baking. Next, prepare your 9-inch (23 cm) springform pan. Line the bottom of the pan with a circle of parchment paper, and also line the sides with a strip of parchment paper. To make the parchment paper adhere easily to the pan, you can lightly brush the inside of the pan with a small amount of vegan butter or oil before pressing the paper firmly in place. This simple step guarantees easy cake removal once baked.
STEP 1: Melt the Dark Chocolate with Vegan Butter
This is a crucial step that requires gentle heat to achieve a smooth, glossy chocolate mixture. I highly recommend using the double-boiler method to prevent the chocolate from burning or seizing. To do this, place a few inches (approximately 5 cm) of water in a small saucepan and bring it to a gentle simmer over medium heat. Place a heat-resistant bowl (or a slightly larger pot) on top of the saucepan, ensuring that the bottom of the top bowl/pot does not touch the simmering water. Add your dark chocolate, roughly chopped into small, even pieces, and the vegan butter, also chopped, into the top bowl.
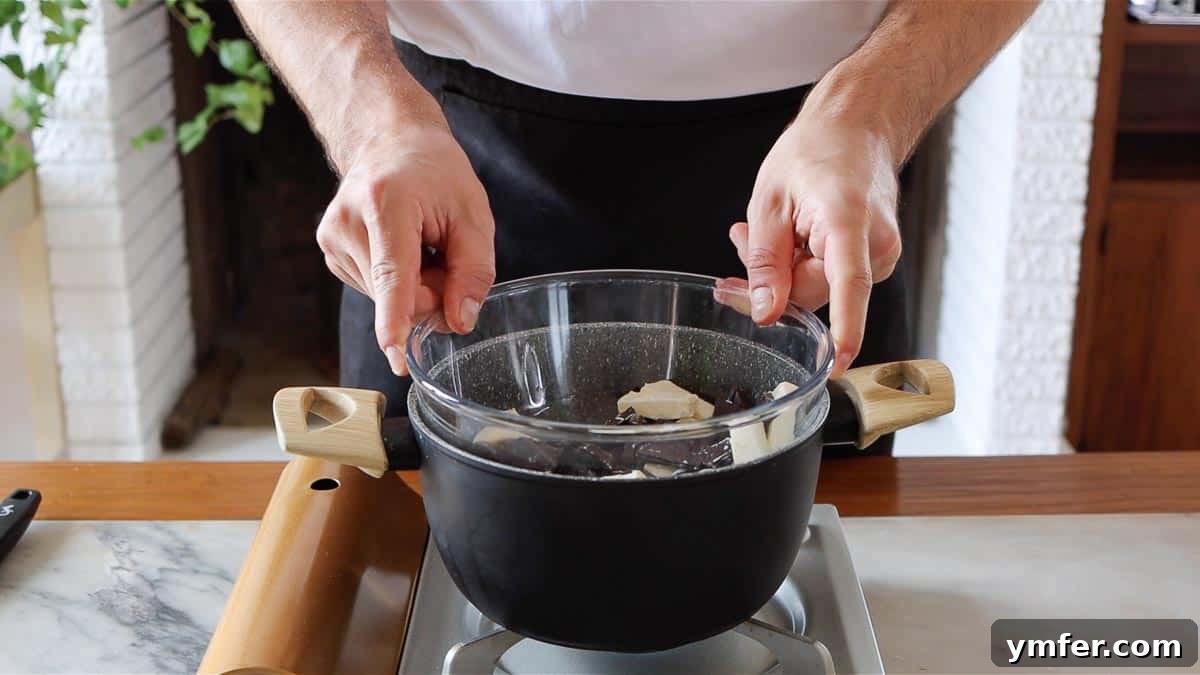
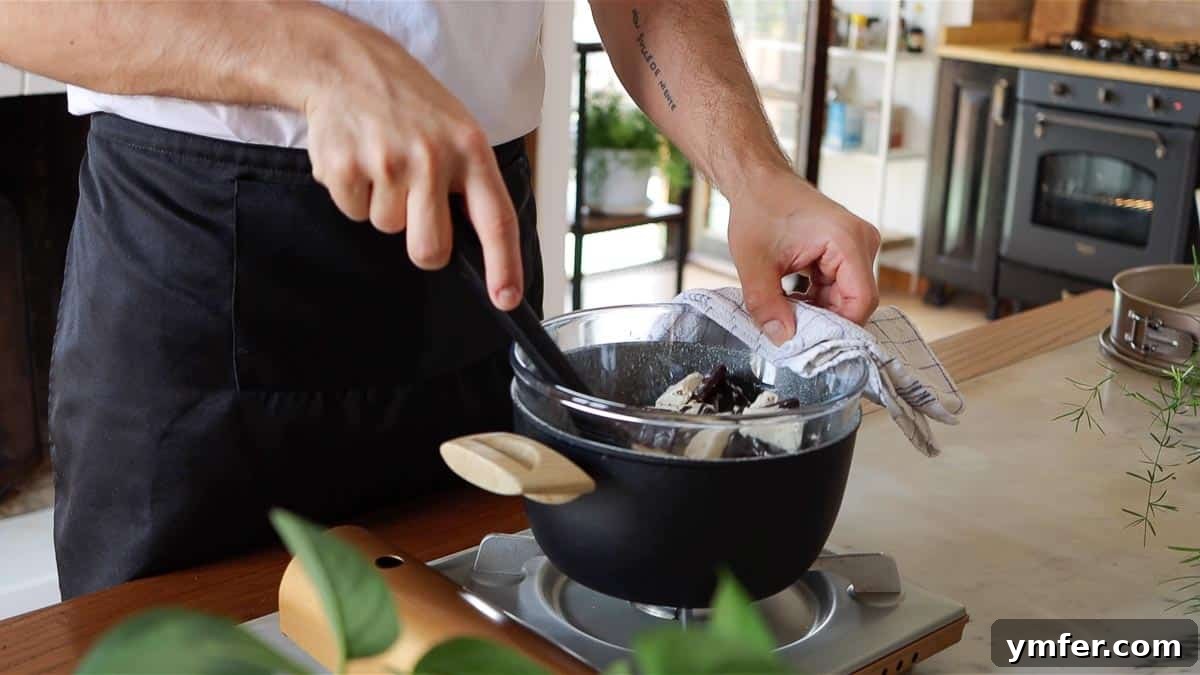
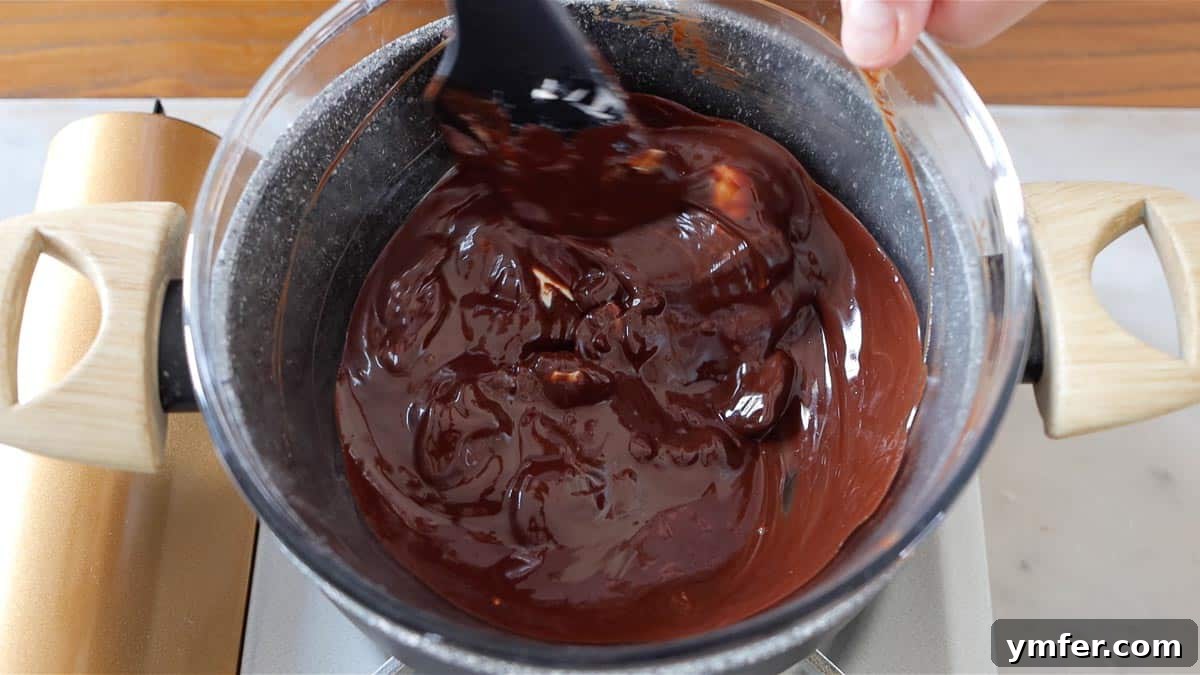
As the steam from the simmering water gently heats the top bowl, the chocolate and butter will begin to melt. Stir continuously with a spoon or spatula until the mixture is completely smooth, glossy, and free of any lumps. This ensures a consistent chocolate base for your cake. Remove the bowl from the heat once fully melted.
Alternatively, you can melt the chocolate and butter in a microwave. Chop them into small pieces and place them in a microwave-safe bowl. Heat them in short intervals of 20-30 seconds each on low to medium power. Stir thoroughly after every interval to ensure even melting and prevent burning. Continue until the mixture is completely melted and smooth. Once melted, set the mixture aside to cool slightly while you prepare the next components. This slight cooling prevents it from cooking the aquafaba prematurely.
STEP 2: Whisk Aquafaba and Sugar Until Foamy
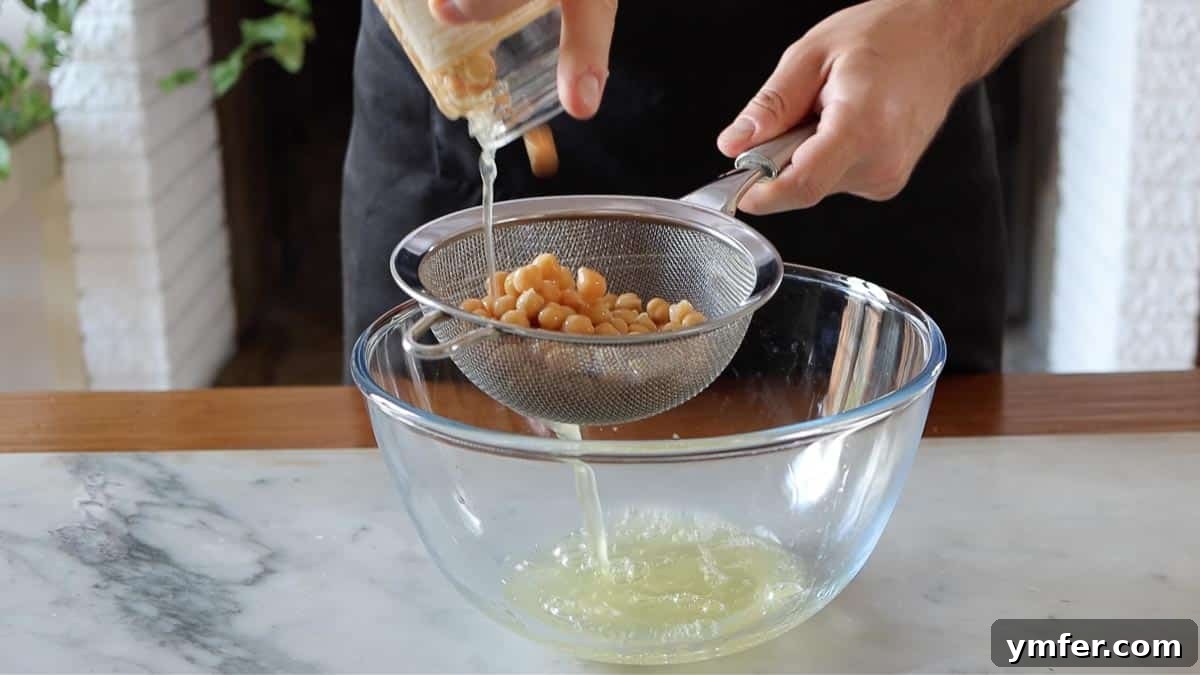
Carefully drain the liquid from a can of chickpeas into a clean, large mixing bowl. This liquid is known as aquafaba. Make sure no chickpea pieces make their way into the bowl, as this could affect the texture. Aquafaba is an extraordinary egg replacement in vegan baking, particularly effective in recipes that benefit from aeration and binding, such as this cake, or even delicate vegan meringues and fluffy vegan ladyfingers. I promise, the final cake will not have any lingering chickpea taste – it’s a truly magical and flavor-neutral ingredient!
Add the granulated white sugar to the same bowl containing the aquafaba. Using an electric hand mixer (or a stand mixer with a whisk attachment), beat the aquafaba and sugar together vigorously for approximately 5 minutes. This extended whisking time is absolutely essential; it incorporates a significant amount of air into the mixture, transforming it into a slightly foamy, thicker, and visibly paler liquid. This aeration contributes significantly to the cake’s light yet wonderfully moist and tender texture, effectively mimicking the role of whipped eggs in traditional baking.
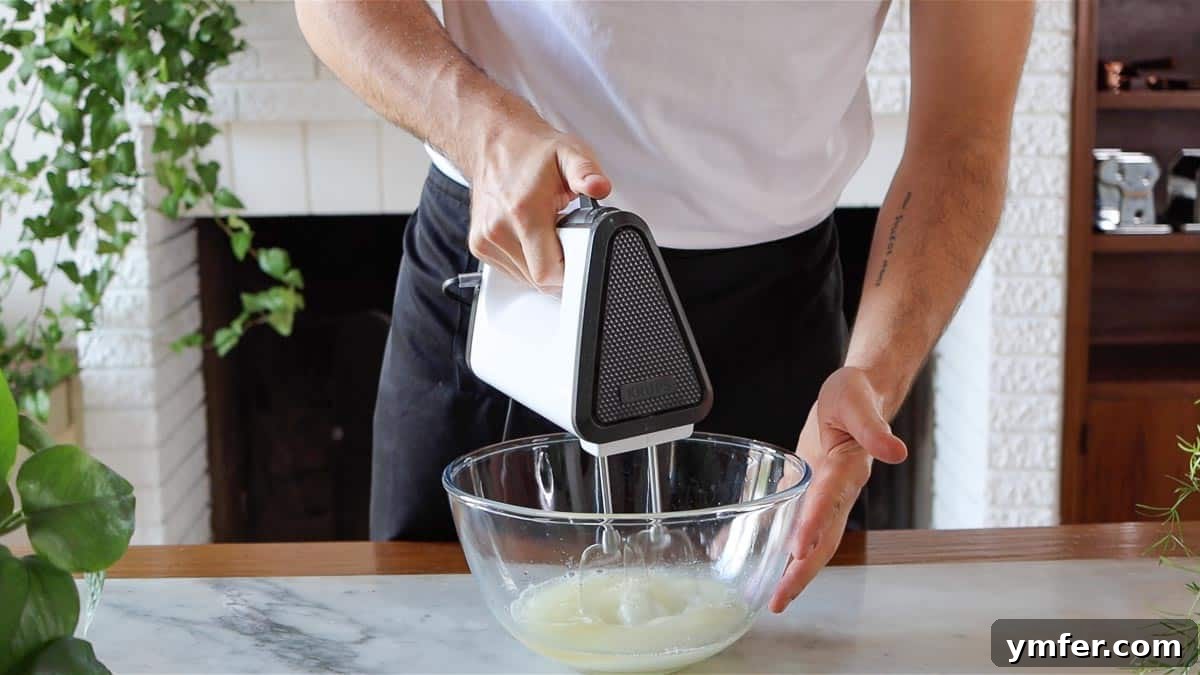
You’ll know the mixture is ready when it is noticeably thicker, has increased in volume, appears slightly pale in color, and has a consistent, light foamy appearance. It won’t necessarily form stiff peaks like meringue, but it should be considerably more voluminous and stable than when you started.
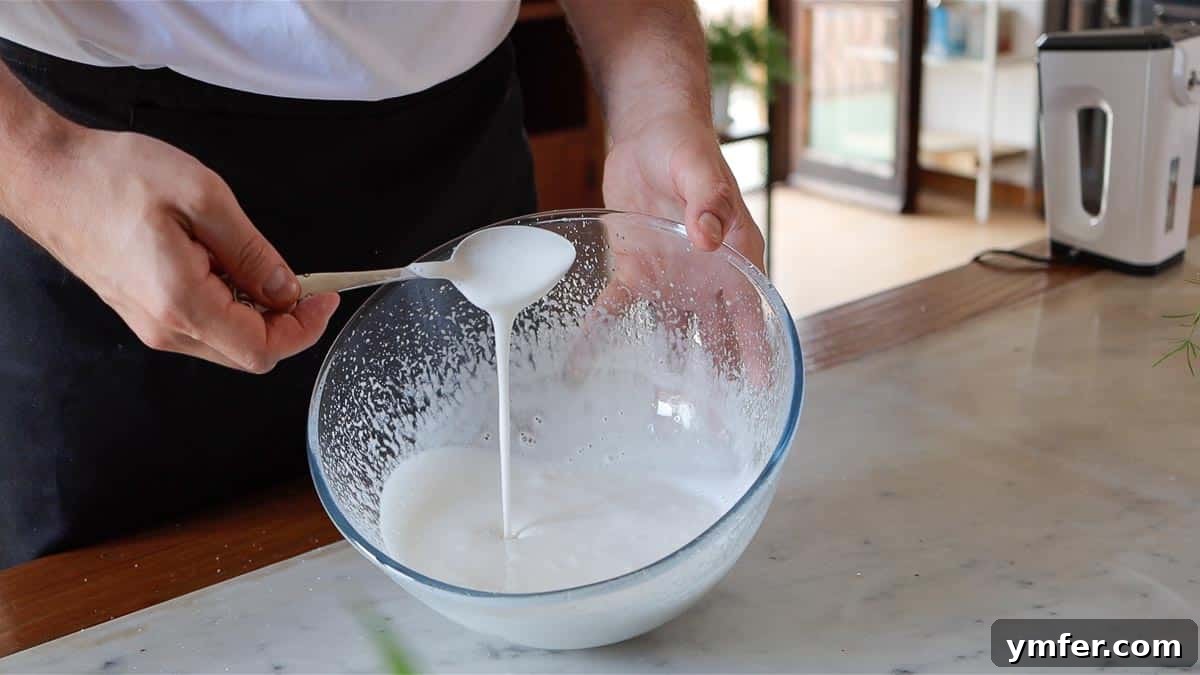
STEP 3: Combine Melted Chocolate with Aquafaba Mixture
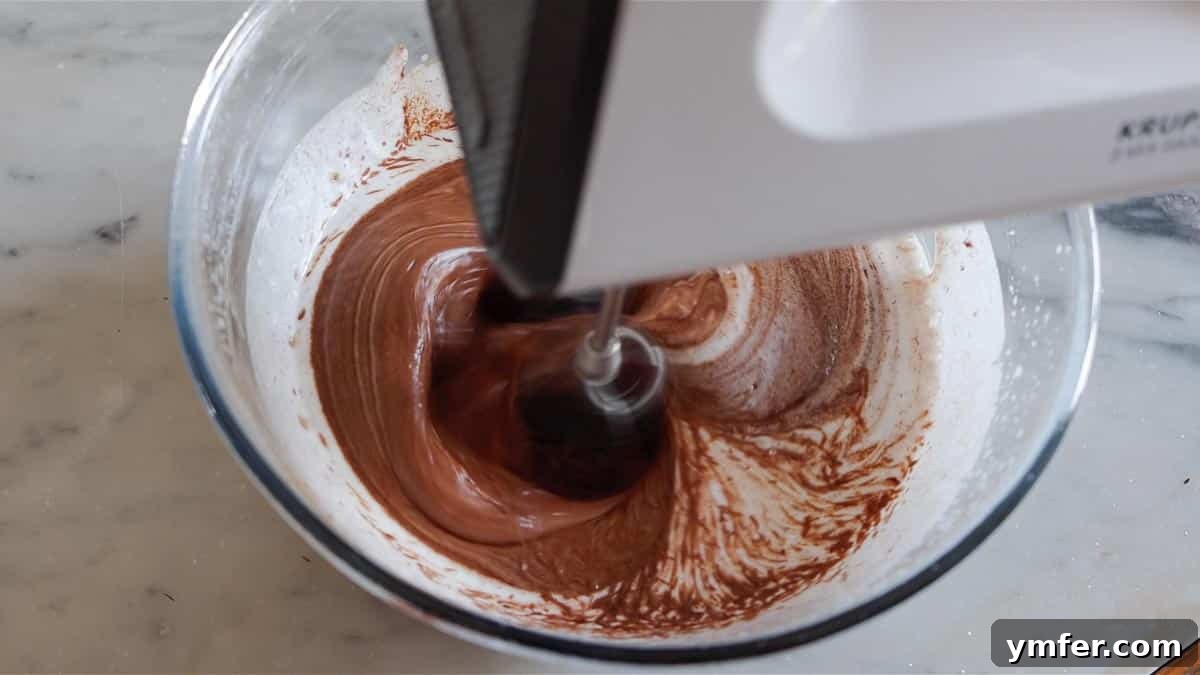
Once your chocolate and butter mixture has cooled slightly (it should still be liquid but not hot), gently pour it into the bowl containing your foamy aquafaba and sugar mixture. Using your electric hand mixer on a low speed, mix for just about 1 minute, or until the chocolate is fully and evenly incorporated into the aquafaba mixture. The goal here is simply to combine the ingredients until no streaks of chocolate or unmixed aquafaba remain.
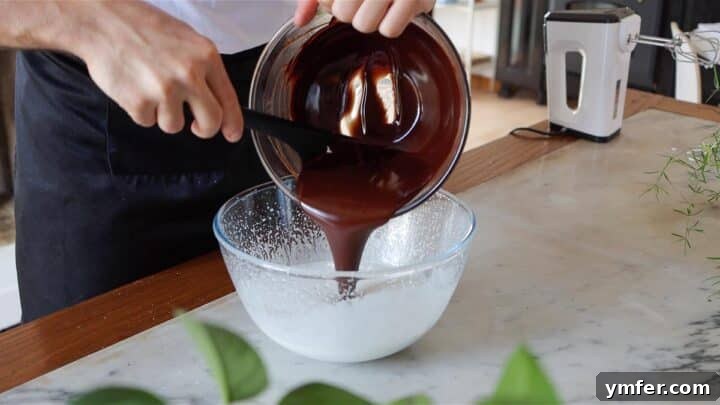
Be careful not to overmix at this stage; excessive mixing can deflate the air you’ve whipped into the aquafaba, which is crucial for the cake’s texture. Mix only until everything is just combined and the batter has a uniform chocolatey color.
STEP 4: Gently Fold in the Flour
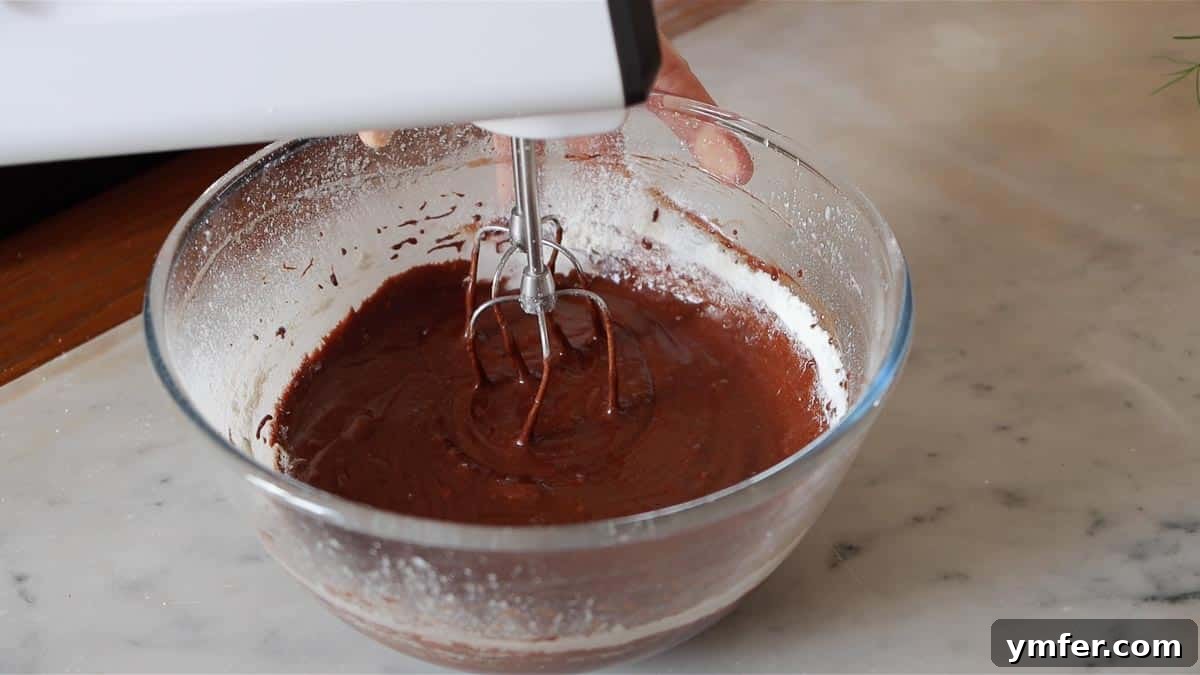
Now it’s time to add the final dry ingredient to complete your batter. For the best results and to ensure a smooth, lump-free batter, I highly recommend sifting the all-purpose flour directly into the chocolate mixture. Sifting helps to aerate the flour and prevents dense pockets, contributing to a more even and tender crumb in the final cake. Once the flour is added, using your hand mixer on the absolute lowest speed, mix for no more than 1 minute. The goal is to mix just until the flour is fully incorporated and no dry streaks are visible in the batter.
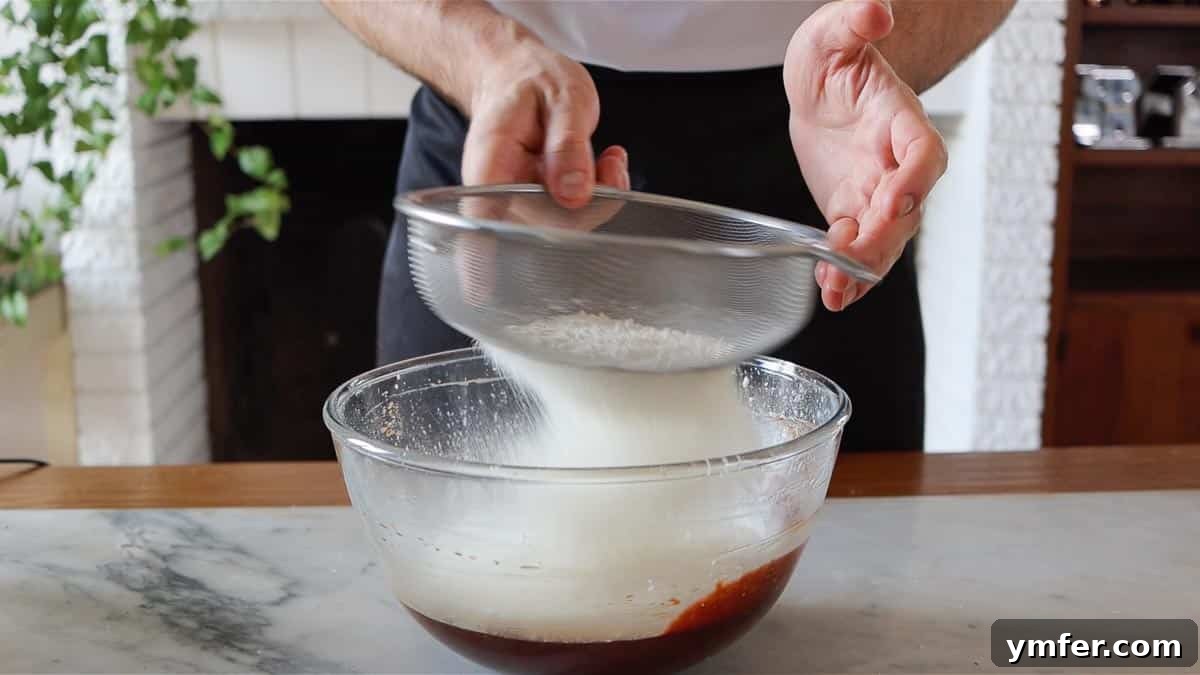
Crucial Tip: Do not overmix the batter once the flour is added! Overmixing develops the gluten in the flour too much, which can result in a tough, hard, or gummy cake. A light hand and minimal mixing at this stage are essential for achieving that signature tender, melt-in-your-mouth brownie cake texture. Stop mixing as soon as the flour disappears into the batter.
STEP 5: Bake to Perfection
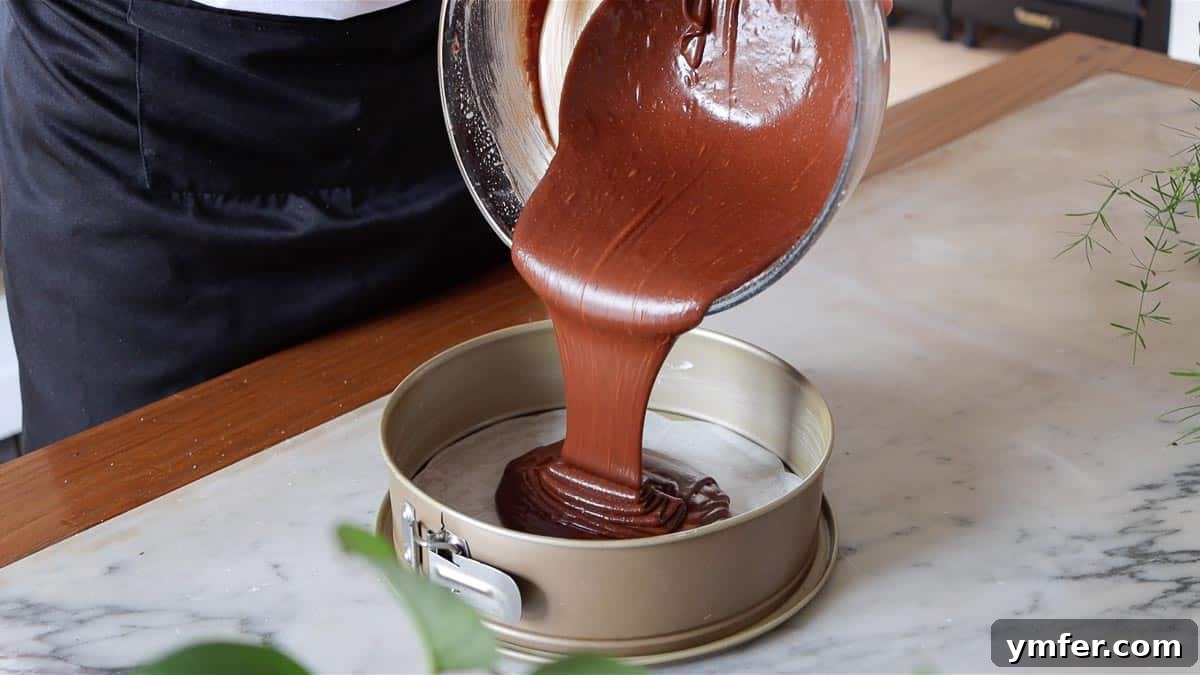
Carefully transfer the rich, luscious chocolate cake batter into your prepared springform pan. Use a spatula to scrape all the batter from the bowl and ensure it is evenly distributed in the pan. Give the pan a gentle tap on the counter a few times to release any trapped air bubbles and ensure an even surface.
Bake in your preheated oven for approximately 30 minutes at 350°F (180°C). The cake will appear mostly set around the edges and might develop a delicate, slightly crackled top, similar to a classic brownie. The center may still appear soft and have a slight wobble when gently shaken; this is perfectly normal and desirable for achieving that signature fudgy, gooey texture. A toothpick inserted into the center should come out with moist crumbs, not wet batter.
Once baked, remove the cake from the oven and let it cool in the pan for at least 10 minutes before carefully unclasping and removing the sides of the springform pan. This crucial resting period allows the delicate cake to set and firm up slightly, preventing it from breaking apart when unmolded. Patience here will be rewarded!
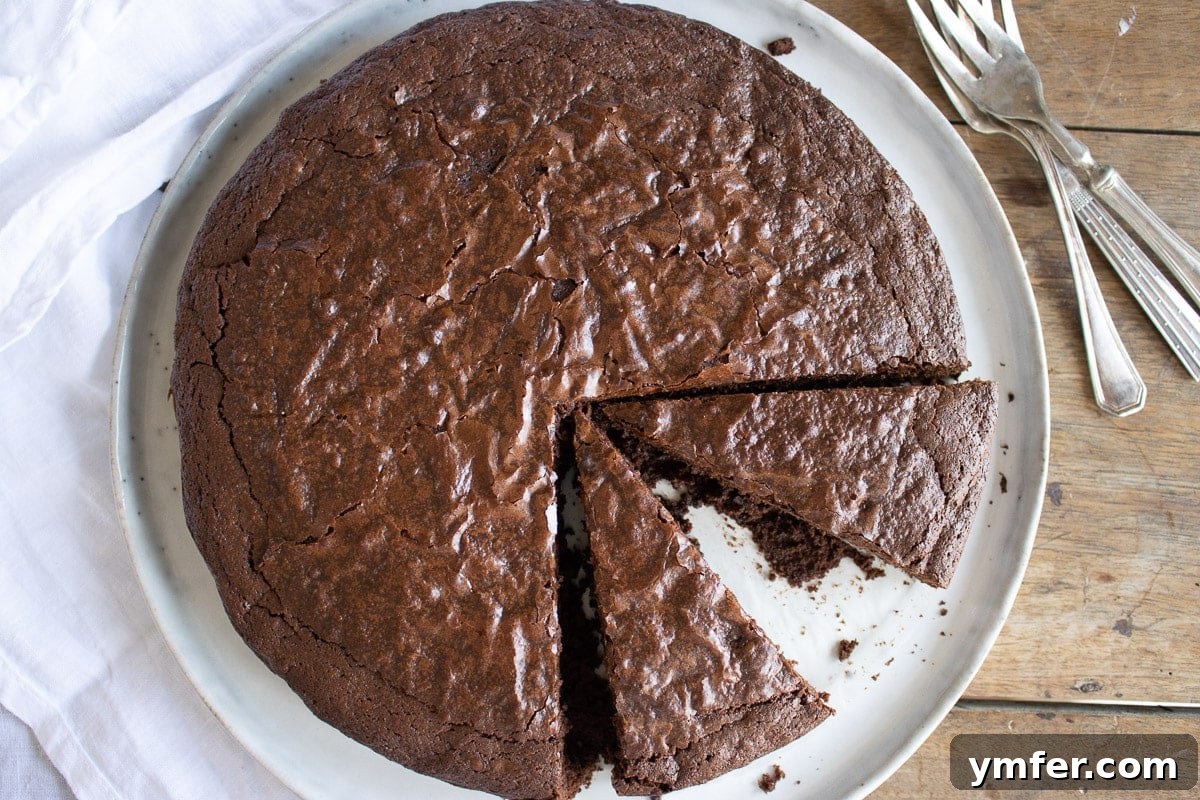
Your delicious, easy vegan chocolate brownie cake is now ready to be savored! For an extra gooey and decadent experience, serve it warm (but not piping hot, as it needs to set slightly) topped with a generous scoop of dairy-free ice cream or a delightful swirl of plant-based whipped cream. The contrast of the warm cake and cold topping is divine. Alternatively, allow it to cool completely to room temperature for a firmer, yet still incredibly moist and fudgy slice that pairs wonderfully with your favorite coffee or tea. This cake is truly a versatile delight that adapts to your serving preference!
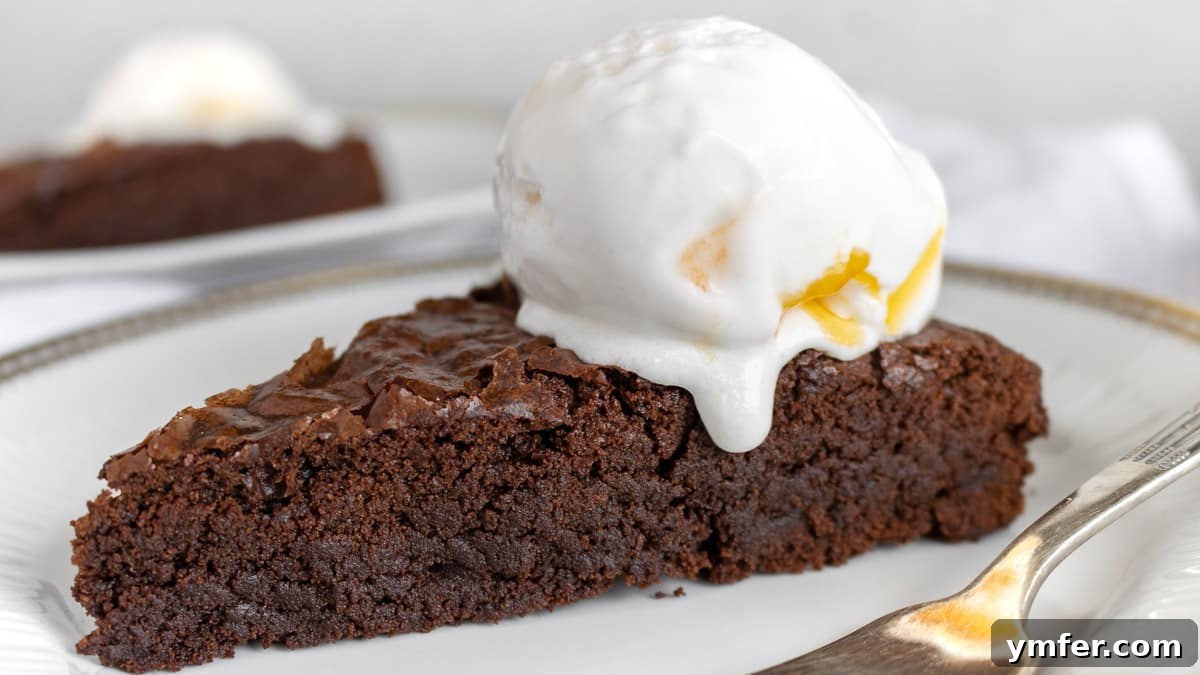
How to Easily Scale This Recipe for Any Pan Size
One of the most practical features of this vegan chocolate brownie cake recipe is its incredible adaptability. Whether you’re baking for a small, intimate gathering or preparing a larger dessert for a celebratory party, you can effortlessly adjust the quantities to fit various springform pan sizes. We’ve simplified the process for you by meticulously calculating a handy scaling number for a range of common pan dimensions.
To scale the recipe, simply choose the diameter of the springform pan you intend to use for your cake. Then, locate its corresponding “Scaling Number” in the comprehensive table below. Once you have this number, you will multiply the quantity of every single ingredient listed in our detailed recipe card by this specific scaling number. For instance, if you decide to use a 7-inch (18 cm) pan instead of the standard 9-inch (23 cm), you will multiply all ingredient amounts by 0.60. This straightforward method ensures the perfect ratio of ingredients, guaranteeing consistent, delicious results every single time, regardless of the pan size you choose to bake with.
| Springform Pan Size | Scaling Number |
|---|---|
| 4 inch (10 cm) | 0.22 |
| 5 inch (13 cm) | 0.31 |
| 6 inch (15 cm) | 0.44 |
| 7 inch (18 cm) | 0.60 |
| 8 inch (20 cm) | 0.79 |
| 9 inch (23 cm) | 1 |
| 10 inch (25 cm) | 1.23 |
This convenient scaling chart takes all the guesswork out of recipe adjustments, making it effortless to bake the perfect size cake for any occasion, ensuring your vegan chocolate brownie cake is always a triumph!
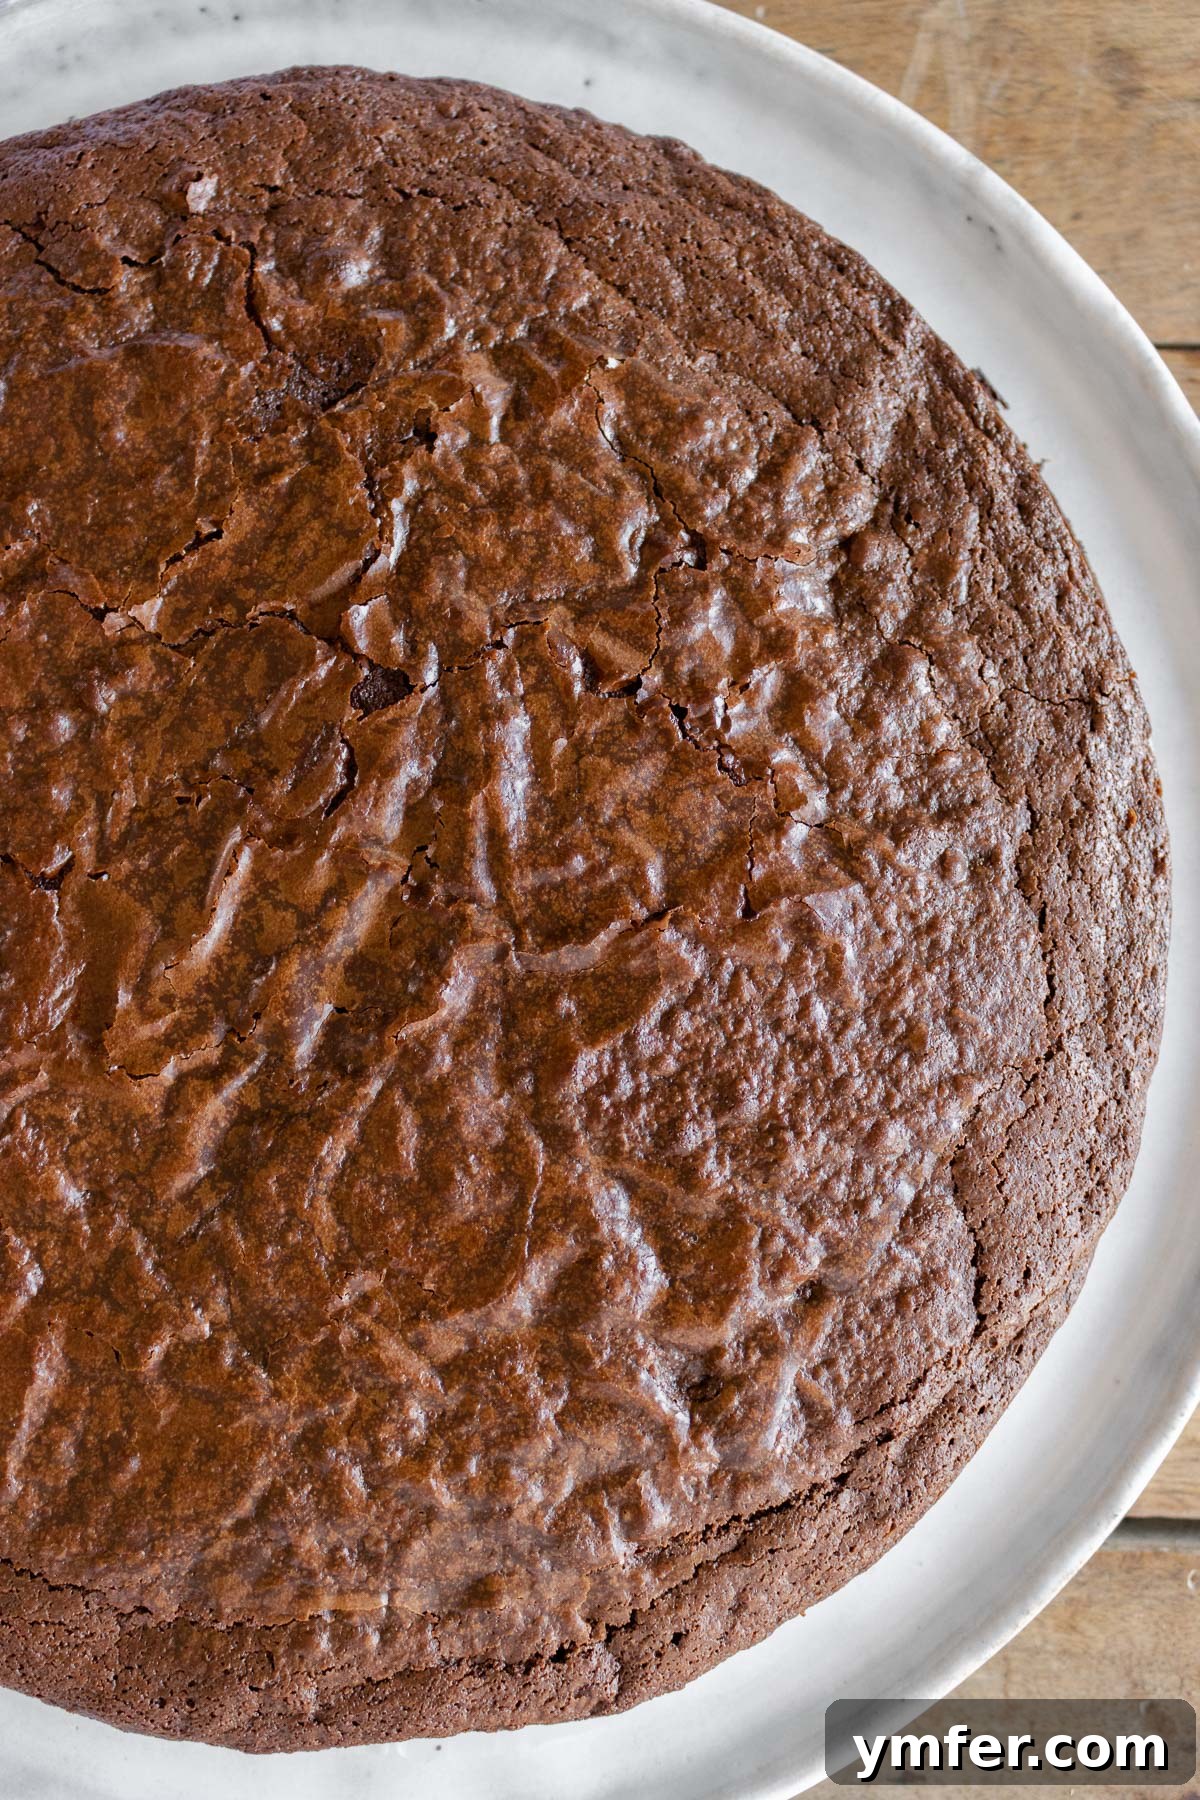
Storage & Freezing Tips for Your Brownie Cake
This easy chocolate brownie cake is not only delightful when freshly baked but also stores beautifully, making it an excellent dessert to prepare ahead of time or to enjoy over several days. Proper storage is key to preserving its rich flavor, incredibly moist texture, and signature fudginess.
- Room Temperature Storage: To keep your cake fresh, moist, and wonderfully fudgy for up to 5 days, store it at room temperature. The best way to do this is in an airtight container or under a cake dome. This method prevents it from drying out and maintains its delicious consistency. Always ensure it’s kept away from direct sunlight or any warm heat sources, which could affect its texture.
- Refrigeration: While not strictly necessary for short-term storage, if your kitchen is particularly warm or humid, or if you prefer a slightly firmer texture, you can store the cake in the refrigerator. If refrigerating, make sure it’s in an airtight container to prevent it from absorbing other odors or drying out. For the best taste and texture, allow the cake to come back to room temperature for at least 30 minutes before serving, as cold chocolate can lose some of its nuanced flavors and become firmer.
- Freezing for Longer Storage: This vegan chocolate brownie cake is remarkably suitable for freezing, allowing you to enjoy a slice of this perfection whenever a chocolate craving strikes, even weeks later.
- To freeze: Ensure the cake is completely cooled to room temperature first. You can freeze it whole, or for convenience, cut it into individual slices. Wrap the cake or slices tightly in at least two layers of plastic wrap, then place them in a heavy-duty freezer-safe bag or an airtight freezer container.
- It can be frozen for up to two months without significant loss of quality, flavor, or texture. Beyond this, it may start to lose some moisture.
- To thaw: The easiest way to thaw is by transferring the frozen cake (or individual slices) to the refrigerator overnight. For a quicker thaw, individual slices can be gently reheated in a microwave on a defrost setting, heating in short bursts until soft and warm again. Be careful not to overheat, as this can alter the texture. Once thawed, it will be as delectable as freshly baked, ready to satisfy your sweet tooth.
For even more easy dessert ideas that are equally delicious and simple to prepare, don’t forget to visit our comprehensive desserts category page. Discover a world of plant-based treats waiting to be baked!
Frequently Asked Questions (FAQ)
Here are some common questions about making this easy vegan chocolate brownie cake:
- Can I make this brownie cake gluten-free?
- While this recipe traditionally uses all-purpose flour, you might be able to substitute it with a good quality 1:1 gluten-free baking flour blend that contains xanthan gum. However, I haven’t personally tested this specific substitution, so results may vary slightly in texture and structure. Always ensure your chosen gluten-free blend is specifically suitable for baking cakes and brownies.
- Why is aquafaba used instead of eggs? Will it taste like chickpeas?
- Aquafaba is a truly remarkable plant-based egg replacement. When vigorously whipped, it mimics the protein structure of egg whites, providing essential lift, moisture, and binding properties to the cake, creating a tender crumb. The best part is that once baked, aquafaba is completely flavorless, so your delicious chocolate brownie cake will not taste like chickpeas, I promise!
- My chocolate mixture seized when melting. What went wrong?
- Chocolate can seize (become thick, gritty, and clumpy) if it comes into contact with even a tiny amount of water or steam, or if it’s overheated too quickly. To prevent this, always ensure your bowls, spatulas, and any utensils used are completely dry. Using the gentle double-boiler method or short, controlled bursts in the microwave on low power helps to melt the chocolate slowly and evenly, significantly reducing the risk of seizing.
- Can I add nuts, chocolate chips, or other mix-ins to the batter?
- Absolutely! For an added crunch or an extra layer of chocolatey goodness, you can certainly fold in about ½ cup of chopped walnuts, pecans, or vegan chocolate chips into the batter during the last step, just before transferring it to the pan. This will introduce another delightful texture and flavor dimension to your brownie cake. Feel free to get creative with your favorite additions!
- How do I know when the brownie cake is done baking?
- The cake should be mostly set around the edges and slightly firm to the touch, but the center may still have a slight wobble when gently shaken. This is ideal for that perfect fudgy brownie texture. A toothpick inserted into the center should come out with moist crumbs, not wet batter. Be careful not to overbake, as this will result in a drier cake rather than the desired fudgy, melt-in-your-mouth consistency.
Full Easy Vegan Chocolate Brownie Cake Recipe
By: Nico Pallotta
This easy 5-ingredient vegan chocolate brownie cake is packed with rich chocolate flavor and boasts an incredibly fudgy, moist, and melt-in-your-mouth texture. It’s perfect for serving warm with ice cream or at room temperature, making it a versatile and simple plant-based dessert for any occasion.
Prep Time: 10 mins
Cook Time: 30 mins
Total Time: 40 mins
Servings: 12 slices
Course: Dessert
Cuisine: Italian, Vegan
Print Recipe
Share on Facebook
Equipment
- Electric Hand mixer (or stand mixer with whisk attachment)
- Cake pan, preferably with removable bottom (springform pan, 9 inches – 23 cm)
- Saucepan and heat-resistant bowl (for double boiler method) or Microwave-safe bowl
- Sifter or fine-mesh sieve (optional, but recommended)
Ingredients
- 7 ounces (200g) dark chocolate (70% minimum cocoa content, high quality)
- 3.5 ounces (100g) vegan butter or margarine
- 1 cup (200g) sugar (granulated white sugar)
- 8 tablespoons (120ml) aquafaba (liquid from a can of chickpeas)
- 1 cup (120g) all-purpose flour (can substitute with semi-whole wheat flour)
Instructions
- Preheat Oven & Prepare Pan: Preheat oven to 350°F (180°C). Line a 9-inch (23 cm) springform pan with parchment paper on the bottom and sides. Lightly grease the pan first to help the parchment stick.
- Melt Chocolate & Butter: In a heat-resistant bowl over a double boiler (or in a microwave in 20-30 second intervals, stirring well after each), melt the chopped dark chocolate and vegan butter together until completely smooth and glossy. Set aside to cool slightly.
- Whisk Aquafaba & Sugar: In a separate large bowl, combine the aquafaba (chickpea liquid) and granulated sugar. Using an electric hand mixer, beat vigorously for about 5 minutes until the mixture is foamy, thicker, and visibly pale.
- Combine Wet Ingredients: Pour the slightly cooled melted chocolate and butter into the foamy aquafaba-sugar mixture. Mix with the hand mixer on low speed for about 1 minute, until just fully incorporated and no streaks remain. Do not overmix.
- Fold in Flour: Sift the all-purpose flour into the chocolate mixture. Using the hand mixer on the lowest speed, mix for about 1 minute, just until the flour is fully incorporated and no dry streaks remain. Be careful not to overmix, as this can make the cake tough.
- Bake: Transfer the batter into the prepared springform pan. Bake in the preheated oven for 30 minutes at 350°F (180°C). The cake will be set around the edges but may still have a slight wobble in the center for a fudgy texture.
- Cool & Serve: Remove from oven and let cool in the pan for at least 10 minutes before carefully unclasping and removing the sides of the springform pan. Serve warm with vegan ice cream or whipped cream, or allow to cool completely to room temperature.
Notes
For more detailed tips, ingredient substitution advice, equipment recommendations, and visual aids, please refer to the comprehensive step-by-step instructions and other sections provided in the main article above.
Nutrition Facts (per serving)
- Calories: 261 kcal
- Carbohydrates: 32g
- Protein: 2g
- Fat: 14g
- Saturated Fat: 5g
- Polyunsaturated Fat: 2g
- Monounsaturated Fat: 5g
- Trans Fat: 1g
- Cholesterol: 1mg
- Potassium: 131mg
- Dietary Fiber: 2g
- Sugar: 21g
- Vitamin A: 6 IU
- Vitamin B6: 1mg
- Vitamin E: 1mg
- Vitamin K: 7 µg
- Calcium: 14mg
- Folate: 19 µg
- Iron: 2mg
- Manganese: 1mg
- Magnesium: 40mg
- Zinc: 1mg
(Nutrition values are estimates based on standard ingredients and may vary slightly depending on specific brands and preparation methods. Calculated for 1 of 12 slices.)
Tried this recipe?
We love hearing from you! Please leave a comment below or mention @theplantbasedschool on Instagram. Your feedback and photos are greatly appreciated! ⭐️ 💚.
If You Enjoyed This Recipe, You Might Also Like These Plant-Based Delights:
Collections
30 Vegan Brunch Recipes: Perfect for Any Weekend Feast
Collections
40 Vegan Desserts: Sweet Treats for Every Craving
Desserts