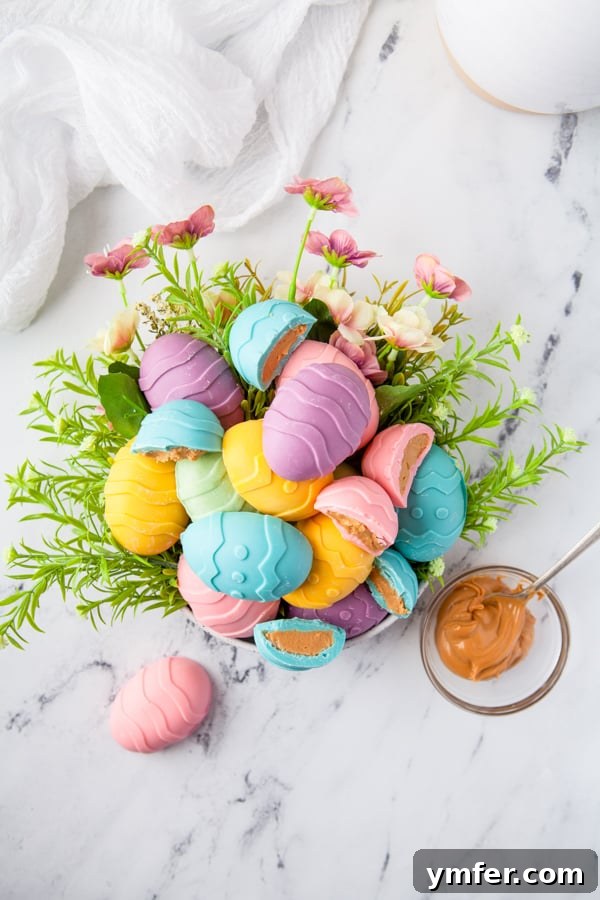
Are you ready to bring the joy of Easter right into your kitchen? If you adore those classic peanut butter-filled chocolate eggs, then get excited! This comprehensive guide will show you how to create your very own homemade peanut butter eggs. Imagine biting into a rich, creamy peanut butter center enveloped in a perfectly smooth, colorful candy shell – a delightful treat that’s not only incredibly simple to make but also fully customizable to your taste and holiday theme. Forget store-bought; these homemade delights are a game-changer for Easter baskets, spring parties, or just a sweet craving.
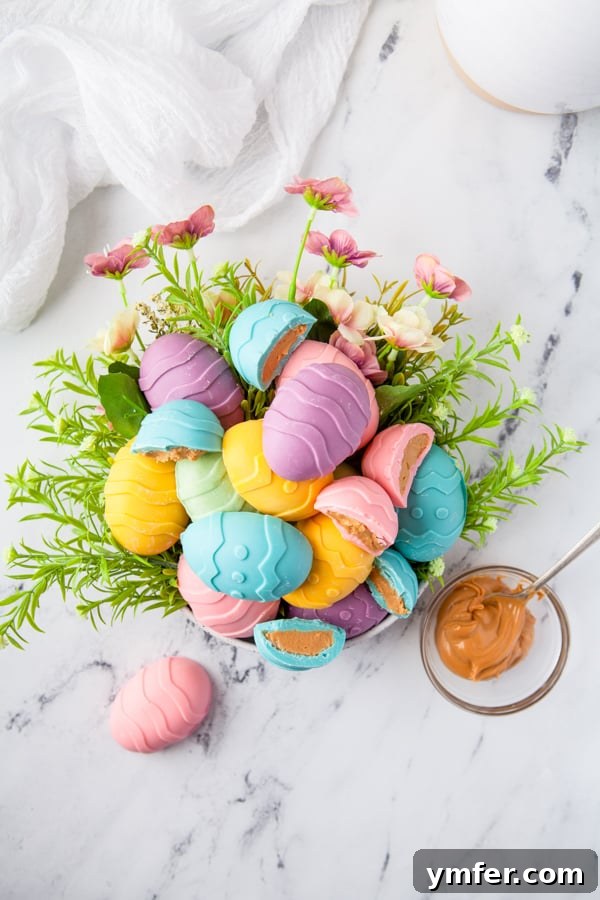
There’s something uniquely satisfying about crafting your own confections, especially when they evoke childhood memories. If you’ve ever dreamt of recreating that iconic peanut butter egg experience at home, this is your chance. Our homemade peanut butter eggs aren’t just adorable; they boast an incredible flavor profile that far surpasses anything you’ll find on a store shelf. Plus, the creative possibilities are endless! You can select any color of candy melt imaginable, making them perfect for Easter, spring celebrations, or even themed events throughout the year. For this recipe, we’ve chosen a palette of cheerful pink, sunny yellow, calming blue, playful purple, and refreshing mint green, ideal for ushering in the vibrant spirit of spring.
Even if you’re a novice in the world of candy making, don’t fret! We’ve meticulously broken down each step, providing expert tips and tricks to ensure your success. This article is designed to guide you through the entire process, from selecting the finest ingredients to achieving that perfect glossy finish. Get ready to impress your friends and family with these irresistible treats!
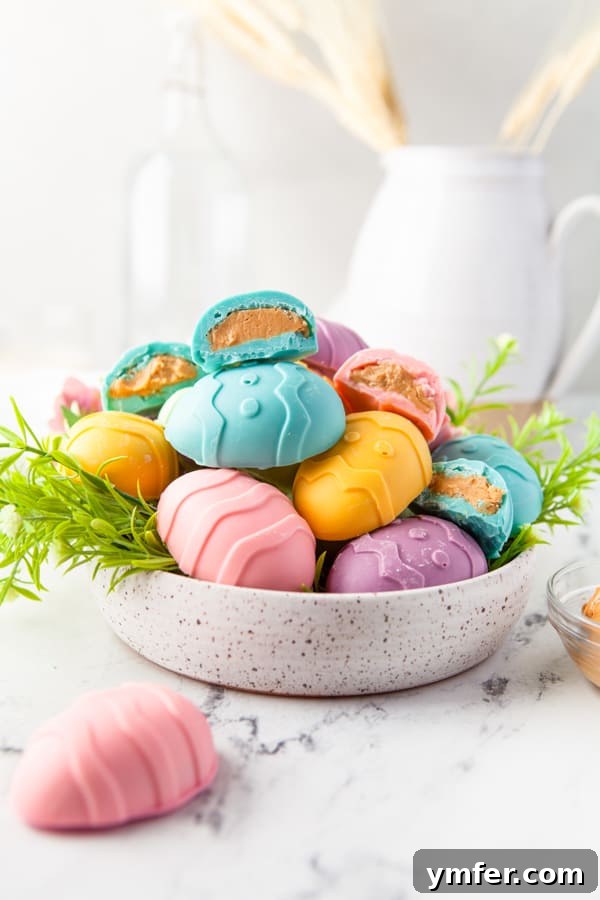
Why Make Your Own Homemade Peanut Butter Eggs?
There are countless reasons to swap store-bought treats for a homemade version, especially when it comes to something as beloved as peanut butter eggs. First and foremost, the customization factor is unparalleled. You control the quality of ingredients, the sweetness level, and of course, the vibrant colors of your candy shells. Imagine a batch of eggs perfectly matched to your Easter decor, or a special blend of flavors tailored to your family’s preferences. Beyond aesthetics, homemade means unparalleled freshness. The creamy, rich flavor of freshly made peanut butter filling simply cannot be replicated by mass-produced candies that have spent weeks on a shelf.
Furthermore, this recipe is a fantastic activity for the whole family. Involving children in the kitchen can be a fun, educational experience, teaching them about ingredients, measurements, and the satisfaction of creating something delicious from scratch. It’s a wonderful way to create lasting memories together during the holiday season. Plus, making your own candy can often be more cost-effective than buying premium artisanal versions, allowing you to enjoy more of these delectable treats without breaking the bank. From the pure joy of creation to the superior taste, homemade peanut butter eggs offer an experience that’s truly a cut above.
Ingredients for Irresistible Homemade Peanut Butter Eggs
Crafting the perfect homemade peanut butter egg requires just a handful of staple ingredients, each playing a crucial role in achieving that iconic texture and flavor. Here’s a detailed look at what you’ll need and why:
- Peanut Butter: The heart of our eggs! I recommend using creamy peanut butter for that super smooth, melt-in-your-mouth filling. However, if you’re a fan of a little textural contrast, feel free to substitute with crunchy peanut butter for an extra nutty bite. The key is to use a good quality, standard peanut butter (like Jif or Skippy) as natural peanut butters (the kind that separate) can be more oily and may require adjustments to the powdered sugar for the right consistency.
- Powdered Sugar (Confectioners’ Sugar): This is essential not only for sweetening our peanut butter filling but also for transforming it into a light, fluffy, and pipeable consistency. Its fine texture dissolves smoothly, preventing any graininess in your finished candy.
- Vanilla Extract: A small splash of vanilla extract goes a long way in enhancing the overall flavor profile of the peanut butter, adding a warm, aromatic depth that elevates the taste of your eggs. Opt for pure vanilla extract for the best results.
- Unsalted Butter: Softened unsalted butter is critical for achieving the perfect rich and creamy texture in the peanut butter filling. It helps bind the ingredients together and contributes to a smooth, luxurious mouthfeel. I prefer unsalted butter because most peanut butter brands already contain salt, allowing you to control the overall sodium content. If you only have salted butter on hand, it’s perfectly fine to use; just be mindful of the added saltiness.
- Candy Melts: These are fantastic for coating your eggs! I used a vibrant array of pink, blue, purple, yellow, and mint green candy melts to create a festive Easter look, but you can choose any colors or flavors you desire. Candy melts are formulated to melt smoothly, set quickly, and maintain a stable, non-sticky finish, making them ideal for candy making. They also come in a variety of delicious flavors. While pure chocolate can be used, it requires proper tempering to achieve a stable, non-melting finish, which can be a bit more challenging for beginners. Without tempering, pure chocolate will melt much faster on your fingers.
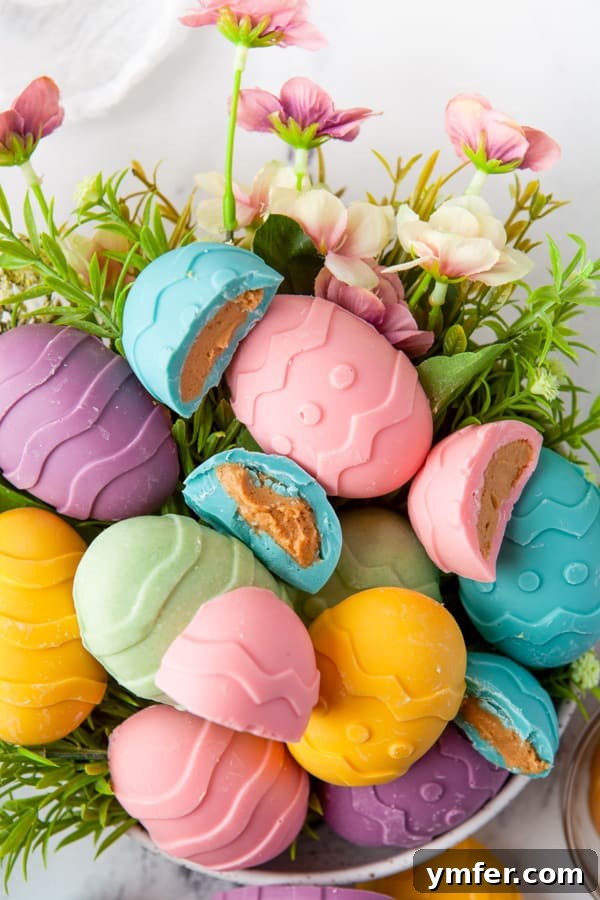
The Best Coating to Use: Candy Melts vs. Real Chocolate
When it comes to coating your colorful Easter peanut butter eggs, you have a couple of excellent options, each with its own advantages. For ease of use and vibrant colors, I highly recommend using colored Wilton candy melts. These are specifically designed for candy making and offer a smooth, consistent finish without the need for tempering.
You can find Wilton candy melts in a vast array of colors and even some flavor variations. Beyond the fun colors, you can also opt for plain white candy melts or classic chocolate-flavored candy melts for a more traditional look. The significant advantage of candy melts is their user-friendliness; they melt beautifully, set quickly, and, most importantly, they don’t get sticky or melt on your fingers once set. This makes them a superb choice, especially if you plan on gifting your homemade peanut butter eggs.
If you prefer to keep things more traditional or desire a richer chocolate flavor, you can certainly use high-quality melted bar chocolate or premium chocolate wafers, such as those from Ghirardelli. However, using real chocolate requires a process called tempering to ensure a shiny, snap-able, and stable coating that won’t melt easily at room temperature. Tempering chocolate can be a bit more advanced, involving precise temperature control, but the results are undeniably luxurious. If you’re a beginner, candy melts offer a foolproof path to delicious and attractive homemade peanut butter eggs.
Peanut Butter Options and Adjustments
The type of peanut butter you choose significantly impacts the flavor and texture of your homemade peanut butter eggs. As mentioned, I opted for creamy peanut butter for its silky-smooth consistency. However, don’t hesitate to use crunchy peanut butter if you’re craving that delightful textural contrast and an extra burst of roasted peanuts in every bite. Both options yield delicious results.
For those with peanut allergies or who simply prefer an alternative, you could experiment with sunflower seed butter (like SunButter) or other nut butters such as almond butter or cashew butter. These alternatives can create equally delicious treats, though their unique flavor profiles will, of course, alter the classic taste. If you do use a peanut-free butter, ensure it’s processed in a nut-free facility if allergies are a concern.
A crucial point to remember is that “natural” peanut butters or other natural nut butters (which often separate, with oil rising to the top) tend to be more oily and runny than their processed counterparts. If you choose to use one of these, you may need to add a bit more powdered sugar to your filling mixture. Gradually add extra powdered sugar, a tablespoon at a time, until the filling reaches a soft, pliable, and pipeable consistency that holds its shape well. This adjustment will prevent your filling from being too loose and ensure it sets properly within the chocolate shell.
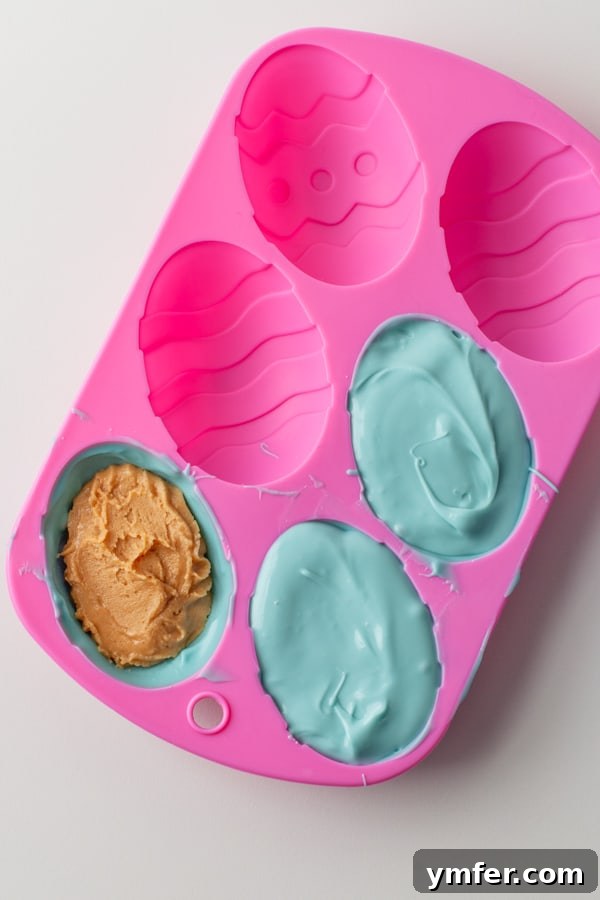
How to Assemble Homemade Peanut Butter Eggs: A Step-by-Step Guide
Now that we’ve covered the ingredients and why candy melts are a fantastic choice, let’s dive into the exciting part: assembling these delightful homemade peanut butter eggs. Follow these steps for a smooth and successful candy-making experience.
Step 1: Preparing the Irresistible Peanut Butter Filling
In a medium mixing bowl, combine the creamy peanut butter and softened unsalted butter. Use a hand mixer or stand mixer to beat them together until the mixture is light, fluffy, and well combined. This aeration step creates a wonderfully smooth texture for your filling. Next, gradually add the powdered sugar and vanilla extract. Continue mixing until the filling is fully combined and no streaks of sugar remain. The ideal consistency should be soft, pliable, and easy to pipe, yet firm enough to hold its shape. If you’ve ever made peanut butter buckeyes, you’ll want this filling to be just slightly softer for easier shaping in the molds. Transfer the finished peanut butter mixture into a sturdy piping bag, preferably with a round tip, and set it aside.
Step 2: Mastering the Candy Shell
Once your peanut butter filling is ready, it’s time to prepare your candy coating. Melt the candy melts slowly in a microwave-safe bowl. Heat in 20-second intervals, stirring thoroughly after each interval, until the candy melts are completely smooth and free of lumps. This slow and gentle melting process is crucial to prevent the candy from burning or seizing. If the candy appears too thick, you can add a small amount of vegetable shortening or coconut oil (about ½ teaspoon per cup of melts) to thin it out slightly, ensuring a smoother coating. Remember to work with one color of candy melt at a time to keep colors vibrant and prevent premature setting.
Step 3: Setting the First Layer of the Shell
Take your chosen silicone egg mold and, using a small spoon or a clean brush, fill each cavity with a generous amount of the melted candy melt. Ensure the candy fully coats the sides and bottom of each cavity. Next, carefully turn the mold upside down over a piece of parchment paper, allowing any excess chocolate to drip out. This creates a thin, even shell. Flip the mold back over and let the chocolate shell set at room temperature for about 10-12 minutes. To speed up this process, you can place the mold in the refrigerator for just 5 minutes until the candy is firm to the touch.
Step 4: Filling with Peanut Butter Perfection
When the candy shell in the mold has completely set and is firm, retrieve your piping bag filled with the peanut butter mixture. Carefully pipe the peanut butter filling into each candy shell cavity. It’s important to fill them approximately two-thirds full. A common mistake is to overfill, which makes sealing the eggs cleanly in the next step difficult. Leave enough space at the top for the final layer of candy melt.
Step 5: Sealing and Finishing Touches
Once the peanut butter filling is in place, spoon another layer of the melted candy melt over the top of each cavity, completely covering the peanut butter. Use a small offset spatula or a bench scraper to gently scrape the excess candy off the top of the mold, creating a flat, smooth back for your eggs. This ensures a professional finish. Place the mold back into the refrigerator for 10-15 minutes, or until the candy is completely set and hardened. Once fully set, carefully remove the peanut butter eggs from the mold by gently flexing the silicone. Repeat these steps with the remaining candy melts and peanut butter filling, working one color at a time to maintain efficiency and cleanliness. This methodical approach ensures beautiful, distinct colors and allows you to reuse any excess melted candy that drips onto the parchment paper.
Pro Tips for Flawless Homemade Peanut Butter Eggs:
- Work in Batches: Especially if using multiple colors, process one color of candy melt and a portion of the peanut butter filling at a time. This prevents the candy from hardening too quickly and makes cleanup easier.
- Temperature Control: Maintain a comfortable room temperature in your kitchen. If it’s too warm, the candy melts might take longer to set, and if too cold, they might seize up when melting.
- Clean Molds: Ensure your silicone molds are perfectly clean and dry before starting. Any moisture can cause the candy melts to seize.
- Don’t Rush the Setting: While it’s tempting to rush, allowing adequate time for each layer of candy melt to set completely is key to easily releasing the eggs from the molds without breakage.
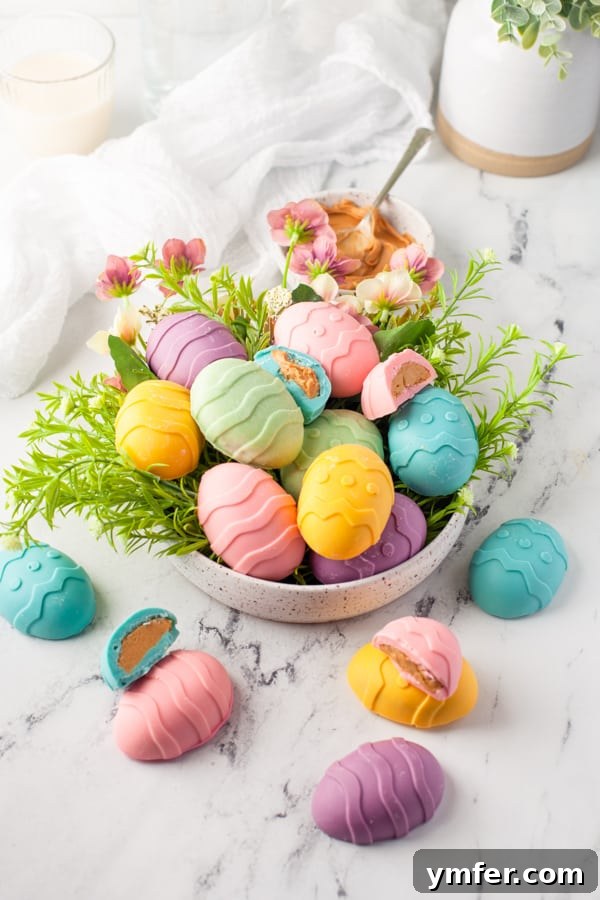
Best Molds to Use for Candy Making
The right mold can make all the difference in the ease and success of your candy-making project. For creating these homemade peanut butter eggs, you’ll want a mold that allows for easy release, ensuring your beautifully crafted candies pop out perfectly intact. This is why I highly recommend using silicone molds.
Silicone molds are incredibly flexible and non-stick, making the demolding process virtually effortless. They are also durable, easy to clean, and typically safe for use in both the freezer and refrigerator, which is great for speeding up the setting time of your candy. For this particular recipe, I used a silicone egg mold with a cute design, which added an extra touch of charm to the Easter eggs.
You can easily find a wide variety of silicone candy molds online, particularly on platforms like Amazon. Additionally, most larger craft stores, especially those with a dedicated baking or candy-making section, will stock various silicone molds suitable for different shapes and occasions. When choosing a mold, consider the size of the cavities—you want them large enough to hold a good amount of peanut butter filling but not so large that they become unwieldy. The egg shape is, of course, perfect for Easter, but feel free to explore other fun shapes for different holidays or events!
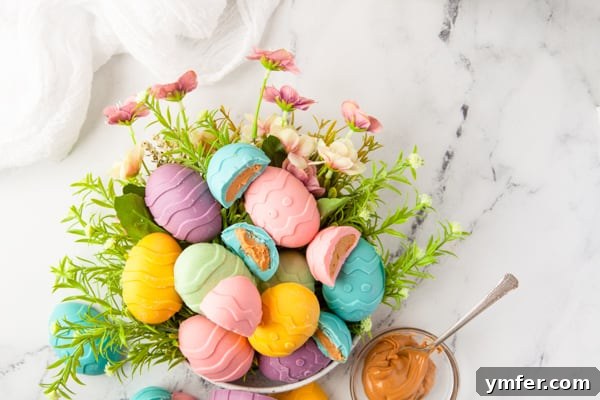
Storage and Gifting Your Homemade Peanut Butter Eggs
Once your beautiful homemade peanut butter eggs are complete, proper storage is key to maintaining their freshness and vibrant appearance. Store your finished eggs in an airtight container at room temperature for up to one week. If your kitchen tends to be warm, or for extended freshness, you can store them in the refrigerator for up to two weeks. However, if refrigerated, allow them to come to room temperature for about 15-20 minutes before serving for the best texture and flavor. The candy coating helps protect the peanut butter filling, keeping it soft and delicious.
These homemade treats make fantastic gifts! Package them in small cellophane bags tied with a festive ribbon, or arrange them in a decorative box with some shredded tissue paper. They are perfect for Easter baskets, hostess gifts, teacher appreciation, or just a thoughtful surprise for friends and neighbors. Their stable candy coating, unlike untempered real chocolate, means they travel well and won’t easily melt on your fingers, making them an ideal choice for sharing.
Troubleshooting Common Homemade Candy Issues
Even seasoned candy makers can encounter a snag or two. Here are some common issues you might face and how to troubleshoot them:
- Candy Melts Seizing: If your candy melts become thick, grainy, or clumpy after melting, it’s usually due to overheating or contact with water. Always melt slowly in short intervals, stirring frequently. Ensure your bowl and utensils are completely dry. If seized, sometimes adding a tiny bit of vegetable shortening or paramount crystals can rescue it, but often starting fresh is best.
- Runny Peanut Butter Filling: If your filling is too soft to pipe or hold its shape, it likely needs more powdered sugar. Add powdered sugar one tablespoon at a time, mixing well after each addition, until the desired firm-but-pliable consistency is reached.
- Cracked Candy Shells: This can happen if the chocolate layer is too thin or if the eggs are removed from the mold before being fully set. Ensure an adequate first layer of chocolate and allow sufficient chilling time.
- Dull Finish: If your candy melts appear dull instead of shiny, it could be due to overheating, cooling too slowly, or condensation. Melting gently, avoiding extreme temperature changes during setting, and ensuring the mold is dry will help maintain a glossy finish.
More Easy Spring Desserts to Brighten Your Table
Looking for more delightful treats to celebrate spring and Easter? These recipes are sure to impress and satisfy your sweet tooth:
- Want a cute Easter-themed cupcake recipe? Try my Robin Egg Cupcakes. They’re as charming as they are delicious!
- Craving a divine layer cake bursting with fruity flavor? Indulge in my Strawberry Coconut Layer Cake for a truly tropical spring sensation.
- Love quick and easy desserts that don’t compromise on taste? My Frozen Peach Cobbler is a simple, refreshing treat perfect for warmer days.
- Need a showstopper of an Easter dessert that will truly amaze your guests? Learn to make these intricate and beautiful Easter Egg Macarons.
Homemade Peanut Butter Eggs
Brandy O’Neill – Nutmeg Nanny
16
eggs

Equipment
-
Creamy Peanut Butter
-
Wilton Candy Melts
-
Easter Egg Silicone Molds
-
Piping Bag
-
Microwave-safe bowls
-
Parchment paper
Ingredients
- 1 cup creamy peanut butter
- 1 cup powdered sugar
- 1 teaspoon vanilla extract
- 3 tablespoons unsalted butter, softened
- 4-3/4 cups candy melts, colors of your choice
Instructions
-
In a small bowl, mix the peanut butter with the softened butter until it is light and fluffy.
-
Add in the powdered sugar and vanilla extract. Mix until the filling is fully combined and smooth. Transfer to a piping bag.
-
In another bowl, melt your candy melts one color at a time. Heat in the microwave in 20-second intervals, stirring thoroughly after each, until completely melted and smooth. Be careful not to burn the candy.
-
Take your silicone egg mold and fill each cavity with the melted candy melt, ensuring the sides are coated. Turn the mold upside down over parchment paper to allow excess chocolate to drip out. Flip the mold back over and let the chocolate set for about 10-12 minutes at room temperature, or 5 minutes in the refrigerator.
-
Once the candy shell has set, pipe the peanut butter filling into each mold, filling them approximately 2/3 full. Do not overfill, as this makes sealing difficult.
-
Seal the eggs with another layer of melted candy melt. Use a small spatula or bench scraper to scrape away any excess candy from the top of the mold for a clean finish.
-
Place the mold in the refrigerator for 10-15 minutes, or until the candy is completely set. Carefully remove the finished peanut butter eggs from the mold.
-
Repeat steps 3 through 6 for each color of candy melt you are using. Working one color at a time prevents mixing colors and allows you to reuse any excess candy melt that drips onto the parchment paper.
-
Once all colors are done and set, your homemade peanut butter eggs are ready to enjoy or share!
Nutrition
Serving: 1g
Calories: 812kcal
Carbohydrates: 177g
Protein: 4g
Fat: 10g
Saturated Fat: 3g
Polyunsaturated Fat: 6g
Cholesterol: 6mg
Sodium: 142mg
Fiber: 1g
Sugar: 115g
Nutrition information is automatically calculated, so should only be used as an approximation.
Additional Info
Dessert
American
Tried this recipe?
Mention @NutmegNanny or tag #nutmegnanny!