
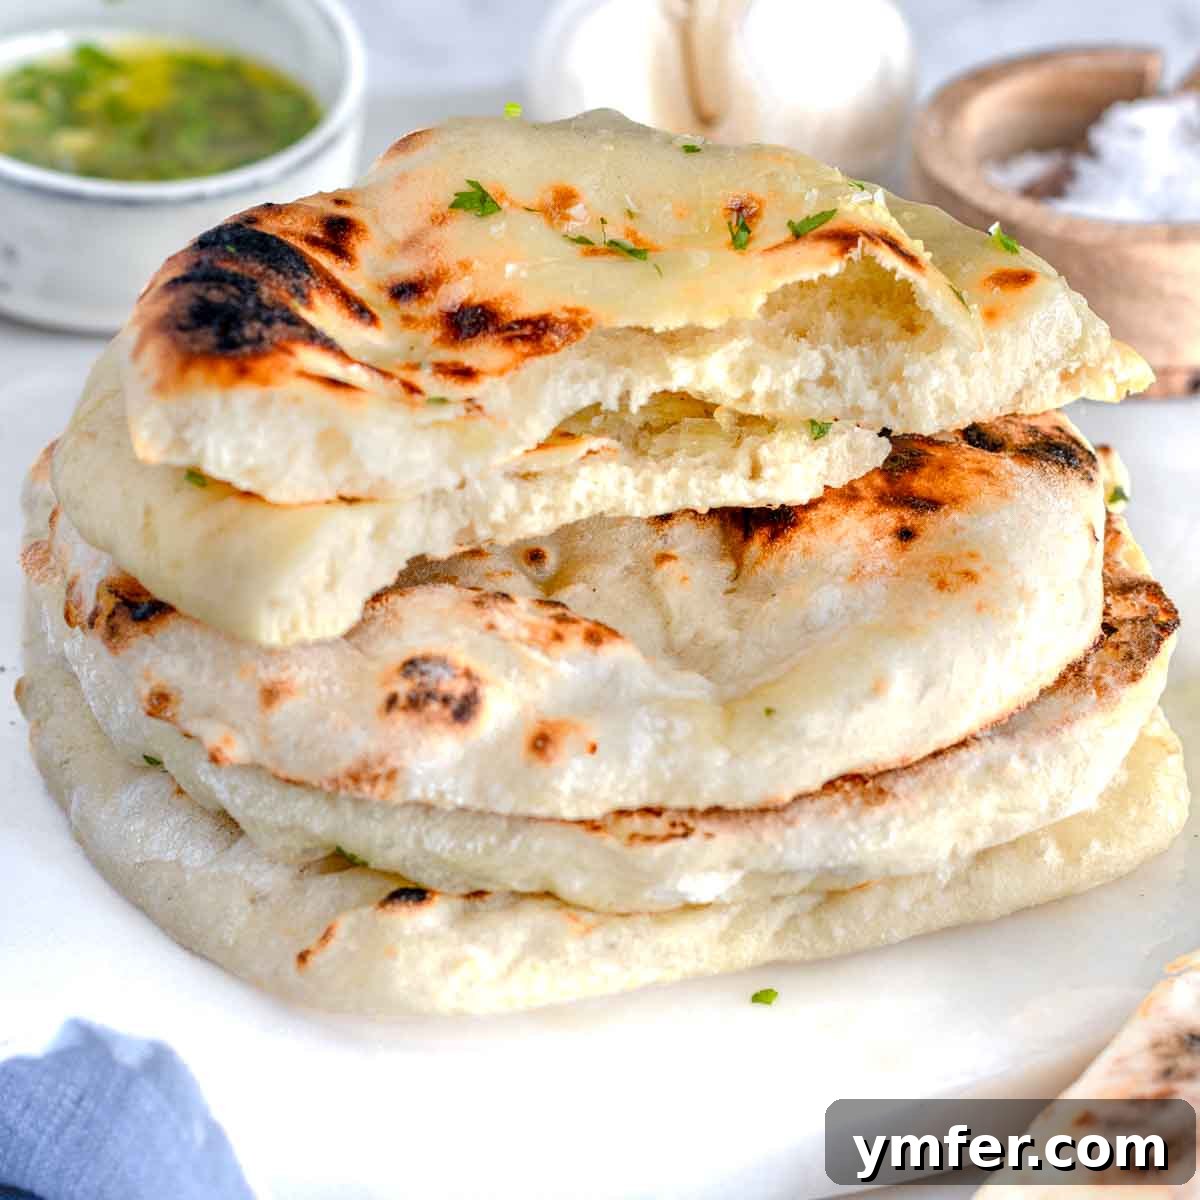
Mastering Homemade Naan Bread: A Simple Recipe for Fluffy, Charred Perfection
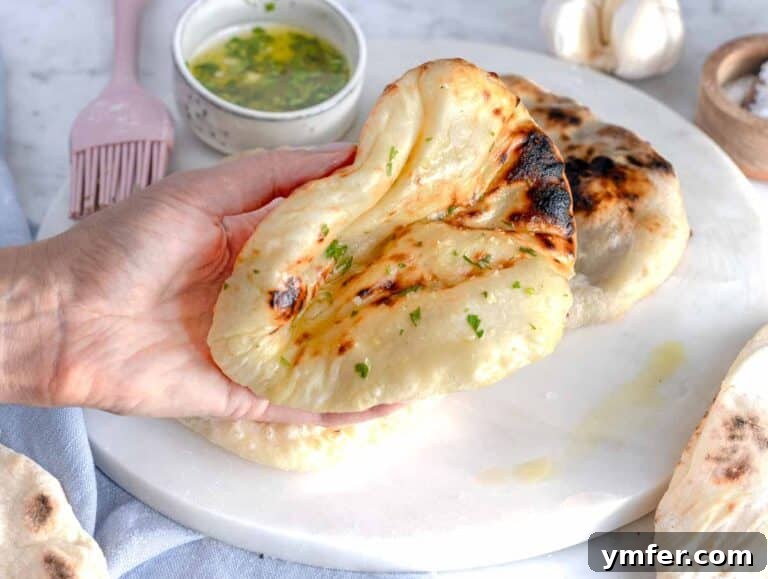
Embark on a culinary journey to create the most incredible **homemade naan bread** right in your kitchen. This comprehensive guide will walk you through an easy-to-follow recipe that consistently delivers **pillowy, soft interiors** with that irresistible, slightly **crisp and charred exterior** that makes naan so beloved. Perfect for scooping up rich curries, complementing hearty soups, or simply enjoying with your favorite spreads and dips, this recipe is a true game-changer for any home cook.
Whether you prefer to cook your naan in a **hot skillet** on the stovetop or utilize the convenience of your **oven**, we’ll reveal an authentic tip to unlock the **best possible flavor and texture**, bringing the essence of traditional Indian tandoori naan right into your home.
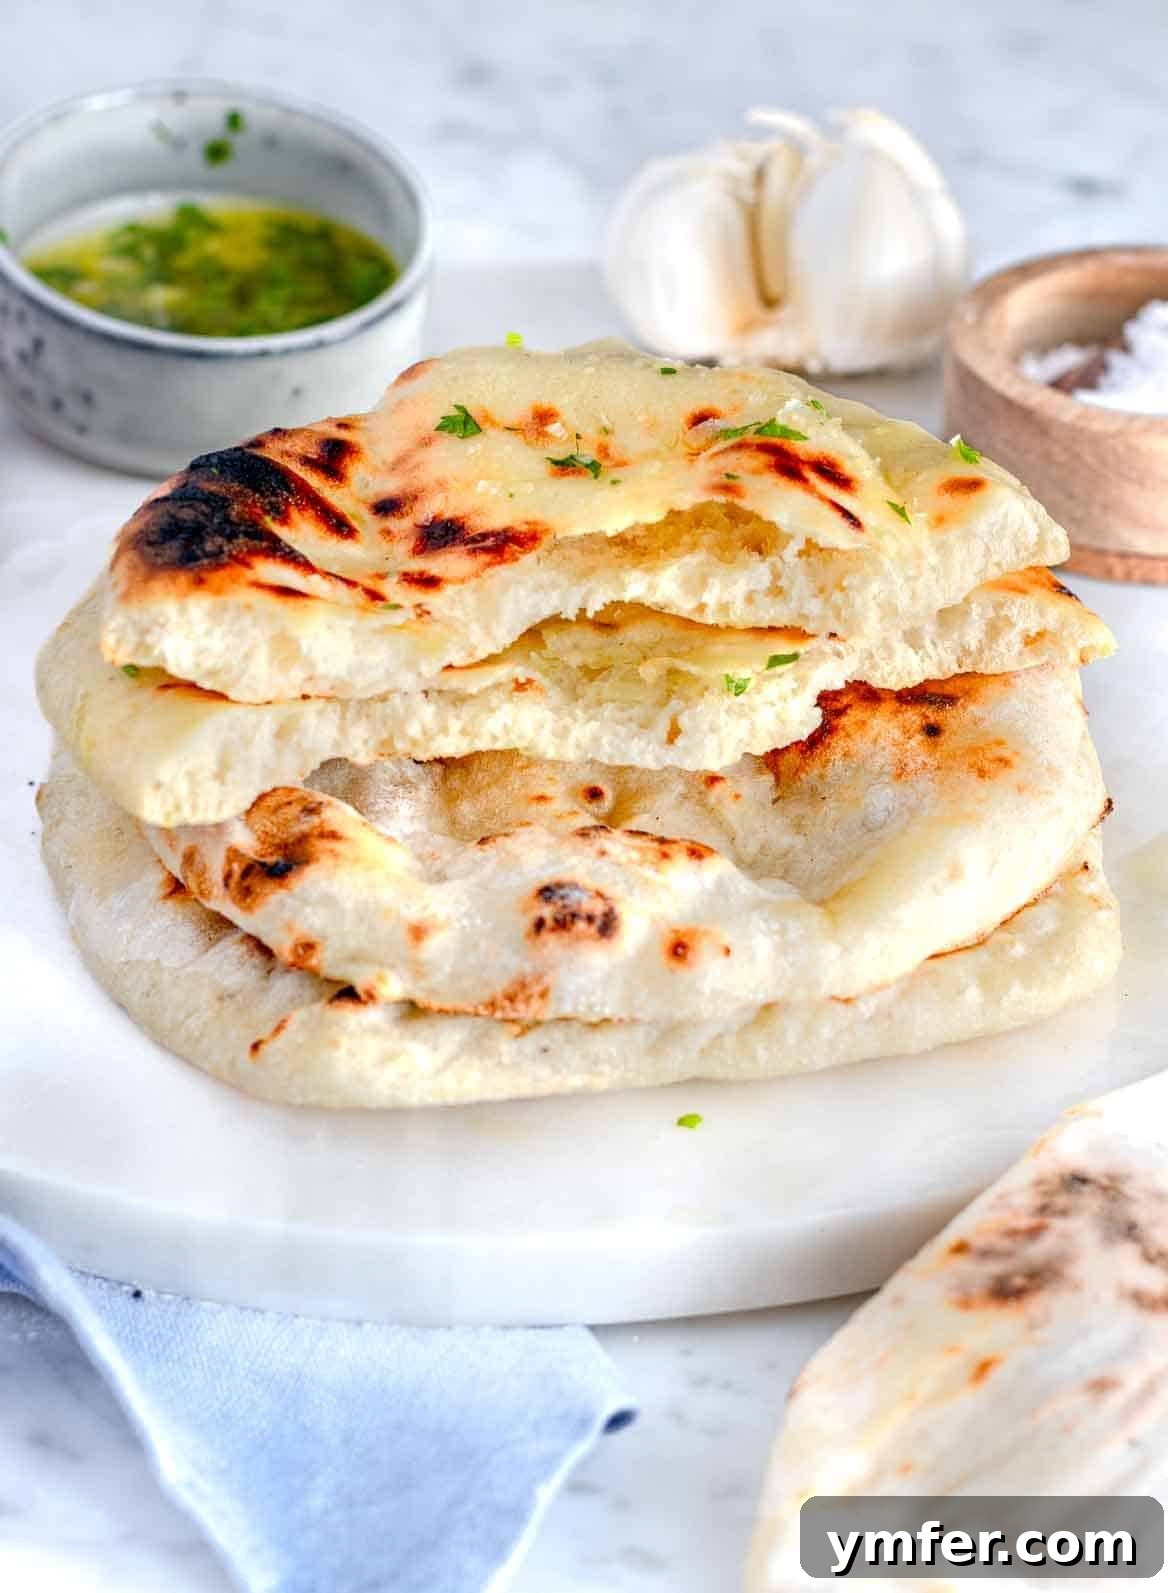
Table of Contents
- What is Naan? A Culinary Staple
- How to Make Naan: Step-by-Step Guide
- Cooking Naan to Perfection
- Serving Suggestions: Beyond the Curry
- Naan Bread Substitutions & Variations
- Storage & Reheating Tips
- Explore More Flatbread Recipes
- Full Naan Bread Recipe Card
What is Naan? A Culinary Staple
Naan is a distinctive **leavened flatbread** that holds a prominent place in the culinary traditions of India, Indonesia, Malaysia, and various Central and Western Asian countries. Unlike unleavened flatbreads such as roti or chapati, naan incorporates yeast or other leavening agents, giving it its characteristic fluffy texture and slight chewiness. This fermentation process is key to its unique taste and incredibly soft crumb, which sets it apart from other types of bread.
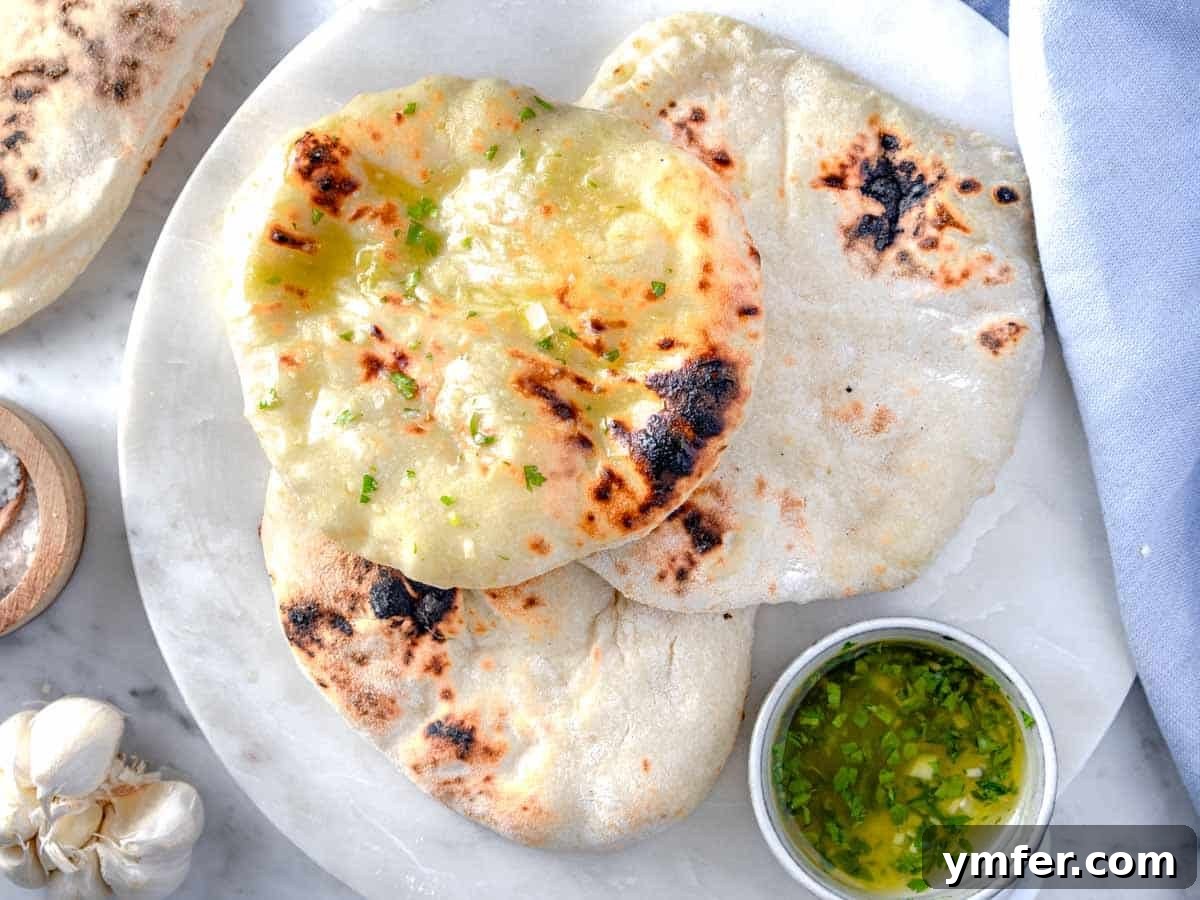
While often enjoyed plain for its comforting flavor, naan truly shines when brushed with aromatic additions such as **garlic, olive oil, traditional ghee, melted butter, or sprinkled with vibrant fresh cilantro**. Its rich flavor and tender texture make it the ideal accompaniment to a wide array of dishes, serving as the perfect edible scoop for savory sauces.
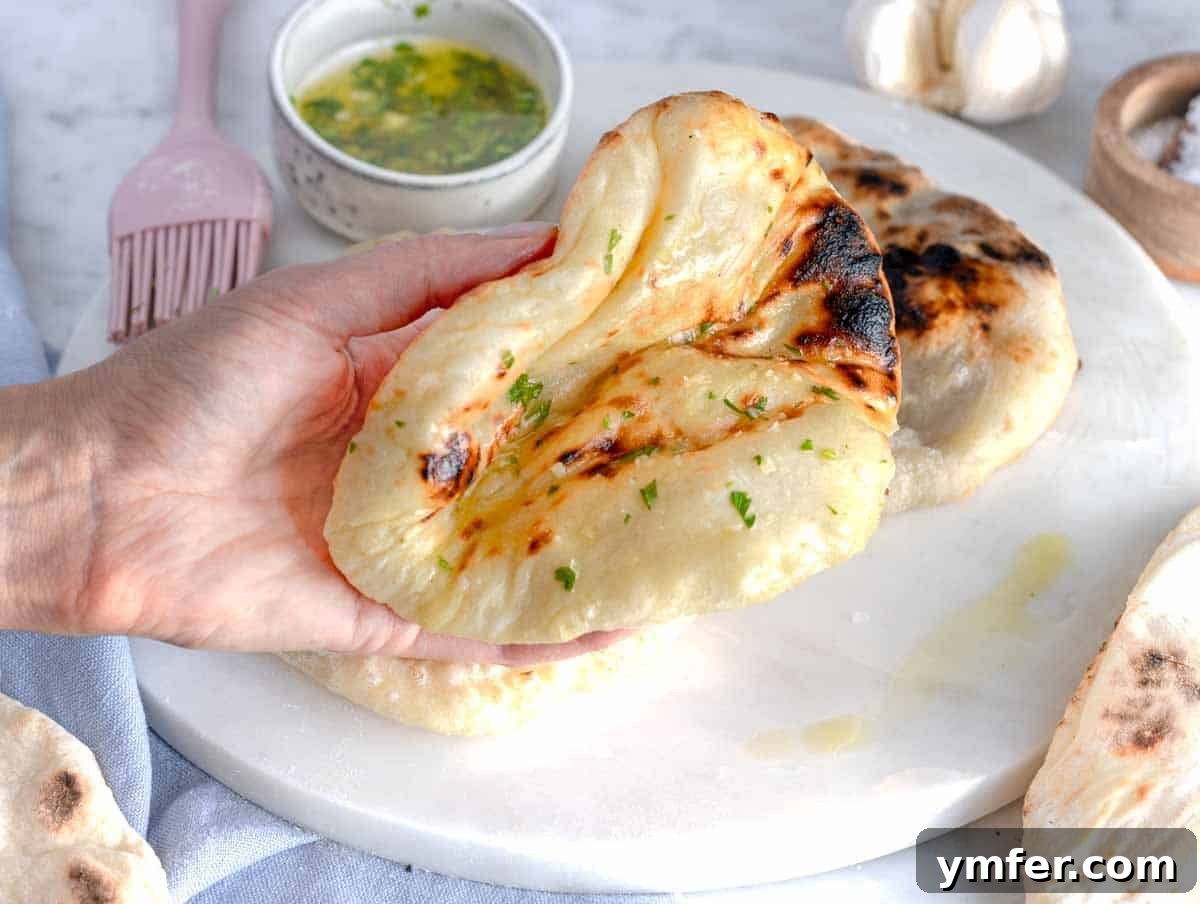
The name “naan” itself originates from the **Persian word “nān,”** simply meaning bread or food. This etymology highlights its ancient roots and widespread presence across historical Persia, influencing many regional cuisines. You’ll find similar leavened flatbreads, like our pita bread, enjoyed across modern-day Iran, Egypt, Turkey, and other Middle Eastern nations, all descendants of this rich culinary heritage. Each region adapts the basic concept, but the essence of a soft, leavened bread remains consistent.
Traditionally, naan is baked in a blistering hot **tandoor oven**, a cylindrical clay oven that cooks the bread quickly at very high temperatures, creating its signature bubbles and char. Another traditional method involves cooking on a **tawa pan**, a flat or concave griddle. For home cooks, however, recreating this effect is surprisingly achievable using a common **skillet**, allowing you to attain that same coveted pillowy softness and delightful charred finish without needing specialized, expensive equipment. We’ll show you how to master this technique for truly authentic results.
Making this homemade naan bread recipe is remarkably straightforward and shares many similarities with preparing other dough-based recipes such as pizza dough or flatbread pizza. If you can handle those, you’re well on your way to mastering delicious naan! The process is less intimidating than it seems, and the reward of fresh, warm naan is absolutely worth the effort.
How to Make Naan: Step-by-Step Guide
Crafting perfect naan at home is a rewarding process that begins with a few simple ingredients and clear steps. You’ll find the exact quantities in the recipe card at the bottom of this page. Follow these instructions carefully for the best results, yielding soft, flavorful naan every time.
1. Gather Your Ingredients
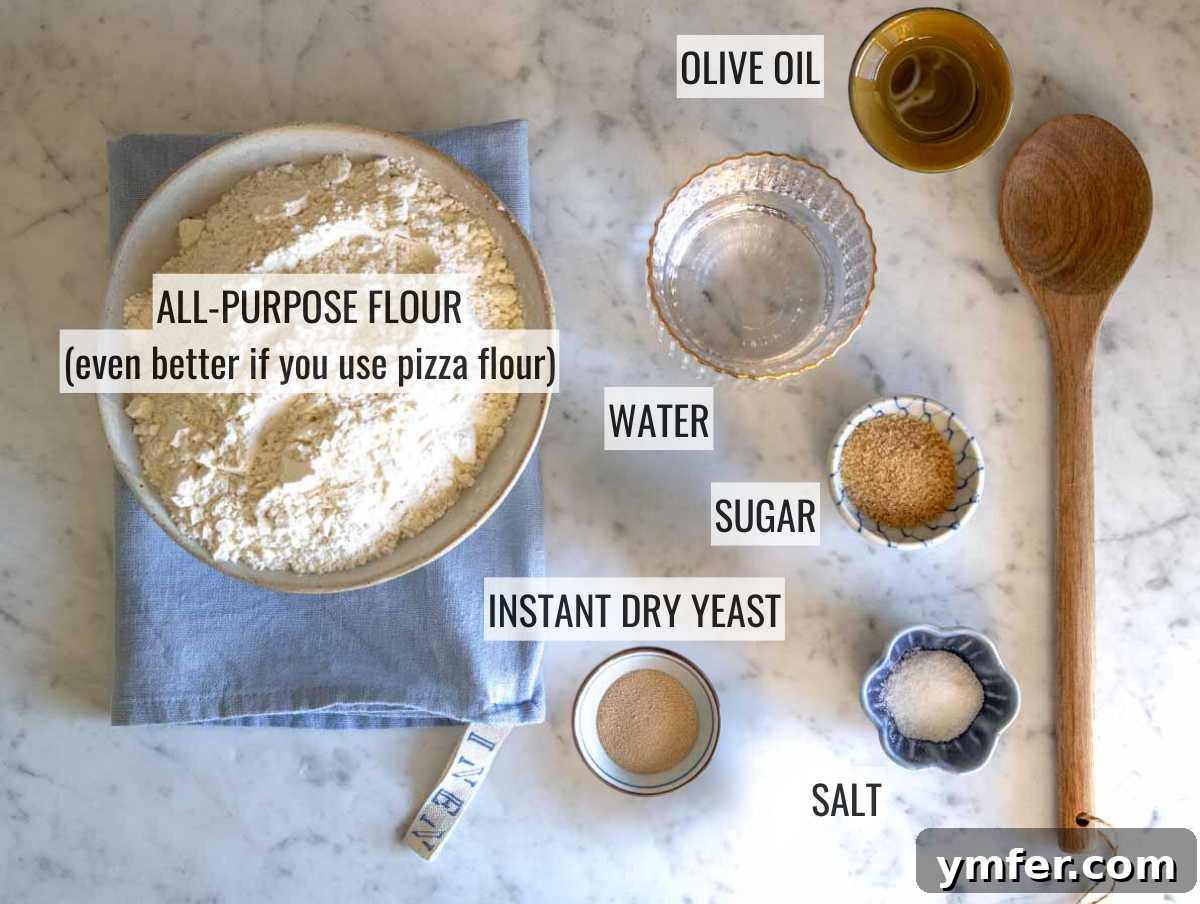
For this delicious homemade naan, you’ll need standard pantry staples that are easy to find: **all-purpose flour** (or a good quality pizza flour, which often has a higher protein content for better elasticity), **extra virgin olive oil**, **lukewarm water**, **sugar**, **salt**, and **instant dry yeast**. It’s crucial to use instant dry yeast, not rapid-rise yeast, as standard instant dry yeast allows for better flavor and texture development during the slower proofing process. Quality ingredients make a noticeable difference in the final product. We’ve had great results with Caputo dry yeast, Red Star active dry yeast, Red Star Saf Instant, and Dr. Oetker instant yeast, so feel free to use a trusted brand.
2. Prepare the Dough
Begin by activating your yeast, which is a vital step for fluffy naan. In a large mixing bowl, gently dissolve the **instant dry yeast** and **sugar** into the **lukewarm water** using a whisk. The sugar acts as food for the yeast, helping it become active and energetic. Within 5-10 minutes, you should observe a light foam or bloom forming on the surface of the water, which is a positive sign that your yeast is alive and ready to work its magic. If you don’t see any foam, your yeast might be expired, and it’s best to use a new batch.
Tip: The water temperature is paramount. It should feel comfortably warm to the touch, similar to a baby’s bath – ideally between 105-115°F (40-46°C). Water that is too hot will kill the yeast, while water that is too cold will inhibit its activity, leading to poor proofing.
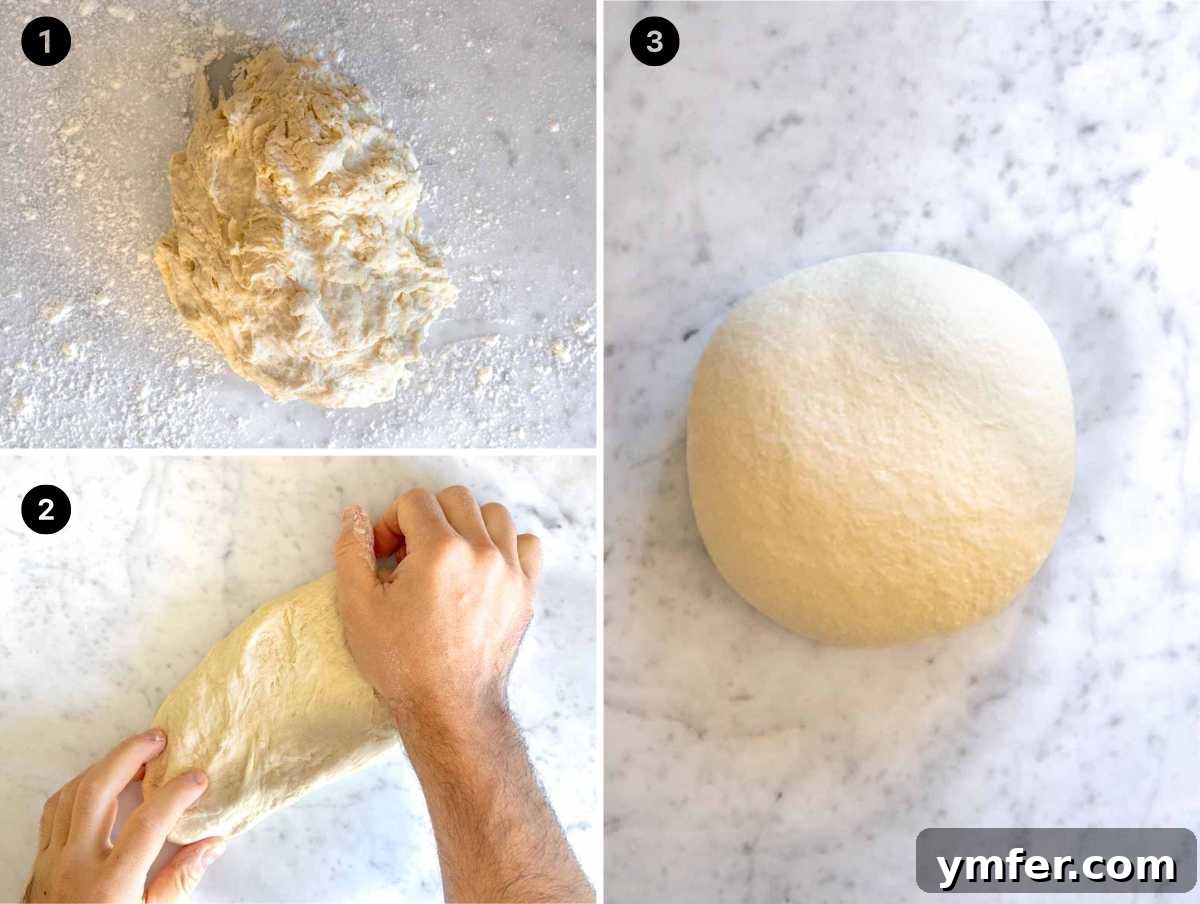
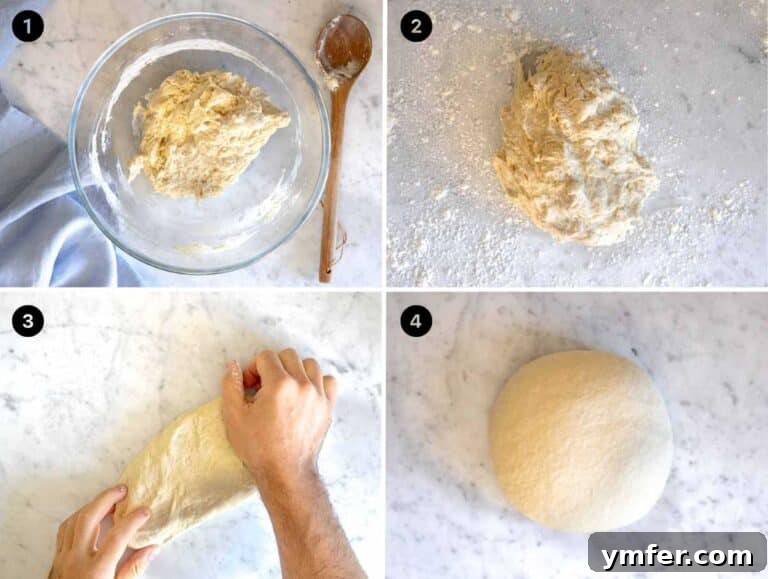
Next, add the measured **all-purpose flour**, **salt**, and **olive oil** to the bowl with the activated yeast mixture. Stir everything together thoroughly with a sturdy wooden spoon until the ingredients are roughly combined and a shaggy, somewhat sticky dough forms. At this initial stage, it won’t be perfectly smooth, and that’s precisely what you’re looking for before kneading.

Transfer the shaggy dough ball onto a **well-floured worktop**. Now comes the satisfying and important part: **kneading the dough with your hands for about 5 minutes**. Focus on pressing, stretching, and folding the dough repeatedly until it transforms into a **smooth, elastic, and very soft ball**. The texture should be supple and pliable. If the dough feels too sticky and unmanageable, add a tiny bit more flour, a tablespoon at a time, but be cautious not to add too much, as this can result in a tough, dense naan. The ultimate goal is a soft, moist dough that springs back gently when lightly poked.
Note: For those who prefer using kitchen appliances, a standing mixer with a dough hook attachment can do the work for you. Add all the ingredients and mix on the third speed for 5 to 7 minutes until the dough achieves that desirable smooth and elastic consistency.
3. Proofing the Dough
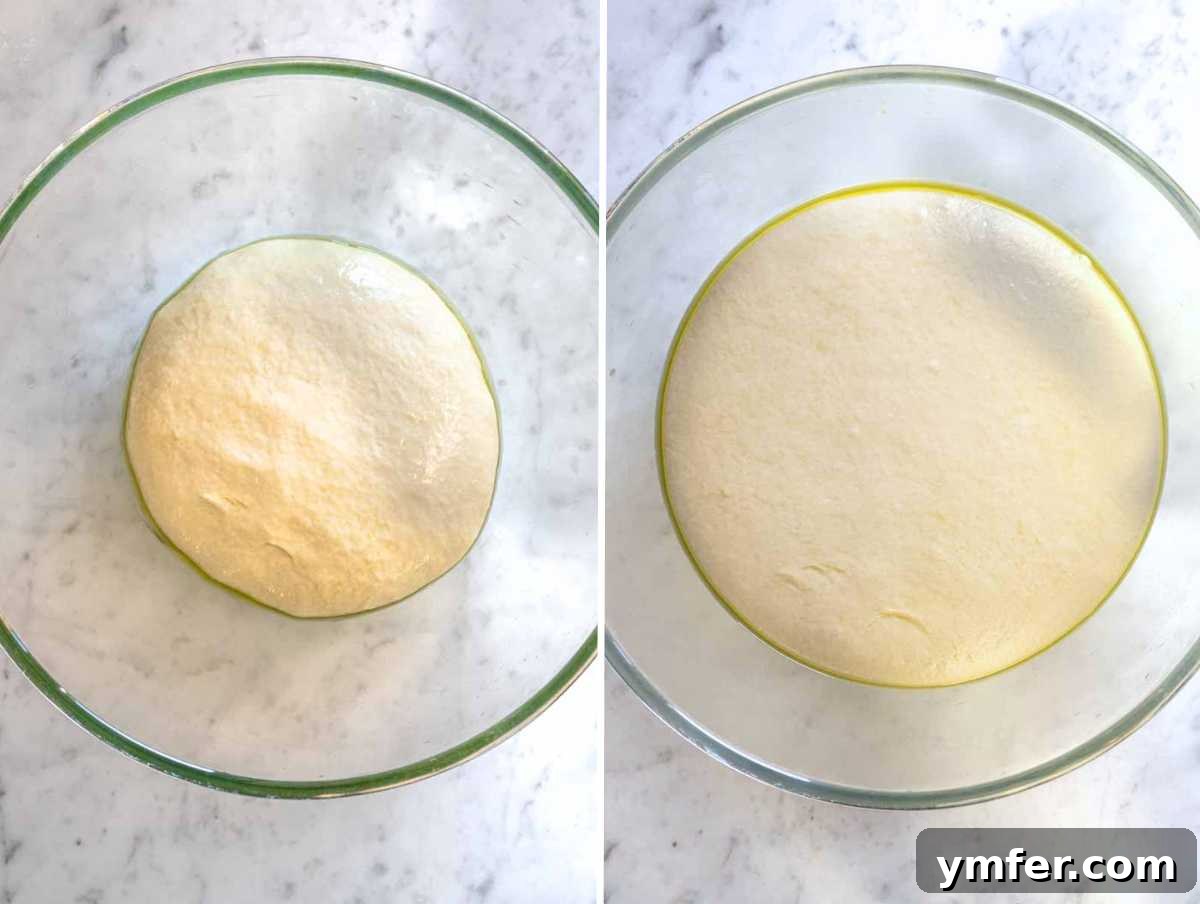
Once your dough is beautifully kneaded and shaped into a cohesive ball, transfer it to a **large, lightly oiled bowl**. Brush the top surface of the dough with a thin layer of oil; this prevents a dry skin or crust from forming on top during proofing. Cover the bowl tightly with plastic wrap or a clean, damp kitchen towel, ensuring there’s ample space for the dough to expand without touching the cover.
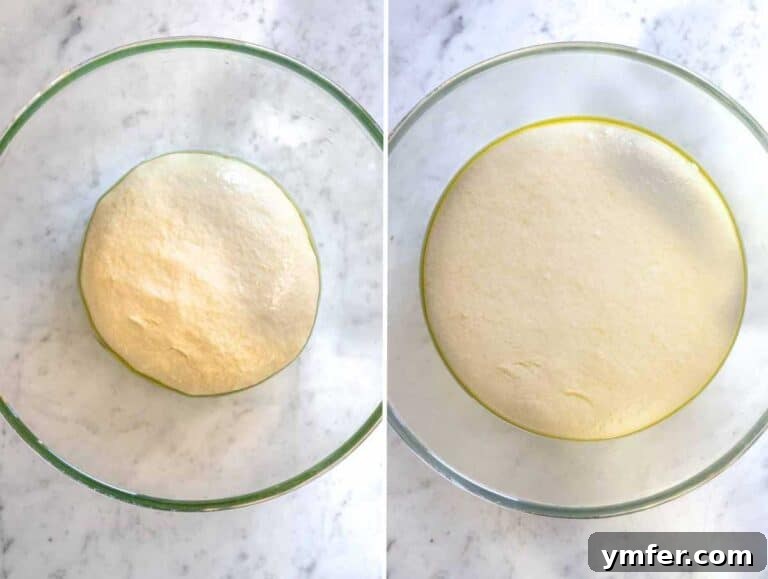
Place the covered bowl in a **warm place** to proof. This crucial step allows the yeast to work its magic, fermenting the sugars in the dough and producing carbon dioxide gas, which is what gives naan its airy, soft, and slightly chewy texture. Let it rest for **1 to 1.5 hours**, or until it has visibly **doubled in volume**. The visual change is a clear indicator of successful proofing.
Tip: An excellent and consistent warm place for proofing is an oven with just the oven light on. The minimal heat generated by the light creates an ideal environment (around 80-90°F or 27-32°C). If your oven light doesn’t work independently, simply turn the oven on for precisely one minute, then turn it off, and immediately place your dough inside to create a warm, draft-free spot.
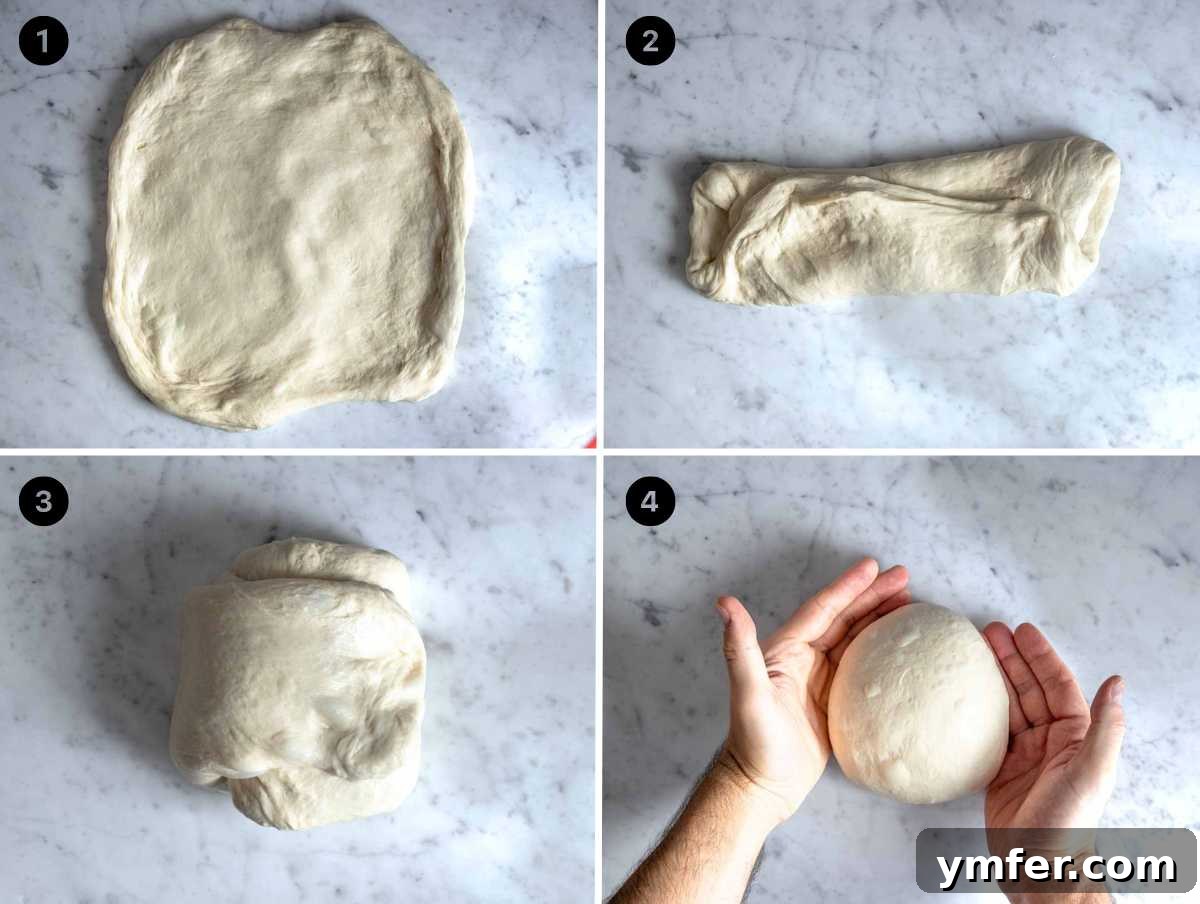
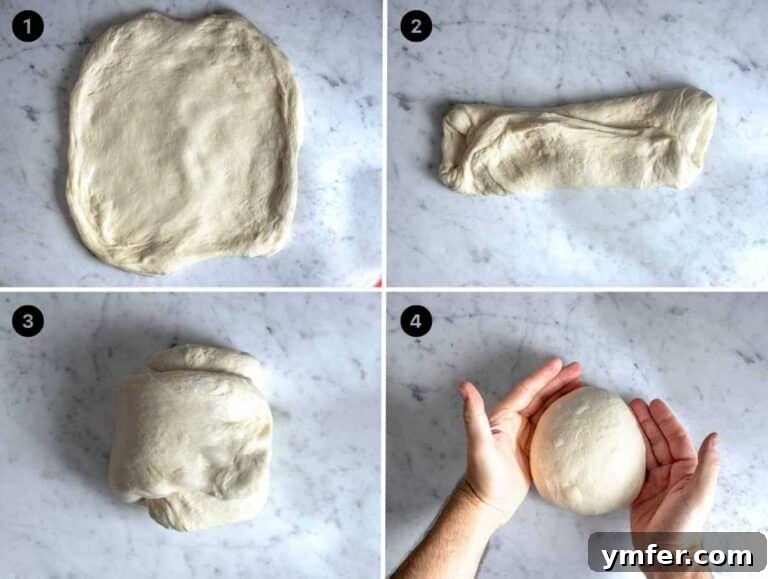
After the initial proof, gently transfer the dough onto a **lightly floured surface**. Deflate it slightly by stretching it out, and then perform a few simple **folds on itself, about four times**. This technique is called “punching down” or “degassing” the dough, and it helps to redistribute the gas pockets, strengthen the gluten structure further, and create a more uniform texture in the final naan. After folding, roll it against your worktop once more to form a **tight, smooth ball**.
Tip: This folding and re-shaping step is essential for developing the dough’s internal structure, leading to more resilient, elastic, and perfectly textured naan that cooks beautifully without being too dense or too fragile.
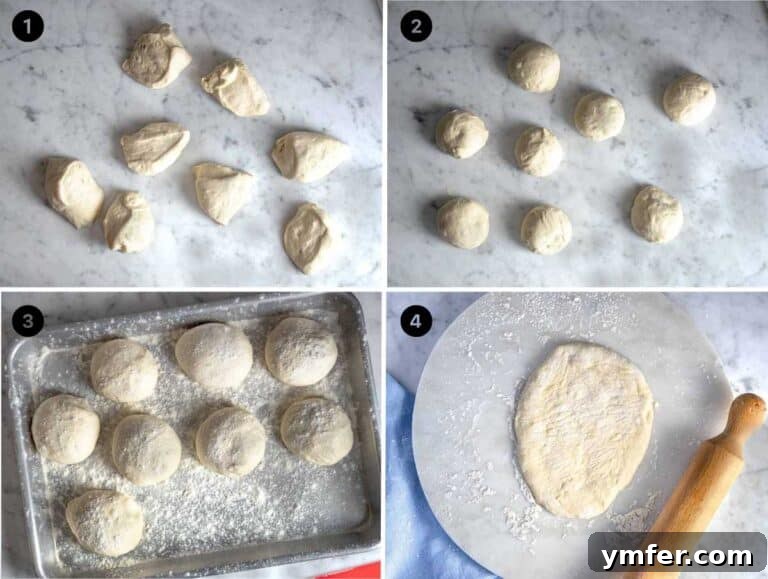
Now, divide the dough into **6 to 8 equal pieces**, depending on your desired naan size. For smaller, more manageable naans that fit easily into a skillet, aim for 8 pieces. Take each individual piece and roll it into a **tight, individual ball** on your worktop. This helps create tension on the surface, which contributes to the naan’s structure. Arrange these smaller dough balls on a **floured baking sheet**, sprinkle them lightly with more flour, and cover with a clean kitchen cloth. Let them rest for another **15 to 30 minutes**; this brief second proof (or bench rest) allows the gluten to relax, making the dough much easier to roll out and contributing further to their ultimate fluffiness.
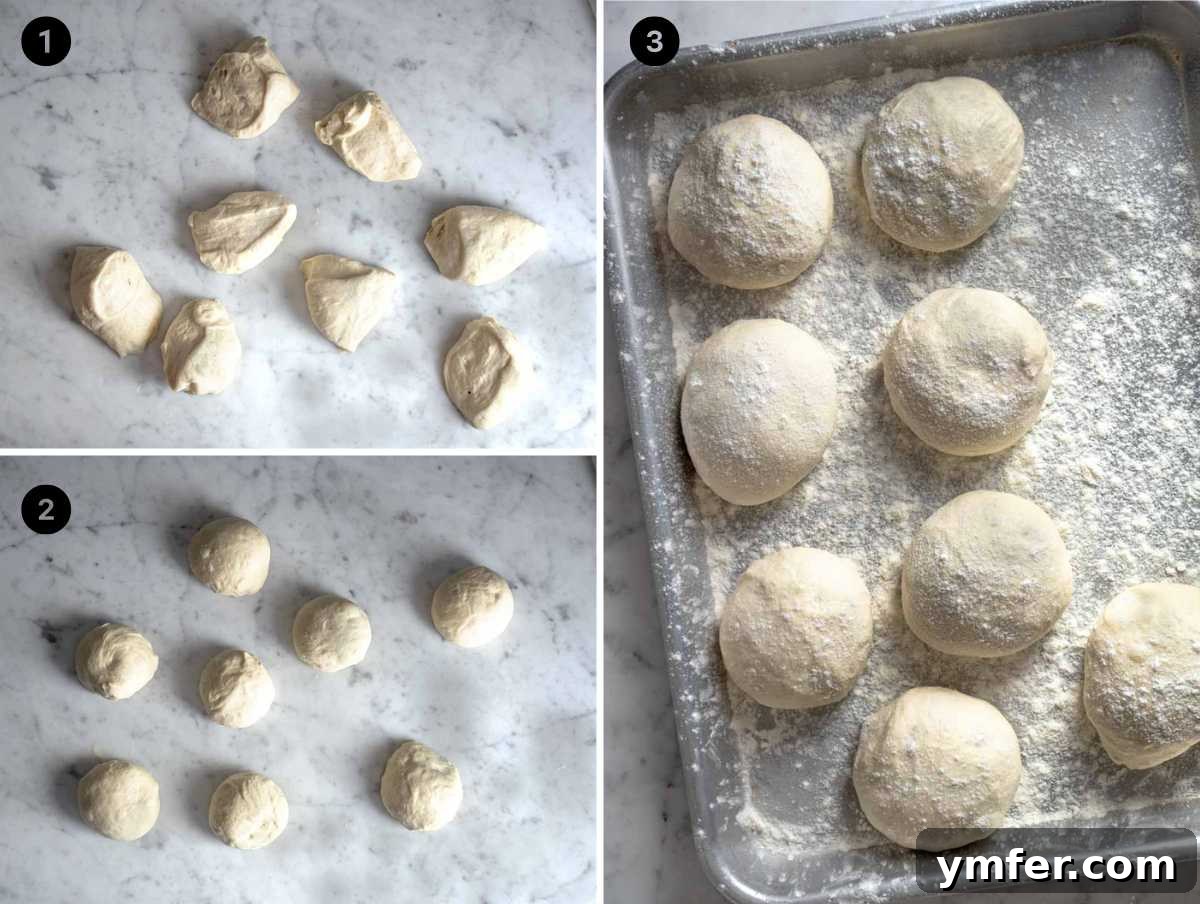
4. Shaping the Naan
Once the individual dough balls have rested sufficiently, it’s time for the final shaping before cooking. On a lightly floured worktop, you have two primary methods: you can either flatten and stretch the dough **with your fingertips**, gently pressing from the center outwards towards the edges, or use a **rolling pin** to achieve a more even thickness. The goal is to roll or stretch each piece into a relatively thin shape, approximately ⅓-inch (0.8 cm) thick. Don’t stress about achieving perfect symmetry; naan is traditionally rustic, and its charm often lies in its imperfect, organic shape. We often shape ours into a classic oval, but feel free to experiment with round or even irregular shapes. The key is even thickness to ensure uniform cooking.
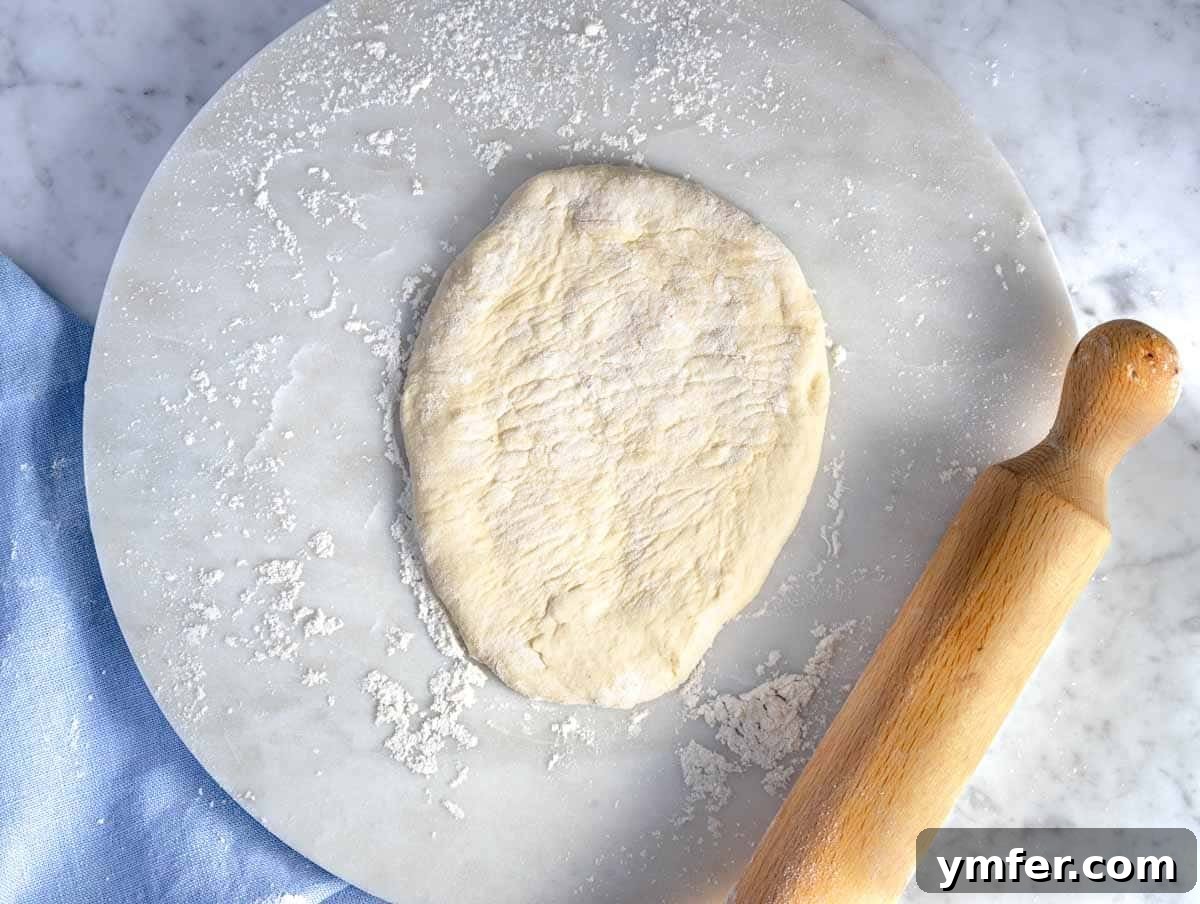
Cooking Naan to Perfection
The cooking method significantly impacts the final texture and flavor of your naan. Below, we detail three popular approaches, including our recommended authentic stovetop technique that best mimics the traditional tandoor.
1. Cast Iron Skillet + Gas Stovetop (Recommended for Authentic Char)
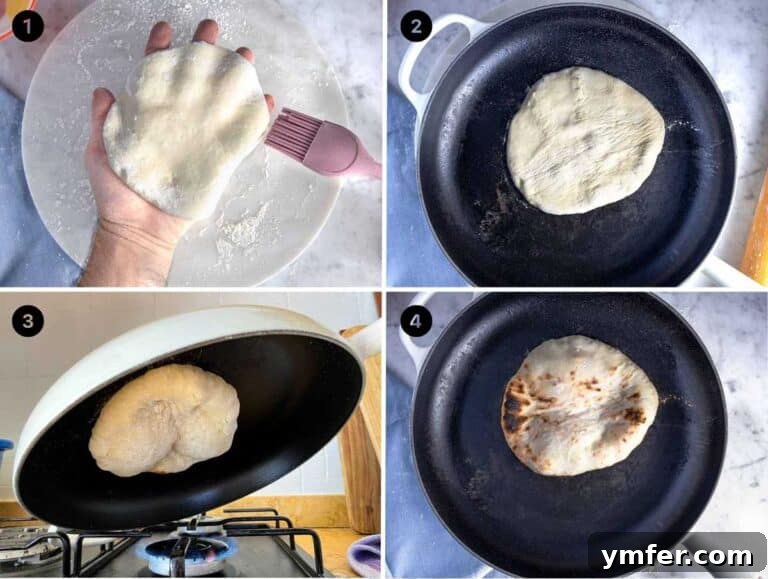
This method best emulates the high, intense heat of a traditional tandoor oven, yielding those beautiful, characteristic bubbles and delightful char. Begin by heating your **cast iron skillet** over medium-high heat until it’s smoking hot. The skillet needs to be very hot to achieve the desired quick cooking and puffing. While the skillet is heating, roll out one naan and hold it flat on your palm. Lightly **brush one side of the naan with water**; this is the crucial trick to make it stick firmly to the hot skillet, mimicking how it adheres to the scorching walls of a tandoor. This contact creates the perfect base texture.
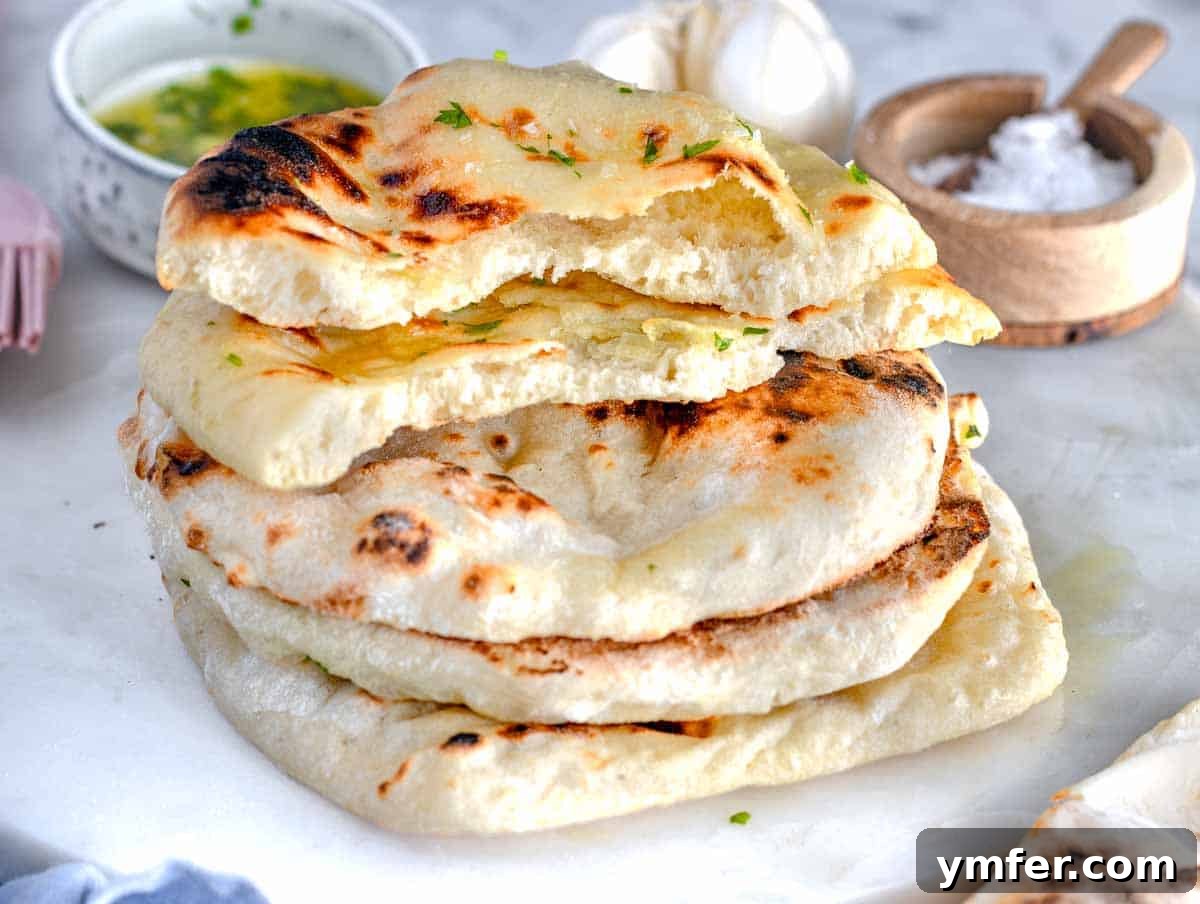
Carefully flip the wet-side-down naan onto the searing hot skillet. Cook for approximately **90 seconds** on this initial side. You’ll observe bubbles rapidly forming on the surface as the bread cooks. Then, using heat-resistant tongs or your hand (if safe, and with caution), carefully pick up the skillet and **turn it upside down directly over the flame** of your gas hob. The naan should remain firmly stuck to the skillet. Cook it directly over the flame, maintaining about a 6-inch (15 cm) distance, for another **30 to 60 seconds**. Watch intently as the naan quickly puffs up, swells, and develops those desirable charred spots, creating an incredibly authentic smoky flavor profile and visually appealing rustic look. Keep cooked naans warm by wrapping them in a clean kitchen towel to maintain their softness.
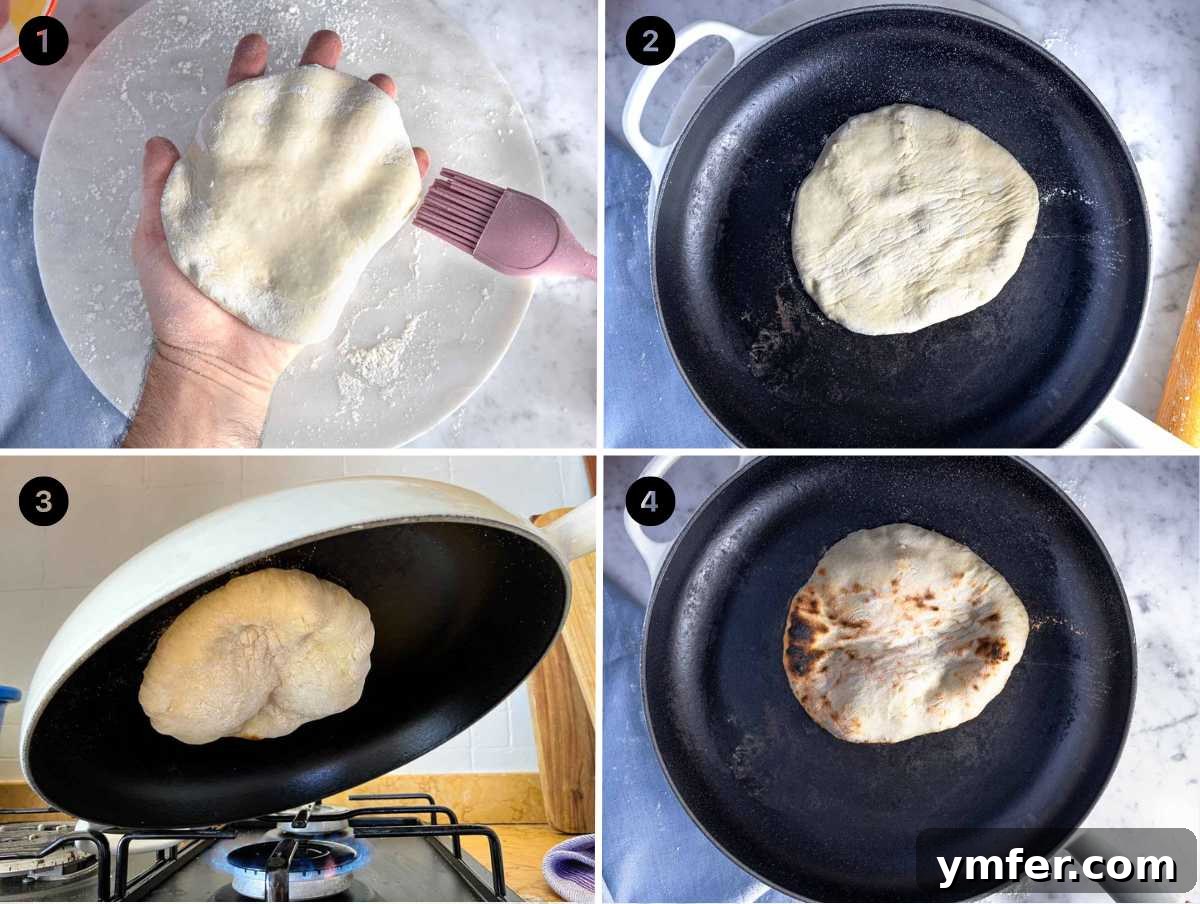
Optional Finishing Touch: For an extra burst of flavor, immediately after cooking and while still warm, brush the naan generously with a mixture of **olive oil** (or melted butter/ghee for a richer taste), finely **minced garlic**, a pinch of **salt**, and fresh **chopped cilantro**. This simple step transforms it into classic, delicious garlic naan, a beloved variation.
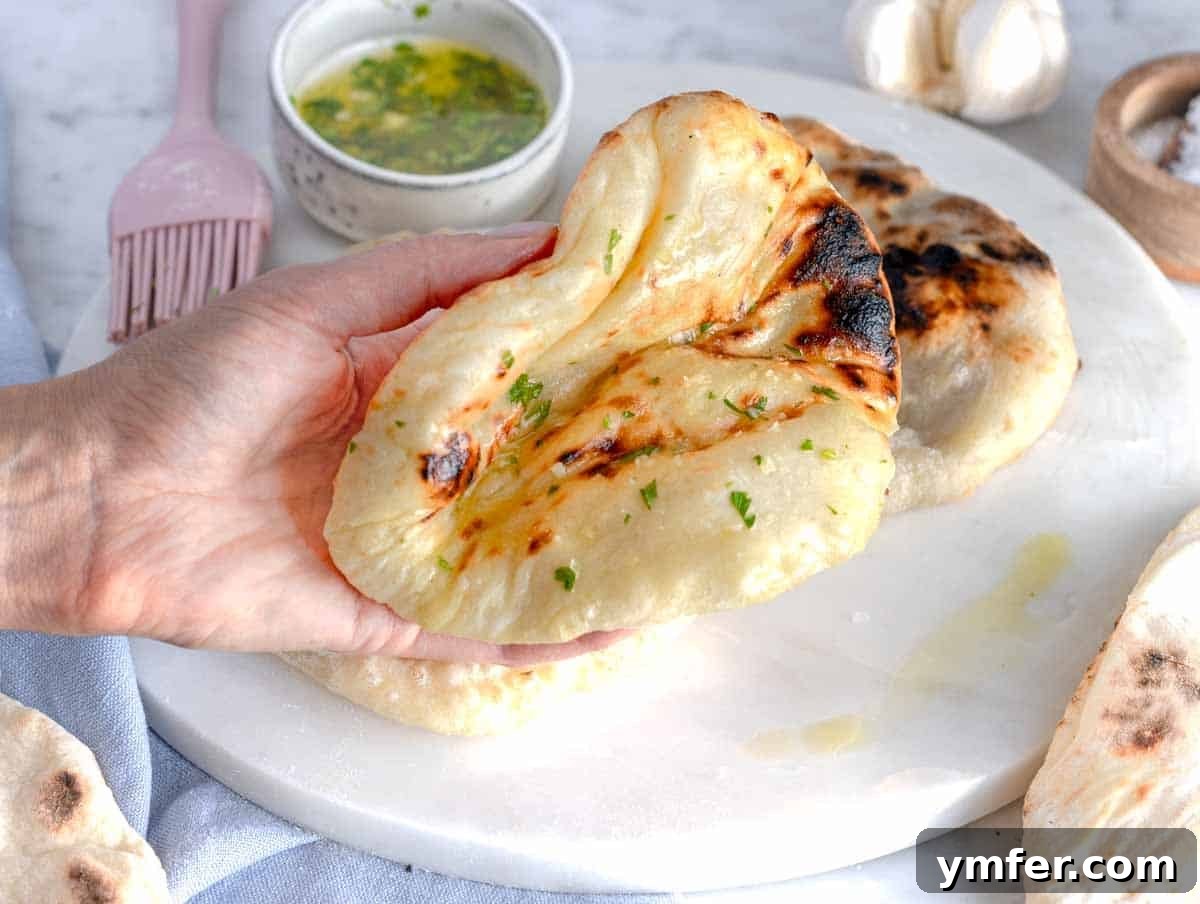
2. Non-Stick Skillet + Induction/Electric Stove
While this method, by nature, won’t give you the deep char and smoky notes of a gas flame or tandoor, it still produces wonderfully **soft and delicious naan** that is tender and enjoyable. Heat a non-stick skillet over medium-high heat. Cook the shaped naan for approximately **90 seconds per side**, or until golden brown spots appear on the surface and the bread begins to puff up. Flip it once and cook the second side until it’s evenly golden brown. This is a great, reliable method for those without gas stovetops or cast iron skillets, ensuring a consistently cooked, tasty flatbread.
3. Oven-Baked Method
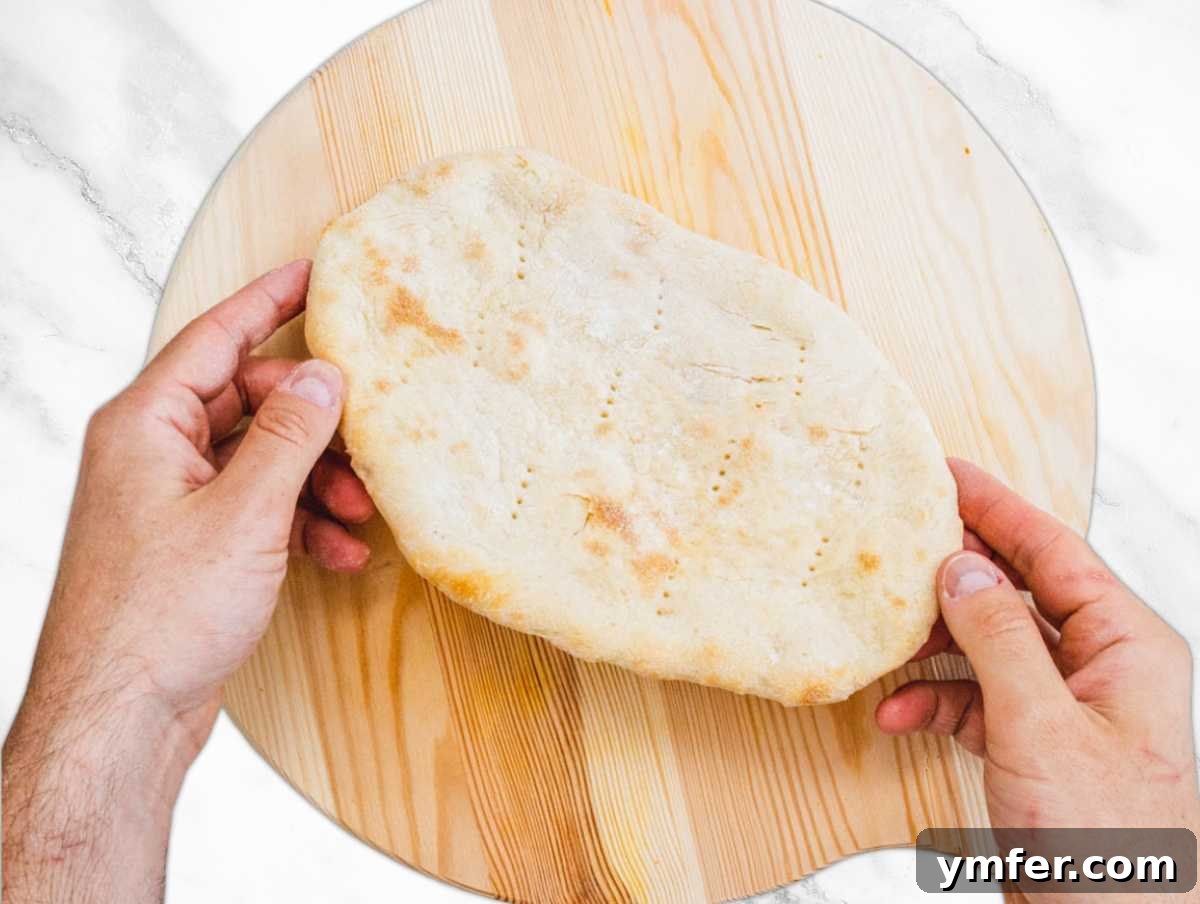
The oven-baked approach yields a slightly **crunchier naan bread** compared to the skillet methods, making it less pillowy and soft but equally delicious in its own right, offering a different textural experience. Preheat your oven to a very high temperature, around **480°F (250°C)**. Arrange the shaped naan breads on a baking tray lined with parchment paper. To encourage some bubbling and ensure more even cooking, gently **pierce them a few times with a fork** across the surface before baking. This helps prevent them from puffing up too much like pita bread.
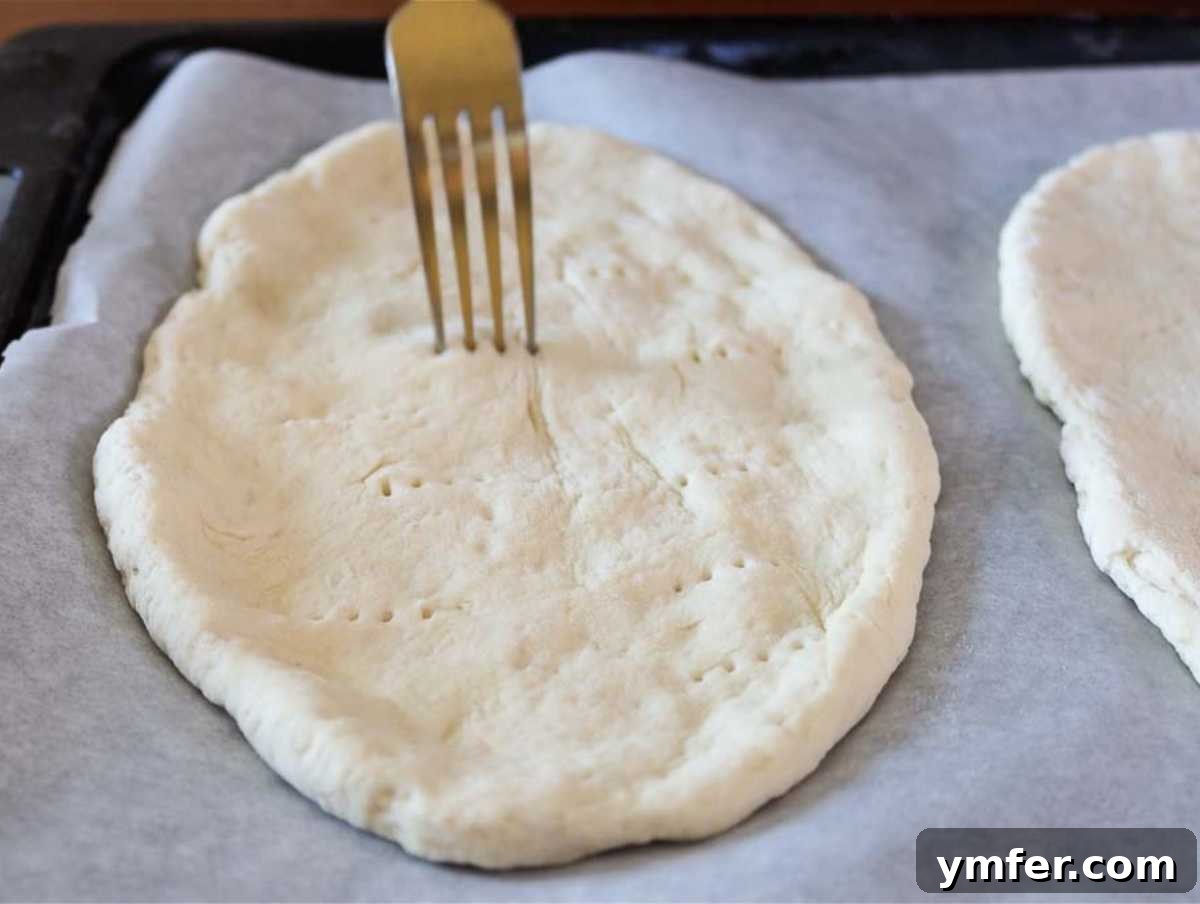
Bake for **5 to 7 minutes**, or until golden brown and slightly puffed. It’s important to keep a close eye on them, as high oven temperatures cook bread quickly, and they can go from perfectly baked to overdone very fast. This method is particularly good if you’re making a larger batch simultaneously and want to cook multiple naans at once.
Serving Suggestions: Beyond the Curry
Naan bread is famously versatile and an absolute must for **soaking up creamy gravies and flavorful sauces** from a variety of delicious Indian dishes. Its soft, absorbent texture makes it the perfect edible utensil for traditional pairings. **We highly recommend serving it with:**
- Dal (creamy split lentils): The subtle sweetness of naan perfectly balances the earthy flavors of dal.
- Chickpea Curry: A hearty and aromatic pairing, ideal for scooping up every last bit of sauce.
- Lentil Curry: A classic comfort food that becomes even more satisfying with warm naan.
- Curry Lentil Soup: Dip pieces of naan into this rich and spiced soup for a delightful meal.
- Vegetable Curry: The ideal complement to a medley of spiced vegetables.
- Chickpea Stew: Hearty and flavorful, elevated by the soft texture of naan.
- Chana Masala: A spicy and tangy chickpea dish that is a match made in heaven with naan.
- Moong Dal: Light and nutritious, this dal benefits from the robust presence of naan.
- Mung Bean Soup: A comforting soup that becomes a full meal when served with fresh naan.
- Chana Dal: A savory and slightly sweet dal that pairs beautifully.
- Navratan Korma: A rich and creamy mixed vegetable curry that naan effortlessly complements.
Beyond these classic pairings, homemade naan can elevate many other meals! Try using it as a base for quick and delicious mini pizzas, as a flavorful wrap for grilled vegetables, paneer, falafel, or kebabs, or simply torn and dipped into creamy hummus, smoky baba ghanoush, or your favorite fresh salsa. Its rich, slightly sweet, and savory flavor also makes it a fantastic accompaniment to robust soups or stews from around the world. The possibilities are truly endless for this versatile Indian-inspired bread, making it a staple in any adventurous kitchen.
Suggested Pairings:
30-minute meals
Dal – Creamy Split Lentils
Curry Recipes
Lentil Curry
Curry Recipes
Chickpea Curry
30-minute meals
Chana Masala in 30 Minutes (Protein Rich and Flavorful)
Naan Bread Substitutions & Variations
This naan bread recipe is surprisingly flexible, allowing for various substitutions to suit your dietary needs, preferences, or what you simply have available in your pantry. Don’t be afraid to experiment!
- All-purpose flour: While standard all-purpose flour works perfectly for a light and fluffy naan, you can achieve a slightly different texture by substituting with “00” pizza flour (known for its fine texture and high gluten) or bread flour (which has a higher protein content for more chewiness). For a healthier, denser naan with more fiber, try using a blend of half all-purpose and half whole wheat flour. This adds a nutty flavor profile.
- Olive oil: For a richer flavor profile and a more traditional touch (if not keeping it strictly vegan), melted ghee or clarified butter can be used interchangeably with olive oil in the dough. This imparts a depth of flavor that complements Indian cuisine beautifully.
- Instant dry yeast: If you prefer using fresh yeast (also known as cake yeast), simply use three times the amount of fresh yeast compared to the dry yeast specified. Remember to activate it in the lukewarm water with sugar as described in the recipe steps.
- Water: For a slightly richer dough and an even more tender crumb, you can substitute lukewarm milk (dairy or a neutral-flavored plant-based milk like almond or soy milk) for water. The fats and sugars in milk can contribute to a softer texture and a slightly richer taste.
Popular Naan Variations:
Once you’ve mastered the basic naan, consider these popular variations to customize your bread:
- **Garlic Naan:** As mentioned in the cooking section, brush generously with a mixture of melted butter/ghee or olive oil, plenty of finely minced garlic, and fresh chopped cilantro immediately after cooking.
- **Butter Naan:** For a simpler, yet equally delicious, rich naan, just brush liberally with melted butter or ghee after it comes off the heat.
- **Cheese Naan:** This is a crowd-pleaser! Roll out the dough partially, sprinkle with shredded cheese (mozzarella, cheddar, or even crumbled paneer work wonderfully), fold the dough over to enclose the cheese, seal the edges, and then gently roll it out again before cooking.
- **Kashmiri Naan:** A sweeter, richer version, often stuffed with a mixture of finely chopped nuts (like almonds or pistachios), raisins, cherries, and sometimes coconut. It’s typically served with rich, creamy curries or as a special treat.
- **Peshwari Naan:** Similar to Kashmiri naan but usually includes a paste made from desiccated coconut, almonds, and sugar.
Storage & Reheating Tips
To ensure you can enjoy your delicious homemade naan for longer, proper storage is key. Naan is best enjoyed fresh, but these methods help preserve its quality:
- Room temperature: First, allow the naan to cool completely on a wire rack to prevent condensation and sogginess. Once fully cooled, store it in an airtight container or a plastic bag to prevent it from drying out and becoming stale. It will typically stay fresh and soft for up to 3 days. When you’re ready to enjoy it again, a quick brush with a tiny bit of water (this creates steam, re-hydrating the bread) and a warm-up in the microwave or a hot, dry skillet will bring back its lovely softness and pliability.
- Freezer: Naan freezes exceptionally well, making it perfect for meal prep. Once completely cooled, arrange the naans in a single layer or with sheets of parchment paper in between each one to prevent sticking, inside a heavy-duty freezer-friendly bag. Squeeze out as much air as possible before sealing to prevent freezer burn. Freeze for up to 3 months. When you’re ready to use it, simply thaw at room temperature for a few hours (or overnight in the refrigerator) before reheating as described above.
Explore More Flatbread Recipes
If you’ve thoroughly enjoyed the process and delicious results of making this naan bread, you might love exploring other fantastic flatbreads and dough recipes from around the world. Expand your baking repertoire with these exciting options:
- Piadina (Italian flatbread): A thin, unleavened bread from Emilia-Romagna, perfect for savory fillings.
- Corn Tortillas: Essential for tacos, enchiladas, and many Latin American dishes.
- Pita Bread: A classic Middle Eastern pocket bread, great for stuffing.
- Flatbread Pizza: A quick and customizable pizza base for any toppings.
- Focaccia (no-knead): A simple, airy Italian bread with a rich olive oil flavor.
- Neapolitan Pizza Dough: The authentic base for world-famous Neapolitan pizzas.
- Classic Pizza Dough: A versatile recipe for all your pizza night needs.
- Quick Pizza Dough: For those times when you need pizza fast!
- Ooni Pizza Dough: Optimized for high-temperature outdoor pizza ovens.
- Caprese Sandwich (using flatbread): A fresh and simple Italian sandwich.
- Focaccia Sandwich: Using robust focaccia as a flavorful sandwich base.
- Focaccia Pizza: A delicious hybrid, marrying the textures of focaccia with pizza toppings.
You might also like:
Bread Recipes
Focaccia (No-Knead)
Recipes
Flatbread Pizza
Bread Recipes
Piadina (Italian Flatbread)
Bread Recipes
Pita Bread

Naan Bread Recipe
This authentic homemade naan bread recipe delivers pillowy-soft interiors and a delightfully crisp, charred exterior. It’s surprisingly easy to make and the perfect accompaniment to your favorite Indian dishes, soups, and dips.
Ingredients
For the Naan Dough:
- 1 cup lukewarm water
- 2 teaspoons instant dry yeast
- 1 tablespoon sugar
- 2½ cups all-purpose flour + more for kneading
- 1 tablespoon olive oil
- 1 teaspoon salt
For Brushing on Top (Optional):
- 3 tablespoons olive oil or melted butter/ghee
- 2 cloves garlic finely chopped
- 1 handful cilantro chopped
- 2 pinches salt
Instructions
-
Make the Dough: In a large mixing bowl, combine 1 cup lukewarm water, 2 teaspoons instant dry yeast, and 1 tablespoon sugar. Stir gently with a whisk until the yeast and sugar dissolve. Let it sit for 5-10 minutes until lightly foamy. Add 2½ cups all-purpose flour, 1 tablespoon olive oil, and 1 teaspoon salt. Stir with a wooden spoon until a shaggy dough forms.

The initial stage of dough preparation. -
Transfer the dough to a well-floured worktop and knead with your hands for 5 minutes until smooth, soft, and elastic. Add more flour sparingly if the dough is too sticky. Shape into a ball.
-
Proofing: Place the dough ball into a large, lightly oiled bowl. Brush the top with a little oil, then cover with plastic wrap or a damp towel. Let it proof in a warm place for 1 to 1.5 hours, or until it has doubled in volume. (An oven with the light on works well).
Dough before and after proofing. -
Once proofed, transfer the dough to a lightly floured surface. Stretch it slightly and fold it over itself four times to build structure. Roll it into a tight ball.
Folding the dough for enhanced texture. -
Shaping: Divide the dough into 6 to 8 equal pieces. Shape each piece into a tight ball. Arrange them on a floured baking sheet, sprinkle with flour, cover with a clean kitchen cloth, and let rest for 15 to 30 minutes. This makes them easier to roll. Roll out each dough ball into an oval shape, about ⅓-inch (0.8 cm) thick.
Shaping the naan into an oval. -
Cooking on Cast Iron Skillet + Gas Stove: Heat a cast iron skillet over medium-high heat until very hot. Hold one shaped naan flat on your hand, brush one side with water, and carefully place it wet-side-down onto the hot skillet. Cook for about 90 seconds until bubbles form. Then, invert the skillet directly over a gas flame (about 6 inches/15 cm distance) for 30-60 seconds until the naan puffs up and develops charred spots. Wrap cooked naans in a clean kitchen towel to keep warm.
Cooking on Non-Stick Skillet + Induction/Electric Stove: Heat a non-stick skillet over medium-high heat. Cook naan for about 90 seconds per side until golden brown and puffed. This method won’t char but yields soft, delicious naan.
Oven-Baked Method: For a slightly crunchier naan, preheat your oven to 480°F (250°C). Arrange pierced naans on a parchment-lined baking tray. Bake for 5 to 7 minutes until golden brown.
Cooking naan on a gas stovetop for authentic char. -
Serve: Naan is best served immediately to soak up creamy gravies and sauces from Indian dishes like lentil curry, dal, chickpea curry, and chana masala. Optionally, brush with a mixture of olive oil/melted butter/ghee, minced garlic, salt, and chopped cilantro after cooking for garlic naan.
Enjoy your freshly made naan!
Recipe Notes
Nutrition information is an estimate for 1 naan bread out of 8 servings.
SUBSTITUTIONS:
- All-purpose flour: Substitute 00 pizza flour or bread flour for a slightly different texture. Half all-purpose and half whole wheat flour can also be used for a denser, healthier option.
- Olive oil: Melted ghee or butter can be used instead of olive oil for a richer flavor.
- Instant dry yeast: If using fresh yeast, use three times the amount of fresh yeast compared to dry yeast.
- Water: Lukewarm milk (dairy or plant-based) can be substituted for water for a richer dough.
STORAGE:
- Room temperature: Cool completely, then store in an airtight container or plastic bag for up to 3 days. Reheat in the microwave after brushing with a little water.
- Freezer: Cool completely, then store in a freezer-friendly bag, removing excess air. Freeze for up to 3 months. Thaw at room temperature before reheating.
Nutrition Information (per serving)
Calories: 241kcal, Carbohydrates: 38g, Protein: 5g, Fat: 8g, Saturated Fat: 1g, Polyunsaturated Fat: 1g, Monounsaturated Fat: 5g, Trans Fat: 0g, Cholesterol: 0mg, Sodium: 294mg, Potassium: 58mg, Dietary Fiber: 1g, Sugar: 2g, Vitamin B6: 0.03mg, Vitamin C: 0.003mg, Vitamin E: 1mg, Vitamin K: 4µg, Calcium: 8mg, Folate: 104µg, Iron: 2mg, Manganese: 0.3mg, Magnesium: 11mg, Zinc: 0.4mg
Tried this recipe? Leave a comment below or mention @theplantbasedschool on Instagram. We love hearing from you ⭐️ 💚.
More Recipes You Might Also Like:
Collections
20 Easy Curry Recipes
Mains
40 High Protein Vegetarian Meals
Collections
30 Lentil Recipes
Collections
30 Easy Soup Recipes