
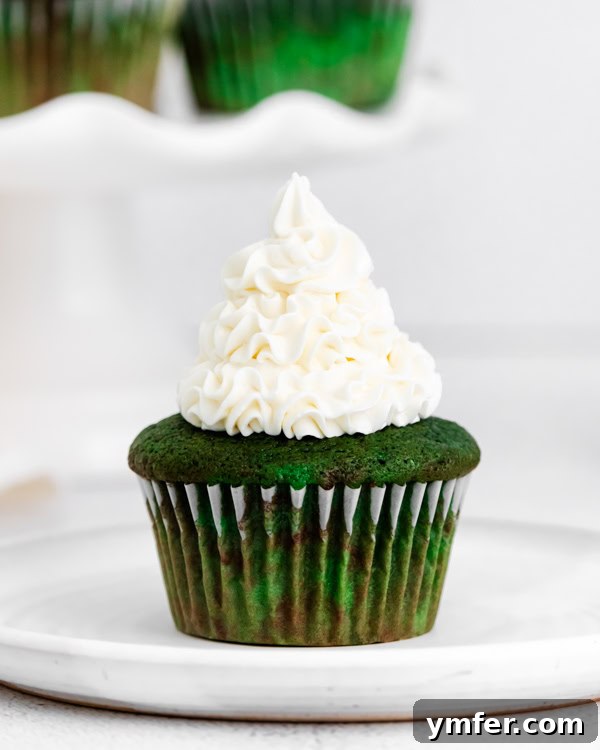
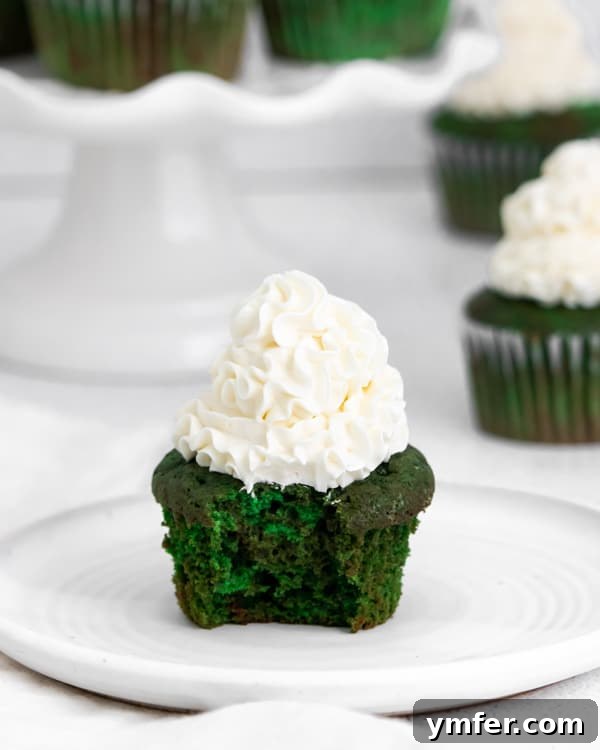
Welcome to the enchanting world of Green Velvet Cupcakes – a festive and utterly delicious twist on the classic red velvet that’s perfect for any celebration! Imagine bite-sized cakes, moist and vibrant green, crowned with a cloud of fluffy vanilla ermine frosting. These aren’t just cupcakes; they’re a statement, a delightful conversation starter, and an irresistible sweet treat that will have everyone asking for more. Whether you’re celebrating St. Patrick’s Day, adding a unique touch to your Christmas dessert table, or simply craving something extraordinary, these easy-to-make cupcakes are guaranteed to bring a smile to every face.
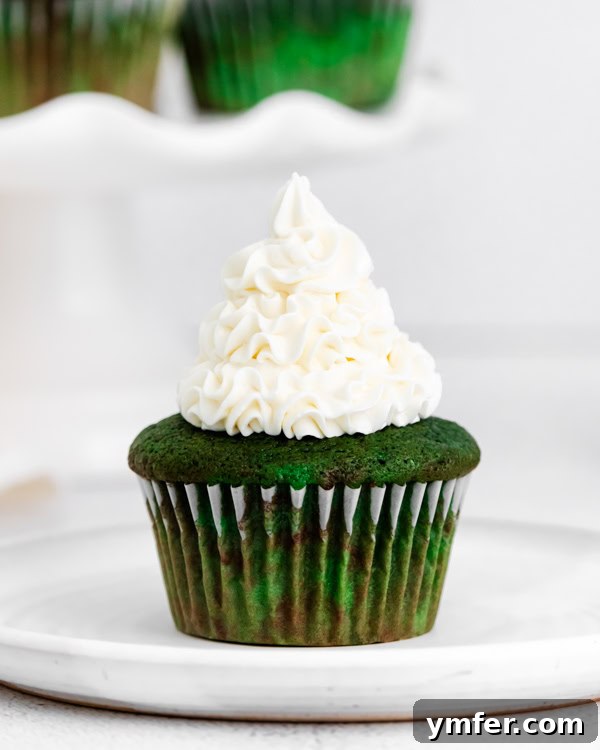
There’s a special kind of joy that comes with baking, especially when the result is a tray of beautifully frosted cupcakes. While red velvet has long been a beloved classic, these green velvet cupcakes offer a fresh, exciting alternative that retains all the iconic qualities you adore: the tender crumb, the subtle hint of cocoa, and that signature tangy-sweet flavor profile. The vibrant green hue makes them incredibly appealing for festive occasions, transforming a traditional dessert into something truly magical and memorable.
What truly sets these cupcakes apart, however, is the topping: a luxurious vanilla ermine frosting. For those unfamiliar, ermine frosting – often referred to as flour buttercream – might sound unusual, but it’s a revelation. Unlike overly sweet powdered sugar buttercreams or rich cream cheese frostings, ermine frosting offers a uniquely silky, light, and less-sweet finish that perfectly complements the cake’s subtle tang. It’s incredibly creamy, melts in your mouth, and allows the nuanced flavors of the green velvet cake to truly shine through. Trust us, once you try this frosting, it will become your new favorite for velvet cakes.
This recipe is inspired by the legendary Magnolia Bakery’s cupcake recipe, a testament to its timeless appeal and flawless execution. If you’ve ever savored their famous cupcakes, you’ll recognize the familiar perfection in every bite of these green beauties. We’ve simply given it a fun, festive green makeover, ensuring that the taste and texture remain absolutely divine.
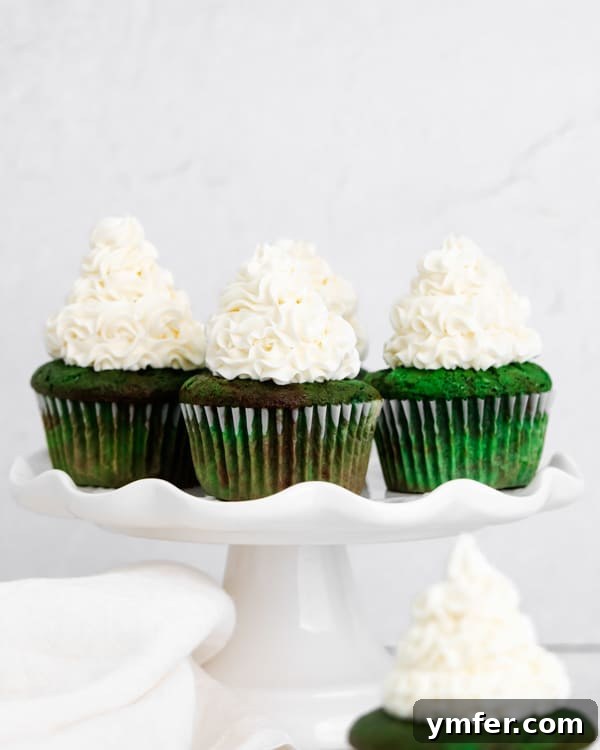
The Allure of Velvet Cake: A Brief History and the Green Twist
Velvet cakes have a rich history, with origins tracing back to the Victorian era. Initially, the “velvet” in their name referred to the cake’s fine, soft crumb, which was achieved by using cocoa and acid (like vinegar or buttermilk). The distinctive red hue of traditional red velvet cakes was originally a result of the chemical reaction between acidic ingredients and natural cocoa powder, which brought out red anthocyanin pigments. Later, food coloring became a common addition to enhance this vibrant color.
Our green velvet cupcakes embrace this rich heritage while adding a playful, contemporary twist. By substituting red food coloring with green, we transform a classic into a holiday-ready masterpiece. The underlying cake recipe remains the same, ensuring that familiar tender texture and delicate flavor. This makes them versatile enough for various occasions, from a festive St. Patrick’s Day treat to a unique addition to your Christmas cookie platters, or even just a fun surprise for a birthday party. The slight hint of chocolate from the cocoa powder combined with the buttermilk and vinegar creates that signature velvet cake flavor that is truly irresistible.
Color Customization: Can I Use Red Food Dye Instead?
Absolutely! The beauty of this recipe lies in its adaptability. While we’ve chosen a festive green to celebrate holidays like St. Patrick’s Day and Christmas, the base velvet cake recipe is fundamentally the same as a traditional red velvet. If you prefer the classic vibrant red, simply swap the green food coloring for red. You can experiment with any color you like to match a theme or simply your favorite shade! The flavor profile remains consistent, regardless of the hue, ensuring a delicious outcome every time.
Why Ermine Frosting is the Perfect Partner for These Cupcakes
When it comes to frosting, many people immediately think of cream cheese or traditional American buttercream. However, for velvet cakes, our fluffy vanilla ermine frosting is truly a game-changer. This “cooked flour frosting” or “milk-and-flour frosting” provides a texture and taste that’s unparalleled.
Here’s why it’s superior for these green velvet cupcakes:
- Less Sweet: Unlike many frostings that can be overpoweringly sweet, ermine frosting has a balanced sweetness that lets the cake’s flavor shine.
- Incredibly Smooth and Creamy: It’s exceptionally silky, almost like a whipped cream, yet it holds its shape beautifully for piping.
- Velvety Texture: The cooked flour mixture creates a uniquely stable and smooth emulsion with the butter and sugar, resulting in a frosting that truly lives up to the “velvet” name.
- Light and Fluffy: It’s lighter than traditional buttercreams, making for a more enjoyable eating experience without feeling heavy.
The process involves cooking milk and flour into a thick paste, then cooling it completely before whipping it into softened butter, sugar, and vanilla. This method eliminates the graininess often found in powdered sugar frostings and produces a dreamy, smooth texture that you’ll absolutely fall in love with. It’s 100% worth the extra effort for this divine frosting.
Achieving the Perfect Green: What Type of Food Coloring Works Best?
For vibrant, consistent color in your green velvet cupcakes, gel food coloring is hands down the best option. Unlike liquid food coloring, which can thin out your batter and require a large quantity to achieve a strong color, gel food coloring is highly concentrated. This means you need much less of it to get that brilliant green hue, without altering the delicate consistency of your cupcake batter.
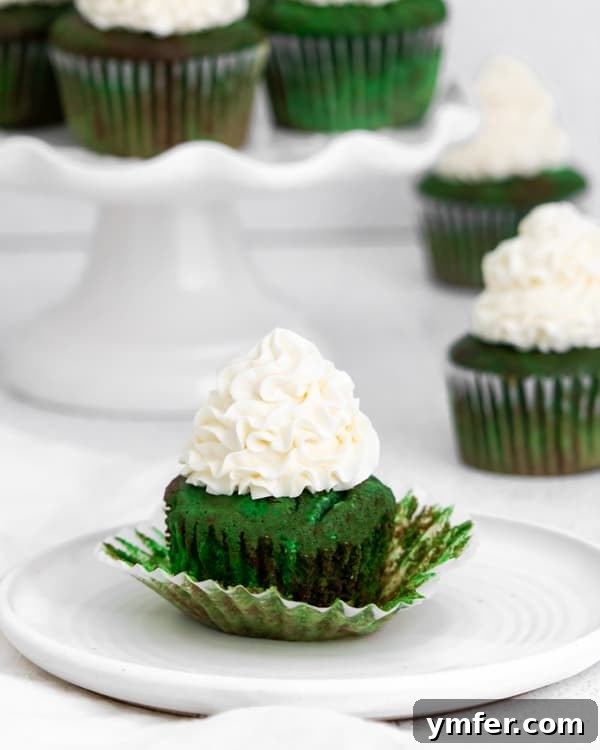
When adding color, start with a smaller amount and gradually add more until you reach your desired shade. Remember, the color often intensifies slightly during baking. I’ve learned from experience that mixing different shades of green can sometimes lead to an inconsistent or “splotchy” color, as I once did when I ran out of my preferred brighter green. While it still tasted absolutely delicious – because we never waste a good cupcake! – for a truly uniform and striking green, stick to one high-quality gel food coloring.
Tips for Baking Flawless Green Velvet Cupcakes
Creating these perfect green velvet cupcakes is straightforward, but a few key tips can elevate your baking experience:
- Room Temperature Ingredients: Ensure your butter, eggs, and buttermilk are at room temperature. This allows them to emulsify properly, creating a smoother, more uniform batter and a finer crumb in your baked cupcakes.
- Measure Flour Correctly: For cake flour, spoon it into your measuring cup and then level it off with a straight edge. Don’t scoop directly from the bag, as this can compact the flour and result in a dry cake.
- Don’t Overmix: After adding the dry ingredients and buttermilk mixture, mix just until combined. Overmixing develops the gluten in the flour, leading to tough, dense cupcakes.
- Fill Cupcake Liners Properly: Fill each cupcake liner about two-thirds full. This prevents overflow and ensures a nice dome shape.
- Even Baking: Rotating your muffin pans halfway through baking helps ensure that all cupcakes bake evenly, especially if your oven has hot spots.
- Cool Completely: Always allow cupcakes to cool completely on a wire rack before frosting. Frosting warm cupcakes will cause the frosting to melt and slide off.
Storing Your Green Velvet Cupcakes
These delightful green velvet cupcakes are so good, they often don’t last long! However, if you find yourself with leftovers (a rare but possible occurrence), proper storage is key to maintaining their freshness and the integrity of the ermine frosting.
Since the frosting is a type of buttercream, it can safely be left at a moderate room temperature (around 70°F or 21°C) for about a day. Avoid direct sunlight or very warm environments, as this can cause the frosting to soften or melt. For longer storage, or if your kitchen is particularly warm, it’s best to refrigerate them. Place the cupcakes in an airtight container to prevent them from drying out or absorbing odors from the fridge. They will keep well in the refrigerator for up to 3-4 days. Before serving, allow them to come to room temperature for about 30 minutes to an hour; this will ensure the cake is soft and the frosting regains its creamy texture.
Serving and Decorating Suggestions
While these green velvet cupcakes are stunning on their own, a few extra touches can make them even more special. Consider:
- Sprinkles: Add green, white, or rainbow sprinkles for an extra festive touch. Gold sprinkles would be beautiful for Christmas or New Year’s!
- Edible Glitter: A dusting of edible glitter can add a magical shimmer.
- Holiday Picks: Small St. Patrick’s Day shamrock picks or miniature Christmas ornaments can be inserted for thematic flair.
- Chocolate Shavings: A light sprinkle of white or dark chocolate shavings can add a lovely texture and complement the subtle cocoa in the cake.
- Fresh Mint Leaves: For a sophisticated touch, a tiny fresh mint leaf on top of each cupcake adds a pop of natural green and a hint of fresh aroma.
These cupcakes are perfect for potlucks, parties, family gatherings, or simply as an indulgent treat for yourself. Their vibrant color and exquisite taste are sure to be a hit!
Love these Green Velvet Cupcakes?
If you’re as smitten with these green velvet cupcakes as we are, you’ll definitely want to explore some of our other delectable dessert creations. Expand your baking repertoire with these crowd-pleasing recipes:
- Black Forest Cake: A timeless classic with rich chocolate, cherries, and whipped cream.
- Easy Birthday Cake Macarons: Delicate and colorful, perfect for any celebration.
- Sourdough Discard Cinnamon Crumb Cake: A cozy and comforting cake with a delightful crumb topping.
- Fourth of July Tie Dye Cupcakes: Fun and patriotic, bursting with vibrant colors.
- Cheesecake Stuffed Strawberries: A light, elegant, and refreshing dessert.
Green Velvet Cupcakes
Equipment
-
KitchenAid 5-Quart Mixer
-
Non-Stick Bakeware Muffin and Cupcake Pan
-
Green Food Coloring
Ingredients
For cake:
- 3-1/2 cups cake flour
- 3/4 cups unsalted butter, room temperature
- 2 cups granulated sugar
- 3 large eggs, room temperature
- 6 tablespoons green food coloring
- 3 tablespoons unsweetened cocoa
- 1-1/2 teaspoons vanilla extract
- 1-1/2 teaspoons kosher salt
- 1-1/2 cups buttermilk
- 1-1/2 teaspoons cider vinegar
- 1-1/2 teaspoons baking soda
For Frosting:
- 6 tablespoons all-purpose flour
- 2 cups milk
- 4 sticks unsalted butter, room temperature
- 2 cups sugar
- 2 teaspoons vanilla extract
Instructions
For cake:
-
Preheat oven to 350°F (175°C). Prepare two 12-cup muffin pans by lining each cup with paper liners.
-
In a large bowl, using an electric mixer on medium speed, cream together the softened butter and granulated sugar for about 5 minutes, until the mixture is very light and fluffy. Add the eggs one at a time, beating well after each addition to fully incorporate. In a small separate bowl, whisk together the green food coloring, cocoa powder, and vanilla extract until smooth. Add this vibrant mixture to the main batter and beat until well combined.
-
In a measuring cup, stir the kosher salt into the buttermilk. Gradually add the buttermilk mixture to the batter in three alternating additions with the cake flour, beginning and ending with the flour. With each addition, beat on low speed just until the ingredients are incorporated; be careful not to overbeat the batter. In another small bowl, combine the cider vinegar and baking soda; stir quickly and add this effervescent mixture to the batter, mixing well for just a few seconds. Use a rubber spatula to scrape down the sides of the bowl, ensuring all ingredients are well blended and the batter is smooth.
-
Evenly divide the green velvet batter among the prepared cupcake tins, filling each liner about two-thirds full. Arrange the oven racks in the upper and lower thirds of the oven. Bake the cupcakes for approximately 20 minutes, switching the positions of the pans halfway through baking to ensure even cooking. The cupcakes are done when a wooden skewer or toothpick inserted into the center comes out clean. Allow the cupcakes to cool in the muffin pans for 10 minutes before transferring them to a wire rack to cool completely before frosting.
For icing:
-
In a medium-sized saucepan, whisk the all-purpose flour into the milk until the mixture is completely smooth and free of lumps. Place the saucepan over medium heat, and stirring constantly, cook the mixture for 10-15 minutes, or until it becomes very thick and starts to bubble. This will create a thick, pudding-like paste. Remove from heat and immediately cover the surface of the mixture directly with plastic wrap or waxed paper to prevent a skin from forming. Allow it to cool completely to room temperature, which will take about 30 minutes.
-
In a large bowl, using an electric mixer on medium-high speed, beat the softened unsalted butter for about 3 minutes until it is perfectly smooth and creamy. Gradually add the granulated sugar, continuing to beat for another 3 minutes until the mixture is light and fluffy. Incorporate the vanilla extract and beat well until fully combined.
-
Add the completely cooled milk-and-flour mixture to the butter and sugar mixture. Continue to beat on medium-high speed for a full 5 minutes. During this time, the frosting will become incredibly smooth, remarkably fluffy, and noticeably whiter in color. Once beaten, cover the bowl and refrigerate the frosting for exactly 15 minutes (no less and no longer – setting a timer is recommended!). This brief chilling period helps stabilize the frosting. Use the frosting immediately after chilling for the best texture and piping consistency.
Nutrition
Calories: 316kcal
Carbohydrates: 37g
Protein: 3g
Fat: 18g
Saturated Fat: 11g
Polyunsaturated Fat: 6g
Cholesterol: 65mg
Sodium: 274mg
Sugar: 28g
Nutrition information is automatically calculated, so should only be used as an approximation.