
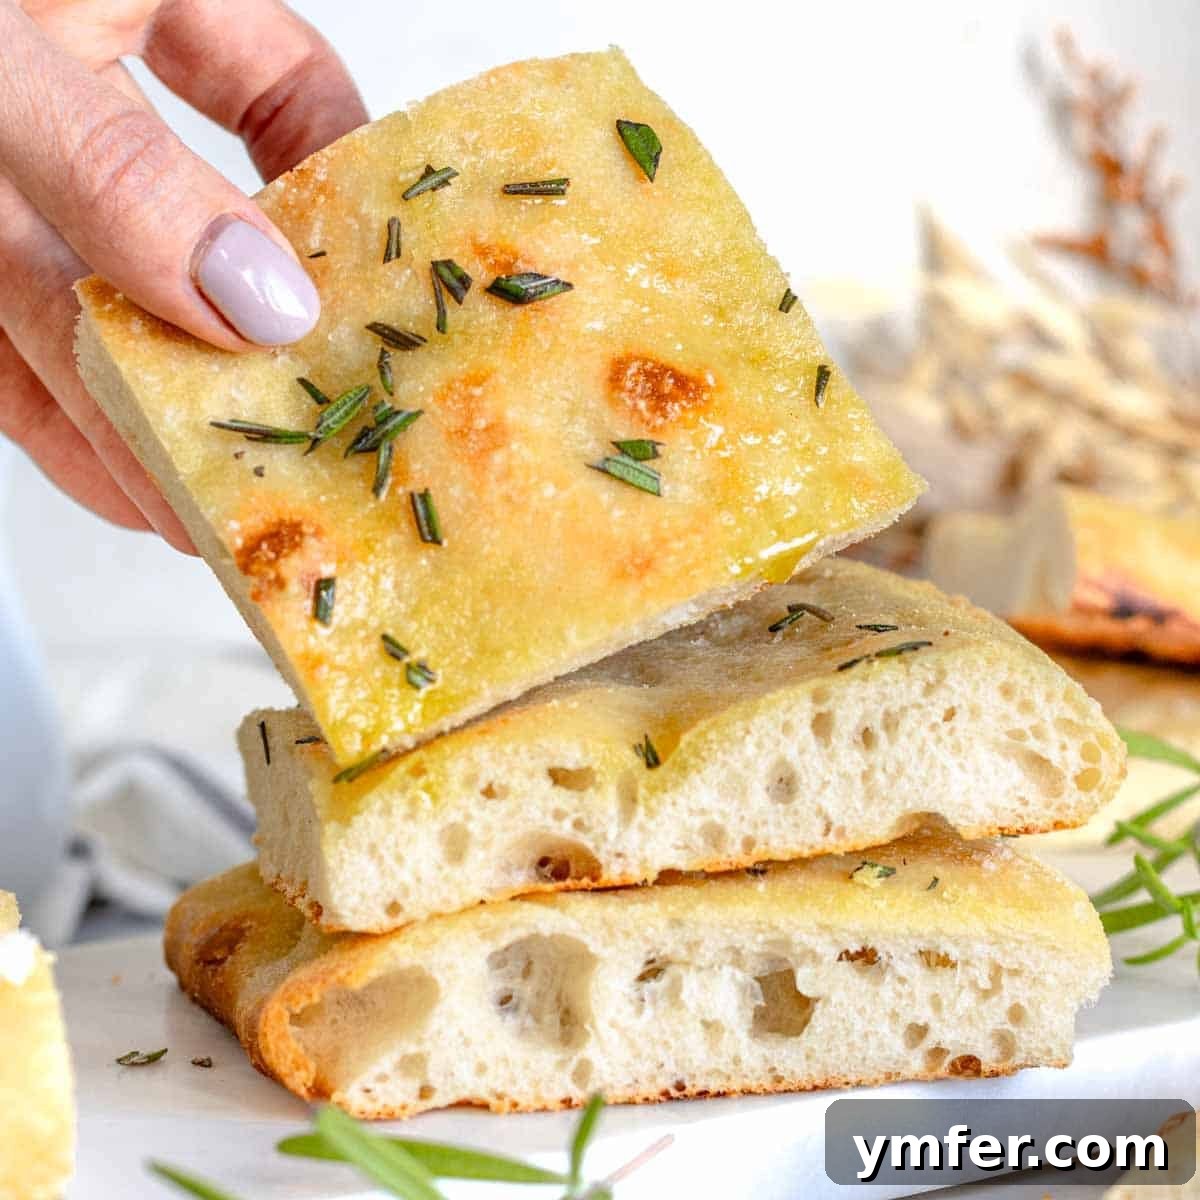
Schiacciata is a quintessential flatbread from the heart of Tuscany, Italy.
Often drawing comparisons to focaccia, schiacciata distinguishes itself by being thinner, delivering a delightful crunch around the edges, and boasting a chewier interior, reminiscent of a thick, rustic pizza crust.
Our perfected no-knead schiacciata recipe makes it incredibly simple to recreate this Italian delicacy in your own kitchen. It relies on a few fundamental ingredients: high-quality flour, robust olive oil, water, salt, and yeast, proving that exceptional flavor doesn’t require complex techniques.
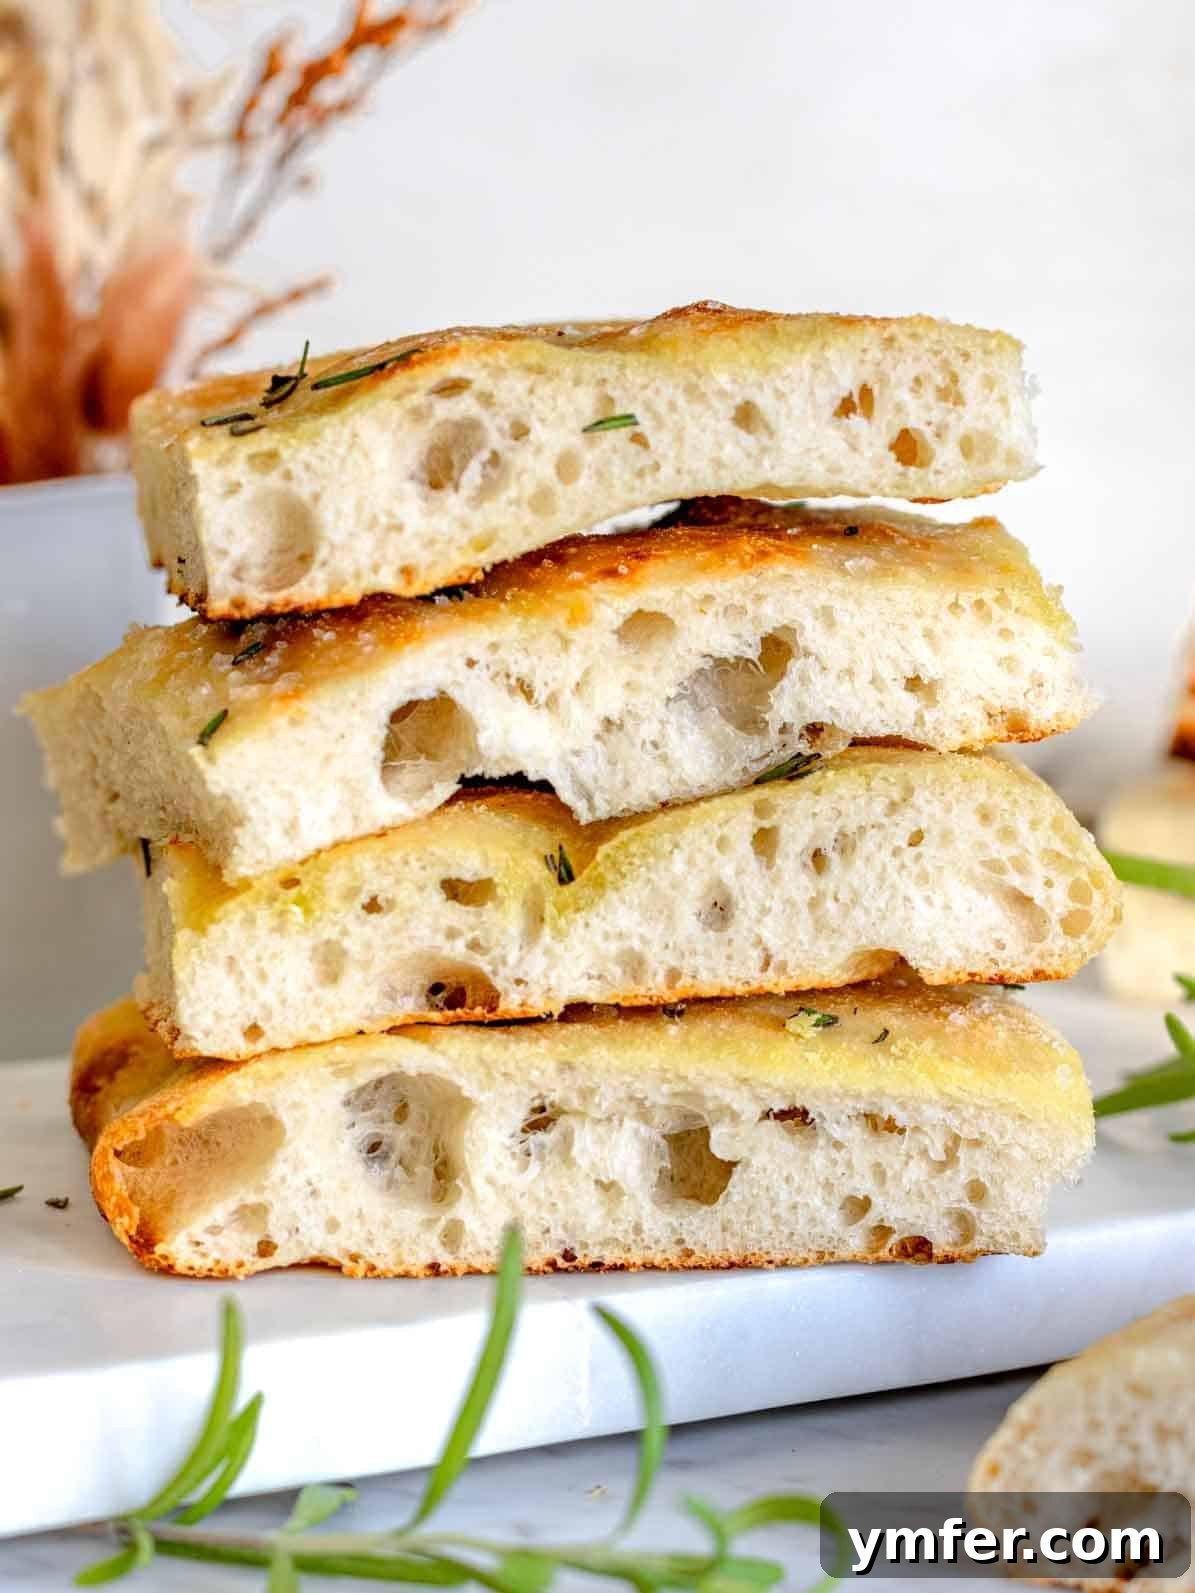
Table of Contents
- What is Schiacciata?
- The Essential Ingredients for Schiacciata
- Step-by-Step Guide to Making Schiacciata
- Serving Schiacciata: A Versatile Delight
- Expert Tips for the Perfect Schiacciata
- Storage and Make-Ahead Options
- Similar Bread and Tuscan Recipes
- Schiacciata Recipe
What is Schiacciata? A Tuscan Flatbread Explained
Schiacciata, pronounced SKJAT-TJA-TA, is a beloved flatbread originating from central Italy, particularly Tuscany. The word itself, meaning “compressed,” “pushed,” or “flattened,” perfectly describes its characteristic thin shape and distinctive dimpled surface.
Our no-knead schiacciata recipe stands out for its incredible simplicity and the delightful results it yields. Crafted effortlessly in a single bowl, it offers a satisfyingly chewy texture and a truly irresistible flavor, making it an ideal choice for both novice and experienced bakers.
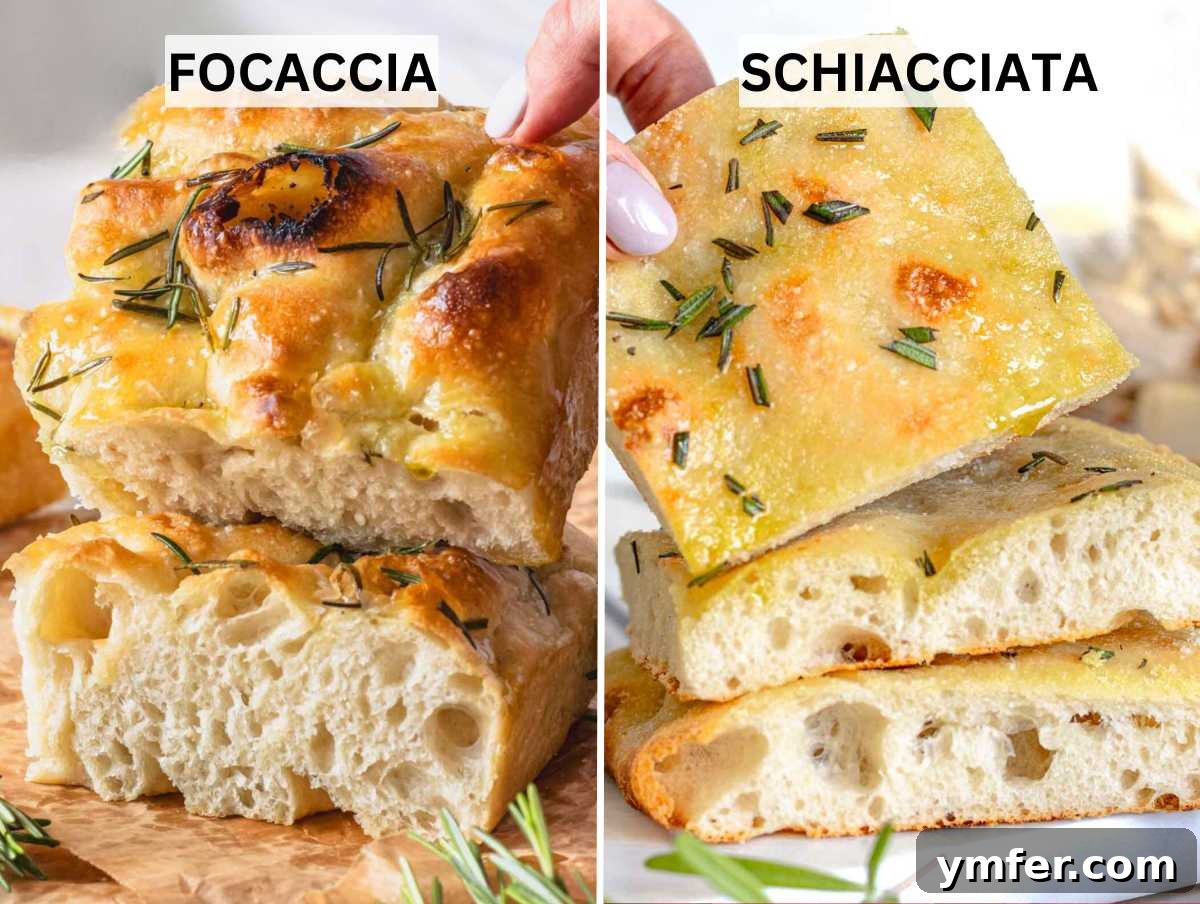
This recipe shares many similarities with our popular no-knead focaccia. However, the primary distinction between schiacciata and focaccia lies in the shaping and overall thickness of the dough. While both are celebrated Italian flatbreads, their nuanced differences create unique culinary experiences.
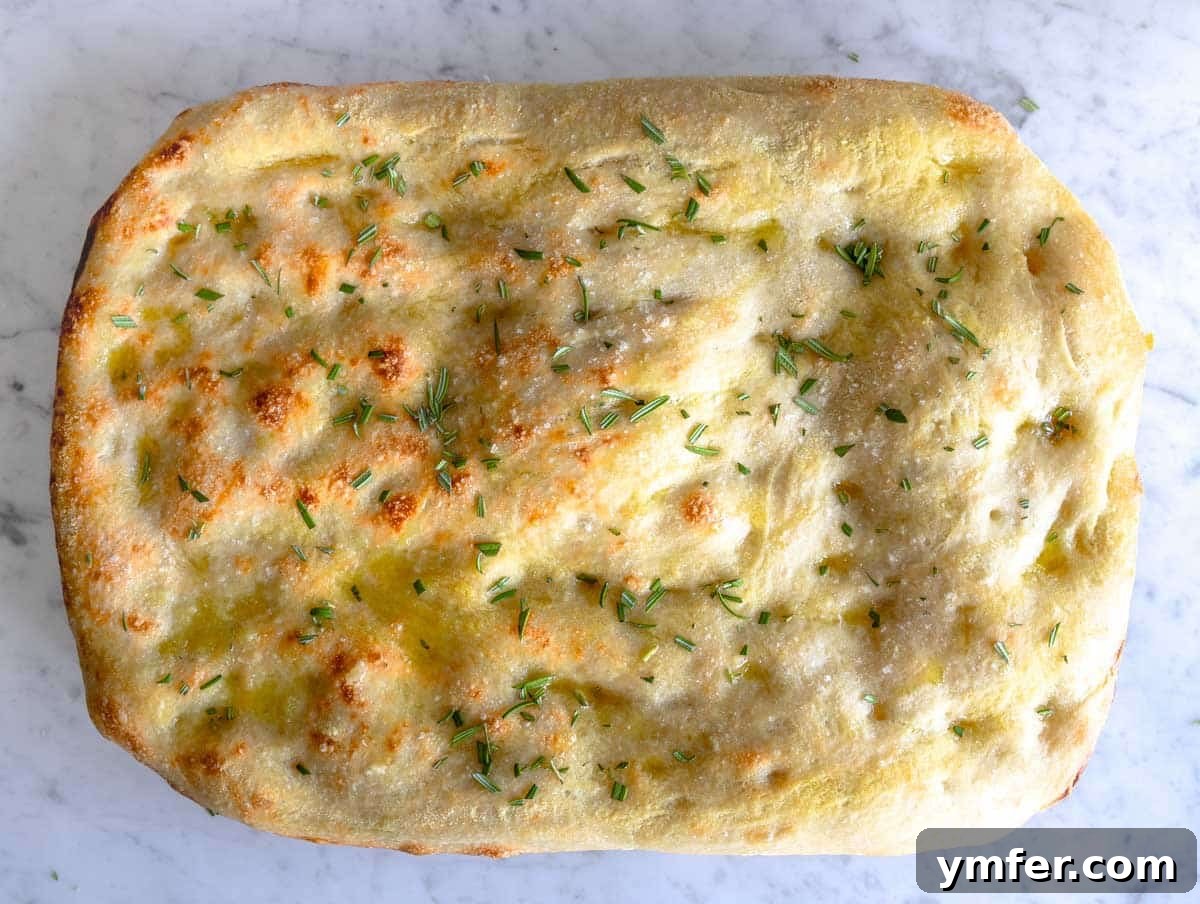
Traditionally, focaccia is known for its thick, soft, and spongy crumb, often baked in a smaller, deeper pan to achieve its characteristic height. In contrast, schiacciata is purposefully thinner, resulting in wonderfully crunchy edges and a more substantial chew. To achieve this signature texture, schiacciata is typically baked in the largest available baking tray, allowing the dough to spread out and crisp up beautifully.
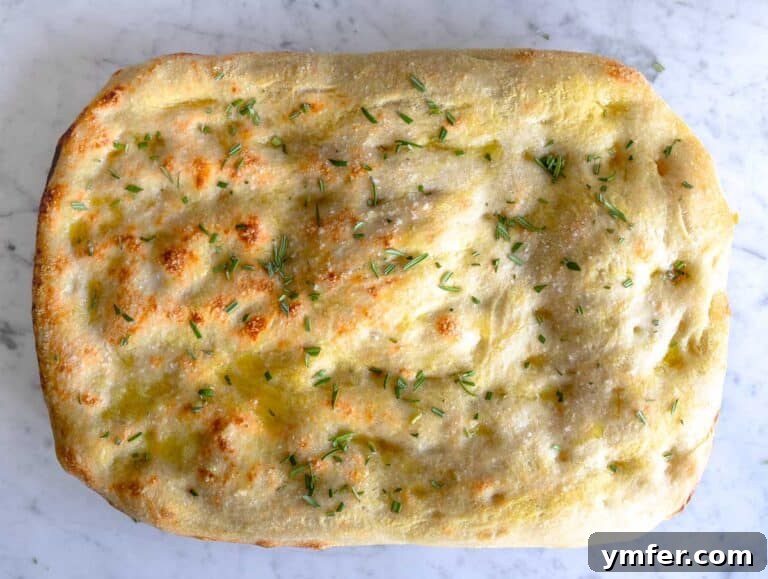
Like many authentic Italian flatbreads, schiacciata is often kept simple, adorned only with a generous drizzle of high-quality extra virgin olive oil and a sprinkle of sea salt. For a touch of rustic Tuscan charm, fresh rosemary is a popular addition, infusing the bread with its aromatic essence.
For those fortunate enough to visit Florence, you’ll discover iconic schiacciata shops, such as the renowned “all’ Antico Vinaio.” Here, schiacciata is served cut open and generously stuffed with local cured meats, artisan cheeses, and fresh vegetables, transforming it into a hearty and satisfying meal, much like a gourmet focaccia sandwich. This versatility makes schiacciata a staple for various occasions, from a simple snack to a robust lunch.
Explore other similar delightful flatbreads and pizza recipes: Focaccia pizza, flatbread pizza, Neapolitan pizza dough, Ooni pizza dough, quick pizza dough, and pizza dough recipe.
The Essential Ingredients for Schiacciata
Creating an authentic no-knead schiacciata relies on a handful of high-quality, simple ingredients. Each component plays a crucial role in developing the unique flavor and texture of this Tuscan flatbread.
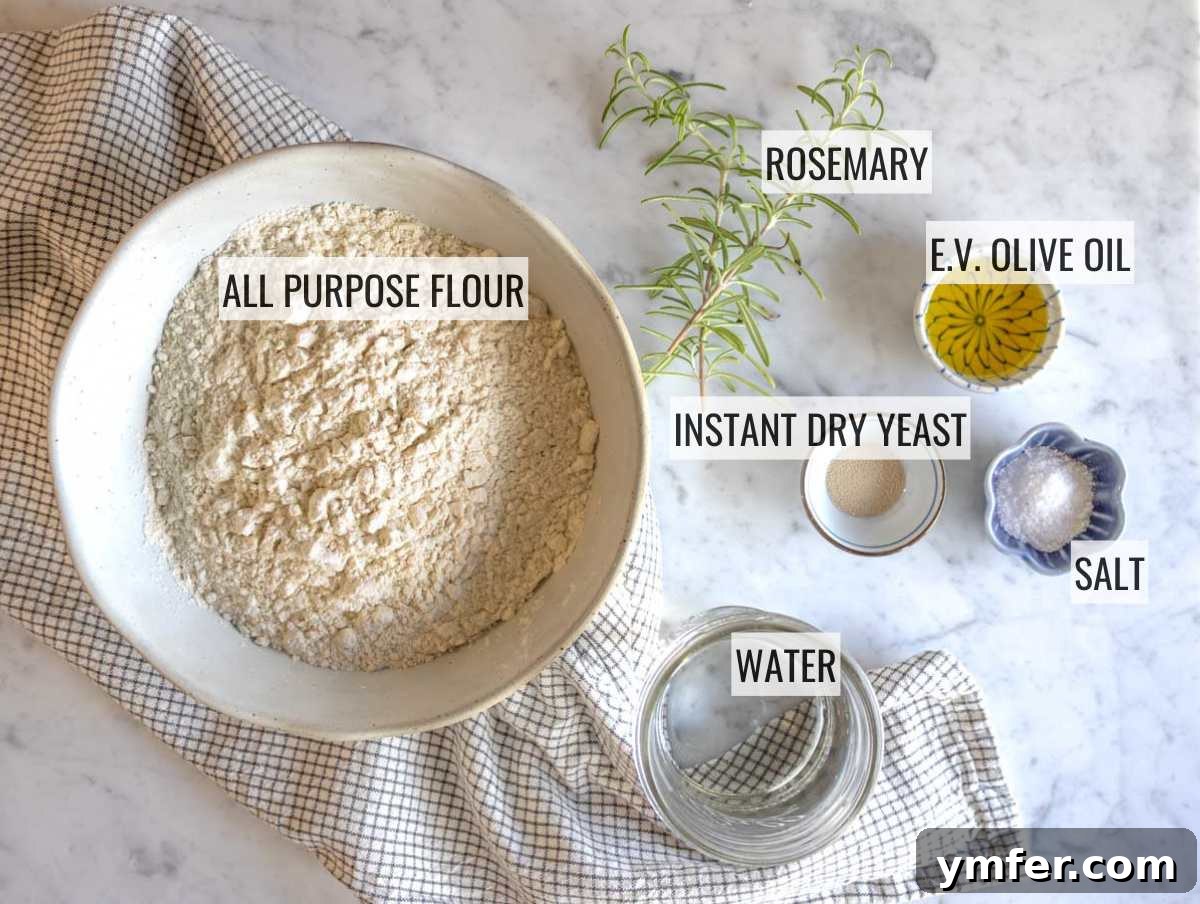
Exact quantities for this recipe can be found in the recipe box at the bottom of the page.
Flour: The Foundation of Flavor and Texture
For a reliable and delicious schiacciata, plain all-purpose flour is an excellent choice, readily available and easy to work with. However, experimenting with different types of flour can significantly alter the final structure and texture of your flatbread.
You can successfully substitute all-purpose flour with 00 flour, often used for authentic Italian pizzas, or opt for pizza flour, bread flour, or even a portion of whole wheat flour for a different profile.
For instance, using 00 flour typically results in a lighter, more tender schiacciata with a quicker chew, reminiscent of delicate bakery creations. Conversely, incorporating whole wheat flour will yield a heartier, more dense, and rustic flatbread, packed with additional fiber and a nutty flavor.
Our personal favorite for a truly exceptional homemade schiacciata is Caputo Nuvola or Caputo Pizzeria flour. These Italian flours are renowned for their fine texture and high protein content, which contribute to a beautiful rise and an ideal balance of crispness and chewiness. You can often find them in larger supermarkets or specialty Italian food stores.
Water: Hydration for a Perfect Crumb
The hydration level, or water content, in schiacciata dough can vary, with no strict rule. However, our no-knead technique thrives on a relatively high water content. This generous amount of water is crucial for achieving the desired open, airy crumb structure without the need for extensive kneading.
It’s important to use lukewarm water, never hot. Water that is too hot can deactivate the yeast, preventing your dough from rising properly and leading to a dense, flat result. Aim for a temperature that feels slightly warm to the touch, around 95-105°F (35-40°C).
Instant Dry Yeast: The Leavening Powerhouse
Yeast is the magical ingredient that makes your schiacciata light and airy. There are three common types: instant dry yeast, active dry yeast, and fresh yeast. Any of these can be used, but we highly recommend instant dry yeast for its convenience and consistent reliability.
Instant dry yeast doesn’t require prior proofing (dissolving in water before mixing with flour), making the process even simpler. We’ve had great success with brands like Caputo Dry Yeast (often found in a small green can), Red Star SAF instant, and Dr. Oetker instant yeast.
If you only have fresh yeast available, remember that you’ll need approximately three times the amount of fresh yeast compared to dry yeast. For example, if the recipe calls for 2 teaspoons of instant dry yeast, use 6 teaspoons of fresh yeast.
A helpful tip, especially if you’re working against the clock, is to add a teaspoon of sugar along with the yeast to the water. Sugar acts as food for the yeast, helping to activate it faster and giving your schiacciata a beautiful golden-brown crust as it bakes.
Extra Virgin Olive Oil: Flavor, Softness, and Crispness
Extra virgin olive oil is more than just a fat in schiacciata; it’s a cornerstone of its flavor and texture, performing three vital functions:
- It contributes significantly to the softness and tenderness of the bread’s interior crumb.
- It imparts a distinctively rich, fruity flavor that is characteristic of Tuscan cuisine.
- It aids in the baking process by conducting heat efficiently, helping the bread cook through evenly and achieve its desired crisp exterior.
Given its crucial role in flavor, always opt for a good quality extra virgin olive oil. The better the oil, the more depth and aroma it will add to your schiacciata.
Salt: Enhancing Taste and Structure
Salt is absolutely essential in any bread recipe. Beyond simply adding flavor, it plays a critical role in controlling the yeast activity and strengthening the gluten structure of the dough. We recommend using sea salt, as its coarse texture and mineral content can add a subtle complexity to the overall taste. A generous sprinkle of flaky sea salt on top before baking also provides a wonderful textural contrast and burst of flavor.
Rosemary: An Optional Aromatic Touch
Rosemary is an optional but highly recommended addition, especially if you love the earthy, piney aroma it brings. While some purists prefer their schiacciata plain, a sprinkle of fresh or dried rosemary truly elevates the flatbread to a rustic Tuscan experience.
If using fresh rosemary, chop it finely and scatter it over the dough just before baking, or immediately after it comes out of the oven for a fresher aroma. Dried rosemary can be mixed into the dough or sprinkled on top.
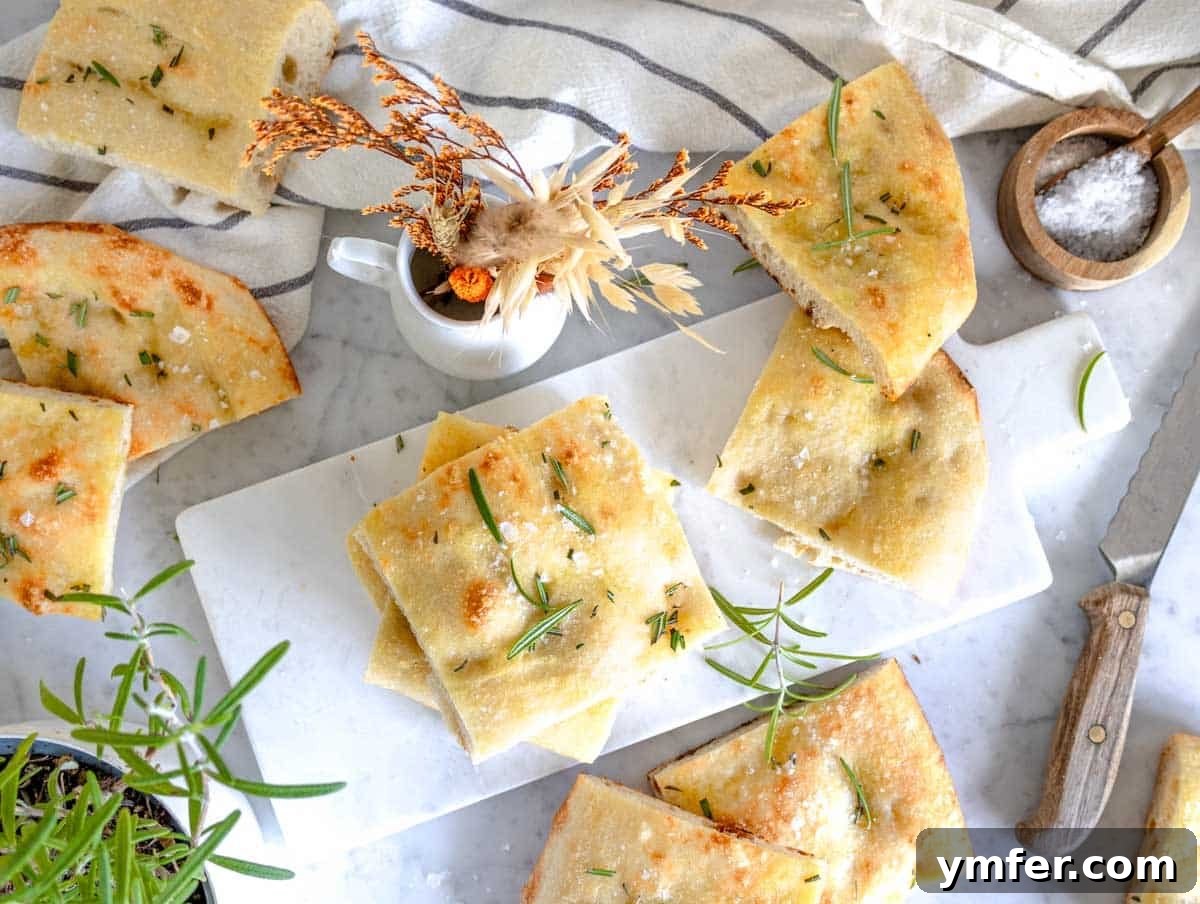
Step-by-Step Guide to Making Schiacciata
Making a delicious no-knead schiacciata at home is a surprisingly straightforward process, broken down into simple steps that yield impressive results.
1. Preparing the No-Knead Dough
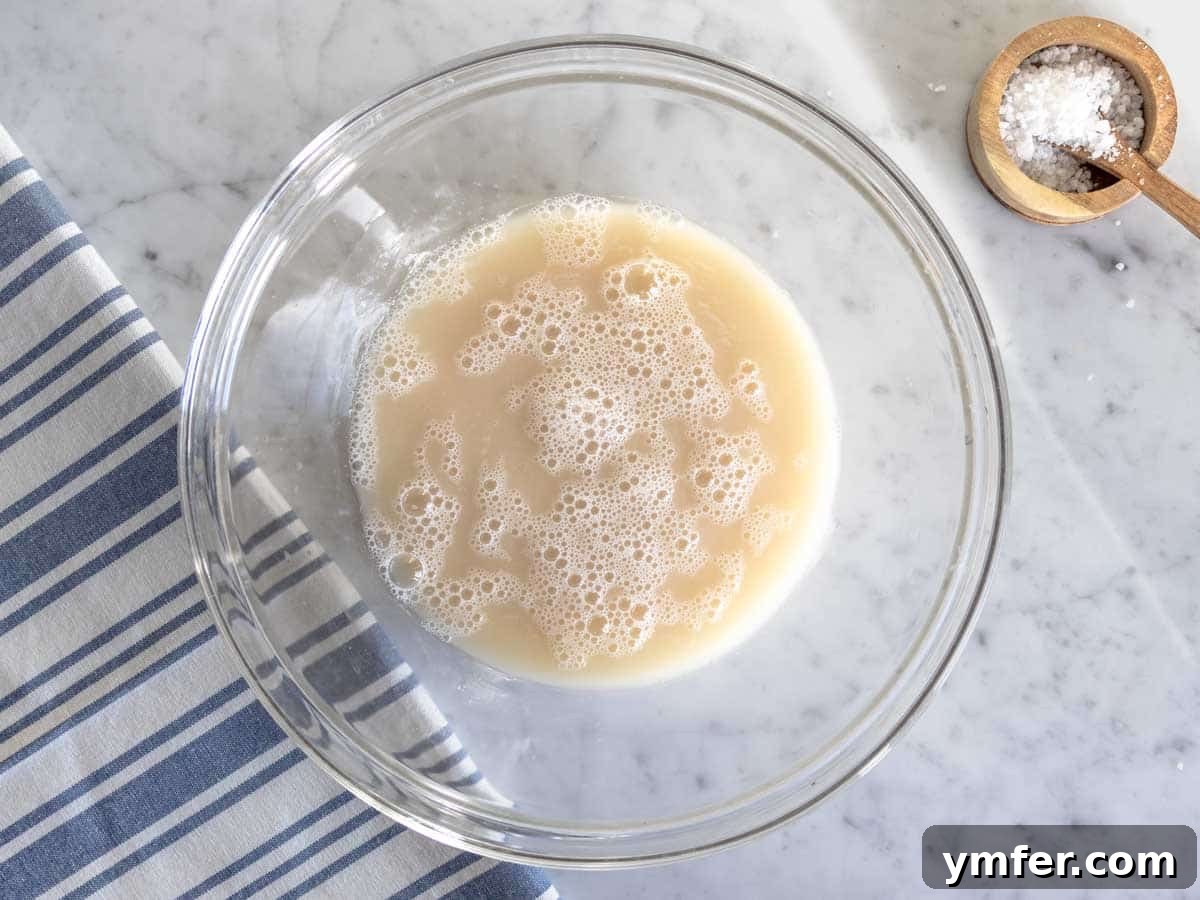
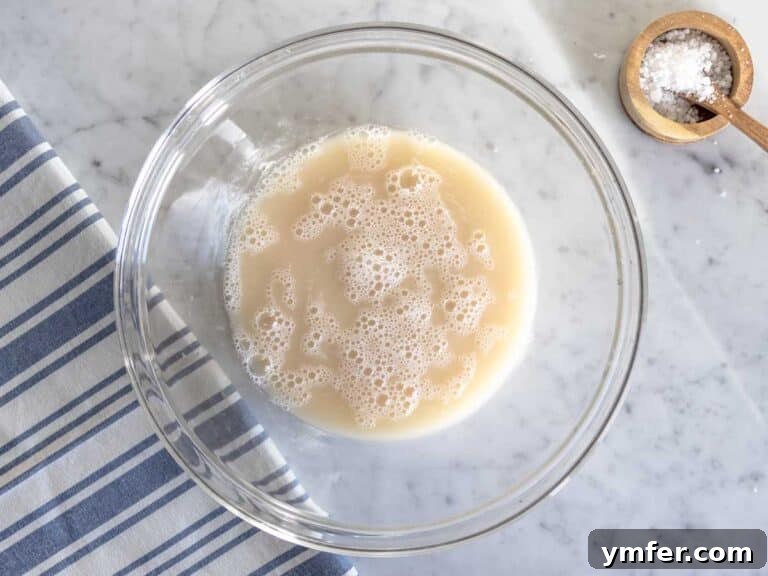
Begin by combining 1⅔ cups of lukewarm water, 2 teaspoons of instant dry yeast, and 2 teaspoons of sugar in a large mixing bowl. Whisk these ingredients together until the yeast is completely dissolved in the water. If the yeast doesn’t dissolve or activate (it should start to look slightly foamy after a few minutes), it may be inactive, and we recommend starting over with fresh yeast.
Tip: The sugar isn’t just for sweetness; it provides initial nourishment for the yeast, helping it activate more quickly and contributing to the beautiful golden-brown crust of your schiacciata during baking.
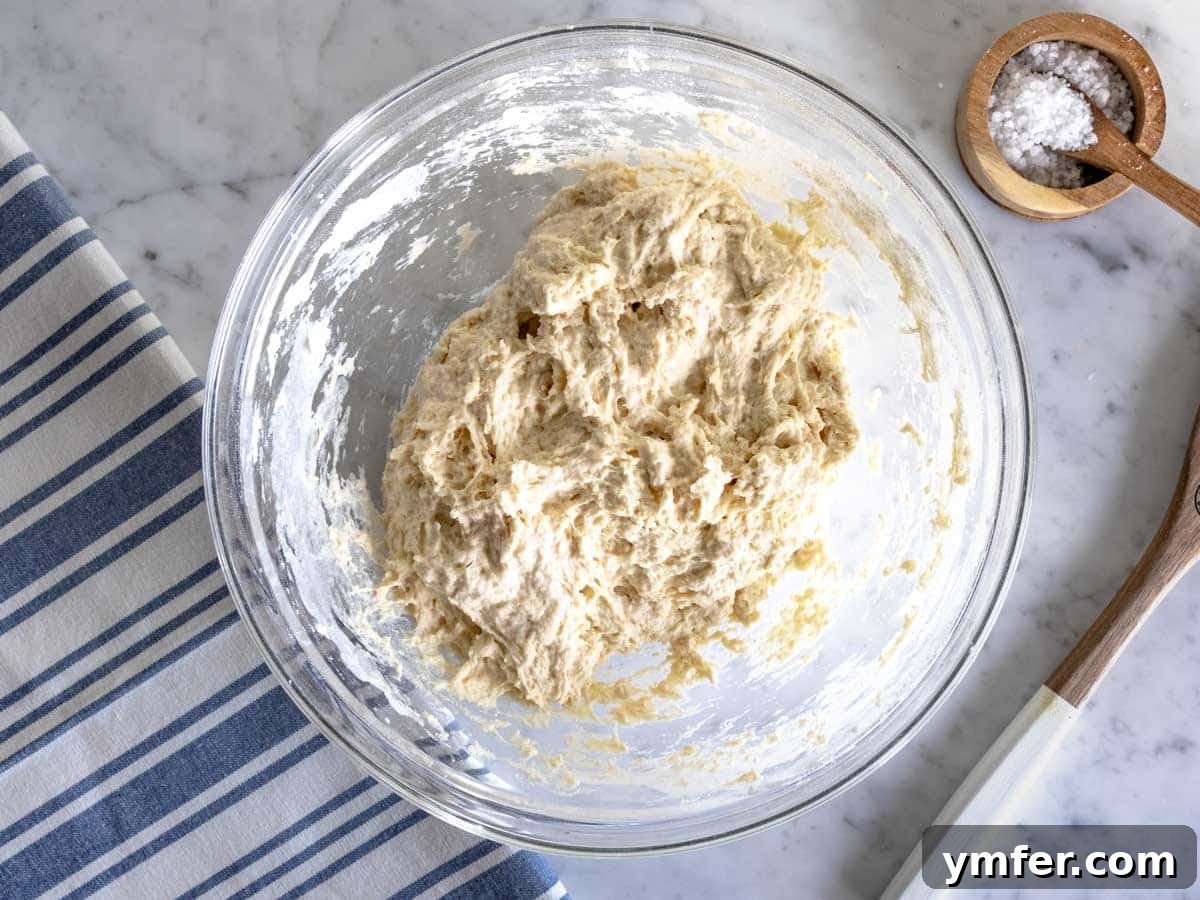
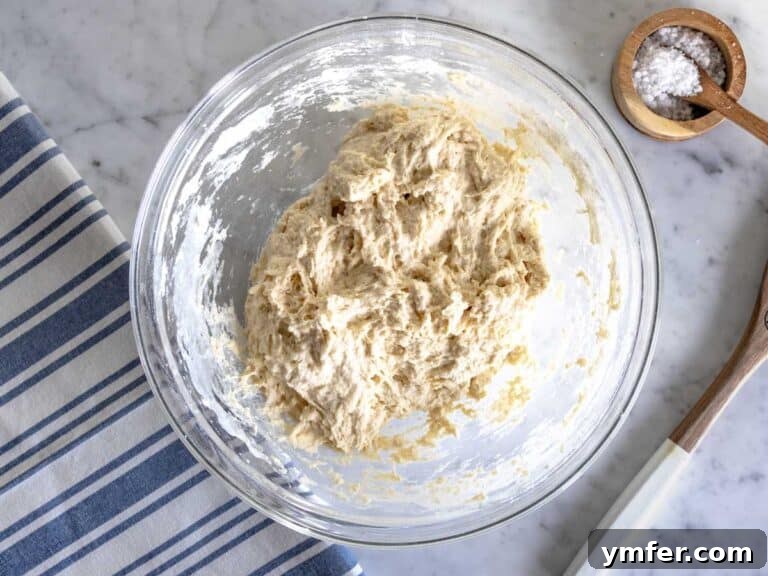
Next, add 3⅓ cups of all-purpose flour and 2 teaspoons of salt to the same bowl. Using a sturdy wooden spoon (or even the handle of a wooden spoon, held upside down, which many find easier for sticky dough), stir the mixture until all the dry ingredients are fully combined with the wet ones. The dough will be very wet and sticky at this stage, without a distinct shape, which is perfectly normal for a high-hydration, no-knead dough. Finally, incorporate 1 tablespoon of extra virgin olive oil, stirring for another minute until it is fully absorbed into the dough.
Once mixed, cover the bowl tightly with plastic wrap, ensuring there’s enough space between the dough and the wrap to allow for expansion. This covering will prevent the dough from drying out during proofing.
2. Proofing the Dough: Quick vs. Slow Fermentation
The proofing stage is where the magic happens, as the yeast ferments and develops flavor. You have two excellent options:
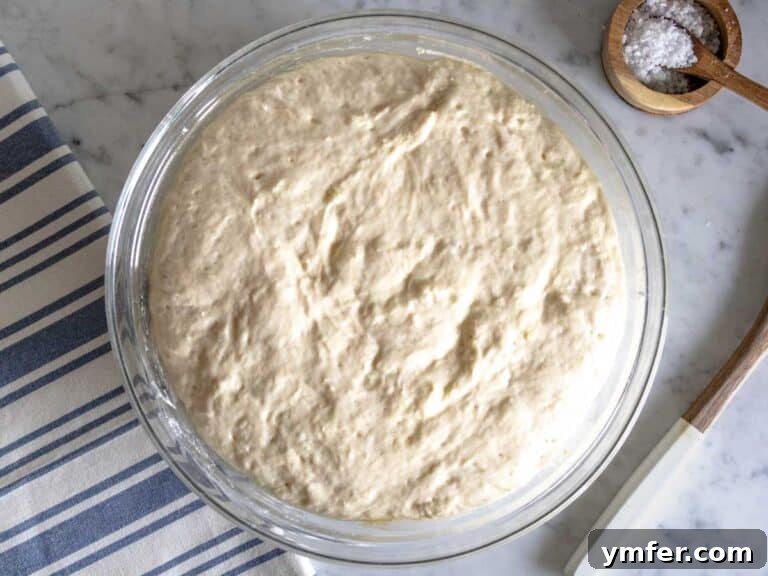
QUICK PROOFING: For a faster result, let your dough proof in a warm spot in your kitchen for approximately 1½ hours, or until its volume has visibly doubled. A consistent warm environment is key for efficient yeast activity.
Tip: If your kitchen is cooler than 68°F (20°C), you can create an ideal proofing environment by turning your oven on for 30 seconds, then immediately turning it off. Place the covered dough inside the slightly warm, turned-off oven. The gentle residual heat and enclosed space provide the perfect conditions (light warmth + moisture) for the yeast to work effectively.
SLOW PROOFING: For a more complex and nuanced flavor, opt for a slow proof in the refrigerator for anywhere from 8 to 36 hours. This extended, cold fermentation allows the dough to develop deeper, richer flavors and a more refined texture. After this long proof, remember to remove the dough from the fridge and let it acclimatize to room temperature for about 2 hours before proceeding to the next step.
Which proofing method is better? It truly depends on your schedule and desired outcome. Quick proofing is fantastic if you’ve decided to bake schiacciata spontaneously and want a delicious flatbread on the table within a few hours. Slow proofing, on the other hand, is ideal if you have more time, as the prolonged fermentation enhances the dough’s flavor profile, making for an even more fragrant and delicious schiacciata.
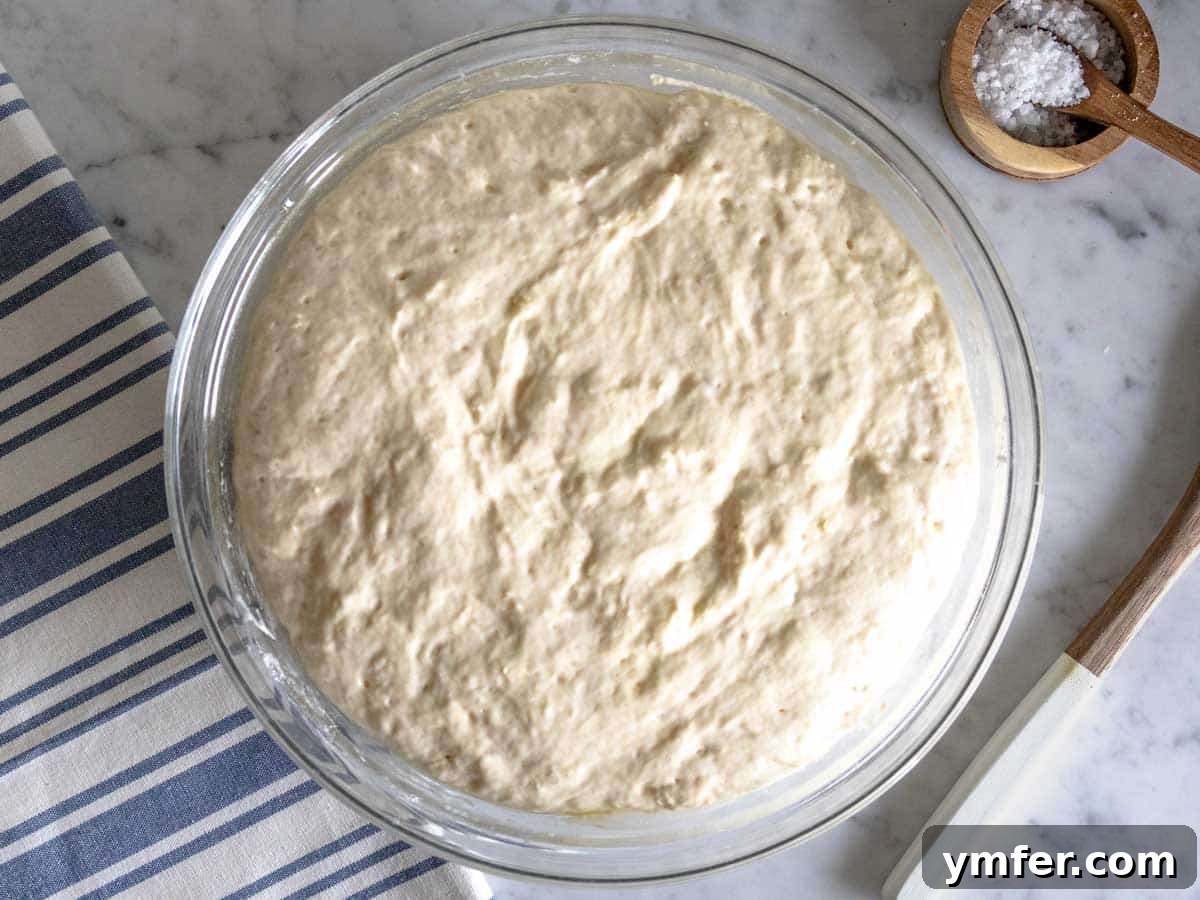
3. Folding the Dough: Building Structure Without Kneading
Even though this is a “no-knead” recipe, a simple folding technique is crucial for developing the dough’s gluten structure, which in turn gives schiacciata its characteristic chew and airy pockets. This method of folding is incredibly easy and requires no special skill.
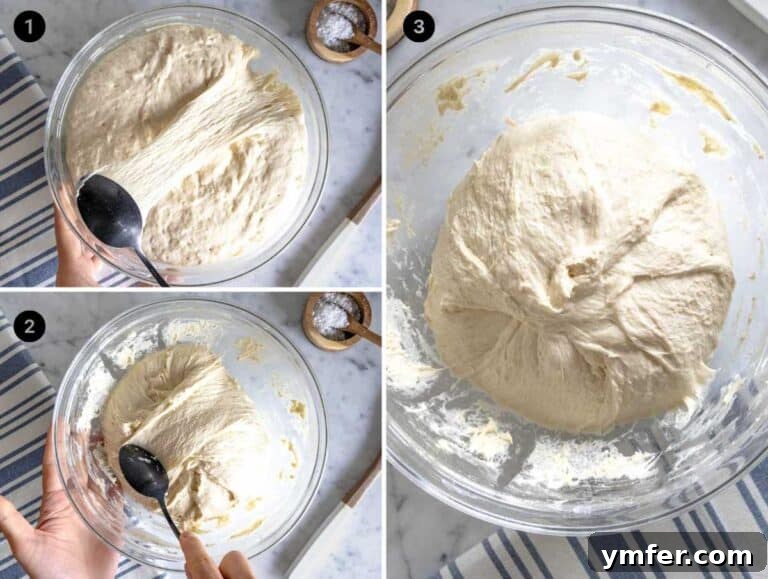
While the dough is still in its mixing bowl, use a sturdy spoon to gently fold it onto itself from the outside towards the inside. Repeat this folding action about 20 times. This process should take no more than 30 seconds to complete. This light folding redistributes the yeast and helps create strength in the dough without the strenuous effort of traditional kneading.
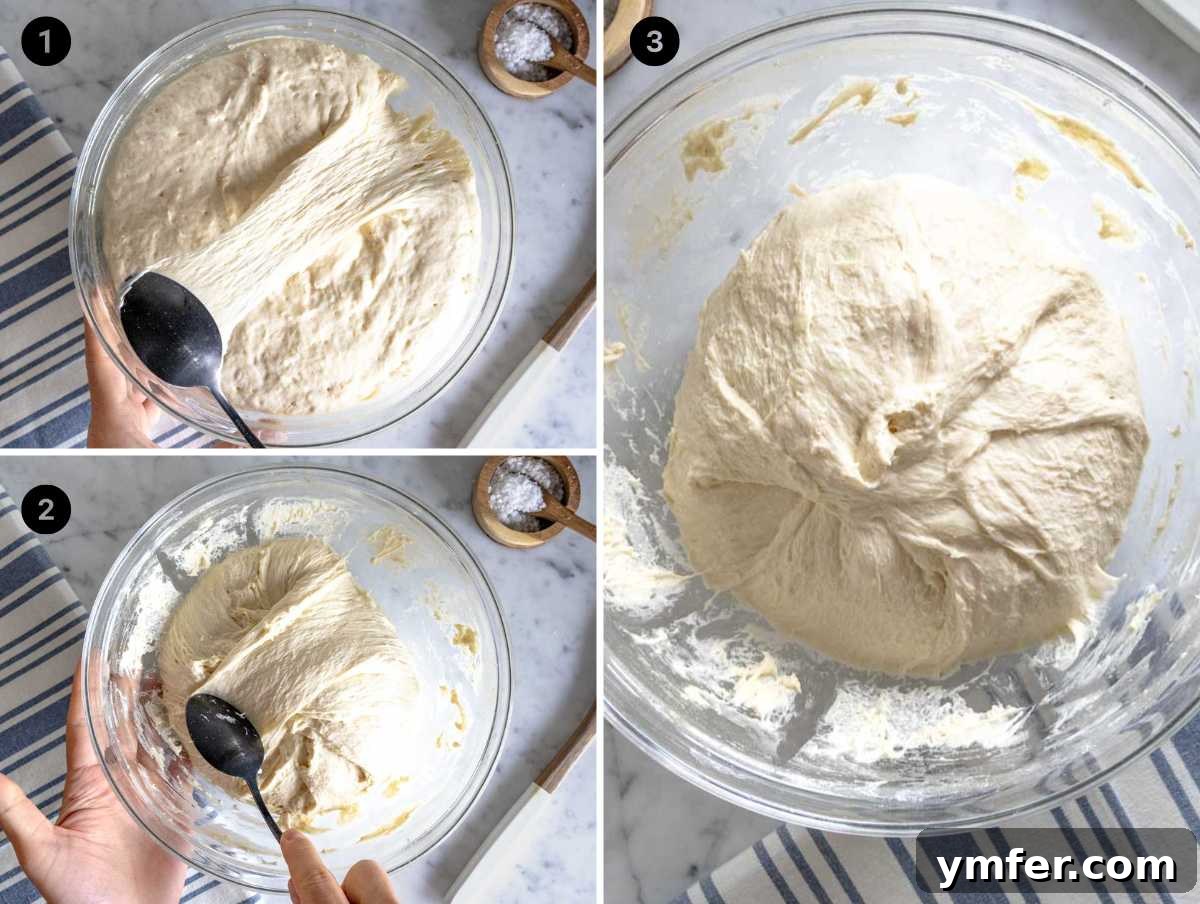
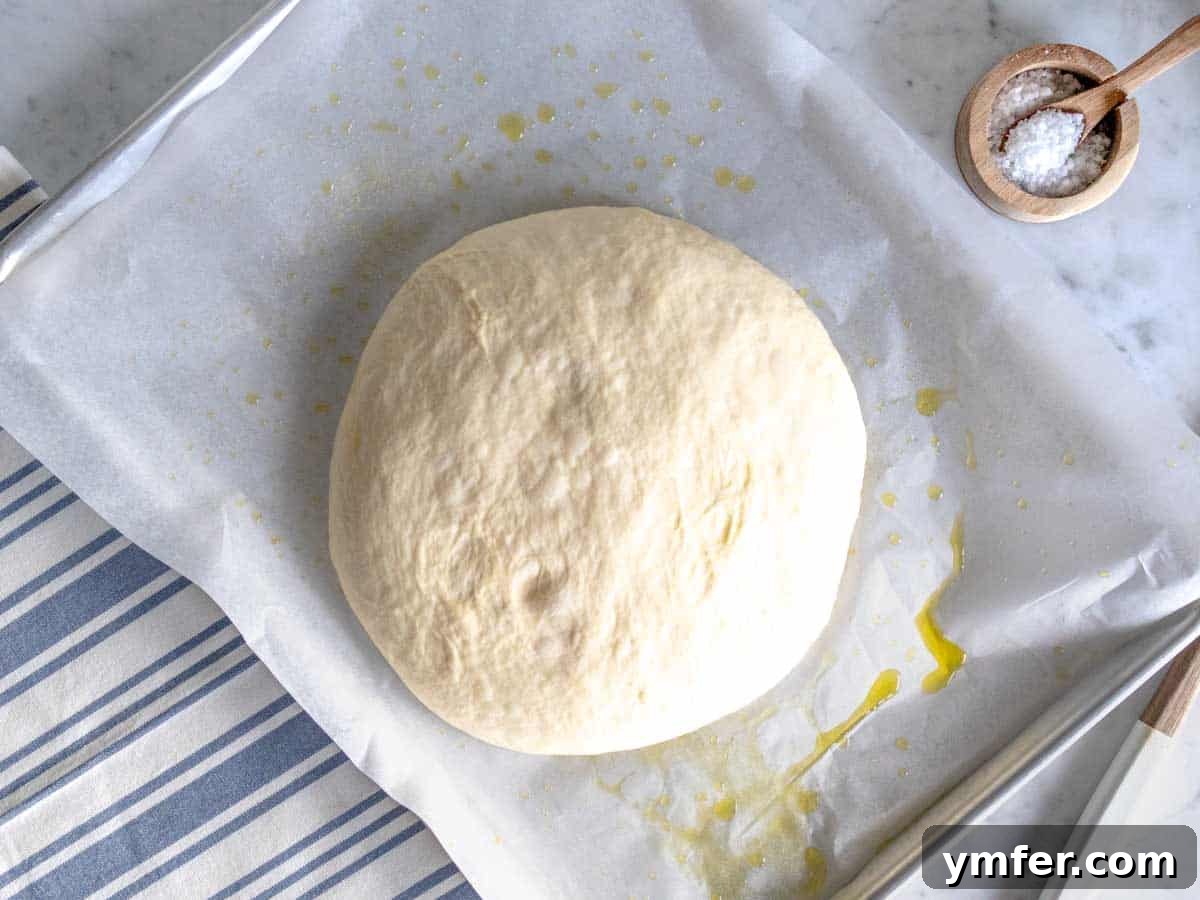
After folding, carefully flip the dough out onto a large baking tray that has been lined with parchment paper and generously drizzled with 1 tablespoon of olive oil. The olive oil prevents sticking and contributes to a crispy bottom crust. Let the dough proof for a second time, uncovered, in a warm spot in your kitchen for another 45 minutes.
During this second proofing period, preheat your oven to a high temperature of 450°F (230°C). A hot oven is essential for achieving the perfect crispy crust and rapid rise of schiacciata.
4. Flattening and Baking for Perfection
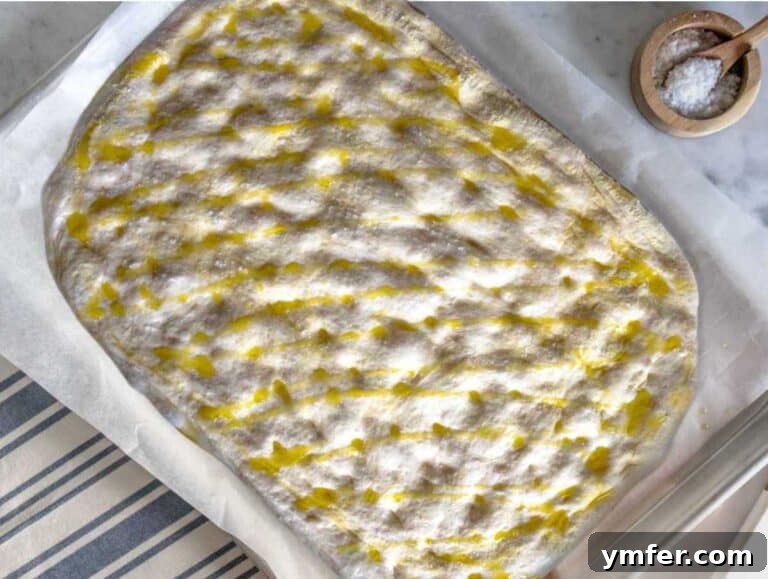
Once the dough has completed its second proof, it’s time to shape and bake. To prevent the sticky dough from adhering to your hands, first wet your fingertips with a little water or olive oil. Then, gently push down with your fingertips all over the dough, spreading it out to cover most of the baking tray. The goal is to create characteristic “dimples” across the surface of the flatbread, while trying to handle the dough as little as possible to preserve the precious air bubbles formed during proofing.
Finish by drizzling another 1 to 2 tablespoons of extra virgin olive oil evenly over the flattened dough, followed by a generous few pinches of sea salt. This not only enhances flavor but also contributes to the beautiful crispness and golden color of the crust.
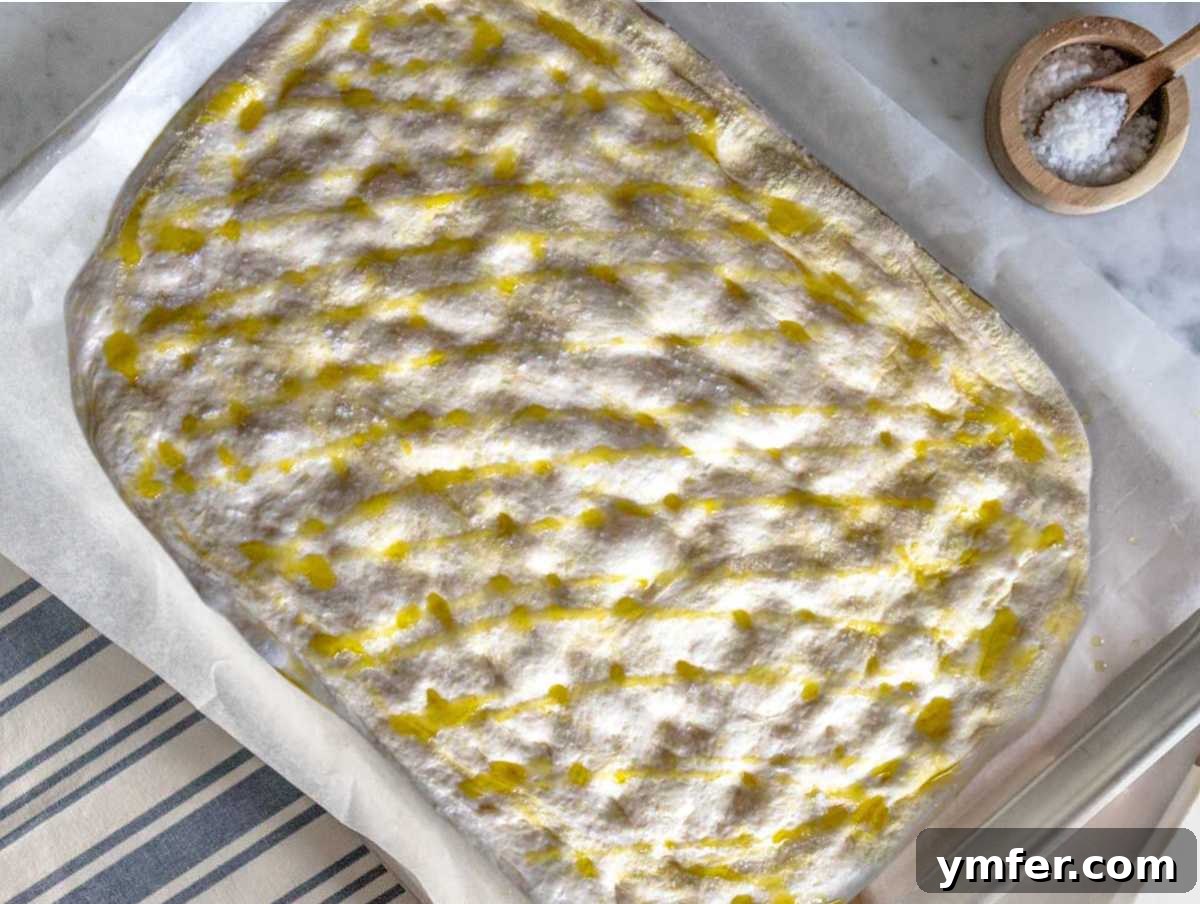
Bake the schiacciata on the lowest rack of your preheated oven for approximately 18 to 20 minutes, or until it’s deeply golden brown and sounds hollow when tapped. Baking on the lowest rack ensures the bottom of the flatbread becomes wonderfully crisp. As soon as it’s baked, carefully remove it from the pan and transfer it to a wire cooling rack. Allow it to sit for 30 to 60 seconds; this brief steaming-out period prevents the bottom from becoming soggy. Optionally, immediately after removing it from the oven, you can scatter fresh rosemary over the top for an extra burst of aroma and flavor.
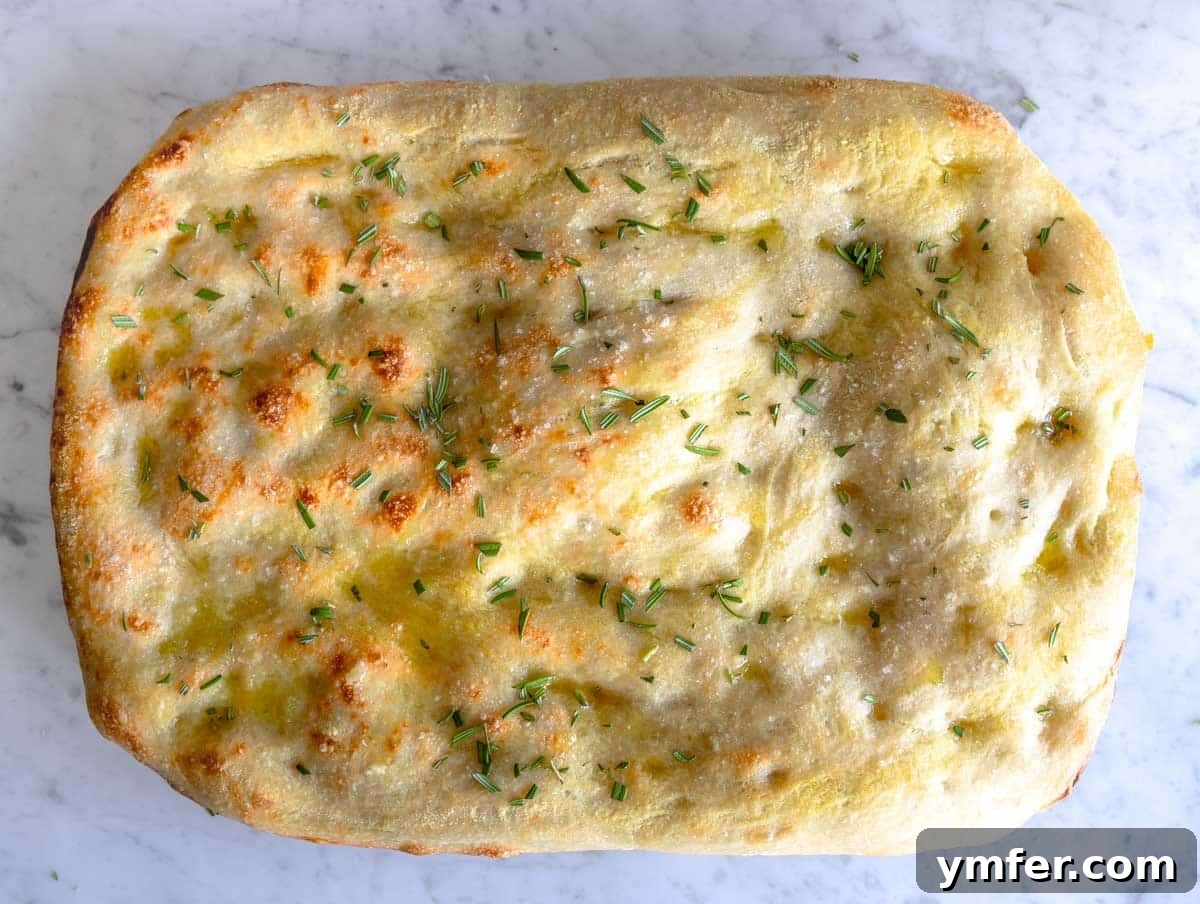
Serving Schiacciata: A Versatile Delight
Schiacciata is an incredibly versatile flatbread that can be enjoyed in countless ways, adapting perfectly to any meal or occasion. Its robust flavor and satisfying texture make it a fantastic companion to a wide array of dishes.
You can serve schiacciata as an elegant alternative to traditional bread, pairing it beautifully with hearty soups, rich stews, or various main courses. Its ability to soak up delicious liquids makes it a perfect side for Mediterranean-inspired meals. It also excels as a delightful afternoon snack, perhaps with a simple spread or a slice of fresh tomato.
Schiacciata is equally impressive as an appetizer, especially when entertaining guests, or as a crowd-pleasing item to bring to potlucks and barbecues. Its rustic charm and irresistible aroma are always a hit.
We absolutely adore dipping warm pieces of schiacciata into flavorful spreads like creamy hummus, vibrant pesto, smooth white bean dip, zesty romesco sauce, smoky muhammara, and rich baba ganoush. The subtle olive oil flavor of the bread perfectly complements these Mediterranean dips.
In Italy, particularly in Tuscany, schiacciata is commonly enjoyed as a late breakfast or a mid-morning snack. It’s frequently cut in half horizontally and generously stuffed with an assortment of Italian cold cuts, local cheeses, and fresh seasonal vegetables, creating a satisfying and portable meal. Its slight crispness and chewy interior hold up well to fillings, making it a superior choice for sandwiches and paninis.
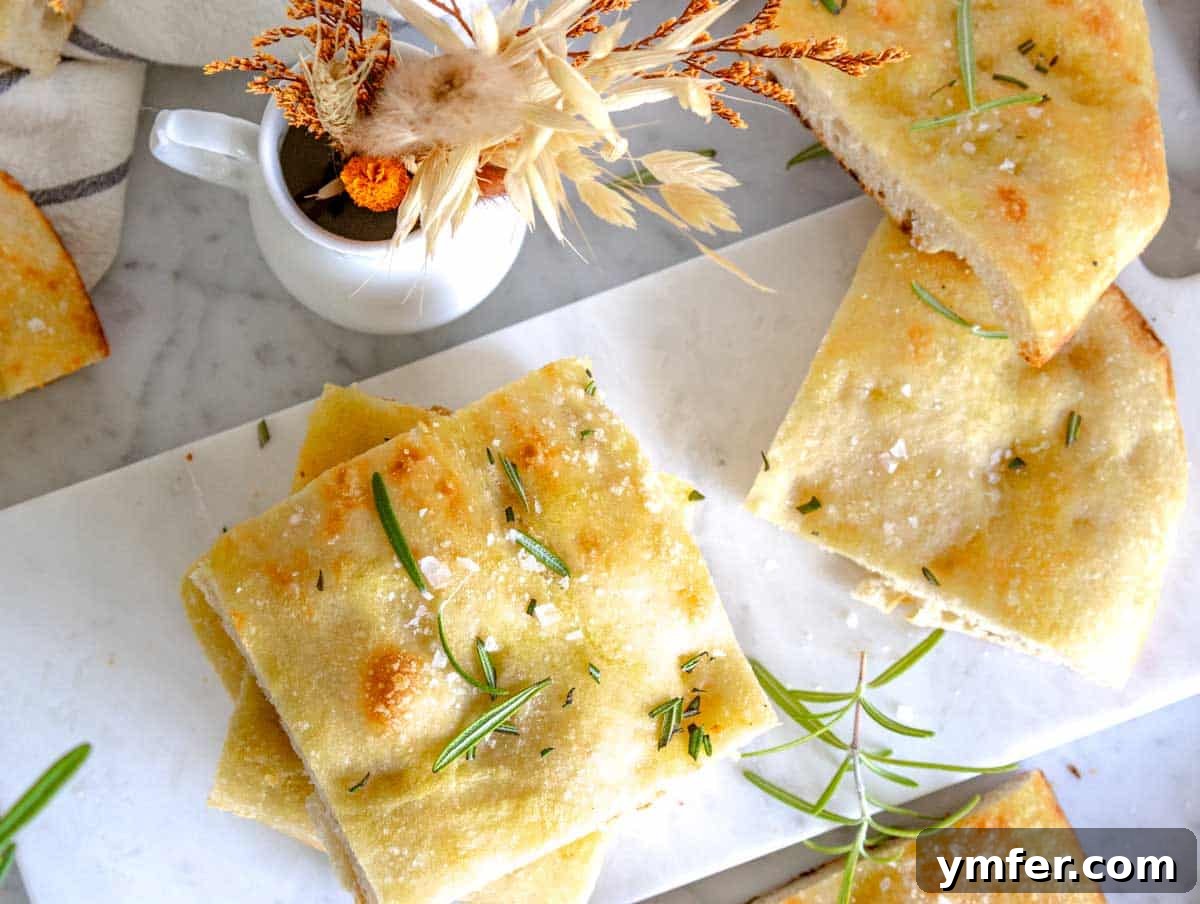
Expert Tips for the Perfect Schiacciata
Achieving a consistently delicious schiacciata is made easier with a few key insights:
Choosing the Right Flour: While all-purpose flour works wonderfully, if you can find specialty flours like Caputo Nuvola or 00 pizza flour, your schiacciata will reach new heights. These flours contribute to a lighter, airier, and more authentically Italian flatbread with a delicate chew. They have a finer grind and specific protein content that enhances gluten development even in no-knead doughs.
The Role of Sugar: Don’t skip the sugar! It serves a dual purpose in this recipe. Firstly, it acts as vital food for the yeast, accelerating its activation and ensuring a robust rise. Secondly, sugar aids in caramelization during baking, which gives your schiacciata a beautiful, appetizing golden-brown color on the crust.
Effective Dough Stirring: Since this is a no-knead recipe, proper stirring is important to ensure all ingredients are well combined and to initiate some gluten development. Many find it easier to stir the very wet and sticky dough with the handle of a sturdy wooden spoon, rather than the spoon end itself. This technique helps to mix the dough thoroughly without it clinging excessively to the utensil.
Optimizing Quick Proofing: Yeast thrives in warmth and humidity. If your kitchen temperature is below 68°F (20°C), creating a makeshift proofing box can greatly improve your dough’s rise. Simply turn your oven on for 30 seconds, then immediately switch it off. Place the covered dough bowl inside the slightly warm, turned-off oven. The light heat and enclosed, moist environment provide perfect conditions for the yeast to work its magic.
Achieving High Oven Temperature: For that signature crispy crust and airy interior, schiacciata demands a very hot oven. Always preheat your oven to its maximum temperature (around 450°F or 230°C) for at least 20 minutes before baking. This ensures the oven and baking sheet are thoroughly heated, providing an initial burst of heat that helps the dough rapidly expand and crisp up.
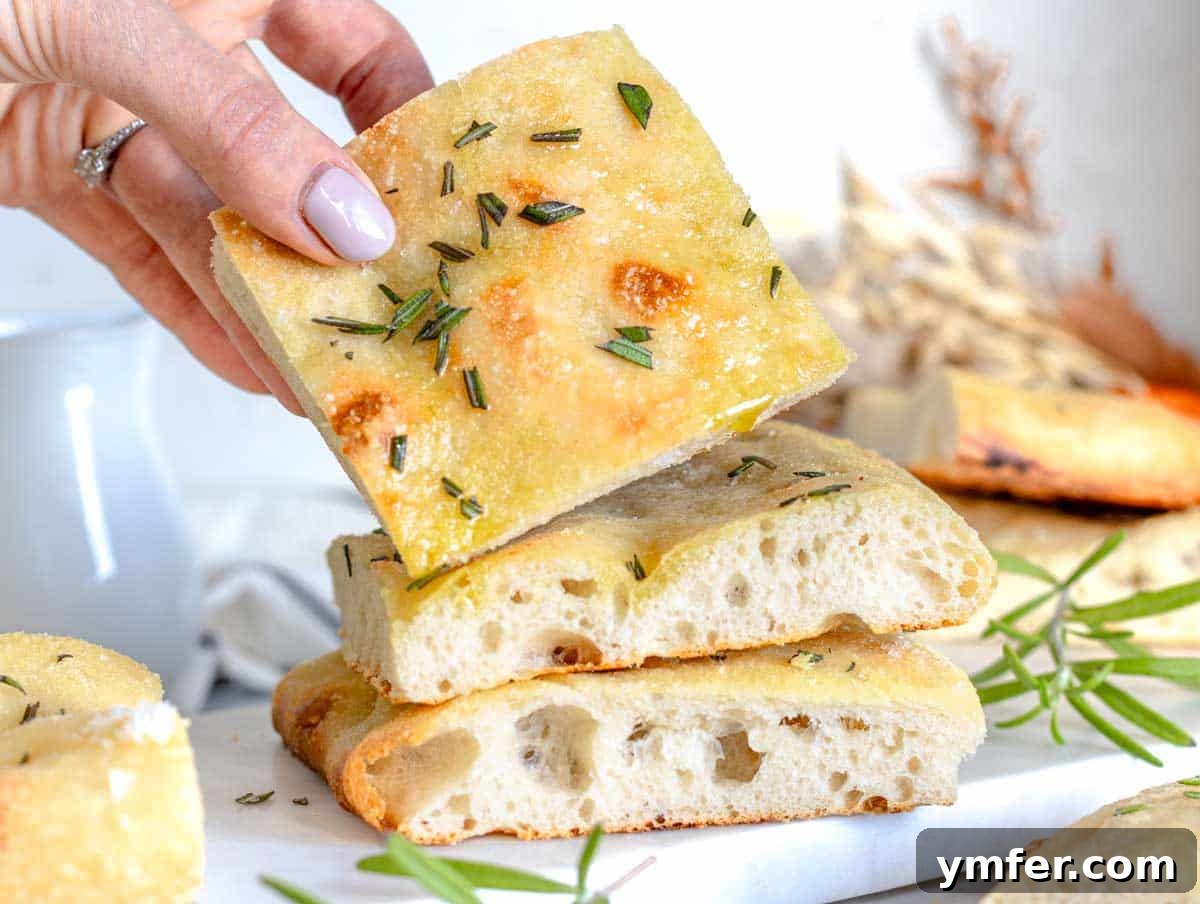
Storage and Make-Ahead Options for Schiacciata
Schiacciata is best enjoyed fresh, but with these tips, you can extend its life or even prepare it in advance for convenience.
Make Ahead for Future Enjoyment: If you’re looking to prepare schiacciata in advance, a fantastic strategy is to partially bake it. Bake the flatbread for approximately 12 minutes—instead of the full 18-20 minutes—and then let it cool completely on a wire rack. At this stage, it can be stored for later use. This partial bake prevents overcooking when you finish it later.
Freezing Partially Baked Schiacciata: For longer storage, wrap the partially baked schiacciata tightly in plastic wrap, then place it in a freezer-safe bag or aluminum foil. It will keep well in the freezer for up to 3 months. When you’re ready to enjoy it, transfer the frozen schiacciata directly to a preheated oven at 400°F (200°C) and bake for an additional 6 to 8 minutes, or until fully heated through and golden brown. This method delivers a fresh-baked taste with minimal effort.
Room Temperature Storage: Leftover schiacciata can be kept in a plastic bag or an airtight container at room temperature for 2 to 3 days. While it won’t be as crisp as when freshly baked, it will still retain its delicious flavor and chewy texture.
Reheating Instructions: To bring leftover schiacciata back to life, you can reheat it in an oven or air-fryer preheated to 400°F (200°C) for a few minutes until it’s warmed through and the crust regains some of its crispness.
Similar Bread and Tuscan Recipes to Explore
BREAD RECIPES: Continue your baking journey with other delightful bread creations like focaccia, focaccia pizza, Neapolitan pizza dough, quick pizza dough, flatbread pizza, pita bread, and Naan bread.
TUSCAN RECIPES: Dive deeper into Tuscan culinary traditions with savory dishes such as Tuscan bean soup, bean stew, kale soup, panzanella, tortellini soup, vegetable soup, minestrone. For dessert, try classic Tuscan treats like biscotti, torta della nonna, and crostata.
Bread Recipes
Focaccia Pizza
Bread Recipes
Focaccia
Bread Recipes
Pita Bread
Bread Recipes
Neapolitan Pizza Dough
Schiacciata Recipe
Share
Equipment
-
We recommend using one half-sheet size pan (17 x 12 Inches or 43×30 cm) or two quarter-sheet size pans (12 x 9 Inches or 30 x 23).
Ingredients
- 1⅔ cups lukewarm water
- 2 teaspoons instant dry yeast
- 2 teaspoons sugar
- 3⅓ cups all-purpose flour or pizza flour
- 2 teaspoons salt + more for topping
- 1 tablespoon extra virgin olive oil + more for topping
- 1 teaspoon rosemary optional
Instructions
MAKING THE DOUGH
-
To a large mixing bowl, add 1⅔ cups lukewarm water, 2 teaspoons instant dry yeast, and 2 teaspoons sugar. Whisk until the yeast is dissolved. If the yeast doesn’t dissolve it might be inactive. Start over with new yeast.

-
Add 3⅓ cups all-purpose flour and 2 teaspoons salt. Stir with a wooden spoon until combined. Add 1 tablespoon extra virgin olive oil and stir for another minute until absorbed. We are aiming for a wet and sticky dough.Cover the bowl with plastic wrap.
PROOFING
-
QUICK PROOFING: Let it proof in a warm corner of your kitchen for about 1½ hours or until it doubles in volume. SLOW PROOFING: Let it proof in the fridge for 8 to 36 hours then remove from fridge and let 2 hours at room temperature.
EASY FOLDING
-
While still in the bowl, fold the dough on itself with a spoon from the outside to the inside for 20 times. It takes one minute.
-
Transfer dough onto a baking tray lined with parchment paper and olive oil. Proof a second time in a warm spot for 45 minutes.In the meantime preheat oven to 450°F or 230°C.
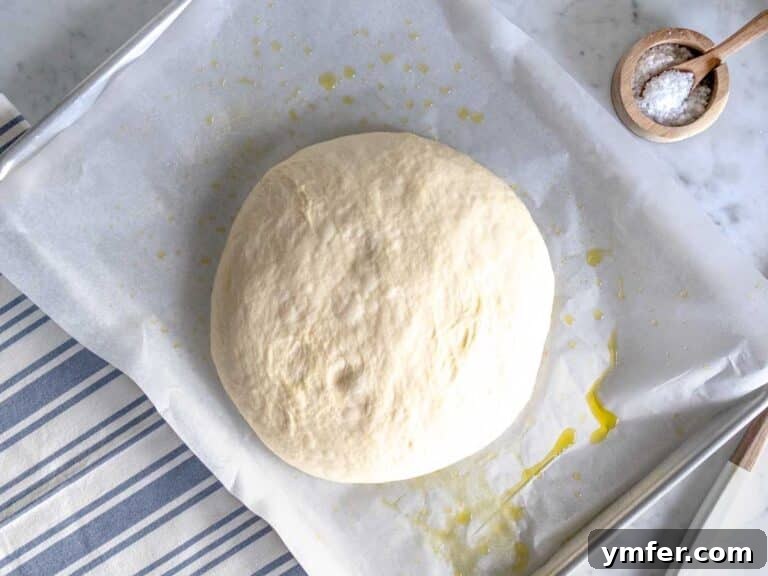
FLATTEN AND BAKE
-
Wet your hands, then flatten dough with the tip of your fingers, filling the baking tray.You want to create dimples as you flatten the schiacciata.Drizzle with extra virgin olive oil (about 1 to 2 tablespoons) and sprinkle with salt to taste (about ½ to 1 teaspoon)
-
Bake on the lowest oven rack for about 18 to 20 minutes. Remove from the pan and let it steam out on a cooling rack for 30-60 seconds before cutting it.Optionally you can top with rosemary.
Notes
TIPS
Flour: If you can find Caputo Nuvola flour or 00 pizza flour, that would make a delicious light focaccia.
Sugar: It feeds the yeast and helps color the schiacciata as it bakes.
Stirring: We find it easier to stir the dough with a wooden spoon, help upside down. That is, stir with the handle of the spoon, not the actual spoon.
Quick proofing: If your home temperature is below 68°F or 20°C, I recommend turning on your oven for 30 seconds and then turning it off. Then, put the dough in the slightly warm oven to proof, creating the perfect conditions (light heat + moist) for the yeast to do its work.
Temperature: When you bake schiacciata, the oven should be very hot. Preheat it to maximum temperature for at least 20 minutes.
SUBSTITUTIONS
Flour: Substitute 00 pizza flour, bread flour, or whole wheat flour. For a more rustic schiacciata, you can also use 50% whole wheat and 50% all-purpose flour.
Instant dry yeast: substitute fresh yeast for instant dry yeast. You’ll need 3x more.
STORAGE
Make ahead: If you want to make schiacciata in advance, my advice is to partially bake it for 12 minutes rather than the full 18 minutes and let it cool on a cooling rack.
At this stage, you can freeze it wrapped in plastic for 3 months or store it in a plastic bag. Then, when you need it, finish baking it for 6 to 8 minutes in a preheated oven at 400°F or 200°C.
Room temperature: Keep leftovers in a plastic bag for 2 to 3 days.
Reheat: You can reheat it in the oven or air-fryer at 400°F or 200°C.
Nutrition
You might also like:
Collections
30 Easy Italian Recipes
Collections
45 Easy Pasta Recipes
Mains
40 High Protein Vegetarian Meals
Recipes