
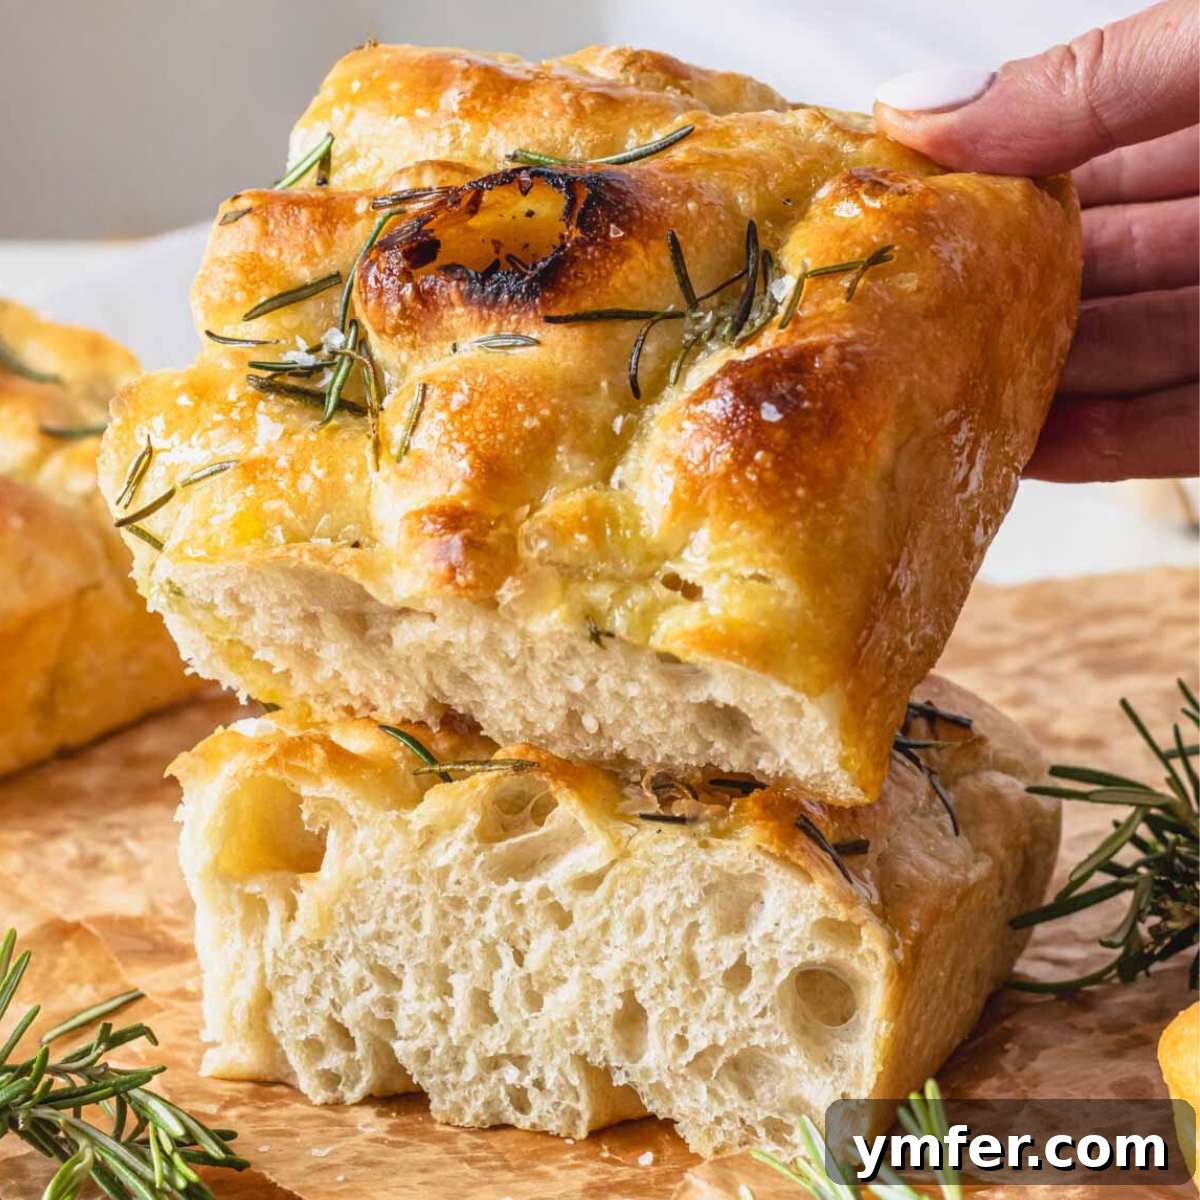
Baking focaccia is a culinary journey simpler than you might imagine. With our meticulously crafted no-knead recipe, you can effortlessly create authentic Italian focaccia bread, delighting your senses in as little as three hours from start to finish. This recipe eliminates the need for complex techniques, making it accessible for bakers of all skill levels.
This method has been rigorously tested and perfected by hundreds of our enthusiastic followers across our website and social media platforms. The result is consistently a focaccia masterpiece: a bread boasting a beautifully crisp and golden crust that crackles with every bite, revealing an incredibly soft, airy, and flavorful crumb within. Prepare for a truly rewarding baking experience!
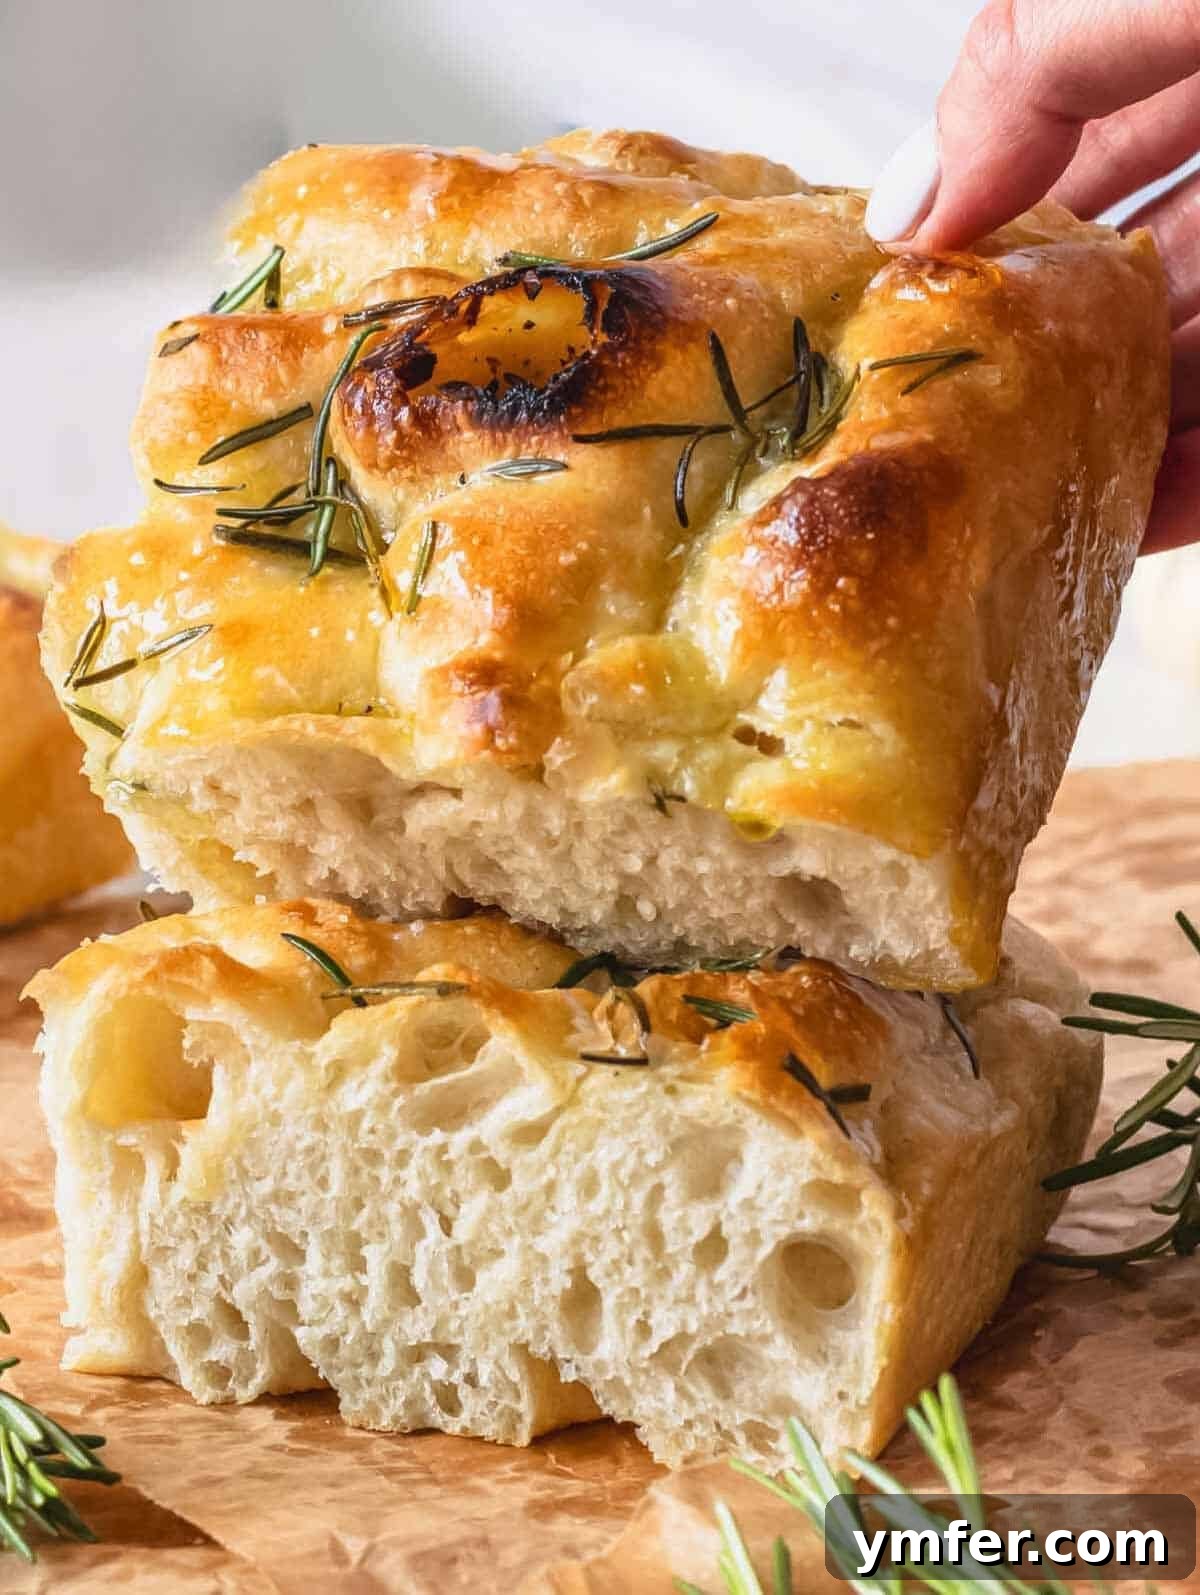
Watch our video for a visual guide to making this delicious Rosemary No-Knead Focaccia:
Watch Rosemary No Knead Focaccia on YouTube
Table of Contents
- Introduction: The Italian Soul of Focaccia
- Why You’ll Love This Easy Focaccia Recipe
- Key Ingredients for Your Perfect Focaccia
- Essential Baking Equipment
- Step-by-Step Guide: How to Bake Focaccia
- Expert Tips for Focaccia Success
- Delicious Focaccia Variations & Toppings
- Serving Suggestions for Your Homemade Focaccia
- Focaccia Recipe Card
- More Bread & Pizza Recipes to Explore
Introduction: The Italian Soul of Focaccia
Focaccia (pronounced Foh-KAH-chah) holds a special place in the heart of Italian cuisine, with its characteristics varying wonderfully across Italy’s diverse regions. Here in central Italy, where we are based, you’ll often find focaccia that is thin and delightfully crunchy, bearing a close resemblance to our local Schiacciata. Journey to other regions, however, and you’ll discover thicker, more substantial versions that lean closer to traditional homemade bread in texture and form.
My own deep affection for focaccia dates back decades. I vividly recall my school days when a warm slice of focaccia was the ultimate mid-morning snack. At precisely 10 AM, my classmates and I would strategically place our foil-wrapped slices on the classroom radiator to gently reheat. The aroma that filled the room was intoxicating, much to the exasperation of our teachers – but oh, it was worth it! The taste of that warm, fragrant focaccia remains a cherished memory.
Today, this love for focaccia has been enthusiastically embraced by Louise, who now insists on having a fresh slice every Saturday morning from our beloved local baker, Nazzareno. It’s a tradition that brings joy and a delicious start to our weekend!
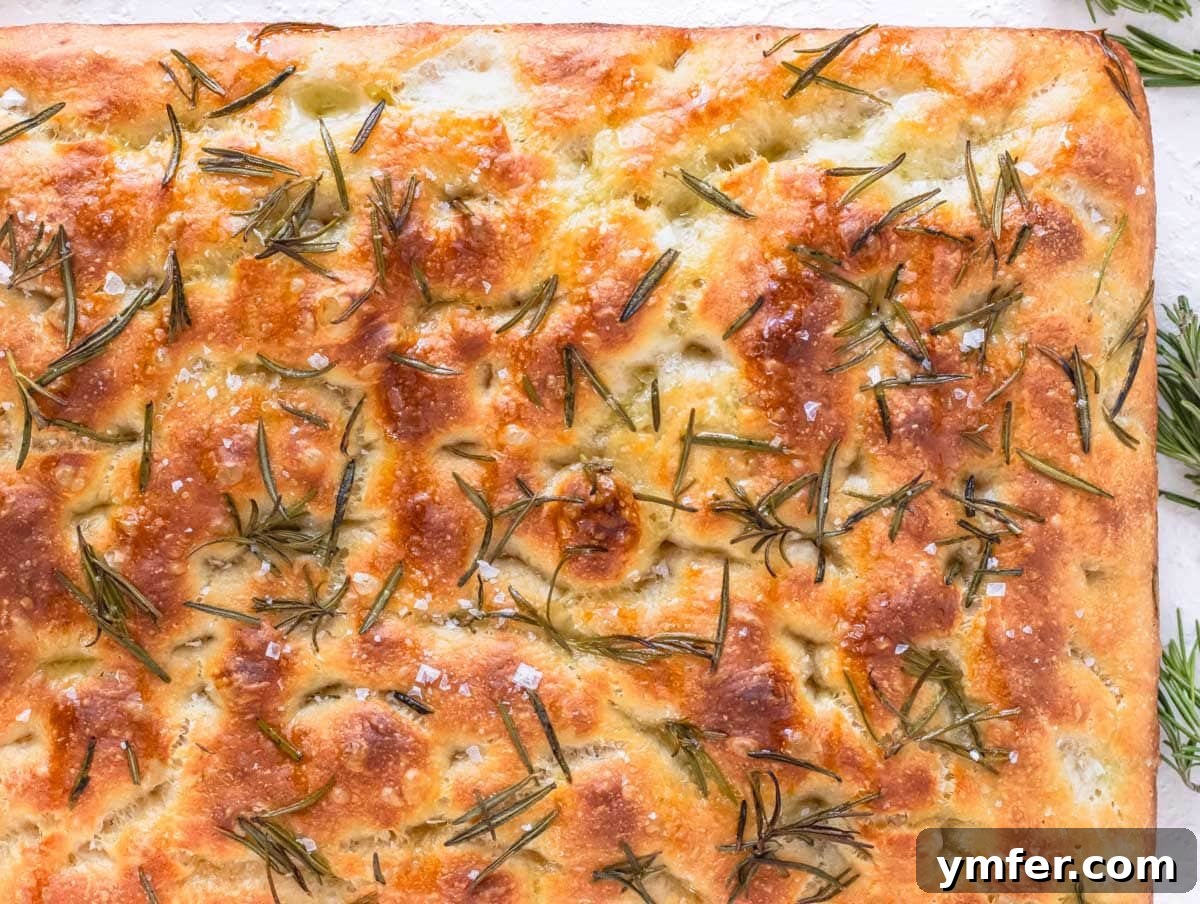
It’s important to understand that in Italy, focaccia isn’t just a simple bread; it’s a high-quality product, traditionally made with the freshest ingredients, and enjoyed at any time of day – from a light breakfast to a satisfying accompaniment for dinner. Every morning, skilled bakers across Italy prepare it from scratch, filling the air with its irresistible scent.
Having spent countless hours observing these masterful bakers, attending classes, and gathering their invaluable insights, I’ve distilled their top tips and secrets into this very recipe. My goal was to create an authentic Italian focaccia bread recipe that is genuinely easy for anyone to make at home, without requiring specialized ovens, complicated equipment, or advanced techniques. This recipe brings the essence of Italian baking directly to your kitchen.
Don’t forget that any leftover focaccia can be transformed into incredibly delicious meals. It makes a fantastic base for a focaccia sandwich or a classic Caprese sandwich. And for those feeling a bit more adventurous, why not try your hand at making Neapolitan pizza or even a focaccia pizza?
Why You’ll Love This Easy Focaccia Recipe
- Effortlessly Simple: Our no-knead method means minimal effort for maximum flavor. Forget the intensive kneading required for many traditional bread recipes; this one is designed for ease.
- Authentic Italian Taste: Crafted with insights from traditional Italian bakers, this recipe delivers the true taste and texture of focaccia, reminiscent of what you’d find in a genuine Italian bakery.
- Perfect Texture Every Time: Expect a beautifully crisp, golden crust that gives way to a soft, airy, and chewy interior. It’s the ideal balance of textures that makes focaccia so irresistible.
- Versatile & Customizable: While delicious on its own with rosemary and sea salt, this focaccia is a blank canvas for your favorite toppings. From olives and tomatoes to caramelized onions, the possibilities are endless.
- Quick or Slow Proofing Options: Whether you need a fresh loaf in under three hours or prefer the deeper flavor development of an overnight cold proof, this recipe offers flexible proofing times to suit your schedule.
- Impressive Results: Even as a novice baker, you’ll produce a focaccia that looks and tastes like it came from a professional kitchen, perfect for entertaining or a special family meal.
- Uses Basic Ingredients: You won’t need any exotic flours or hard-to-find ingredients. This recipe relies on common pantry staples, making it accessible and cost-effective.
Key Ingredients for Your Perfect Focaccia
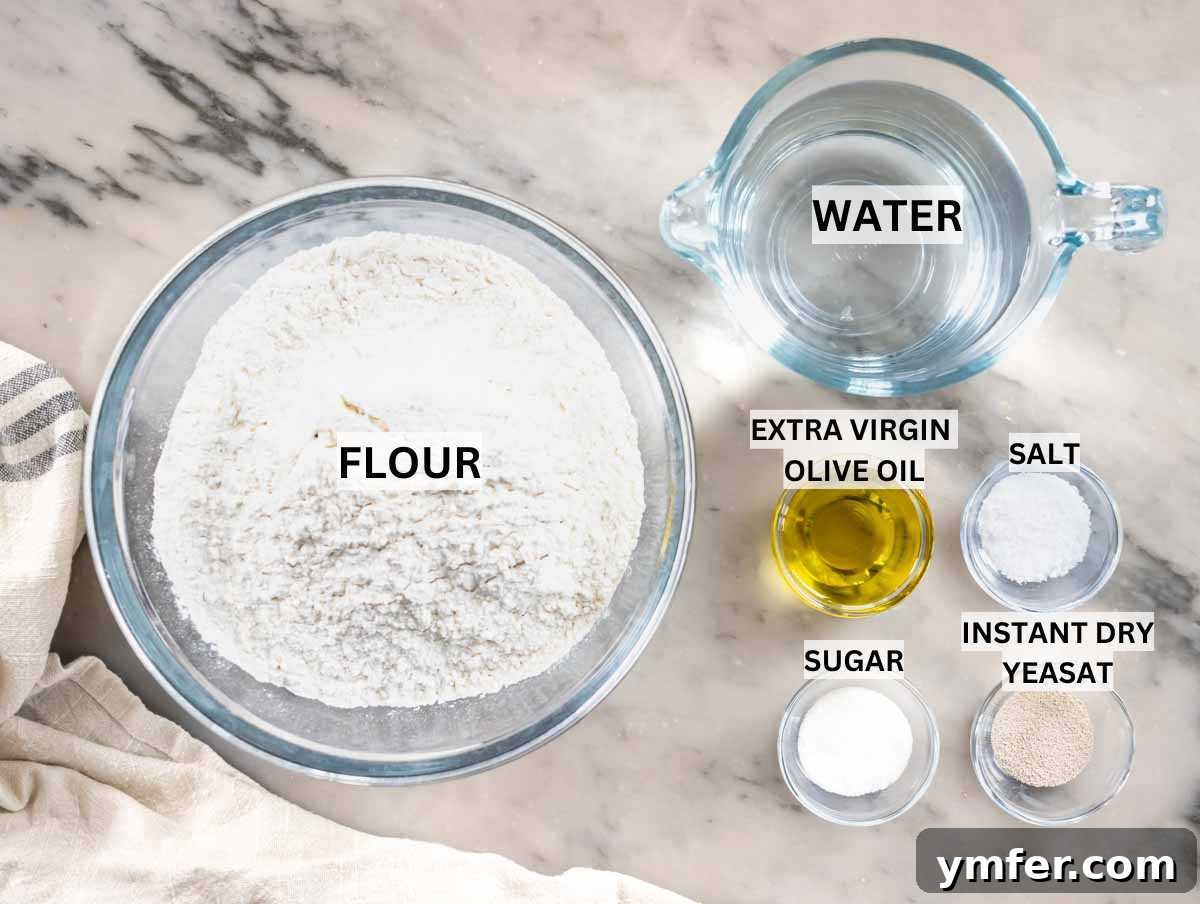
Creating extraordinary focaccia starts with understanding the role each simple ingredient plays. Quality ingredients make a noticeable difference in the final taste and texture of your bread.
- Flour: We recommend using good quality bread flour or all-purpose flour for excellent results. Bread flour, with its higher protein content, will give you a chewier focaccia, while all-purpose flour creates a slightly softer crumb. For those looking for an extra touch, you can substitute half of the all-purpose flour with whole-wheat flour for a nuttier flavor and added fiber. If you’re fortunate enough to find Caputo Pizzeria or Caputo Nuvola flour, imported directly from Italy, you’re in for an unparalleled treat – these flours are renowned for their superior gluten structure and are a favorite among professional bakers (not sponsored).
- Water: The temperature of your water is crucial for activating the yeast correctly. Ensure it is lukewarm, not hot (which can kill the yeast) and not cold (which will slow down or prevent activation). Aim for a temperature between 95°F and 110°F (35°C-43°C).
- Yeast: For consistency and ease, instant dry yeast is our top recommendation. Brands like SAF Instant and Caputo Dry Yeast are excellent choices (not sponsored), but any reliable instant dry yeast will perform well. If you prefer to use fresh yeast, you’ll need to use three times the amount specified for dry yeast, and it should also be bloomed in lukewarm water and sugar before combining with other ingredients.
- Extra Virgin Olive Oil: This is a cornerstone ingredient for authentic focaccia, contributing immensely to its flavor, tenderness, and preventing sticking. A generous amount of good quality extra virgin olive oil gives focaccia its characteristic rich aroma and soft interior. While you can substitute parchment paper for less oil on the bottom of the pan, remember that reducing the oil will slightly alter the flavor and crust texture.
- Salt and Sugar: Salt is vital for enhancing the flavor of the bread and controlling yeast activity. Without it, your focaccia would taste bland. Sugar, though a small amount, plays a dual role: it helps to “feed” the yeast, promoting a more vigorous rise, and contributes to the beautiful golden-brown color of the crust during baking.
- Toppings: The most classic focaccia topping is a simple yet effective mixture of extra virgin olive oil, water, and salt. This creates the signature dimpled surface and adds moisture and flavor. For an aromatic touch, fresh rosemary sprigs and a sprinkle of flaky sea salt are optional but highly recommended, elevating the focaccia to a new level of deliciousness.
Essential Baking Equipment
Choosing the right baking pan is key to achieving your desired focaccia texture and thickness. Ensure your pan is adequately prepared to prevent sticking, which is a common challenge when baking focaccia.
- Baking Pan Preparation: Focaccia dough is sticky and rich. To ensure it doesn’t adhere to the pan, generously grease your baking dish with at least 2-3 tablespoons of extra virgin olive oil, covering the bottom and sides thoroughly. Alternatively, you can line the pan with parchment paper, though this might slightly reduce the crispy bottom crust that oil provides.
Pan options for different textures and thickness:
- 9×13-inch (23×33 cm) Rectangular Pan: This is our preferred size, as seen in all our recipe photos and videos. It yields a medium-thick focaccia, which is incredibly versatile and excellent for most occasions, especially perfect for creating hearty focaccia sandwiches.
- 13×18-inch (33×46 cm) Half Sheet Pan: Opt for this larger sheet pan if you desire a thinner, crispier focaccia. Its larger surface area allows for a more even, delicate crisp, making it ideal for a light snack or a base for focaccia pizza.
- 8×8-inch (20×20 cm) Square Pan: For those who love a truly substantial and bready focaccia, this smaller pan is perfect. It results in a very thick, fluffy bread that can serve as a delightful homemade bread substitute, wonderful for dipping into olive oil or soups.
- 9×9-inch (23×23 cm) Square Pan: This pan offers a focaccia that is slightly thinner than the 8×8-inch version but still wonderfully soft and fluffy, striking a great balance between chewiness and lightness.
- 10-11 inch (25-28 cm) Round Pan: If you prefer a traditional round focaccia, similar to a rustic pizza, this size works perfectly. It gives your focaccia a charming, classic presentation.
Step-by-Step Guide: How to Bake Focaccia
Follow these simple steps to create a show-stopping homemade focaccia with a golden crust and a tender, airy crumb.
Step 1: Bloom the Yeast – The Foundation of Flavor
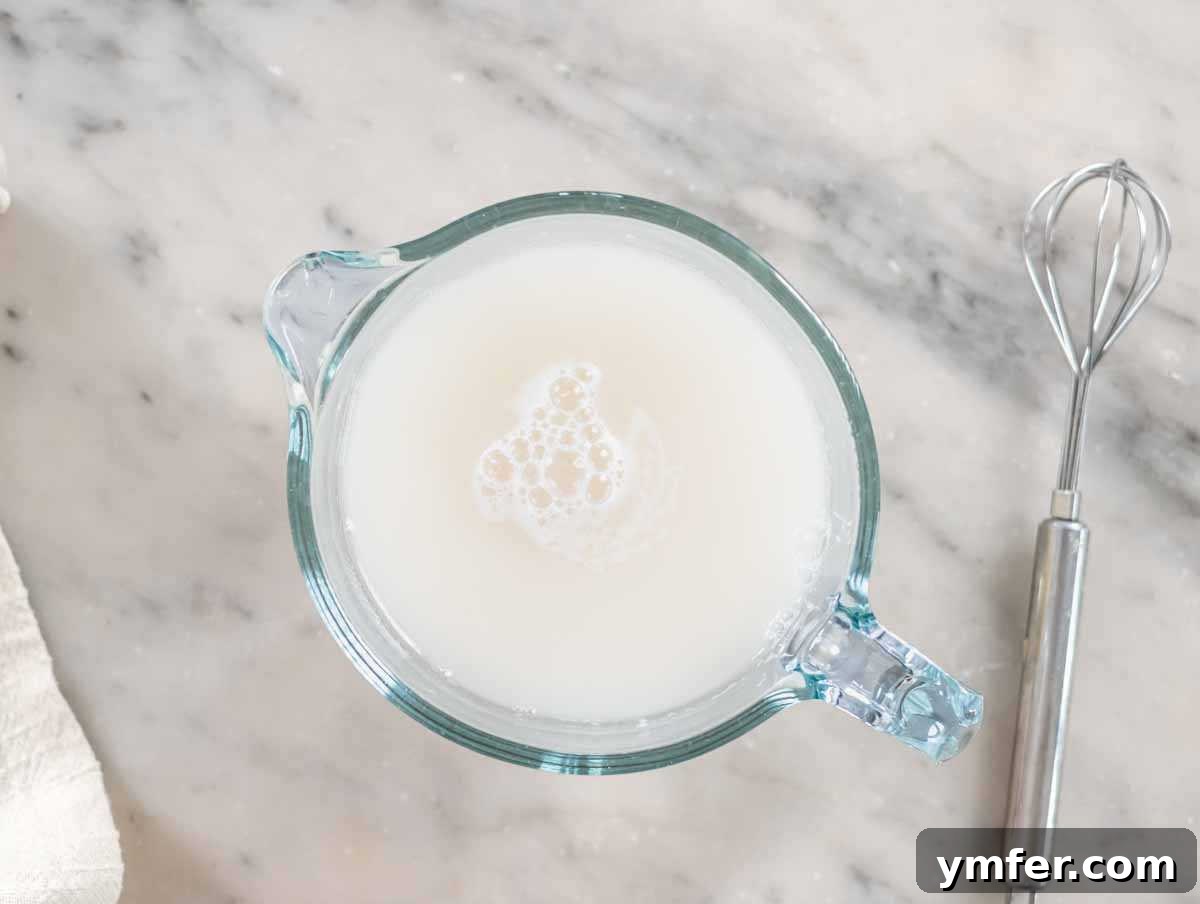
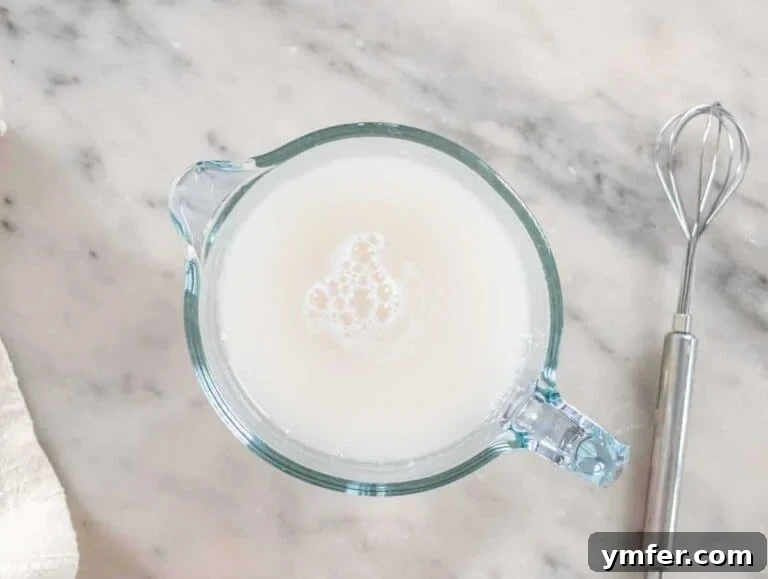
Begin by accurately measuring all your dough ingredients. In a small bowl, combine the lukewarm water (ensure it’s not too hot or cold, ideally 95-110°F/35-43°C), instant dry yeast, and sugar. Whisk gently until the yeast and sugar are fully dissolved. Set this mixture aside for about 30 seconds. You should see a slight foam or bubbling, indicating the yeast is active and ready. If there’s no activity, your yeast might be old or the water temperature was off; it’s best to start again with fresh yeast.
Step 2: Craft the No-Knead Dough – Simplicity at its Best
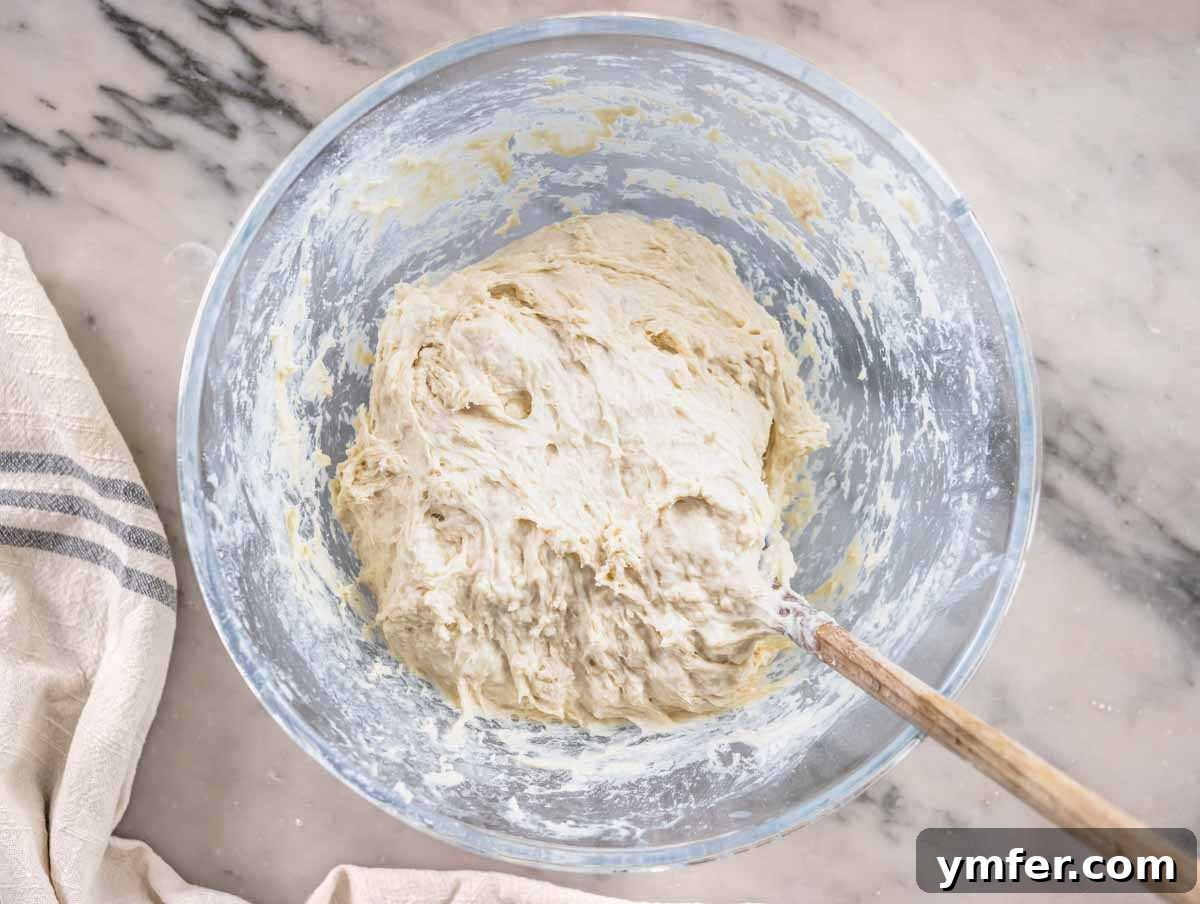
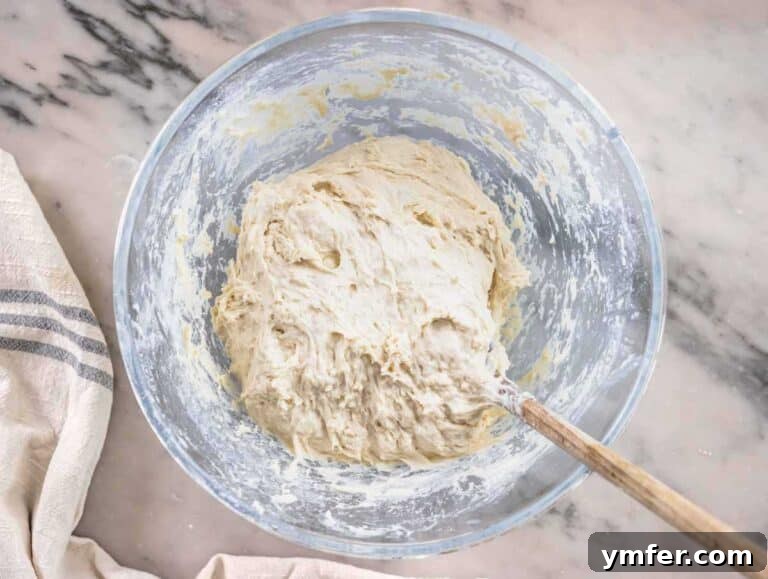
In a large mixing bowl, combine the flour and salt, stirring them well to ensure even distribution. Next, pour in the bloomed yeast-water mixture. Using a sturdy wooden spoon or spatula, stir vigorously for approximately one minute. Your goal is to achieve a very wet, sticky dough – don’t worry if it looks unmanageable, this is exactly what we want for an airy focaccia. Finally, add the extra virgin olive oil and continue stirring for another minute until it is fully incorporated into the dough, adding richness and elasticity.
Step 3: Choose Your Proofing Method – Quick or Flavorful Slow Rise
This recipe offers two proofing options, allowing you to prioritize speed or enhanced flavor development:
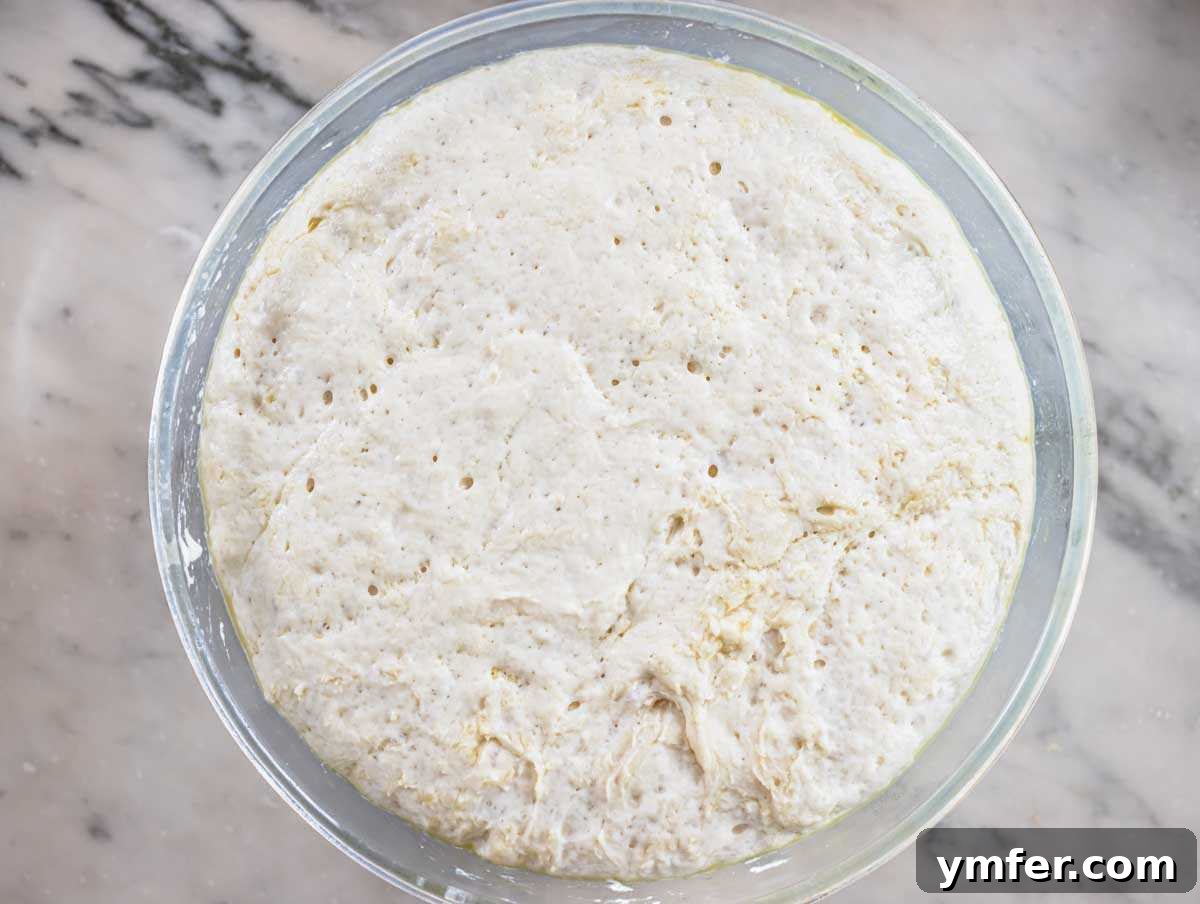
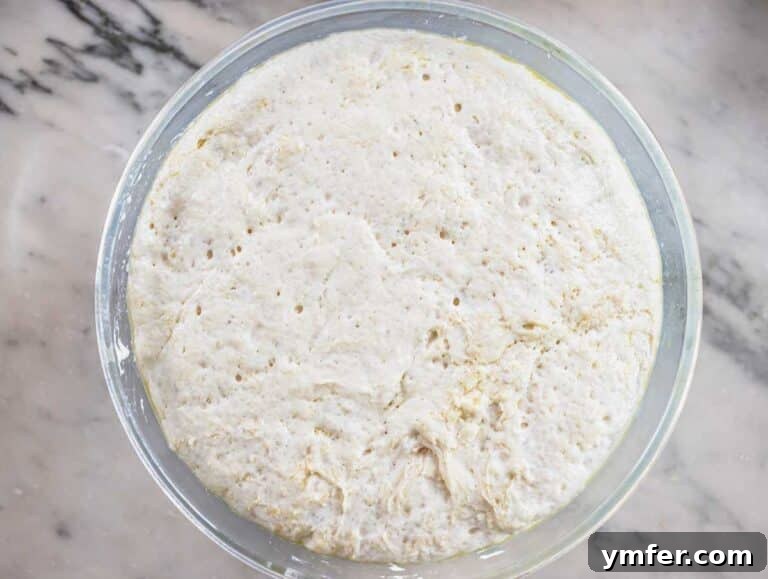
- Quick Proofing (1.5 to 2 hours): For same-day baking, cover the bowl with a damp cloth or plastic wrap, ensuring there’s enough space for the dough to expand without touching the cover. Place the bowl in a slightly warm environment. A common trick is to warm your oven by turning it on for just 60 seconds, then immediately turning it off; this creates the perfect cozy spot for proofing. Let the dough rise for 1.5 to 2 hours, or until it has visibly doubled in volume.
- Slow Proofing (8 to 24 hours): For a focaccia with a more complex flavor profile and superior texture, opt for a slow, cold proof. Cover the bowl tightly with plastic wrap and refrigerate the dough for 8 to 24 hours. This extended cold fermentation develops deeper flavors and a more open crumb. When you’re ready to bake, remove the dough from the fridge and allow it to come to room temperature for 2 to 3 hours before proceeding to the next step.
Step 4: The Art of Folding – Developing Structure, Not Kneading
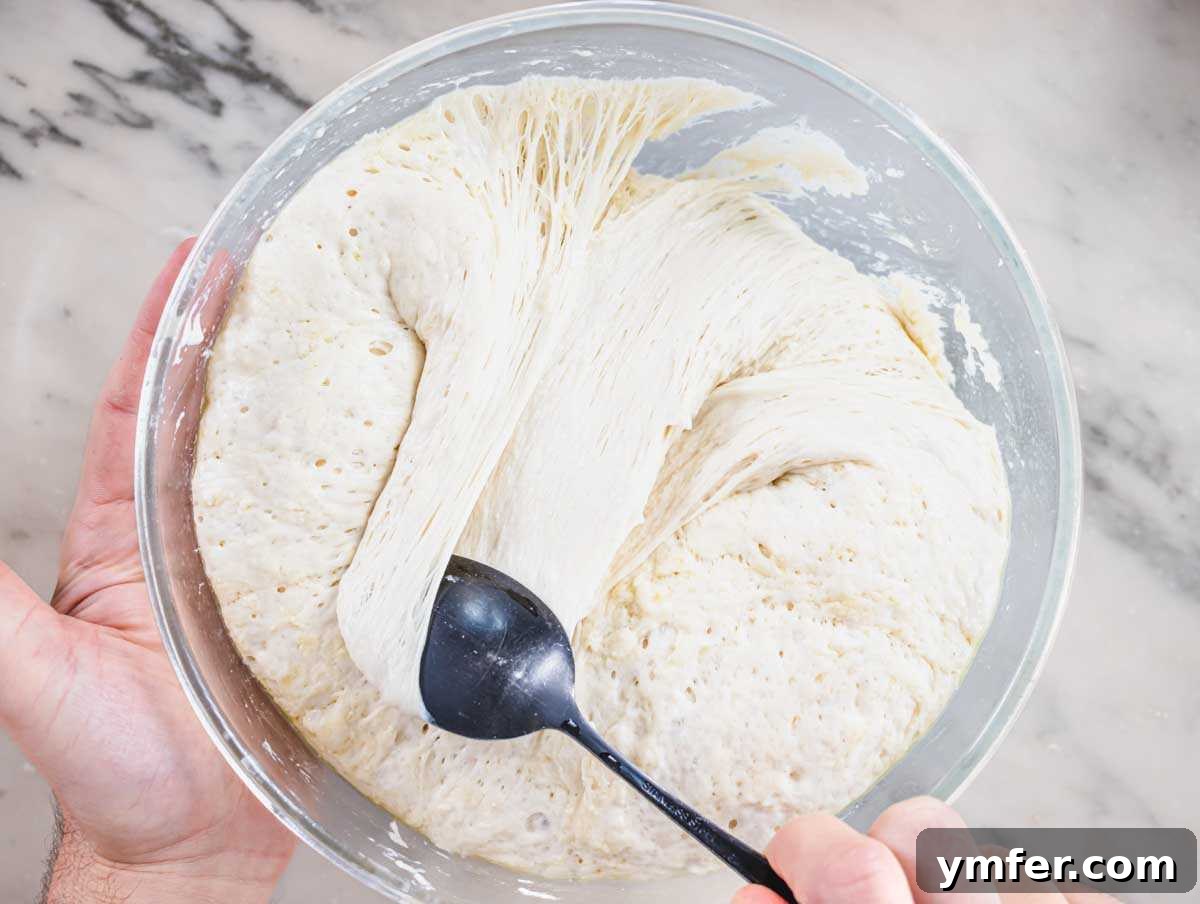
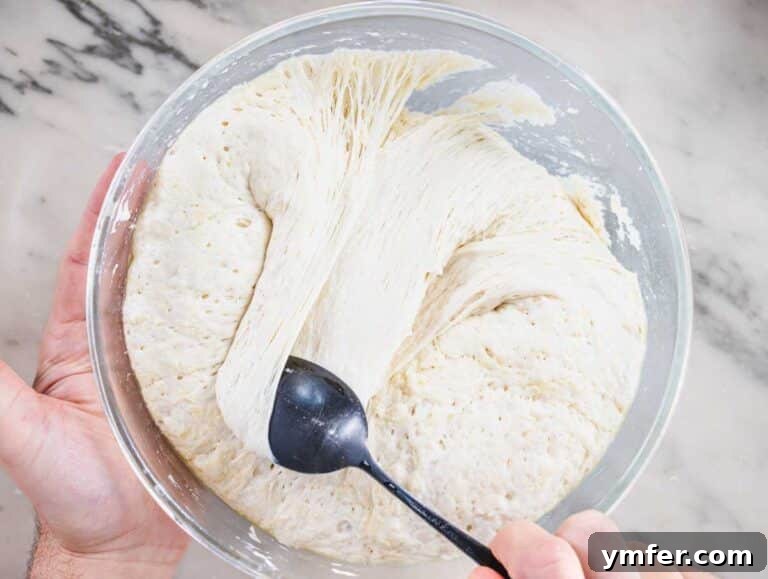
After the initial proofing, it’s time to build structure without traditional kneading. With a spoon (or wet hands, if you prefer), gently fold the dough over itself 20 to 40 times, working from the outside edges towards the center of the bowl. This process, taking only 30-60 seconds, helps to develop the gluten and create those desirable air pockets. You’ll notice the dough becoming tighter and more cohesive as you fold; stop once you feel this resistance.
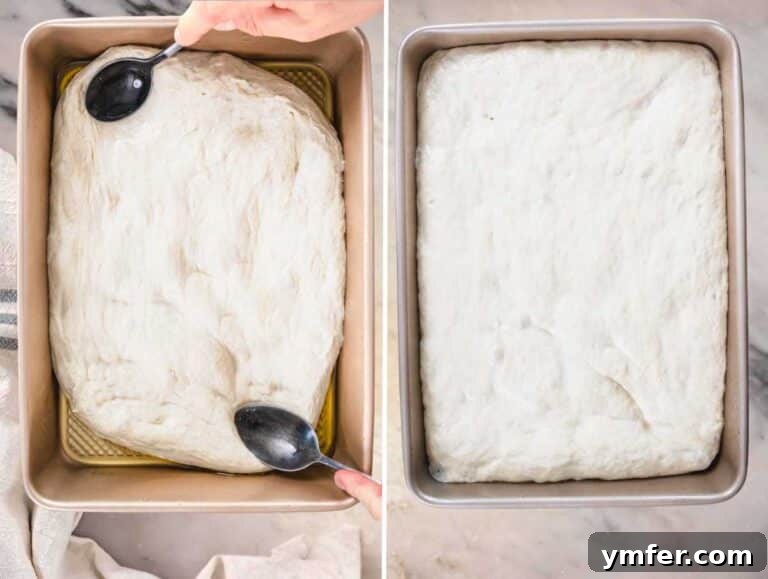
Step 5: Final Proofing in the Pan – Preparing for Baking
Generously grease your chosen baking pan with 2 to 3 tablespoons of extra virgin olive oil, ensuring all surfaces are well-coated to prevent sticking and promote a crispy bottom. Carefully transfer the dough into the prepared pan. Using the back of two spoons (wet them with water to prevent sticking), gently spread the dough until it covers most of the baking pan. Don’t force it to the edges if it resists; it will relax during this proof. It’s perfectly fine if the top of the focaccia gets a little wet from the spoons. Cover the pan with a damp cloth, another baking tray, or plastic wrap. Allow it to proof a second time in a warm spot in your kitchen for approximately 45 minutes. During this time, preheat your oven to 450°F (230°C) and prepare your desired topping.
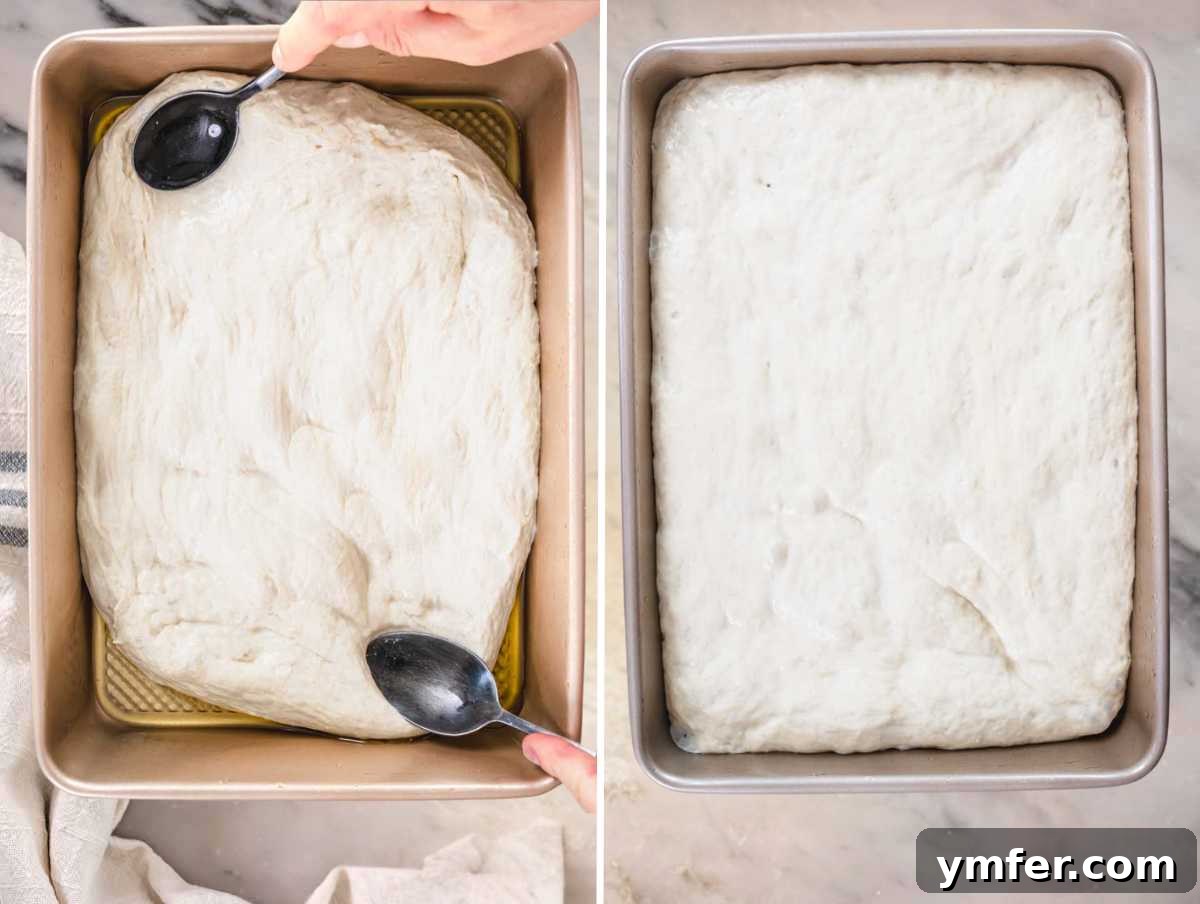
Step 6: The Signature Dimples & Topping – Adding Character and Flavor
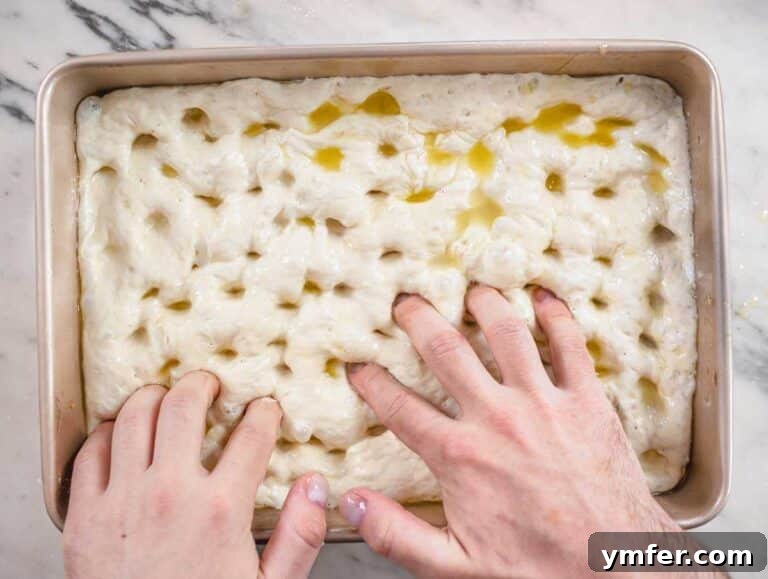
In a small bowl, whisk together extra virgin olive oil, water, and salt until the salt is fully dissolved. This is your essential topping mixture. Dip your fingers into this mixture, then gently but firmly press dimples across the entire surface of the focaccia dough. These dimples are characteristic of focaccia, creating pockets for the olive oil and ensuring a light, airy texture. Pour the remaining oil-water mixture evenly over the dough, allowing it to pool into the dimples. For a classic finish, optionally scatter fresh rosemary sprigs over the top and sprinkle generously with flaky sea salt for an irresistible crunch and burst of flavor.
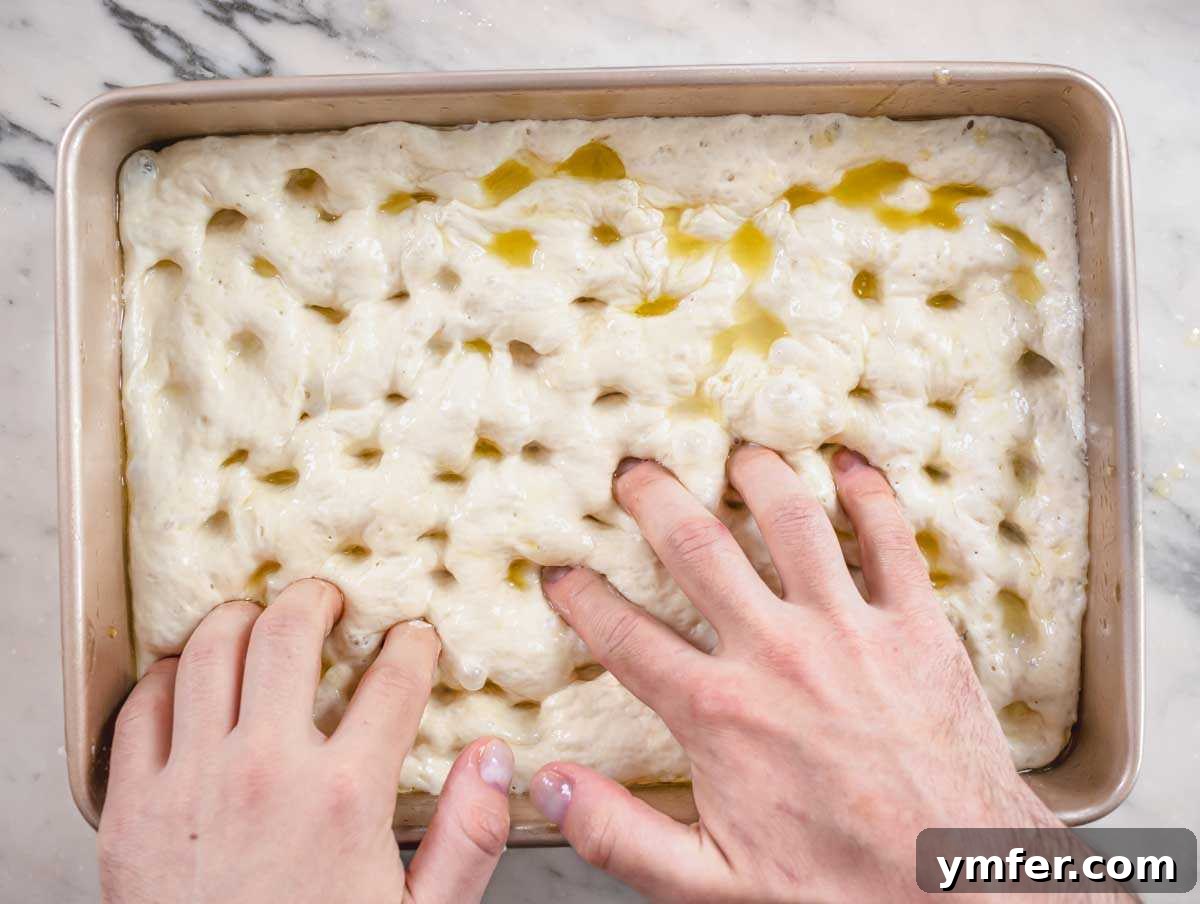
Step 7: Bake to Golden Perfection – The Grand Finale
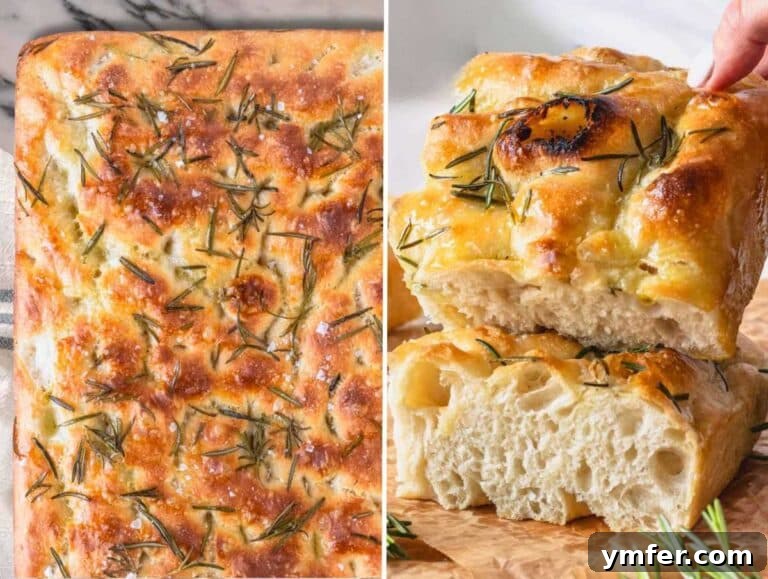
Once your oven has reached the preheated temperature of 450°F (230°C), carefully place the focaccia pan on the medium-low rack. Bake for 20 to 25 minutes. Baking times can vary depending on your oven and the thickness of your focaccia. A thicker focaccia might need closer to 25 minutes, while a thinner one could be ready in 20 minutes. The focaccia should emerge from the oven with a rich, golden-brown and crispy top, a well-cooked bottom, and a wonderfully soft, airy interior. Allow it to cool in the pan for at least 5 minutes before carefully removing, slicing into squares or desired shapes, and serving warm. Enjoy your magnificent homemade focaccia!
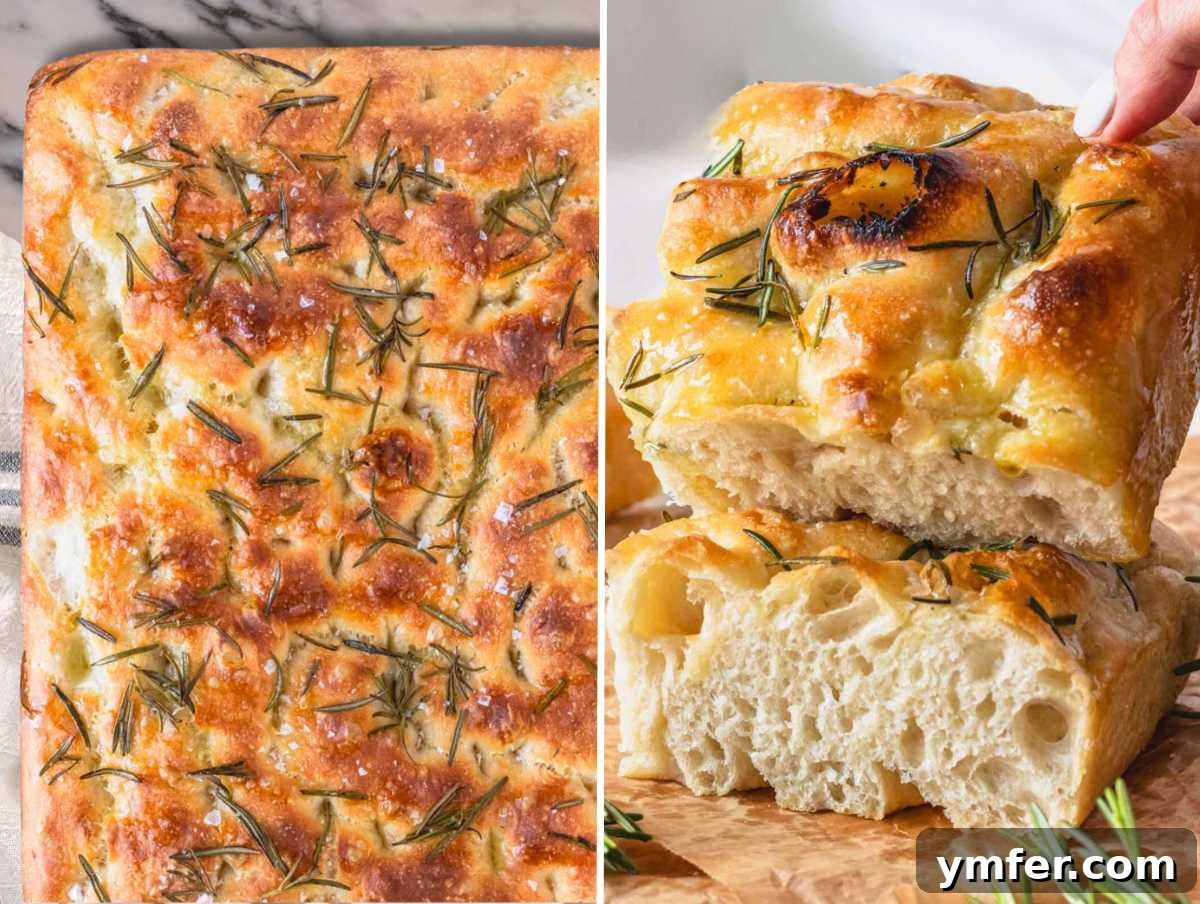
Expert Tips for Focaccia Success
- Don’t Skimp on the Olive Oil: Olive oil is crucial not just for flavor but also for preventing sticking and achieving that perfect crispy crust. Be generous when greasing the pan, and don’t be afraid to drizzle extra over the top before baking.
- Lukewarm Water is Key: Yeast is sensitive to temperature. Water that’s too hot will kill it, and water that’s too cold won’t activate it properly. Aim for water between 95°F and 110°F (35°C-43°C) for optimal yeast activity.
- Embrace the Stickiness: A wet and sticky dough is a happy dough for focaccia. Resist the urge to add more flour during the mixing or spreading stages. The high hydration is what contributes to the characteristic airy and open crumb.
- Proofing Environment Matters: For quick proofing, a slightly warm, draft-free spot is ideal. If your kitchen is cold, use the oven trick (turn on for 60 seconds, then off) or place the bowl in a warm corner. For slow proofing, the fridge is your friend for deeper flavor development.
- Gentle Handling: Focaccia dough is delicate. Avoid over-handling or deflating it too much, especially after the first proof and when spreading it into the pan. This preserves the precious air bubbles.
- Dimple with Purpose: The dimples are more than just decorative. They create pockets for the olive oil and steam, contributing to the focaccia’s unique texture and ensuring even baking.
- Preheat Your Oven Thoroughly: A hot oven from the start is essential for a good “oven spring” (the rapid rise of the dough when it first enters the hot oven) and a crispy crust.
- Listen to Your Focaccia: While timings are provided, keep an eye on your focaccia. It’s ready when it’s deeply golden brown on top and cooked through on the bottom. If the top browns too quickly, you can loosely tent it with foil.
- Cool Before Cutting: Letting the focaccia cool for at least 5-10 minutes allows the internal structure to set, preventing a gummy texture and making it easier to slice cleanly.
Delicious Focaccia Variations & Toppings
While the classic rosemary and sea salt focaccia is undeniably delicious, this versatile bread is an incredible canvas for a myriad of toppings. Don’t be afraid to experiment and discover your new favorite!
Our absolute favorite variation features a vibrant topping that transforms the focaccia into a meal in itself. For this, you’ll need:
- 2 tablespoons extra virgin olive oil (for drizzling)
- 1 thinly sliced red onion
- 2 cups halved cherry tomatoes
- A heaping teaspoon of dried oregano
- 2 handfuls of black or green olives (pitted and roughly chopped, if large)
- A pinch of salt and freshly ground black pepper
Simply arrange these toppings over the dimpled dough before the final olive oil drizzle and baking. The flavors meld beautifully as it bakes, creating a rustic and incredibly satisfying focaccia. If you’d like to see this specific variation in action, here’s a video on YouTube:
Watch our video tutorial for this delicious loaded focaccia variation:
Watch No knead focaccia bread with toppings on YouTube
Beyond our personal favorite, Italy itself boasts a remarkable array of regional focaccia variations, each with its own unique charm and flavor profile. Exploring these regional specialties is a fantastic way to experience the depth of Italian baking:
- Pizza in Teglia: A Roman style of sheet pan pizza, often with a thick, airy crust similar to focaccia.
- Focaccia Genovese: Hailing from Genoa, this is typically a thin, crisp focaccia generously seasoned with olive oil and coarse salt.
- Focaccia di Recco: A truly unique Ligurian specialty, featuring two very thin layers of dough filled with stracchino cheese, baked until bubbly and golden.
- Focaccia Barese: From Bari, Puglia, this focaccia is known for its toppings of cherry tomatoes, olives, and often potatoes, resulting in a tender, moist crumb.
- Pizza Bianca Romana: A Roman “white pizza” – essentially focaccia served plain or with just olive oil and salt, perfect for sandwiches or as an accompaniment.
- Focaccia alla Messinese: A Sicilian variation from Messina, often topped with endive, tomatoes, anchovies, and cheese.
- Schiacciata Toscana: A Tuscan flatbread, typically thinner and crispier than focaccia, often made with lard and salt, sometimes with grapes for a sweet-savory version.
- Strazzata Lucana: A round focaccia from Basilicata, often made with lard and pepper, cooked in wood-fired ovens.
- Vastedda: A Sicilian bread, sometimes refers to a focaccia-like bread topped with ricotta and other ingredients.
- Sfincione Palermitano: A thick, soft Sicilian focaccia-pizza, usually topped with tomato sauce, onions, caciocavallo cheese, and often breadcrumbs and anchovies.
- Sceblasti: A very rustic focaccia from Puglia, often containing olives, tomatoes, and herbs, baked in a wood oven.
- Tiròt di Felonica: A savory pie from Lombardy, similar to focaccia, filled with onions and bacon.
- Chisola coi grasei: A rich focaccia from Piacenza, made with cracklings (grasei), a true indulgence.
- Pitta Calabrese: A ring-shaped focaccia from Calabria, sometimes plain, sometimes stuffed or topped.
This list merely scratches the surface of the incredible diversity of Italian baked goods. Each region, sometimes even each town, holds its own cherished focaccia tradition, waiting to be discovered.
Serving Suggestions for Your Homemade Focaccia
Homemade focaccia is incredibly versatile and can be enjoyed in countless ways. Here are some delicious ideas to make the most of your freshly baked bread:
- As an Appetizer: Serve warm slices with a small bowl of high-quality extra virgin olive oil for dipping. A balsamic glaze or a sprinkle of freshly ground black pepper can also enhance the experience.
- Alongside Soups and Salads: Focaccia makes an excellent accompaniment to any soup, from a hearty minestrone to a creamy tomato soup. Its robust texture and flavor also pair wonderfully with fresh, crisp salads.
- Sandwiches & Panini: Slice focaccia horizontally and fill it with your favorite ingredients to create incredible sandwiches. Think fresh mozzarella, ripe tomatoes, basil, roasted vegetables, pesto, or even deli meats and cheeses. It makes a particularly fantastic focaccia sandwich.
- Bruschetta Base: Lightly toast individual pieces of focaccia and use them as a base for bruschetta toppings like diced tomatoes, garlic, and basil, or creamy spreads.
- With a Cheese Board: Its mild, savory flavor makes focaccia a perfect addition to a charcuterie or cheese board, complementing a variety of cheeses, olives, and cured meats.
- Breakfast or Brunch: Enjoy a slice with a cup of coffee, perhaps lightly toasted and spread with a savory jam or a thin layer of cream cheese. The plain focaccia is also fantastic dipped in a savory egg yolk.
- Focaccia Pizza: Use a thinner focaccia as a quick and delicious base for a focaccia pizza, adding your favorite sauce and toppings before a quick bake.
- With Dips: Tear off pieces and use them to scoop up creamy dips like hummus, baba ghanoush, or a flavorful spinach and artichoke dip.
However you choose to enjoy it, your homemade focaccia is sure to be a crowd-pleaser!
More Bread & Pizza Recipes to Explore
If you’ve enjoyed making this focaccia, you might be inspired to dive deeper into the world of homemade bread and pizza. Here are some other fantastic recipes from our collection to try:
- Easy Vegan Flatbread Pizza: A quick and delicious option for a homemade pizza night.
- Authentic Tuscan Schiacciata: Explore a different regional Italian flatbread, known for its thin and crispy texture.
- Simple No-Knead Homemade Bread: A fundamental recipe for anyone looking to bake a classic loaf with minimal effort.
- Fluffy Homemade Pita Bread & Soft Naan Bread: Master these versatile flatbreads perfect for dipping or wraps.
- Traditional Vegan Piadina: Discover the Italian flatbread from Romagna, ideal for wraps and fillings.
If you tried this Focaccia recipe or any other recipe on our blog, please leave a 🌟 star rating and let us know how it goes in the comments section below. Your feedback means the world to us!
Authentic No-Knead Focaccia
Making delicious homemade focaccia is simpler than you think! Our no-knead recipe guides you to authentic Italian focaccia bread with a crisp, golden crust and a soft, airy crumb in just three hours. Perfect for beginners and seasoned bakers alike, this recipe delivers bakery-quality results right in your kitchen.
Print Recipe
Share on Facebook
Video Tutorial
For a complete visual guide to this easy focaccia bread recipe, watch our video:
Watch Easy Focaccia Bread on YouTube
Equipment
- 9×13-Inch (23×33 cm) Rectangular Baking Pan (See notes below for more pan options to adjust thickness and texture.)
- Large Mixing Bowl
- Small Bowl (for yeast and topping)
- Sturdy Wooden Spoon or Spatula
- Damp Cloth or Plastic Wrap
Ingredients
FOR THE DOUGH
- 1¾ cups (440 grams) lukewarm water
- 2 teaspoons (7 grams) instant dry yeast
- 2 teaspoons (8 grams) sugar
- 4 cups (600 grams) all-purpose flour or bread flour
- 3 teaspoons (12 grams) salt
- 2 tablespoons (30 grams) extra virgin olive oil (plus 2-3 tablespoons to generously grease the baking pan or substitute parchment paper)
FOR THE TOPPING
- 2 tablespoons (15-30 grams) extra virgin olive oil
- 3 tablespoons (45 grams) water
- ½ teaspoon (2.5 grams) salt (plus flaky sea salt, optional)
- 3 pinches rosemary (optional, fresh or dry, to taste)
Instructions
-
1. BLOOM THE YEAST: Measure all dough ingredients. In a small bowl, combine lukewarm water, instant dry yeast, and sugar. Whisk until dissolved and let sit for 30 seconds until slightly foamy.

-
2. MAKE THE DOUGH: In a large mixing bowl, stir together flour and salt. Add the yeast-water mixture and stir with a sturdy wooden spoon for about 1 minute until a wet, sticky dough forms. Stir in extra virgin olive oil for another minute until incorporated.
-
3. CHOOSE PROOFING METHOD:
QUICK PROOFING (1.5 to 2 hours): Cover the bowl with a damp cloth or plastic wrap. Place in a slightly warm oven (turned on for 60 seconds, then off) for 1.5 to 2 hours, or until doubled in volume.
SLOW PROOFING (8 to 24 hours): Cover tightly with plastic wrap and refrigerate. When ready to bake, remove from fridge and let sit at room temperature for 2-3 hours before the next step. -
4. FOLDING: After proofing, fold the dough over itself 20-40 times (30-60 seconds) from the outside to the inside using a spoon while still in the bowl. Stop when the dough feels tight.
-
5. FINAL PROOFING: Grease your baking pan with 2-3 tablespoons of olive oil and transfer the dough into the pan. Using the back of two water-wet spoons, gently spread the dough to cover most of the pan. Cover with a damp cloth/baking tray/plastic wrap and proof a second time in a warm spot for 45 minutes. Preheat oven to 450°F (230°C) during this time.
-
6. TOPPING: In a small bowl, mix 2 tablespoons extra virgin olive oil, 3 tablespoons water, and ½ teaspoon salt until dissolved. Dip fingers in it, then press dimples across the focaccia. Pour the remaining mixture over the dough. Optionally, add 3 pinches rosemary and sprinkle with flaky salt.
-
7. BAKE: Place focaccia on the medium-low rack in the preheated 450°F (230°C) oven. Bake for 20 to 25 minutes until golden brown and crispy on top, well-cooked on the bottom, and soft inside. Let cool for at least 5 minutes before removing from the pan, cutting, and serving.
Notes
TIPS FOR PERFECT FOCACCIA
Generously Oil or Line the Pan: Focaccia is prone to sticking. Always use at least 2-3 tablespoons of extra virgin olive oil to thoroughly grease the pan, or line it with parchment paper for easy removal. The oil also contributes significantly to flavor and crust crispiness.
Pan Options for Different Textures & Thickness:
- 9×13-inch pan (23×33 cm): Produces a medium-thick focaccia, perfect for most uses and especially great for focaccia sandwiches. This is the size used in our photos and video.
- 13×18-inch sheet (33×46 cm): Results in a thinner, crispier focaccia, ideal for focaccia pizza or a light snack.
- 8×8-inch pan (20×20 cm): For a thick, bready focaccia, this size is excellent and can serve as a delightful homemade bread substitute.
- 9×9-inch pan (23×23 cm): Yields a focaccia that is slightly thinner than the 8×8-inch but still wonderfully soft and fluffy.
- 10-11 inch round pan (25-28 cm): Great for making a classic round focaccia with a beautiful presentation.
INGREDIENT SUBSTITUTIONS
- All-purpose flour: You can substitute with bread flour, pizza flour, or use a blend of 50% all-purpose and 50% whole-wheat flour for a nuttier flavor. For superior results, if available, try Italian imported Caputo Pizzeria or Caputo Nuvola flour (not sponsored).
- Instant dry yeast: We highly recommend reliable brands like Caputo Dry Yeast (small green can), Red Star SAF instant, or Dr. Oetker instant yeast (not sponsored). If using fresh yeast, you’ll need three times the amount of dry yeast (e.g., 6 teaspoons fresh yeast for this recipe).
STORAGE & REHEATING
- Make Ahead: While focaccia is best enjoyed fresh, the dough can be prepared ahead and slow-proofed in the refrigerator for 8-24 hours.
- Room Temperature Storage: Store any leftover focaccia in an airtight container at room temperature for up to 2 days. Avoid refrigerating baked focaccia, as it can dry out quickly.
- Freezing: For longer storage, allow the focaccia to cool completely after baking. Cut it into individual squares, then wrap each piece tightly in plastic wrap and foil. Freeze for up to 3 months.
- Thawing & Reheating: To thaw, simply leave frozen focaccia at room temperature or use a microwave. Reheat in a preheated oven at 360°F (180°C) for about 10 minutes, or in an air fryer at 350°F (175°C) for 5 minutes, until warmed through and crispy.
Nutrition
Per Serving (1 of 12 pieces):
- Calories: 228kcal
- Carbohydrates: 39g
- Protein: 5g
- Fat: 5g
- Saturated Fat: 1g
- Polyunsaturated Fat: 1g
- Monounsaturated Fat: 3g
- Trans Fat: 0g
- Cholesterol: 0mg
- Potassium: 59mg
- Dietary Fiber: 1g
- Sugar: 1g
- Vitamin A: 1IU
- Vitamin B6: 0.03mg
- Vitamin C: 0.01mg
- Vitamin E: 1mg
- Vitamin K: 3µg
- Calcium: 9mg
- Folate: 104µg
- Iron: 2mg
- Manganese: 0.3mg
- Magnesium: 12mg
- Zinc: 0.4mg
Tried this recipe?
We’d love to hear from you! Leave a comment below or mention @theplantbasedschool on Instagram. Your feedback and star ratings truly help us grow ⭐️ 💚.
Craving pizza next? Focaccia’s delicious cousin is just as rewarding to make at home. Here are some of our best pizza dough recipes to get you started on your next baking adventure:
Bread Recipes
Quick Pizza Dough: Ready in No Time
Bread Recipes
Authentic Neapolitan Pizza Dough Recipe
Bread Recipes
Classic Homemade Pizza Dough Recipe
Bread Recipes
The Best Ooni Pizza Dough Recipe