
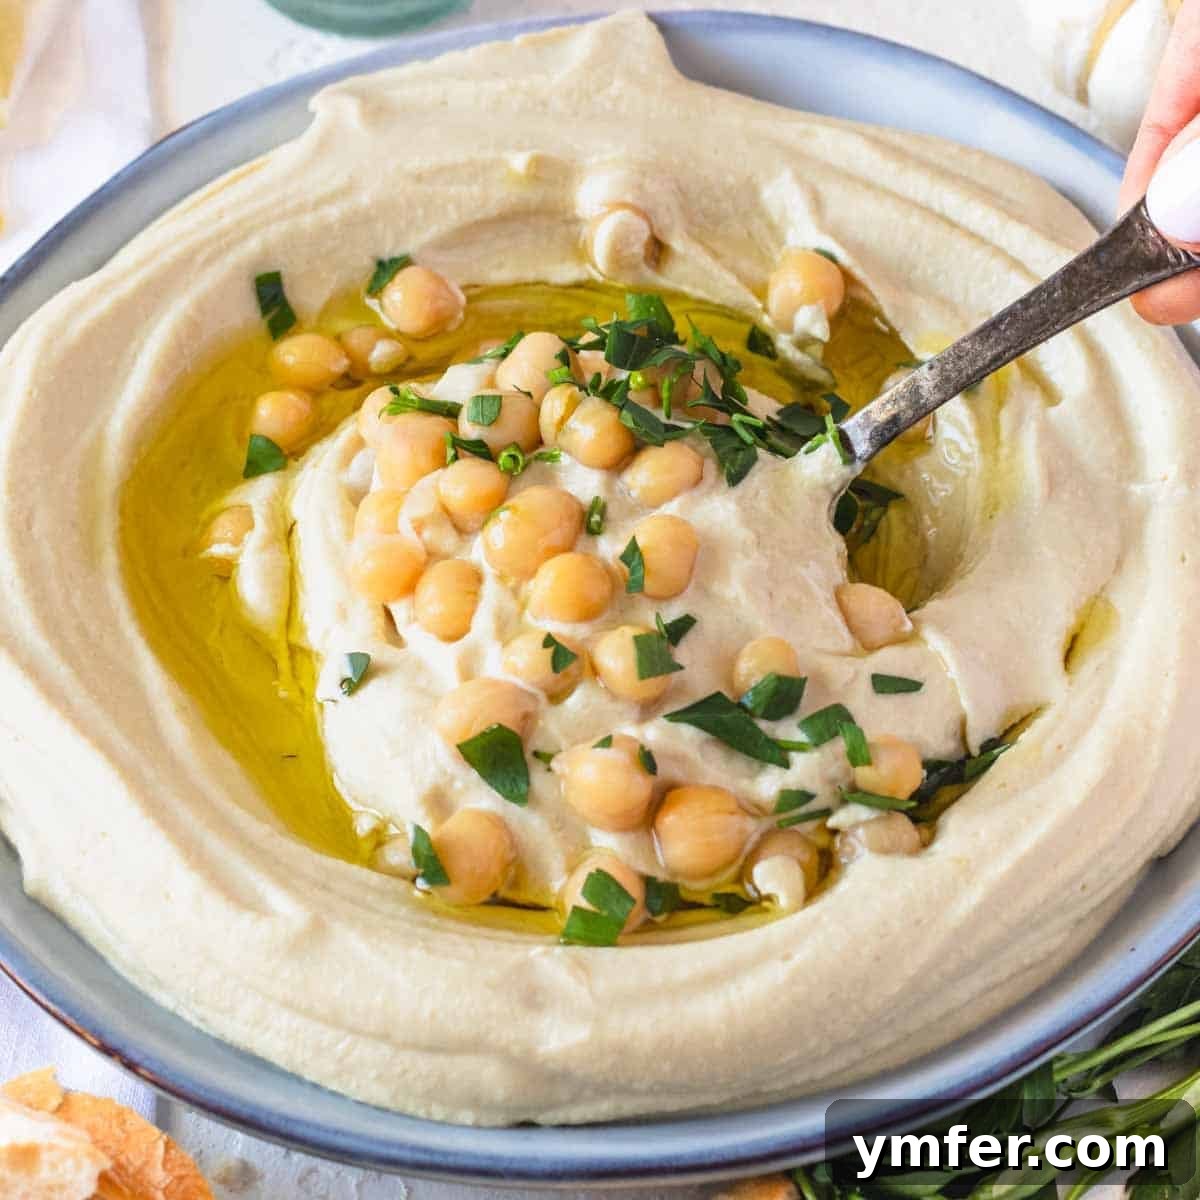
Have you ever savored that impossibly smooth, rich, and utterly delicious hummus at your favorite Middle Eastern restaurant and wondered how they achieve such perfection? You’re not alone, and you’ve landed in precisely the right spot! This is our definitive guide to crafting the creamiest homemade hummus that rivals, or even surpasses, any restaurant experience. It’s a deceptively simple recipe, built on wholesome, real ingredients, and infused with the secrets we’ve learned along the way. Get ready to transform your kitchen into a hummus haven!
Beyond this classic, explore more delightful dip recipes from our collection, including our authentic baba ganoush, the smoky mutabal, the layered goodness of fatteh, and the hearty msabacha.
The Berlin Secret: Unlocking the Ultimate Hummus Creaminess
Our journey to perfecting this creamy homemade hummus recipe has been a passionate pursuit, spanning years of countless kitchen experiments, meticulous notes from cherished cookbooks, and culinary pilgrimages to incredible hummus establishments across the globe. Each trial, each taste, brought us closer to the ideal texture and flavor.
The turning point, however, came during our time living and working in Berlin. My colleague, Louise, and I stumbled upon a hidden gem in the vibrant Prenzlauer Berg district: a quaint little deli called Balabait. It was more than just a place to eat; it was an experience. The deli was lovingly run by a kind Lebanese chef whose culinary prowess, particularly with hummus and masabacha, was nothing short of extraordinary.
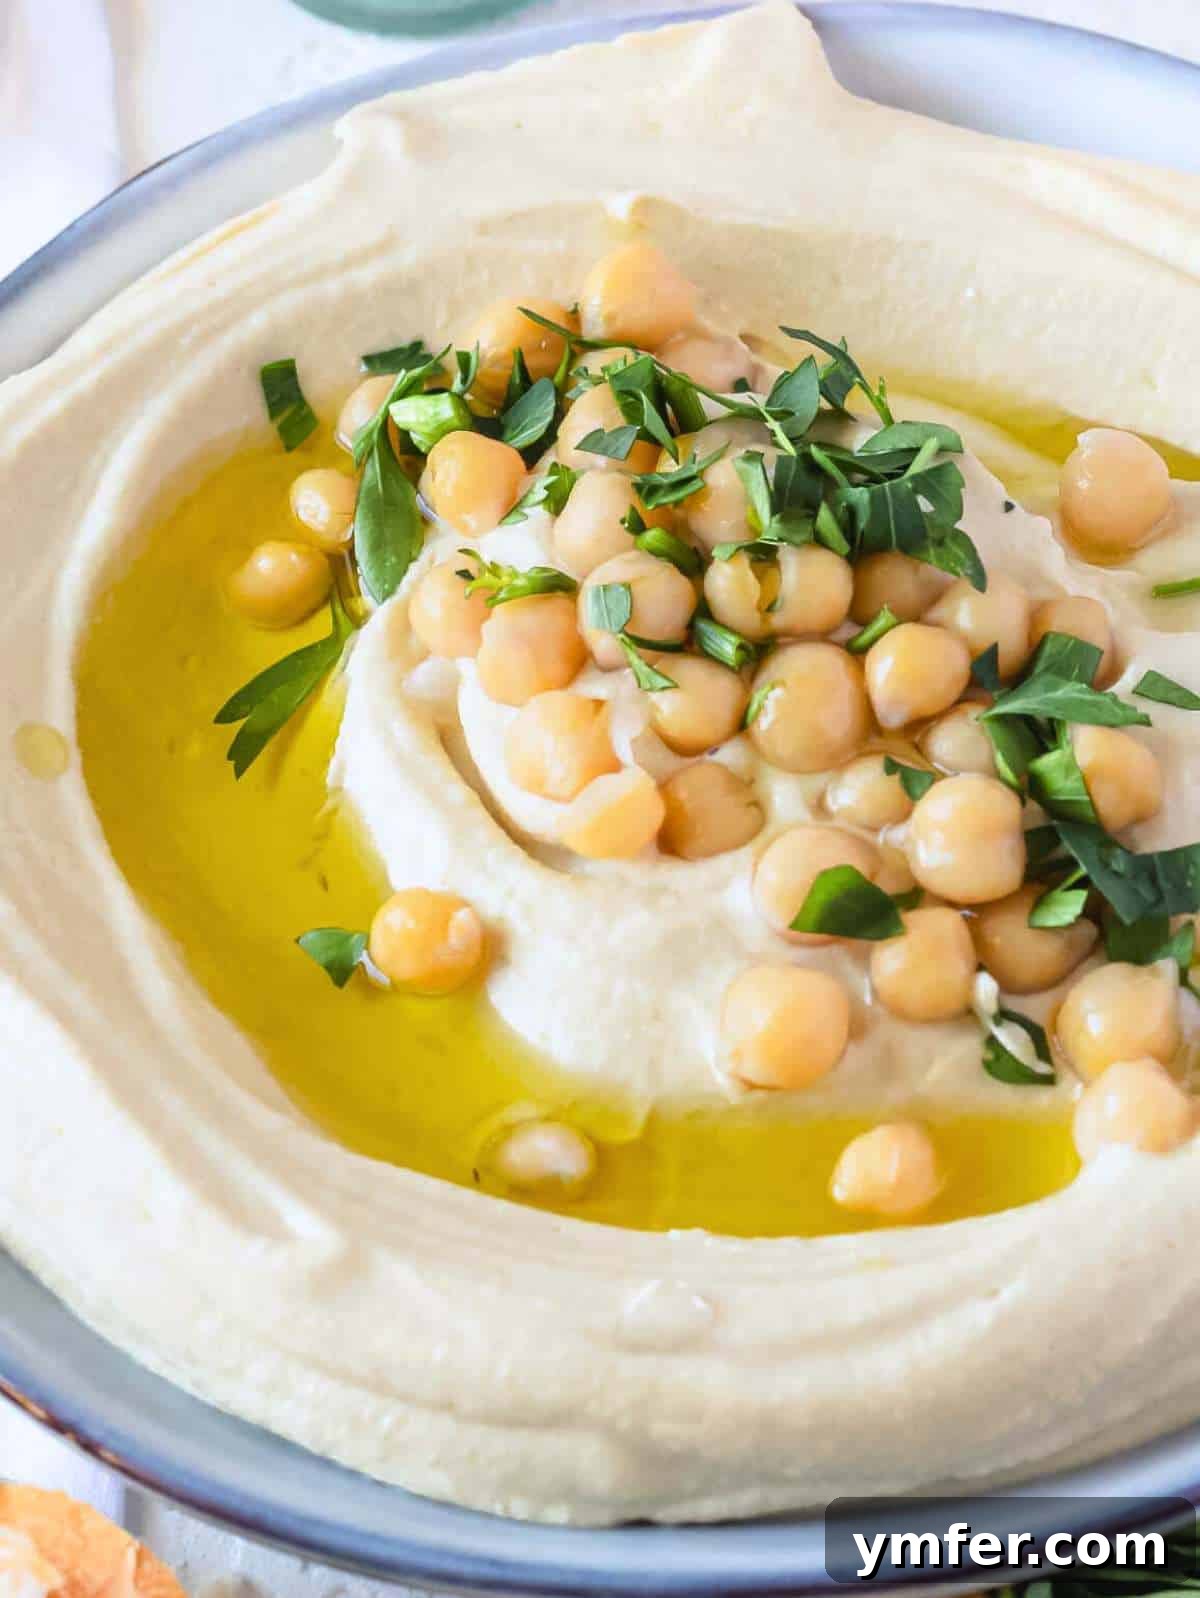
The hummus served at Balabait was unlike anything we had ever tasted. It possessed an unparalleled creaminess – so silken, so airy, it felt almost whipped. This wasn’t just a dip; it was a revelation. Driven by curiosity and a desire to understand this magic, we respectfully inquired about his secret. With a warm smile, he shared two crucial insights:
- “Always use the smallest chickpeas you can find,” he advised, “and boil them until they almost fall apart, until they’re utterly tender.” He emphasized that the cooking process should render them beyond simply soft, almost mushy.
- Then, he revealed his tahini. It was a revelation in itself: light in color, incredibly silky, and so pourable, made exclusively from hulled sesame seeds. This was a stark contrast to the thick, often gritty tahini we typically found in stores.
That encounter profoundly reshaped our understanding and approach to making hummus. Every time we prepare this recipe now, the aroma and texture transport us back to that charming little deli on a quiet Berlin street, a testament to the power of shared culinary wisdom. It’s a reminder that sometimes, the simplest advice holds the deepest secrets to flavor.
We sincerely hope that this creamy homemade hummus recipe brings as much joy and deliciousness to your table as it has to ours. Enjoy the journey to hummus perfection! ❤️
Key Ingredients for the Perfect Hummus
Crafting exceptional hummus starts with exceptional ingredients. Each component plays a vital role in achieving that coveted creamy texture and balanced flavor. Below, we delve into the core ingredients, offering insights and tips for selection and preparation. For a complete ingredient list, specific quantities, and potential substitutions, please refer to the detailed recipe card at the bottom of this page.
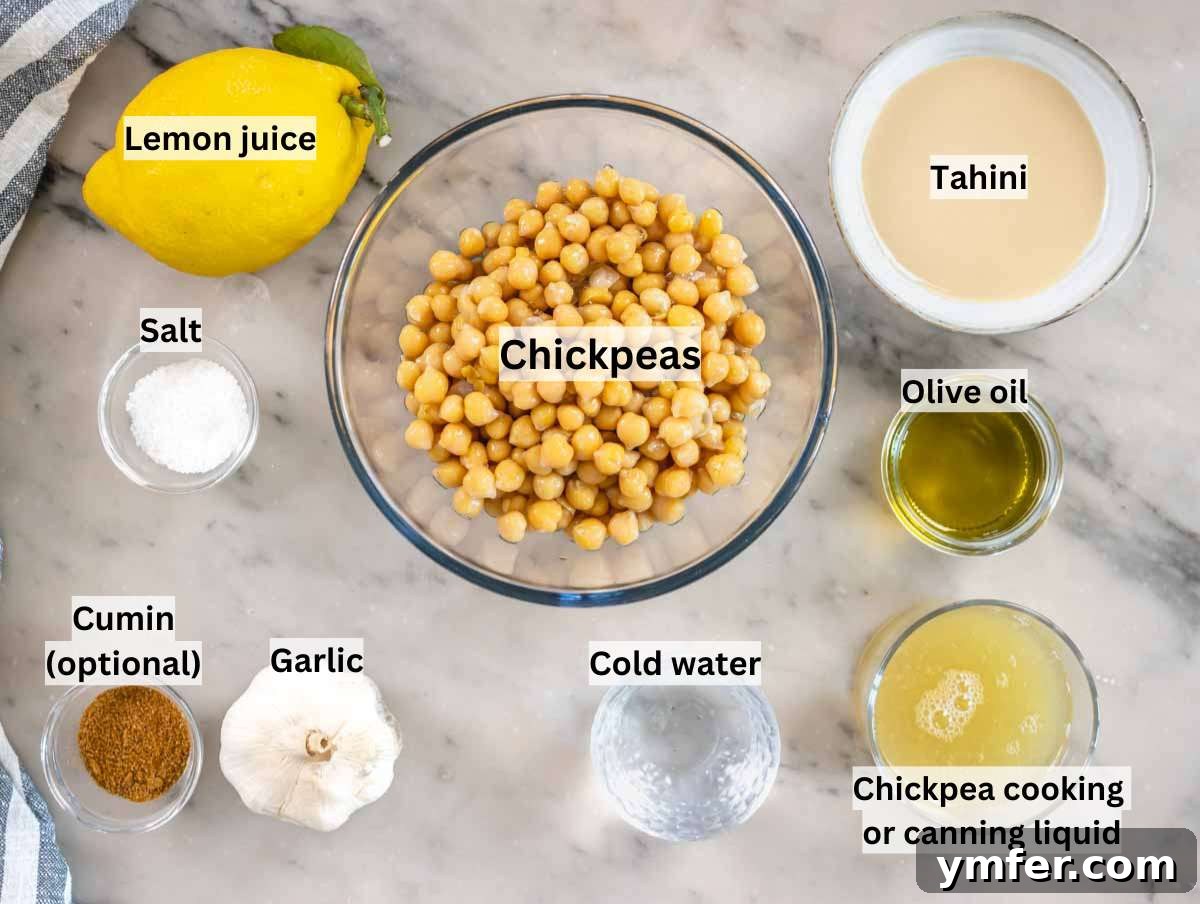
- Dried Chickpeas: The foundation of any great hummus. Our Berlin secret taught us to prioritize the smallest dried chickpeas you can source. They tend to have thinner skins and cook down to a superior creamy consistency. Crucially, soak them for at least 24 hours, then boil them until they are significantly overcooked and ultra-tender, almost falling apart. We have a comprehensive guide on how to cook chickpeas for best results. If using canned chickpeas as a substitute, choose a good quality brand and if they feel firm, boil them for 15-20 minutes until thoroughly tender.
- Baking Soda: An essential, often overlooked ingredient when cooking dried chickpeas. Adding a small amount to the cooking water dramatically helps to break down the chickpea skins and soften their structure, leading to that incredibly smooth, almost mushy texture vital for velvety hummus.
- Aquafaba (Chickpea Cooking Water or Canned Chickpea Liquid): Do not discard this liquid! Whether from boiling your dried chickpeas or draining a can, aquafaba is a magical ingredient. Reserve it and chill it thoroughly. Its unique properties help to emulsify the hummus, making it lighter, airier, and contributing to its luxurious creaminess.
- Tahini: The other cornerstone of authentic hummus. The quality of your tahini makes a profound difference. Seek out 100% hulled sesame seed tahini that is light in color and has a pourable, silky consistency, rather than a thick, gritty, or separated texture. This indicates a well-processed, high-quality product that will blend seamlessly into your hummus.
- Extra Virgin Olive Oil: Used in two ways: a small amount in the blend contributes to the overall richness, and a generous drizzle on top enhances flavor and presentation. Choose a mild, good-quality extra virgin olive oil to complement, not overpower, the other ingredients.
- Lemon Juice or Citric Acid: Fresh lemon juice provides a bright, essential acidity that cuts through the richness of the tahini and chickpeas, balancing the flavors beautifully. For those aiming for a longer shelf life or a consistent tartness, a tiny pinch of citric acid can be used as an alternative.
- Garlic (Optional): Fresh garlic adds a pungent, aromatic kick. Start with a modest amount, like half a clove, as its flavor can intensify as the hummus rests. You can always add more to taste.
- Italian Parsley: Fresh flat-leaf parsley is primarily used as a vibrant, fresh garnish. It adds a pop of color and a subtle herbaceous note that complements the hummus perfectly.
How to Make the Creamiest Hummus (Food Processor Method)
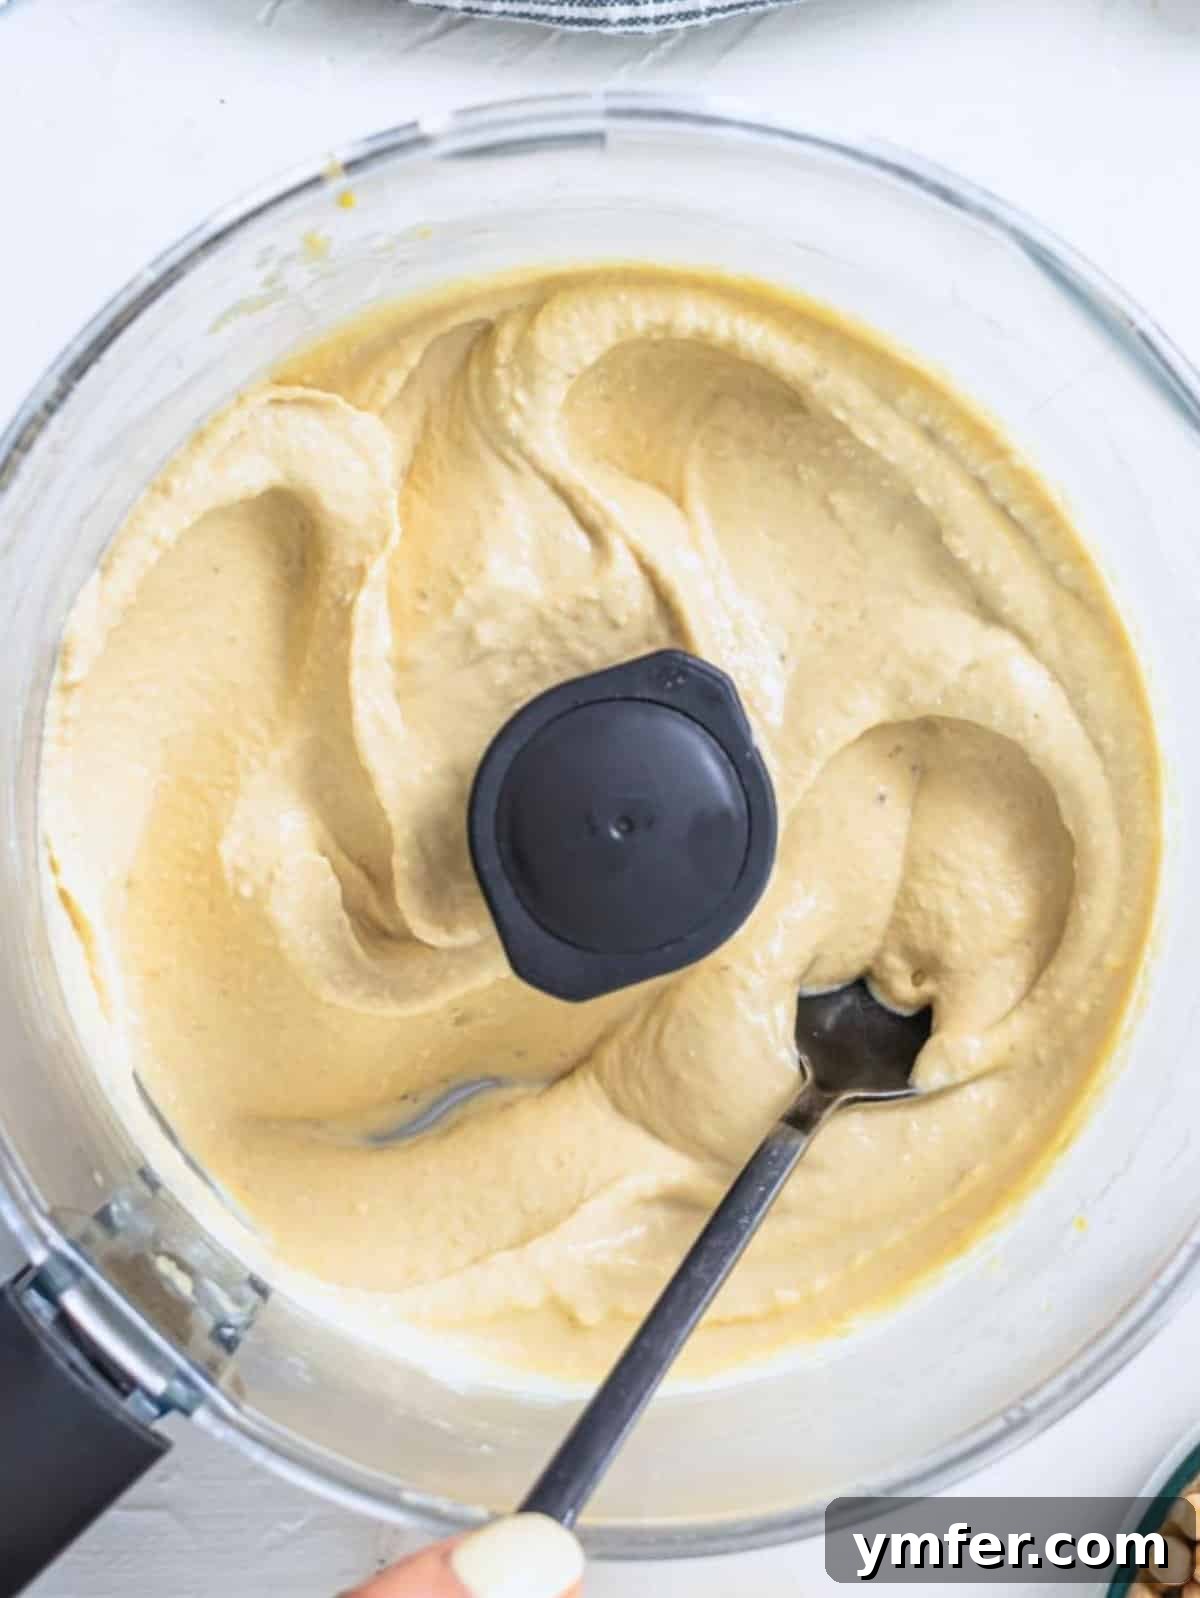
Achieving that coveted smooth, creamy texture in your homemade hummus is easier than you think, especially with a food processor. This method ensures all ingredients are perfectly emulsified for a truly luxurious result. Follow these steps for hummus perfection:
- Prepare Chickpeas: Begin by setting aside approximately 2 tablespoons of your cooked chickpeas. These will be used later as a delightful garnish, adding texture and visual appeal to your finished dish. Ensure your main batch of cooked or canned chickpeas are thoroughly chilled, as cold ingredients are key to a lighter, fluffier hummus.
- Initial Blend: In the bowl of your food processor, combine the cold cooked chickpeas, chilled aquafaba (the reserved cooking liquid), fresh lemon juice, garlic (if you’re using it), and a pinch of salt. Pulse and blend this mixture for a full 3 minutes. During this initial stage, it’s crucial to stop occasionally and scrape down the sides of the food processor bowl with a spatula to ensure all ingredients are evenly incorporated and begin to break down into a coarse paste.
- Add Tahini and Spices: After the first blend, add the high-quality tahini, ground cumin (if desired), and about half of the cold water to the food processor. Continue to blend for another 2 minutes. The tahini will begin to emulsify with the chickpea mixture, contributing to the hummus’s signature creaminess and distinct flavor. Scrape the sides again as needed.
- Final Blending for Creaminess: Now, pour in the extra virgin olive oil. At this stage, also add the remaining cold water, or more if necessary, to achieve your desired consistency. Blend for a final 2 minutes. This extended blending time is essential for transforming the mixture into the incredibly smooth, velvety, and luxurious hummus you’re aiming for. The oil will also help in achieving that perfect texture.
- Season and Adjust: Once the hummus is wonderfully smooth and creamy, give it a taste test. Adjust the seasoning by adding more salt if needed. If you prefer a thinner consistency, drizzle in a little more cold water, one tablespoon at a time, blending briefly after each addition until it reaches your perfect texture. Remember, good hummus has a delicate balance of savory, tart, and rich notes.
🥄 To Serve Your Homemade Hummus
Presentation is almost as important as taste! Here’s how to beautifully serve your freshly made hummus:
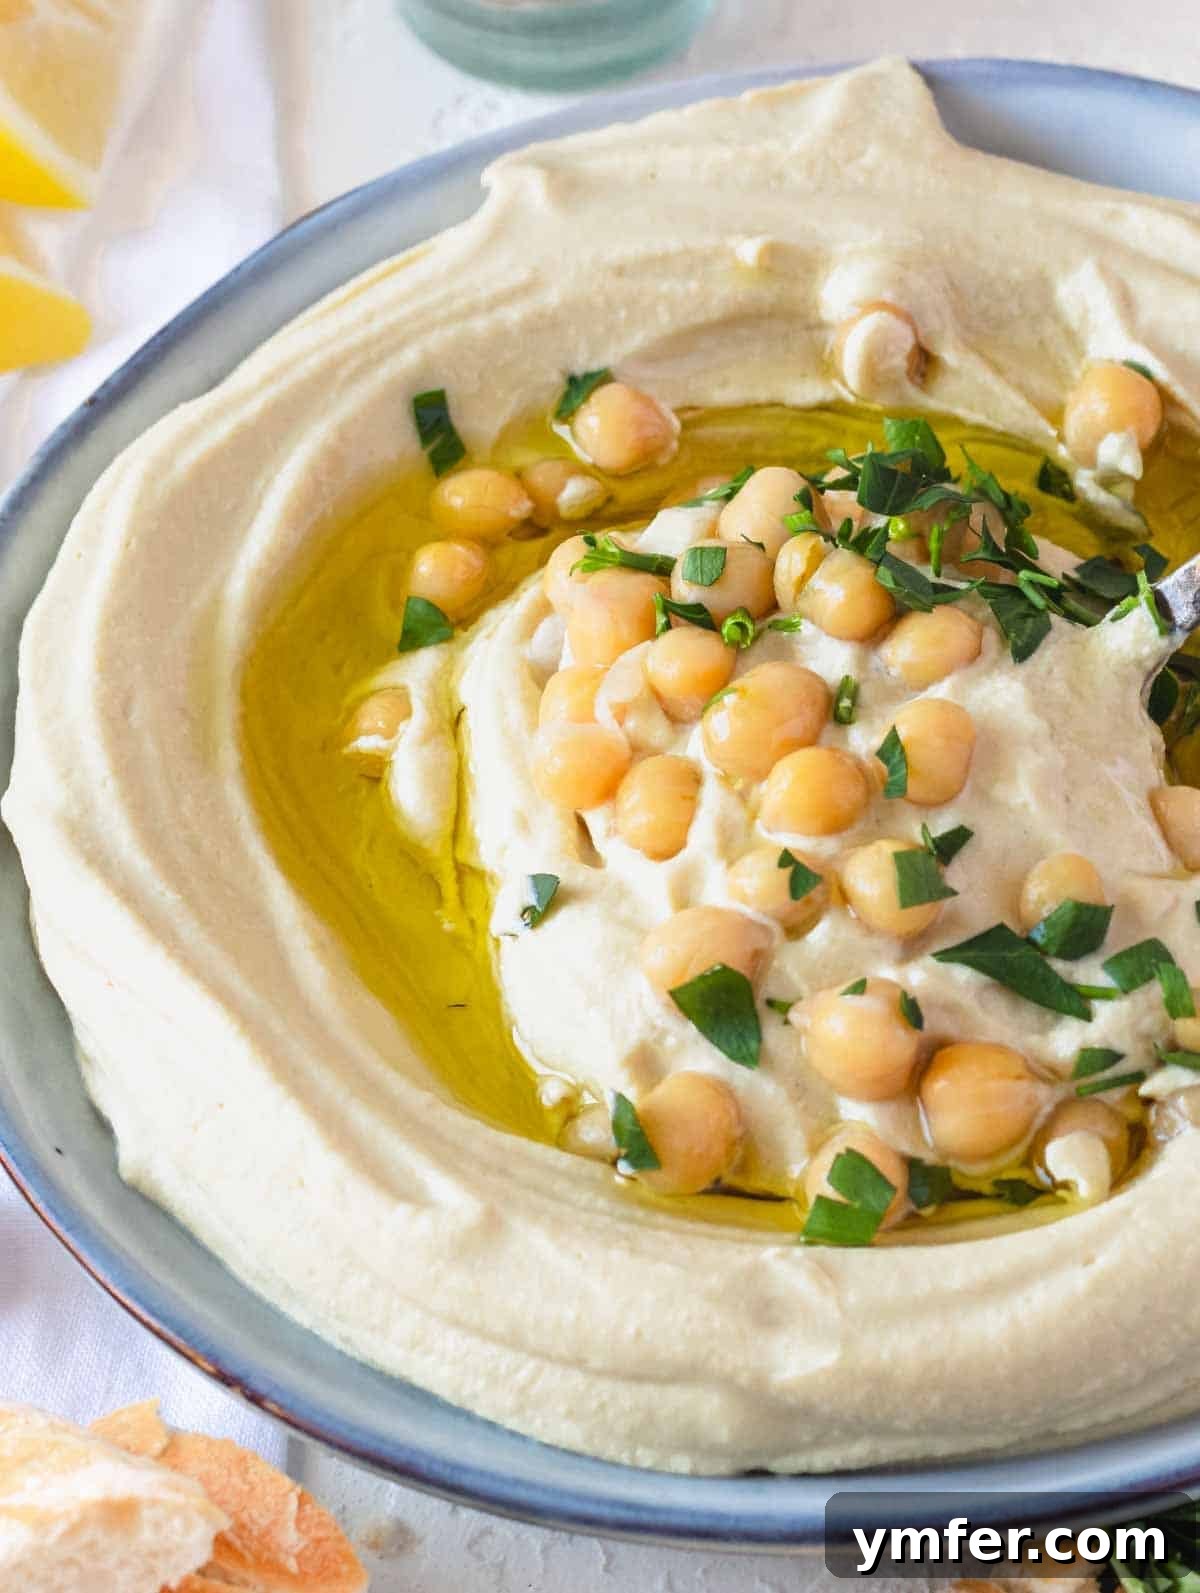
- Plate and Swirl: Gently spread the hummus onto a serving plate or into a shallow bowl. Using the back of a spoon, create a decorative swirl or a shallow well in the center of the hummus. This not only looks elegant but also creates a perfect reservoir for olive oil and garnishes.
- Garnish Generously: Drizzle generously with a good quality extra virgin olive oil into the created well. Scatter the reserved cooked chickpeas over the top for added texture and sprinkle with freshly chopped flat-leaf parsley for a burst of color and herbaceous freshness. A dash of paprika or sumac can also be added for extra flair and flavor.
- Pairing Perfection: Serve your delicious, creamy hummus with warm, fluffy pita bread (toasted or fresh), crispy falafel, or an assortment of fresh, crisp vegetables like cucumber sticks, carrot batons, bell pepper strips, and cherry tomatoes. It’s also fantastic as a spread in sandwiches, wraps, or dolloped onto salads.
Pro Tips for Hummus Mastery
Elevate your hummus game with these expert tips, ensuring every batch you make is consistently perfect:
General Hummus Tips
- Chill Ingredients: For the lightest and fluffiest hummus, chill all your liquid ingredients (aquafaba/water) and even the cooked chickpeas overnight, or for at least 4 hours, before blending. Cold ingredients emulsify better and result in a superior texture.
- Layering is Key: Don’t dump everything in at once. Add ingredients in stages as outlined in the recipe. This allows each component to properly incorporate and emulsify, contributing to the ultimate creamy texture.
- Overcook Chickpeas: This cannot be stressed enough. Small, slightly overcooked chickpeas (until they are almost mushy) are the secret to that coveted velvety smoothness. Hard chickpeas will result in gritty hummus, no matter how long you blend.
- Taste and Adjust: Always taste your hummus before serving. Adjust salt, lemon juice, or even a touch more tahini to achieve your perfect flavor balance. Remember, flavors can mellow or strengthen as the hummus rests.
Equipment Advice
- Food Processor is Best: A high-quality food processor is ideal for making hummus. Its blade design and controlled speed are perfect for creating a smooth emulsion without over-heating the ingredients, which can negatively affect texture and flavor.
- Blender Alternative: If you’re using a blender, which can generate more heat, counteract this by adding 5-6 ice cubes along with all other ingredients. Blend everything together for 2-3 minutes, monitoring the temperature, to keep the mixture cool and prevent a denser texture.
Chickpea Preparation Insights
- Small is Mighty: Prioritize sourcing the smallest dried chickpeas available. Their thinner skins contribute significantly to a smoother final product.
- Baking Soda Magic: Always boil your dried chickpeas with baking soda. This alkaline environment helps soften the chickpea skins and flesh, making them incredibly tender and easy to blend.
- Slightly Overcooked: Cook chickpeas beyond “al dente” until they are very soft, almost falling apart when squeezed. This mushy texture is what guarantees ultimate creaminess.
- Chill in Liquid: After cooking, cool and chill the chickpeas in their cooking liquid (aquafaba). This allows them to absorb more moisture and remain tender.
- Canned Chickpea Prep: If opting for canned chickpeas, refrigerate the entire can in advance. For firmer canned chickpeas, boil them briefly (15-20 minutes) to soften them further before chilling.
- Peeling Larger Chickpeas: If you only have access to larger chickpeas with thicker skins, consider peeling them after cooking for an extra-smooth result. While time-consuming, it can make a difference.
Aquafaba Expertise
- Don’t Waste It: Always use the reserved chickpea cooking water or the liquid from a can of chickpeas (aquafaba). It’s crucial for the texture.
- Must Be Cold: Just like the chickpeas, cold aquafaba is non-negotiable for a light, airy, and fluffy hummus. Warm aquafaba can result in a gluey texture.
- Flavor and Creaminess: Aquafaba acts as an emulsifier, binding ingredients and adding both flavor and a luxurious creaminess. Skipping it will lead to a dense and less vibrant hummus.
Tahini Selection
- Quality Over Quantity: Invest in a high-quality, light-colored, and pourable tahini made from 100% hulled sesame seeds. This is perhaps the second most important ingredient after the chickpeas themselves.
- Avoid Gritty/Dark: Steer clear of tahini that is dark in color, separated, or has a gritty texture. These usually indicate lower quality and will make your hummus bitter or dense.
- Storage and Stirring: Store tahini in the fridge. Always stir it thoroughly before use, as the oil and solids tend to separate.
Extra Virgin Olive Oil Use
- Mild and Mellow: Choose a mild, fruity, and good-quality extra virgin olive oil. It should enhance, not dominate, the delicate flavors of the hummus.
- Dual Purpose: A small amount is incorporated into the hummus during blending for added richness, and a generous pour on top provides a beautiful finish and flavor boost.
Cumin & Garlic Nuances
- Subtlety is Key: Cumin and garlic are optional but highly recommended. Start with small amounts (as specified in the recipe) as their flavors can be quite potent.
- Flavor Evolution: Be mindful that the flavors of garlic and cumin can grow stronger as the hummus rests in the refrigerator.
- Balance: While these aromatics add depth, the primary flavors of an authentic hummus should always be the earthy chickpeas and the nutty, rich tahini. They should complement, not overpower.
Frequently Asked Questions About Homemade Hummus
Yes—absolutely! When cooking dried chickpeas for hummus, baking soda is a game-changer. It creates an alkaline environment in the cooking water that helps to break down the chickpea skins, making them incredibly tender and almost mushy. This process is essential for achieving that characteristic silky-smooth, restaurant-quality hummus texture. Without it, your hummus is likely to be gritty.
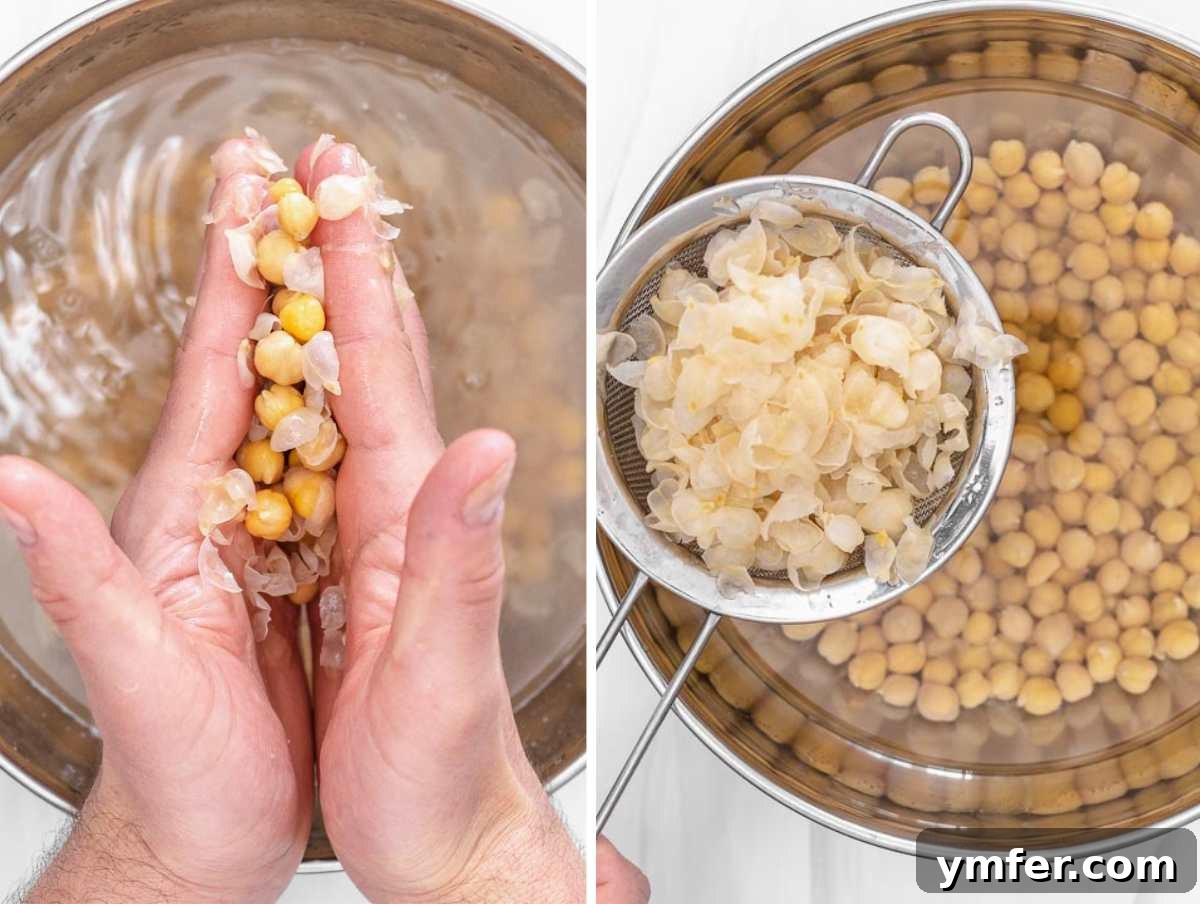
For the ultimate creamy hummus, especially if you’re using larger chickpeas with thicker skins, removing some of the skins after cooking can make a noticeable difference. While not strictly mandatory if you’ve cooked your chickpeas until exceptionally tender with baking soda, it definitely contributes to an even smoother result. Here’s a simple method for peeling them:
- Place the cooked chickpeas in a large bowl filled with cold water.
- Gently rub them between your hands. The friction will help to loosen and separate the skins from the chickpea flesh.
- As the skins detach, they will naturally float to the surface of the water. Use a spoon or a fine-mesh sieve to skim them off and discard them. You don’t need to remove every single skin; just removing a good portion will significantly improve the texture.
We strongly recommend using a food processor for making the best hummus. Food processors are designed to blend ingredients efficiently without generating excessive heat. This is crucial because keeping the ingredients cool helps preserve the vibrant flavors and contributes to a light, airy texture. Blenders, on the other hand, tend to heat the mixture quickly and can over-aerate it, often resulting in a denser, sometimes slightly gluey, and less flavorful spread.
If a food processor isn’t available, you can certainly use a blender. To mitigate the heat issue, simply add five to six ice cubes along with all the other ingredients. Blend for one to two minutes, pausing to scrape down the sides and keeping a close eye on the mixture’s temperature and consistency.
With the right techniques and tips, you can achieve delicious hummus using both canned and dry chickpeas. However, we generally prefer making hummus from dry chickpeas for several compelling reasons:
- Quality Control: Starting with dry chickpeas gives you complete control over their quality and freshness from the very beginning.
- Optimal Size Selection: You can specifically choose the smallest dry chickpeas, which, as our Berlin secret revealed, are paramount for the creamiest texture due to their thinner skins.
- Baking Soda Advantage: Cooking dry chickpeas allows you to incorporate baking soda into the boiling water, a step that significantly aids in softening the chickpeas and achieving that desirable tender, almost mushy consistency.
- Perfect Overcooking: With dry chickpeas, you can intentionally “overcook” them slightly, pushing them past standard tenderness to a point where they are incredibly soft and ready to blend into the silkiest hummus imaginable.
Explore More Delicious Dips, Spreads, and Salads
If you’ve enjoyed crafting this perfect hummus, we invite you to explore more vibrant and flavorful recipes from our kitchen. Expand your culinary repertoire with these enticing dips, spreads, and refreshing salads, perfect for entertaining or everyday enjoyment:
- Tirokafteri – A spicy Greek feta dip.
- Avocado Spread – A quick and creamy alternative.
- Muhammara – A rich and tangy roasted red pepper and walnut dip.
- Zaalouk – A Moroccan cooked salad or dip made with eggplant and tomatoes.
- Fattoush – A refreshing Lebanese bread salad.
- Tabbouleh – The classic fresh parsley and bulgur salad.
- Tzatziki – A cool and creamy Greek yogurt and cucumber dip.
- Whipped Ricotta – A light and versatile creamy cheese spread.
We truly hope you loved this creamy homemade hummus recipe! If you tried it or any other recipe from our blog, please take a moment to leave a 🌟 star rating and share your thoughts in the comments section below. Your feedback means the world to us and helps other home cooks discover these delicious creations. We love hearing from you!
Hummus
Pin Recipe
Print Recipe
Share on Facebook
Ingredients
- 2 cans (15 ounces each) chickpeas or 3 cups cooked chickpeas, or 1 cup / 200 grams dry chickpeas + 2 teaspoons baking soda
- ⅓ cup aquafaba (the liquid in a can of chickpeas or the cooking liquid of chickpeas)
- 2 tablespoons lemon juice
- ¼ cup cold water (add more if necessary to reach your desired consistency)
- ⅓ cup tahini (from 100% hulled sesame seeds, light in color, and of pourable consistency)
- 1 tablespoon olive oil (extra virgin)
- ½ clove garlic (or more to taste)
- ¾ teaspoon salt (or more to taste)
- ½ teaspoon ground cumin (optional)
- 1 tablespoon flat-leaf parsley (chopped, for garnish)
Instructions
- Initial Blend: Set aside 2 tablespoons of chickpeas for garnish. In a food processor, combine the drained cold cooked chickpeas, ⅓ cup cold aquafaba, 2 tablespoons lemon juice, ½ clove garlic, and ¾ teaspoon salt. Blend for 3 minutes, scraping down the sides as needed to ensure all ingredients are well combined.
- Add Tahini and Water: Add ⅓ cup tahini, ½ teaspoon ground cumin (if using), and ¼ cup cold water to the mixture. Blend for another 2 minutes, again scraping down the sides to incorporate everything evenly.
- Final Smoothness: Pour in 1 tablespoon extra virgin olive oil and add more cold water if needed for desired consistency. Blend for 2 more minutes, until the hummus is incredibly smooth and creamy. Taste and adjust the salt and consistency by adding a little more water if necessary, blending briefly after each addition.
- Serve: Spread the creamy hummus on a plate or in a bowl. Use the back of a spoon to create a beautiful swirl or well in the center. Drizzle generously with extra virgin olive oil, top with the reserved whole chickpeas, and sprinkle with 1 tablespoon fresh flat-leaf parsley for garnish. Serve immediately with warm pita bread, falafel, or fresh vegetables.
Notes
HOW TO PREP CHICKPEAS FOR THE BEST HUMMUS
Using Canned Chickpeas: If your canned chickpeas are firm, transfer 2 cans (15 oz each) with their liquid to a saucepan. Bring to a boil, then reduce heat and simmer for 15 minutes until they become very tender. Afterward, cool both the chickpeas and their liquid thoroughly in the fridge before using them in the recipe.
Using Dry Chickpeas: Soak 1 cup (200g) of dry chickpeas in plenty of water for 24 hours. Drain and rinse them. Then, place the soaked chickpeas in a large pot with 2 teaspoons of baking soda and enough fresh water to cover them by about 4 inches (10 cm). Bring to a boil, then reduce heat and simmer until the chickpeas are incredibly soft—almost falling apart—which typically takes about 2 hours. Once cooked, chill the chickpeas and their cooking water (aquafaba) in the fridge until cold.
PRO TIPS (Summary from above)
General Tips:
- Chill all ingredients (chickpeas, aquafaba, water) beforehand for best results.
- Add ingredients step-by-step as outlined in the instructions for proper emulsion.
- Always use small, overcooked chickpeas for the smoothest possible texture.
Equipment Tips:
- A food processor is highly recommended as it keeps ingredients cool during blending.
- If using a blender, add 5 ice cubes with the ingredients and blend for 2-3 minutes to prevent heating.
Chickpea Tips:
- Opt for the smallest dry chickpeas for a superior texture.
- Boil dry chickpeas with baking soda and ensure they are slightly overcooked.
- Chill cooked chickpeas in their cooking liquid.
- If using canned, refrigerate the can in advance.
- Consider peeling larger chickpeas for extra smoothness.
Aquafaba Tips:
- Use either chickpea cooking water or liquid from the can.
- It must be cold for light and fluffy hummus.
- It’s vital for creaminess and flavor—do not omit it!
Tahini Tips:
- Select light-colored, pourable tahini made from 100% hulled sesame seeds.
- Avoid dark or gritty varieties.
- Store in the fridge and stir well before use.
Extra Virgin Olive Oil:
- Choose a mild, high-quality extra virgin olive oil.
- Use a little in the blend and primarily for drizzling as a garnish.
Cumin & Garlic:
- These are optional; start with small amounts.
- Their flavors will strengthen as the hummus rests.
- Authentic hummus should primarily highlight the flavors of chickpeas and tahini.
Nutrition Facts
Serving: 1 of 6
Calories: 172 kcal
Carbohydrates: 14 g
Protein: 6 g
Fat: 11 g
Saturated Fat: 1 g
Polyunsaturated Fat: 4 g
Monounsaturated Fat: 5 g
Trans Fat: 0 g
Cholesterol: 0 mg
Sodium: 519 mg
Potassium: 186 mg
Dietary Fiber: 4 g
Sugar: 0.1 g
Vitamin A: 23 IU
Vitamin B6: 0.4 mg
Vitamin C: 3 mg
Vitamin E: 0.3 mg
Vitamin K: 1 µg
Calcium: 50 mg
Folate: 34 µg
Iron: 2 mg
Manganese: 1 mg
Magnesium: 35 mg
Zinc: 1 mg
Tried this recipe?
Leave a comment below or mention @theplantbasedschool on Instagram. We love hearing from you ⭐️ 💚.