
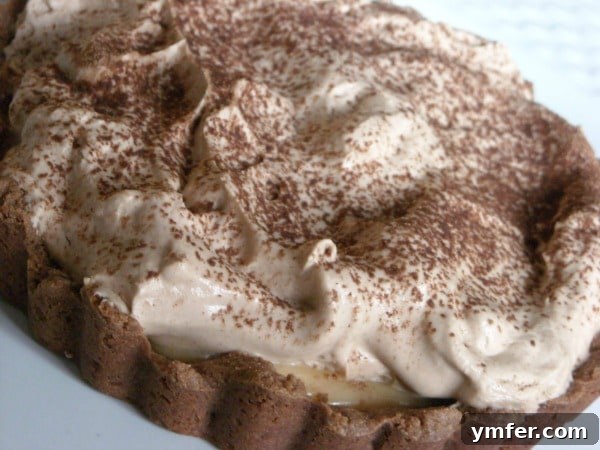
Indulge in a truly remarkable dessert experience with this exquisite Milky Way Tart. This sweet and creamy creation perfectly captures all the beloved flavors of the classic candy bar, transformed into an elegant, irresistible tart. Prepare to fall head over heels for its decadent layers of chocolate and rich caramel goodness, all nestled within a perfectly baked crust.
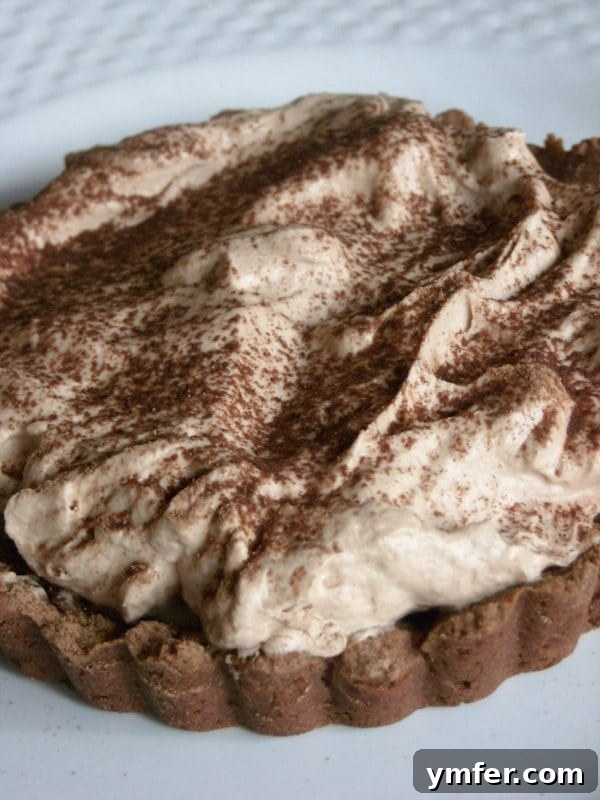
The Ultimate Homemade Milky Way Tart: A Decadent Delight
Life can get incredibly busy, and sometimes, even the most passionate bakers find themselves a bit behind on sharing their latest culinary triumphs. After a short hiatus, I’m thrilled to finally bring you a recipe that has truly stolen my heart: this incredible Homemade Milky Way Tart. It’s a dessert that not only tastes phenomenal but also offers a rewarding baking journey.
I crafted this Milky Way Tart over a month ago, and from the very first bite, I knew it was a winner. The initial idea was to recreate the nostalgic taste of a Milky Way candy bar, but in a sophisticated, dessert-party-ready format. What emerged from my kitchen was even better than I could have imagined. While it does involve a few distinct steps – mixing, cooling, mixing again, cooling again – don’t let that intimidate you. The beauty of this recipe lies in its flexibility; many components can be prepared in advance, turning what might seem like an all-day affair into a manageable, enjoyable process. Trust me, the sheer delight of tasting this tart makes every moment spent in the kitchen utterly worthwhile.
Why This Milky Way Tart Will Become Your New Favorite Dessert
What makes this tart truly stand out? For starters, the homemade chocolate whipped cream topping is an absolute revelation. It’s light, airy, and intensely chocolatey, providing the perfect contrast to the rich, gooey caramel beneath. Speaking of caramel, crafting it from scratch is an experience in itself. My first attempt resulted in a batch of rather unpleasant, burnt caramel – a truly unforgettable (and not in a good way!) taste experience. It was a classic learning moment, a testament to the importance of patience and precision in the kitchen. But the second batch? Pure perfection. That smooth, buttery, deep amber caramel is the heart of this tart, delivering an unparalleled depth of flavor that complements the chocolate beautifully.
This Milky Way Tart isn’t just a dessert; it’s an experience. Each bite delivers a harmonious blend of textures and tastes: the crisp, chocolatey crust, the soft, sweet caramel, and the ethereal chocolate whipped cream. It’s an ideal choice for special occasions, holiday gatherings, or simply when you want to treat yourself and your loved ones to something truly extraordinary. Prepare for compliments – this tart is a showstopper!
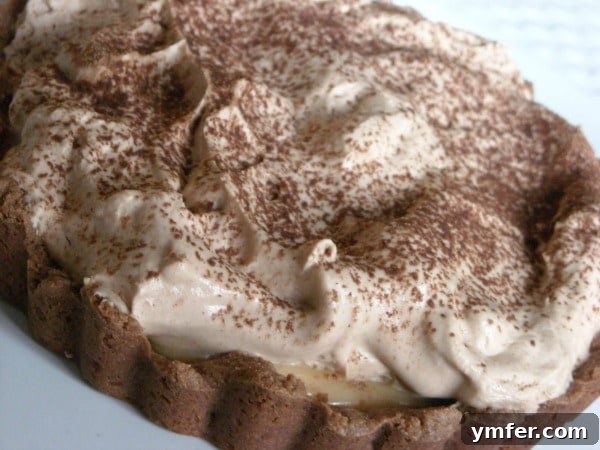
Essential Tips for Baking a Perfect Milky Way Tart
Creating a dessert like the Milky Way Tart, with its distinct layers and homemade components, can seem daunting at first glance. However, with a few key tips and a dash of patience, you’ll be baking like a pro in no time. Let’s dive into how to ensure every element of your tart is nothing short of perfection.
Mastering the Chocolate Tart Crust
- Chilling is Crucial: The recipe calls for chilling the dough twice – once after mixing and again after pressing it into the tartlet pans. Do not skip these steps! Chilling ensures the butter solidifies, preventing the crust from shrinking excessively during baking and helping it maintain its crisp, flaky texture. A well-chilled dough is much easier to work with and results in a more professional-looking tart.
- Even Pressing: When pressing the dough into the tartlet pans, aim for an even thickness throughout the bottom and sides. This ensures uniform baking and prevents any thin spots that might crack or become overly crispy. Using your fingertips or the back of a small spoon can help achieve a smooth finish.
- Pre-baking for Perfection: Pre-baking, or blind baking, the crusts is essential. This step sets the crust and prevents it from becoming soggy once the wet filling is added. Keep an eye on the crusts; they should be just set and lightly golden, not overly browned.
Crafting Silky Smooth Homemade Caramel
- The Right Pan: Use a heavy-bottomed, light-colored saucepan. A heavy bottom distributes heat more evenly, reducing the risk of scorching, while a light color allows you to accurately monitor the caramel’s changing color.
- Patience is Key: Caramel making requires undivided attention. Start by dissolving the sugar slowly over medium-low heat. Once dissolved, increase the heat but resist the urge to stir. Stirring can cause sugar crystals to form, leading to grainy caramel. Instead, gently swirl the pan occasionally to ensure even cooking.
- Watch the Color, Not the Clock: The instruction mentions “deep amber,” which is your visual cue. This can happen faster or slower than the suggested 8 minutes depending on your stove and pan. Remove it from the heat as soon as it reaches that rich, golden-brown hue. Any darker, and you risk burning it, as I regrettably experienced with my first batch! Burnt caramel has an incredibly bitter, unpleasant taste.
- Adding Cream and Butter: When adding the hot cream-butter mixture to the hot caramel, be extremely cautious. It will bubble up vigorously. Pour slowly and stir continuously until everything is smooth and incorporated. If you notice any stubborn caramel bits, return the pan to very low heat and stir until they dissolve, ensuring a perfectly smooth caramel.
- Proper Chilling: The caramel needs to chill until “slightly firm (semi-soft).” This texture is crucial for it to hold its shape within the tart without being too runny or too hard. Stirring it occasionally during chilling helps achieve a uniform consistency.
Whipping Up Decadent Chocolate Cream
- High-Quality Chocolate: Since the chocolate is a star flavor in this component, use good quality milk chocolate. It makes a significant difference in taste and meltability.
- Chill Everything Thoroughly: For the best results when whipping cream, ensure your mixing bowl and whisk attachment (or beaters) are cold. You can even pop them in the freezer for 10-15 minutes before you start. The cold helps the cream whip up faster and hold its peaks better.
- Don’t Over-Whip: Beat the chilled milk chocolate-cream mixture until “peaks form.” Stop just as stiff peaks are achieved. Over-whipping can turn it grainy or even separate it. It should be light, airy, and able to hold its shape.
Assembling Your Milky Way Masterpiece
Once all your components are ready and properly chilled, the assembly process is straightforward and incredibly satisfying. Gently spoon the semi-soft caramel into the pre-baked crusts, aiming for an even layer. Then, carefully dollop the luscious chocolate whipped cream atop the caramel, spreading it smoothly to the edges. A final chill helps all the layers set beautifully, making for clean slices and a picture-perfect presentation. Before serving, a light dusting of unsweetened cocoa powder adds an elegant touch and hints at the chocolatey goodness within.
Variations and Serving Suggestions
While this Milky Way Tart is a masterpiece on its own, feel free to get creative! A sprinkle of sea salt flakes over the caramel layer can enhance its flavor beautifully. You could also garnish with finely chopped roasted peanuts for an added textural crunch, or even a drizzle of extra chocolate sauce. These mini tarts are perfect for individual servings, making them ideal for dinner parties or dessert buffets. Serve them alongside a scoop of vanilla bean ice cream or a hot cup of coffee for an extra special treat.
Make-Ahead Convenience and Storage
This tart is an excellent candidate for making ahead, which is a huge bonus when planning for events. The crusts can be baked and stored at room temperature for a day or two. The chocolate-cream mixture needs to be made and chilled overnight for optimal whipping. The caramel can also be made a day in advance and stored in the refrigerator, ready to be softened slightly if needed before filling. Once fully assembled, the tarts can be covered and refrigerated for up to 2-3 days without losing their quality. This flexibility allows you to spread out the preparation, making the entire process stress-free.
Milky Way Tart Recipe
This sweet and creamy Milky Way Tart offers an irresistible combination of rich chocolate and luscious caramel, reimagining the classic candy bar into an elegant dessert. Perfect for impressing guests or simply indulging your sweet tooth, this tart is a truly decadent treat that captures all the beloved flavors you crave.
Yield: 6 mini tarts
Prep Time: 40 minutes
Cook Time: 60 minutes
Total Time: 1 hour 40 minutes plus various resting and chilling times
Ingredients:
For the Decadent Chocolate Crust:
- 3/4 cup plus 2 tablespoons all-purpose flour
- 2 tablespoons plus 2 teaspoons unsweetened cocoa powder
- 1 stick (1/2 cup) unsalted butter, softened to room temperature
- 1/2 cup plus 2 tablespoons powdered sugar (confectioners’ sugar)
- 1 large egg yolk
For the Luscious Caramel and Chocolate Cream Filling:
- 3-1/2 ounces high quality milk chocolate, finely chopped (for optimal melting)
- 2 cups heavy whipping cream, divided
- 1/4 cup unsalted butter
- 1/2 cup plus 2 tablespoons granulated sugar
- 3 tablespoons water
- Unsweetened cocoa powder – for a final dusting and elegant presentation
Source: Adapted from Bon Appétit
Directions:
Step 1: Prepare the Chocolate Tart Crust
In a medium-sized mixing bowl, thoroughly whisk together the all-purpose flour and unsweetened cocoa powder. Set aside.
In a separate large bowl, using an electric mixer, beat the softened unsalted butter and powdered sugar together until the mixture is light, fluffy, and well blended. This should take about 2-3 minutes on medium speed.
Beat in the large egg yolk until just combined, ensuring not to overmix.
Gradually add the whisked flour and cocoa powder mixture in two additions, beating on low speed just until the dry ingredients are fully incorporated and the dough comes together. Be careful not to overwork the dough.
Gather the dough into a cohesive ball, then gently flatten it into a disk. Wrap the disk tightly in plastic wrap and refrigerate for a minimum of 2 hours. This chilling step is crucial for making the dough easier to handle and preventing shrinkage during baking.
Once chilled, divide the dough into 6 equal pieces. Press each piece evenly onto the bottom and up the sides of six 4 1/2-inch tartlet pans, ideally those with removable bottoms for easy unmolding. Ensure the dough is of consistent thickness.
Refrigerate the formed crusts for another 1 hour, or alternatively, freeze them for 30 minutes. This second chill helps the crusts maintain their shape beautifully during baking.
Preheat your oven to 375°F (190°C). Bake the cold crusts until they are set and appear lightly golden around the edges, which typically takes about 12-15 minutes. Once baked, remove from the oven and allow the crusts to cool completely in their pans on a wire rack before proceeding.
Step 2: Craft the Luscious Caramel Filling
First, prepare the chocolate cream base: Place the finely chopped milk chocolate in a medium-sized heatproof bowl. In a small saucepan, bring 1 1/2 cups of heavy cream to a gentle simmer over medium heat. Do not boil vigorously.
Pour the hot cream directly over the chopped chocolate. Let it stand undisturbed for 1 minute to allow the chocolate to melt. Then, whisk gently until the chocolate is completely melted and the mixture is smooth and glossy. Cover the bowl with plastic wrap, pressing it directly onto the surface of the cream to prevent a skin from forming. Refrigerate until thoroughly cold, ideally for at least 4 hours, or even better, overnight. This mixture will be whipped later.
Next, make the caramel sauce: In a separate small saucepan, combine the remaining 1/2 cup heavy cream and 1/4 cup unsalted butter. Stir this mixture over medium heat until the butter is completely melted and the mixture is warm. Remove from heat and set aside.
In a heavy-bottomed, light-colored small saucepan, combine the 1/2 cup plus 2 tablespoons granulated sugar and 3 tablespoons water. Stir continuously over medium-low heat until the sugar completely dissolves and the mixture is clear. This usually takes a few minutes.
Increase the heat to medium-high and boil without stirring. Watch the color carefully. Occasionally, brush down the sides of the pan with a wet pastry brush to prevent sugar crystals from forming, and gently swirl the pan to ensure even caramelization. Continue cooking until the sugar syrup transforms into a deep amber color – this typically takes about 8-10 minutes. Do not let it get too dark, or it will taste burnt.
Immediately and very carefully add the hot cream-butter mixture to the hot caramel. Be extremely cautious as the mixture will bubble vigorously. Remove the pan from the heat and stir continuously until any remaining caramel bits have fully dissolved and the mixture is smooth and uniform.
Transfer the finished caramel to a small, heatproof bowl and chill until it is slightly firm (semi-soft), stirring often during the chilling process to achieve a consistent texture. This typically takes about 40 minutes in the refrigerator.
Step 3: Assemble and Chill Your Milky Way Tarts
Spoon approximately 2 generous tablespoons of the semi-soft caramel into the center of each cooled, baked tart crust, spreading it gently to form an even layer.
Retrieve the chilled milk chocolate-cream mixture from the refrigerator. Using an electric mixer, beat the mixture on medium-high speed until stiff peaks form. The cream should be light, airy, and hold its shape. Be careful not to over-whip.
Spoon the whipped chocolate cream atop the caramel in each crust, dividing the mixture equally (approximately 1/2 cup for each tart) and spreading it evenly to the edges.
Chill the assembled tartlets for at least 2 hours to allow all the layers to set properly. This also makes them much easier to slice and serve.
DO AHEAD: These tartlets can be prepared up to 8 hours in advance. Simply cover them loosely with plastic wrap and keep refrigerated until ready to serve. For longer storage, refer to the “Make-Ahead Convenience and Storage” section above.
Step 4: Final Touches and Serving
Carefully remove the tartlets from their pans. Just before serving, lightly sift a dusting of unsweetened cocoa powder over each tartlet. This adds an elegant finish and enhances the chocolate flavor. Serve immediately and enjoy the delightful combination of chocolate and caramel!