
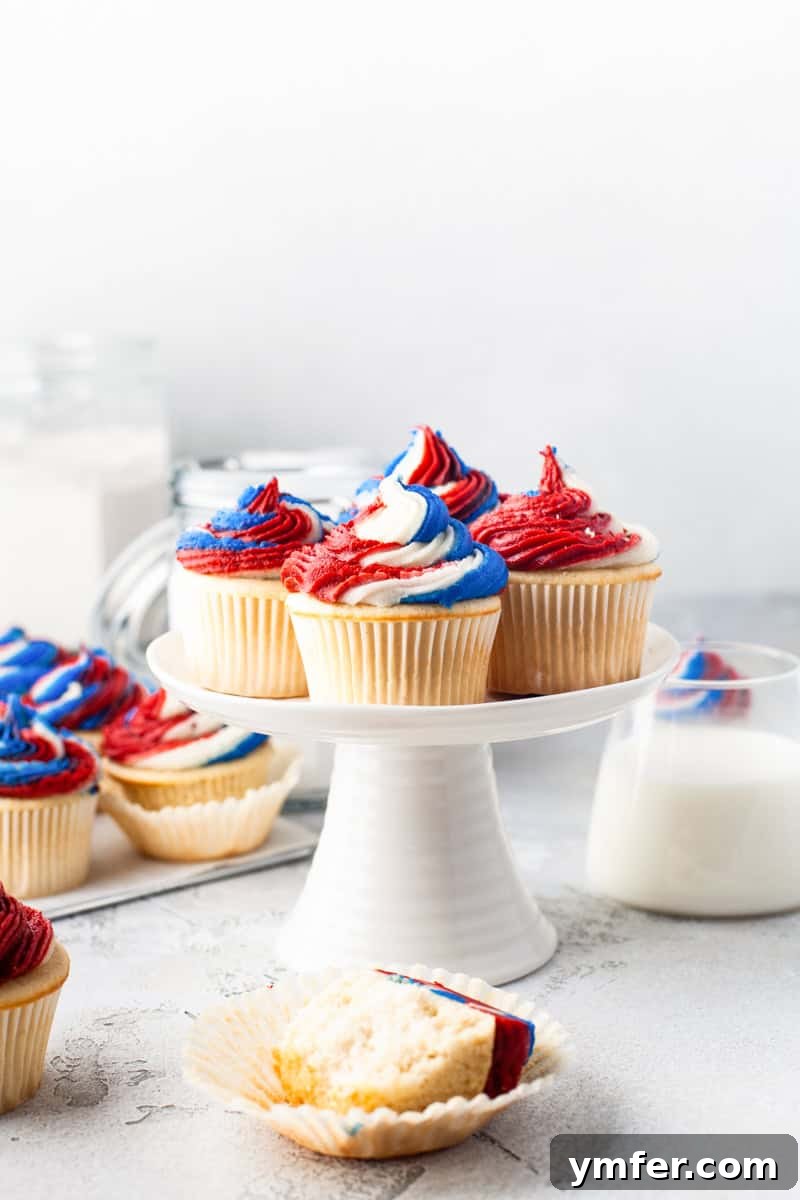
Celebrate America’s spirit with these incredibly light, fluffy, and vibrant Fourth of July cupcakes! Adorned with a mesmerizing swirl of red, white, and blue buttercream frosting, these patriotic treats are not just desserts; they’re a delightful declaration of festivity. Perfect for your Independence Day barbecue, Memorial Day picnic, or Labor Day gathering, they promise to be the star of any celebration. Forget dry, crumbly cakes; this recipe delivers the softest white cupcakes imaginable, elevated by a dreamy, colorful frosting that’s as fun to make as it is to eat.
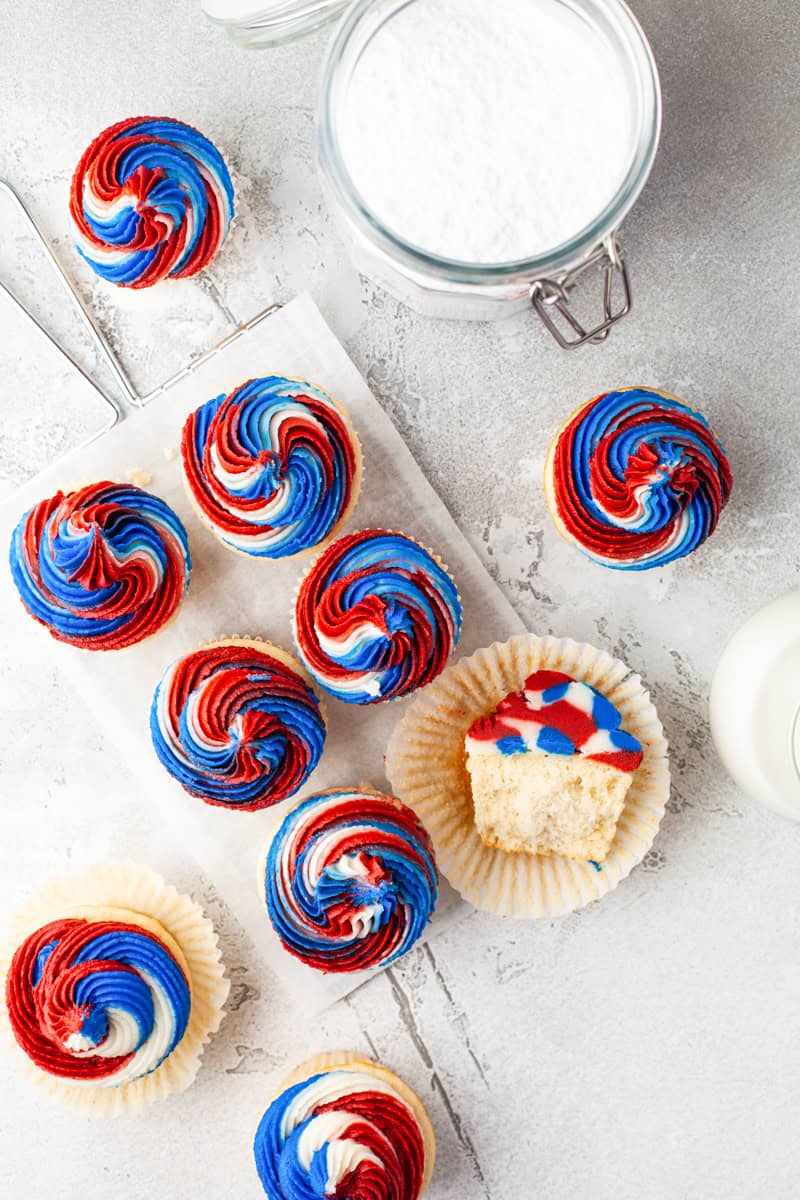
Are you on the hunt for that elusive, perfectly soft, and unbelievably fluffy white cupcake? One that effortlessly becomes the centerpiece of your American holiday spread? Your search ends here! This isn’t just a recipe; it’s a culinary triumph, offering a white cake so exquisite, it might just be the best you’ve ever tasted. Paired with a generously piped swirl of homemade red, white, and blue buttercream, these cupcakes are a feast for both the eyes and the palate. They are an absolute must-have for the Fourth of July, Memorial Day, and Labor Day, adding a burst of patriotic joy to your festivities.
Beyond these classic American holidays, this versatile white cake and buttercream recipe can be adapted for almost any special occasion or gathering throughout the year. Throughout this guide, I’ll share creative ideas on how to customize these delightful treats, ensuring they become a staple in your baking repertoire. From subtle flavor twists to dazzling color schemes, the possibilities are endless.
Looking to expand your repertoire of patriotic desserts? Don’t miss out on these fantastic Red, White, and Blue Jello Shots for another fun and spirited treat!
Essential Ingredients for Perfect Fourth of July Cupcakes
Crafting these show-stopping cupcakes requires a thoughtful selection of ingredients, each playing a crucial role in achieving that coveted light texture and rich flavor. Let’s break down what you’ll need for both the tender white cake base and the vibrant, airy buttercream frosting.
For the Fluffy White Cupcakes:
- Cake Flour: This is the secret weapon for an incredibly soft and fine crumb. With a lower protein content than all-purpose flour, it results in a more delicate and tender cake. If you don’t have cake flour on hand, you can easily make your own at home by combining all-purpose flour with cornstarch.
- Granulated Sugar: Our primary sweetener, granulated sugar contributes to the cupcakes’ moistness and delicate structure, while also providing that essential sweetness.
- Whole Milk: Incorporating whole milk adds rich moisture and depth of flavor to the batter, creating a truly decadent cupcake. Ensure it’s at room temperature for optimal mixing.
- Large Egg Whites: Using only egg whites is key to maintaining a bright white cake and contributes significantly to its light, airy, and fluffy texture. Make sure they are also at room temperature to emulsify properly.
- Flavorings (Vanilla and Almond Extract): A harmonious blend of vanilla and almond extracts creates a wonderfully complex and soft flavor profile that complements the white cake beautifully. You can adjust the ratio to your liking, use all vanilla, or experiment with other extracts like lemon or coconut for a different twist.
- Kosher Salt: A pinch of kosher salt is vital in all baked goods. It enhances and balances the sweetness, bringing out the nuanced flavors of the other ingredients and preventing the cupcakes from tasting flat.
- Unsalted Butter: We opt for unsalted butter to give you complete control over the salt content in the recipe. Softened but still cool butter is crucial for proper creaming and achieving the right cake texture.
- Baking Powder: The leavening agent that gives these cupcakes their beautiful rise and airy texture.
For the Creamy Swirled Buttercream Frosting:
- Unsalted Butter: The foundation of any good buttercream frosting. Using high-quality, room-temperature unsalted butter ensures a rich, smooth, and stable base.
- Powdered Sugar (Confectioners’ Sugar): This finely milled sugar dissolves perfectly into the butter, creating a smooth, velvety texture and adding essential sweetness and body to your frosting.
- Kosher Salt: Just a touch of salt is indispensable in buttercream. It cuts through the sweetness, providing balance and highlighting the rich, creamy flavors.
- Flavorings (Vanilla and Almond Extract): Similar to the cake, these extracts infuse the frosting with a delightful aroma and taste. Feel free to adjust or swap for other flavorings that suit your preference.
- Heavy Cream: Added incrementally, heavy cream helps to thin the frosting to your desired consistency, making it wonderfully spreadable or perfectly pipeable for intricate designs.
- Gel Food Coloring (Red and Blue): Gel food colorings are highly concentrated and produce vibrant, rich colors without thinning out the frosting, which is essential for our patriotic swirl.


Mastering the Art of Swirled Red, White, and Blue Frosting
The stunning swirled frosting is what truly makes these cupcakes pop! Achieving this professional-looking effect is surprisingly simple with a few key steps. Follow these instructions to create your vibrant, patriotic buttercream masterpiece.
Step One: Prepare the Buttercream Base
Begin by placing your room-temperature unsalted butter into the bowl of an electric mixer fitted with a paddle attachment. Beat the butter on medium-high speed for a good 5-7 minutes. This extended creaming time is crucial; it aerates the butter, transforming it from a pale yellow to a lighter, almost white color and a wonderfully fluffy texture. Once light and airy, reduce the mixer speed to low and gradually incorporate the powdered sugar, a cup at a time, until fully combined and no powdery streaks remain. Add the kosher salt and mix for another 30 seconds to ensure it’s evenly distributed. Finally, pour in the heavy cream, vanilla extract, and almond extract. Increase the mixer speed back to medium-high and beat for another 5-7 minutes. This second beating stage is essential for creating a light, fluffy, and pipeable buttercream. If your frosting appears too thick, add a bit more heavy cream, one teaspoon at a time, until it reaches your desired silky consistency.
Step Two: Color Your Frosting
Once your buttercream base is ready, evenly divide it into three separate bowls. For precision, a kitchen scale can be helpful here to ensure equal portions. Into one bowl, add your red gel food coloring. Into the second bowl, add the blue gel food coloring. Leave the frosting in the third bowl its natural white color. Stir each colored frosting vigorously until the color is uniform and vibrant. Add more food coloring as needed to achieve your desired intensity for each patriotic hue.
Step Three: Layer the Colors for the Swirl
Transfer each of the three colored frostings into separate piping bags. Prepare a clean piece of plastic wrap by laying it flat on your counter. Now, take the piping bag with the blue frosting and carefully pipe a line of blue buttercream lengthwise onto the plastic wrap. This line should be approximately the length of your main piping bag (the one you’ll use to frost the cupcakes) and about an inch wide. Repeat this directly on top of the first blue line to create a double-thickness stripe. Next, pipe a double-thickness line of red frosting parallel to the blue, right alongside it. Finally, do the same for the white frosting. Continue this pattern of blue, red, and white, repeating each color once more until you have two distinct lines of each color (blue, red, white, blue, red, white) side by side on the plastic wrap.
Step Four: Assemble and Pipe
Carefully roll one edge of the plastic wrap inwards, gradually encompassing all the colored stripes, until it meets the opposite edge. The last color you rolled in should ideally touch the first, forming a cylindrical log of multi-colored frosting. Gently tie off the ends of the plastic wrap, creating a compact log. Now, snip one end of the plastic wrap cylinder. Take your main piping bag, fitted with your chosen decorating tip (an open star tip works beautifully), and carefully insert the frosting log, snipped end first, into the bag. Position it so the snipped end is at the bottom of the piping bag, ready to be squeezed through the tip. This method ensures that all three colors are evenly distributed as you pipe, preventing them from smudging together and creating that beautiful, distinct swirled effect. Once your cupcakes are completely cooled (this is critical to prevent the frosting from melting!), pipe a generous dollop of the colorful buttercream onto each cupcake, working from the outside in. Serve immediately and enjoy the festive display!

Essential Tools for Professional-Looking Swirled Frosting
While making a fun swirled frosting isn’t overly complicated, having the right equipment on hand can significantly streamline the process and help you achieve those picture-perfect results. Here are the tools that will make your frosting journey a breeze:
- Piping Bags: Disposable piping bags are a baker’s best friend for clean and effortless frosting application. They allow you to pipe the buttercream precisely, creating uniform and “professional-looking” cupcakes with ease.
- Open Star Pastry Tip: This specific tip is responsible for the lovely textured “star” design you see in most professionally decorated cupcakes. An open star tip provides a beautiful, defined ridged pattern, making your cupcakes visually appealing.
- Red Gel Food Coloring: Gel food colorings are superior to liquid dyes for frosting because they are highly concentrated. This means you achieve vibrant, rich reds without adding excess moisture that could alter the frosting’s consistency. This particular shade of red is perfect for patriotic themes.
- Blue Gel Food Coloring: Just like the red, a high-quality blue gel food coloring provides intense color without compromising the buttercream’s texture, ensuring your patriotic swirl is bright and striking.
- Plastic Wrap: This humble kitchen staple is indispensable for creating the swirled frosting effect. It acts as a temporary sleeve, allowing you to layer your colored frostings before transferring them to the piping bag, ensuring a clean and defined multi-color swirl.
- Electric Mixer (Stand or Handheld): While not exclusively for frosting, an electric mixer is crucial for both the cake batter and whipping the butter for the buttercream. It ensures thorough mixing and aeration, leading to light and fluffy results.

Creative Substitutions and Festive Adaptations
The beauty of this cupcake recipe lies in its versatility. While perfect for patriotic holidays, it can be easily adapted and “jazzed up” to suit various themes, occasions, and dietary preferences. Get creative with these fun and festive ideas:
- Color the Cupcake Batter: Take the patriotic theme to the next level by coloring the cake itself! Divide your prepared cupcake batter into three separate bowls. Dye one portion red, another blue, and leave the third white. Then, simply add alternating spoonfuls of each color into your cupcake liners before baking. The result will be a delightful surprise inside: a marbled, swirled cupcake that’s just as vibrant as the frosting!
- Customize Frosting Colors for Any Holiday: This white cake is a blank canvas for any celebration. The red, white, and blue frosting can be easily swapped for other festive color combinations:
- Christmas: Opt for rich red and forest green frosting swirls, perhaps with a touch of white or gold edible glitter.
- Easter: Embrace the spring palette with soft, muted pastel colors like lavender, mint green, baby pink, and pale yellow for a delicate touch.
- St. Patrick’s Day: A vibrant swirl of yellow and various shades of green would be perfect for a touch of Irish cheer.
- Halloween: Bold orange, black, and purple can transform these into spooky delights.
- Baby Showers/Gender Reveals: Use pink and blue for a classic reveal, or any combination to match the nursery theme.
You can also experiment with different extract flavors in the frosting to match the occasion, like peppermint for Christmas or coconut for a tropical theme.
- Make it Even Easier (Time-Saving Hack): If you find yourself short on time or prefer a quicker baking process, don’t hesitate to use a high-quality box white cake mix! Simply follow the package instructions, then proceed with our homemade swirled buttercream recipe. This allows you to enjoy the stunning visual and delicious taste of homemade frosting with a minimal time commitment for the cake base.
- Gluten-Free Option: For those with dietary restrictions, a good quality gluten-free all-purpose flour blend can often be substituted for cake flour in a 1:1 ratio, though results may vary slightly in texture.
- Dairy-Free Option: Substitute regular milk with a plain, unsweetened plant-based milk (like almond or oat milk) and use dairy-free butter alternatives for both the cake and frosting. Ensure your heavy cream substitute is also plant-based and suitable for whipping.
- Topping Ideas: Enhance your patriotic cupcakes with fun toppings! Sprinkles in red, white, and blue are a classic. Fresh berries like blueberries and raspberries or sliced strawberries can add a natural touch and burst of flavor. Edible glitter or sugar pearls can also elevate the festive look.

Proper Storage and Enjoying Leftover Cupcakes
While it’s hard to imagine having any of these delicious cupcakes left over, proper storage is key to maintaining their freshness and flavor. Here’s how to handle any uneaten treats:
- Airtight Container: The absolute best way to store frosted cupcakes is in an airtight container at room temperature. This creates a barrier that prevents the cake from drying out and keeps the buttercream frosting wonderfully soft and creamy. Avoid storing them in the refrigerator unless your kitchen is excessively warm, as refrigeration can sometimes dry out cakes and harden buttercream.
- Optimal Freshness: For the best flavor and texture, aim to enjoy your leftover cupcakes within 3 days. Beyond that, the cake may start to dry out, and the frosting might lose some of its initial freshness.
Freezing Cupcakes for Future Enjoyment
If you’re planning ahead or have baked a large batch, freezing is an excellent option for preserving your cupcakes. However, it’s best to freeze them *unfrosted* for optimal results.
- Unfrosted Freezing: You can freeze unfrosted cupcakes for up to 3 months without compromising their quality. Once completely cooled, wrap each individual cupcake tightly in plastic wrap. This prevents freezer burn and protects the cake from absorbing any freezer odors.
- Airtight Protection: After wrapping, place the plastic-wrapped cupcakes into an airtight container or a freezer-safe ziptop bag. This double layer of protection is crucial for long-term storage.
- Thawing: When you’re ready to enjoy them, simply remove the desired number of cupcakes from the freezer and let them thaw at room temperature for a few hours. Once thawed, you can then frost them fresh with your vibrant red, white, and blue buttercream, making them taste as if they were just baked.

More Festive Dessert Recipes to Explore
If you loved these Fourth of July cupcakes and are looking for more delightful treats to celebrate or simply satisfy your sweet tooth, here are some other fantastic dessert recipes to try:
- Craving a sweet and festive cake that’s equally stunning? Try my Fourth of July Bundt Cake for a grand presentation.
- Love a good tart with fresh seasonal flavors? You’ll adore my refreshing Red, White, and Blueberry Sour Cream Tart.
- Need a fun and customizable cookie recipe for any occasion? My Fourth of July Sugar Cookies are perfect for decorating.
- Want something effortlessly delicious with no oven required? Try my simple and creamy No Bake Blueberry Cheesecake.
Fourth of July Cupcakes
Brandy O’Neill – Nutmeg Nanny
24
cupcakes
Pin Recipe
Email Recipe
Print Recipe
Equipment
-
Piping Bags
-
Non-Stick Bakeware Muffin and Cupcake Pan
-
Standard White Cupcake Liners
-
Electric Mixer (Stand or Handheld)
-
Mixing Bowls
Ingredients
For the Cupcakes:
- 1 cup + 2 tablespoons whole milk, at room temperature
- 6 large egg whites, at room temperature
- 2 teaspoons almond extract
- 1 teaspoon vanilla extract
- 2-1/4 cups cake flour
- 1-1/2 cups + 2 tablespoons granulated sugar
- 4 teaspoons baking powder
- 1 teaspoon kosher salt
- 12 tablespoons unsalted butter, softened but still cool
For the Frosting:
- 12 ounces unsalted butter, room temperature
- 6 cups powdered sugar
- 1/8 teaspoon kosher salt
- 2-3 tablespoons heavy cream
- 1 tablespoon vanilla extract
- 1 teaspoon almond extract
- Red gel food coloring
- Blue gel food coloring
Instructions
For the Cupcakes:
- Set the oven rack in the middle position and preheat the oven to 350 degrees F (175 degrees C).
- Line a 12-count cupcake baking tray with paper liners. This recipe yields 24 cupcakes, so you will either bake in two batches or use two cupcake trays if available.
- In a medium-sized mixing bowl, combine the milk, egg whites, almond extract, and vanilla extract. Whisk gently until just combined. Set aside.
- In the bowl of an electric stand mixer (or a large bowl with a handheld mixer), add the cake flour, granulated sugar, baking powder, and kosher salt. Whisk these dry ingredients together thoroughly.
- Add the softened but cool unsalted butter to the flour mixture. Mix on medium speed until the mixture resembles moist crumbs and no powdery streaks of flour remain.
- Pour all but 1/2 cup of the prepared milk mixture into the flour and butter mixture. Beat on medium speed (or high speed if using a handheld mixer) for 1-1/2 minutes.
- Add the remaining 1/2 cup of the milk mixture and beat for an additional 30 seconds.
- Stop the mixer and use a rubber spatula to scrape down the sides and bottom of the bowl, ensuring all ingredients are well incorporated.
- Return the mixer to medium (or high) speed and beat for 20 seconds longer to ensure a smooth, uniform batter.
- Divide the batter evenly among the prepared cupcake liners, filling each about two-thirds full. Bake for approximately 15 minutes per batch, or until the tops of the cupcakes spring back when lightly touched and a toothpick inserted into the center comes out clean.
- Allow the cupcakes to cool completely on a wire rack before attempting to frost them. This is crucial to prevent the frosting from melting.
For the Frosting:
- In the bowl of an electric mixer fitted with a paddle attachment, add the room-temperature unsalted butter.
- Beat on medium-high speed for 5-7 minutes, until the butter is light yellow, incredibly fluffy, and airy.
- Reduce the mixer speed to low and gradually incorporate the powdered sugar, one cup at a time, until fully mixed in.
- Once all powdered sugar is incorporated, add the kosher salt and mix for 30 seconds to ensure it’s well combined.
- Add the heavy cream, vanilla extract, and almond extract to the mixture.
- Increase the mixer speed to medium-high and beat for another 5-7 minutes, until the frosting is exceptionally light, fluffy, and smooth.
- If the frosting appears too thick for piping, add a bit more heavy cream (1 teaspoon at a time) until you achieve your desired consistency.
- Evenly distribute the prepared white frosting into three separate bowls. For precise measurements, use a kitchen scale.
- Add red gel food coloring to one bowl, blue gel food coloring to another bowl, and leave the third bowl of frosting white. Stir each bowl until the color is vibrant and uniformly mixed. Add more coloring as needed to reach your desired intensity.
- Transfer each colored frosting (red, white, and blue) into individual piping bags.
- Lay a piece of plastic wrap flat on your clean counter. Take the blue piping bag and pipe a long, straight line of blue frosting down the center of the plastic wrap, approximately the length of your main piping bag. Repeat directly on top to create a double-thick line of blue.
- Repeat the process with the red frosting, piping a double-thick line parallel to the blue. Then, do the same for the white frosting. Continue layering in this order (blue, red, white) until you have two distinct stripes of each color side-by-side (blue, red, white, blue, red, white).
- Carefully roll one edge of the plastic wrap over the layered frosting stripes until it meets the opposite edge, forming a neat cylinder or log of multi-colored frosting. Gently twist and tie off the ends of the plastic wrap.
- Snip off one end of the plastic wrap cylinder. Insert this end into a larger piping bag that has been fitted with your chosen decorating tip (e.g., an open star tip).
- Once your cupcakes are completely cooled, pipe a generous dollop of the beautiful swirled frosting onto each cupcake, starting from the outside and swirling inwards. Serve and enjoy!
Additional Info
Dessert
American
Tried this recipe? Mention @NutmegNanny or tag #nutmegnanny!
Frequently Asked Questions About Fourth of July Cupcakes
Q: Can I use all-purpose flour instead of cake flour?
A: While cake flour is highly recommended for its low protein content which results in a softer, finer crumb, you can create a substitute. For every cup of cake flour needed, measure out 1 cup of all-purpose flour, remove 2 tablespoons, and replace them with 2 tablespoons of cornstarch. Sift this mixture together thoroughly before using. This substitution will yield a cake that is still light, though perhaps not quite as delicate as one made with pure cake flour.
Q: Why do my ingredients need to be at room temperature?
A: Room temperature ingredients, especially butter, milk, and egg whites, emulsify much more easily. This means they combine smoothly and evenly, creating a uniform batter and frosting without curdling. When cold ingredients are added, they can seize up the butter, leading to a lumpy batter or frosting and a denser final product. Planning ahead to let your ingredients come to room temperature is a small step that makes a big difference.
Q: How can I prevent the frosting colors from bleeding into each other when swirling?
A: The key to preventing color bleed is using gel food coloring, which is highly concentrated and won’t thin out your frosting, and the plastic wrap method described in step three. By layering the distinct stripes of colored frosting on plastic wrap and then rolling it into a log, you create a barrier that keeps the colors separate until they are piped. When piping, maintain steady pressure and work efficiently.
Q: My buttercream frosting is too thick/thin. How can I fix it?
A: Adjusting buttercream consistency is simple. If your frosting is too thick, gradually add more heavy cream, 1 teaspoon at a time, beating after each addition until you reach the desired pipeable consistency. If it’s too thin, add more powdered sugar, 1 tablespoon at a time, beating until it thickens. The key is to add slowly and check the consistency often.
Q: Can I make these cupcakes ahead of time?
A: Absolutely! Unfrosted cupcakes can be baked 1-2 days in advance and stored in an airtight container at room temperature. For longer storage, freeze the unfrosted cupcakes as directed in the “Freezing Cupcakes” section. The buttercream frosting can also be made 1-2 days in advance and stored in an airtight container in the refrigerator. Before using, let it come to room temperature and re-whip it for a few minutes until light and fluffy again. Frost the cupcakes just a few hours before serving for the freshest look and taste.
Q: What if I don’t have an electric mixer?
A: While an electric mixer makes the process much easier and ensures optimal fluffiness for both the cake and frosting, you can make them by hand. For the cake batter, use a whisk and strong arm muscles, ensuring all ingredients are thoroughly combined and lumps are removed. For the buttercream, you’ll need to vigorously whisk the butter and powdered sugar for a longer period to incorporate enough air, but it is achievable with dedication.
