
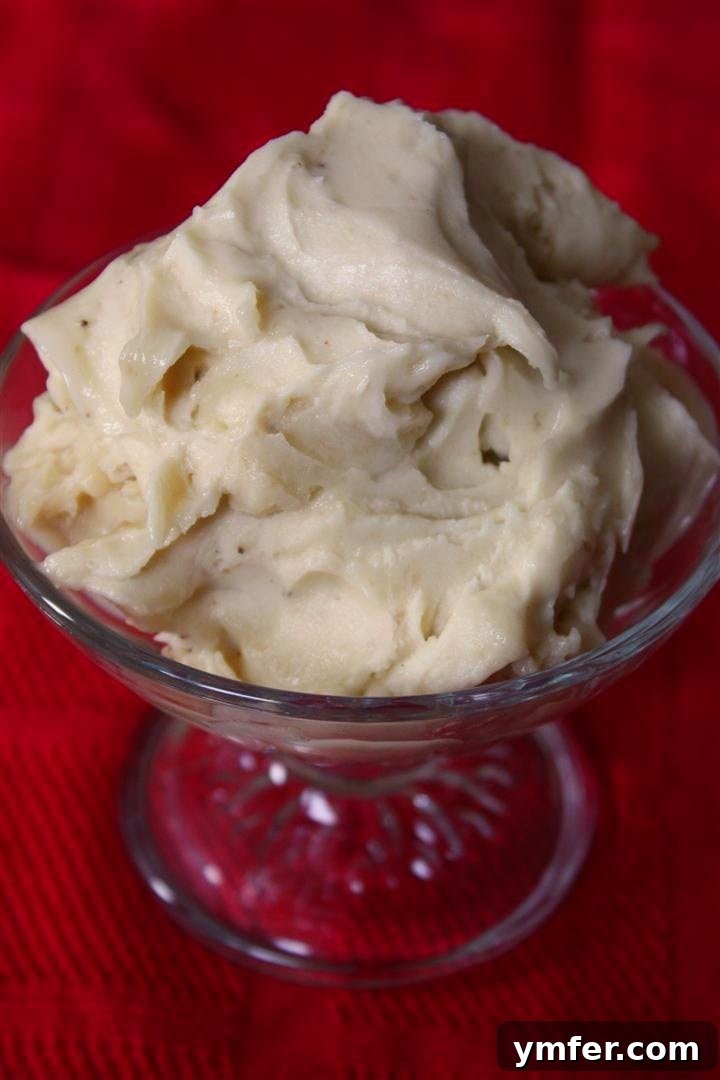
Prepare to be amazed by the simplicity and deliciousness of this incredible 1-ingredient banana whip! This delightful treat, often called “nice cream,” transforms humble frozen bananas into a creamy, dreamy dessert that rivals traditional ice cream. You truly won’t believe how effortless it is to create this naturally sweet, low-fat indulgence right in your own kitchen. Perfect for satisfying sweet cravings without the guilt, this banana whip is about to become your new favorite go-to dessert.
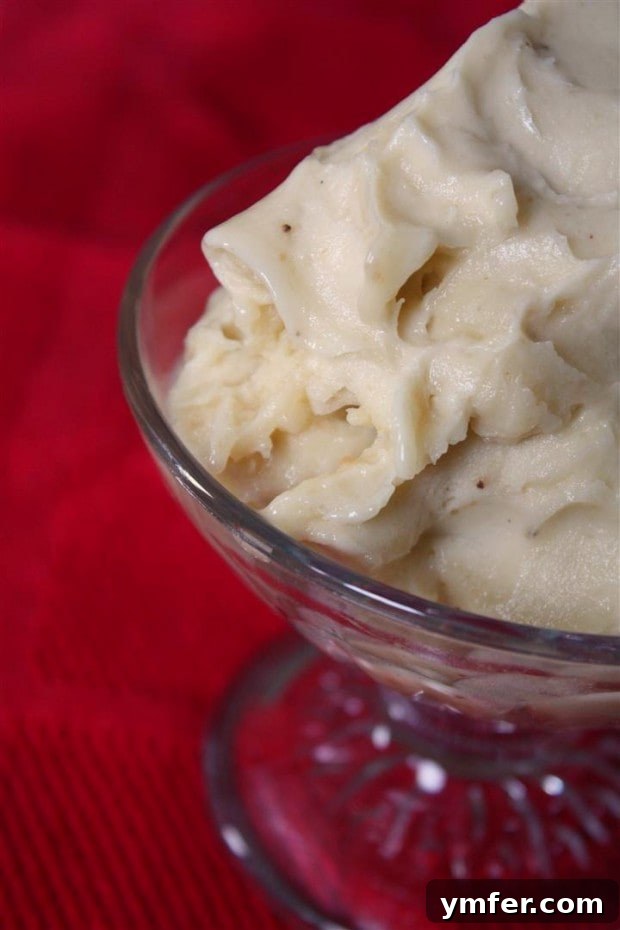
The Ultimate 1-Ingredient Banana Whip “Nice” Cream: Your Guide to a Healthy, Delicious Dessert
Craving something sweet, creamy, and utterly satisfying? Look no further than this incredibly simple, yet profoundly delicious, banana whip “nice” cream. This isn’t just a dessert; it’s a revelation, proving that you don’t need a long list of ingredients or complex techniques to create something truly magical. With just one humble ingredient, you can whip up a treat that’s not only bursting with natural banana flavor but also incredibly healthy, low in fat, and surprisingly fulfilling.
While the concept of turning frozen bananas into a soft-serve-like dessert has been around for a while, its timeless appeal endures. It’s my absolute go-to for those moments when a sweet craving strikes, but I want to keep things light and simple. Forget the added sugars, artificial flavors, and heavy creams – this dessert is pure, unadulterated goodness, relying solely on the natural sweetness and creamy texture of ripe bananas. Made effortlessly in a food processor or high-speed blender, it’s a testament to the power of whole foods to create exquisite culinary experiences.
The secret, as you might have guessed, lies in the humble frozen ripe banana. When processed correctly, these frozen golden fruits undergo a mesmerizing transformation, changing from solid chunks into a thick, velvety concoction that has the exact consistency of soft-serve ice cream. It’s a delightful trick of nature and kitchen science that yields a surprisingly decadent result from such a basic component. This frozen banana dessert is not just easy; it’s practically a culinary magic trick.
Beyond its incredible simplicity, this banana whip offers a guilt-free pleasure. It’s a fantastic way to enjoy a “dessert” that aligns with a healthy lifestyle, offering essential nutrients found in bananas without the usual pitfalls of sugary, high-fat ice creams. So, get ready to discover the joy of making your own healthy, homemade “nice” cream. Trust me, once you try this effortless dessert, you’ll wonder how you ever lived without it!
What Exactly is “Nice” Cream? A Deep Dive into This Healthy Dessert Trend
“Nice” cream is more than just a playful twist on words; it’s a revolutionary way to enjoy a frozen treat that’s genuinely good for you. At its core, “nice” cream is simply frozen bananas processed into a creamy, ice cream-like consistency. The “nice” part of its name stems from its inherent health benefits: it’s naturally low in fat, dairy-free, vegan-friendly, and contains no added sugars when made with ripe bananas. It offers the indulgent texture and refreshing coolness of traditional ice cream but without the heavy cream, eggs, or refined sugars typically found in conventional recipes.
The beauty of nice cream lies in the unique composition of bananas. When frozen, their starches convert to sugars, enhancing their natural sweetness. More importantly, their cellular structure changes, allowing them to break down into an incredibly smooth, thick, and almost elastic texture when blended at high speed. This mimics the mouthfeel of soft-serve ice cream perfectly, making it an ideal substitute for those seeking a healthier alternative or those with dietary restrictions such as lactose intolerance or a vegan diet.
Unlike sorbet, which is often icier and less creamy, or traditional ice cream, which relies on fat for its richness, nice cream achieves its lusciousness through the banana itself. It’s a delightful paradox: a dessert that feels incredibly decadent but is, in fact, incredibly wholesome. While I firmly believe there’s room for all kinds of frozen delights in a balanced diet, having a readily available, nutrient-dense option like nice cream makes healthy eating both easy and exciting.
Nice cream has become a staple in health-conscious kitchens worldwide, not just for its nutritional profile, but for its versatility. It serves as a fantastic base for endless flavor combinations and toppings, allowing for creative experimentation without compromising its inherent healthfulness. It’s a true testament to how simple, natural ingredients can be transformed into something truly extraordinary.
The Magic of a Single Ingredient: Frozen Ripe Bananas
The brilliance of this 1-ingredient banana whip truly lies in its star component: the frozen ripe banana. But why specifically ripe bananas, and why frozen? The ripeness of the banana is crucial. As bananas ripen, their starches convert into natural sugars, making them sweeter and more flavorful. This ensures your “nice” cream is naturally delicious without needing any added sweeteners. The riper the banana (think yellow with plenty of brown spots), the sweeter and more intense the banana flavor will be, creating a richer tasting dessert.
Freezing the bananas is the next key step. When bananas are frozen solid, their water content crystallizes. As these frozen chunks are vigorously processed in a food processor or high-speed blender, the ice crystals are broken down, and the banana cells are pulverized. This intense mechanical action, combined with the natural pectin in bananas, creates an emulsion that’s remarkably smooth, thick, and creamy. It’s this transformation from solid to silky that gives “nice” cream its characteristic soft-serve texture.
Using frozen bananas also eliminates the need for ice, which can dilute the flavor and create an icier, less creamy consistency. With just this single, perfect ingredient, you’re tapping into the fruit’s inherent ability to deliver a luxurious, refreshing dessert. It’s a simple concept, but the result is nothing short of magical – a truly pure and vibrant banana flavor captured in a delightful, spoonable form. This ingenious method not only reduces ingredient lists but also minimizes waste by providing a delicious purpose for those overly ripe bananas on your counter.
Step-by-Step: How to Create Your Creamy Banana Whip
Creating this delicious frozen banana dessert is incredibly straightforward, often taking less than five minutes from start to finish. Here’s a detailed guide to achieving the perfect creamy consistency every time:
- Preparation is Key: Ensure your bananas are adequately ripe (yellow with brown spots) before peeling. Once peeled, break them into smaller chunks (about 1-inch pieces) or slice them into coins. This helps them blend more easily and prevents overworking your equipment. Place the banana pieces in a freezer-safe bag or container and freeze for at least 6-8 hours, or ideally overnight, until solid.
- Load Your Processor: Transfer the frozen banana chunks directly into the bowl of your food processor. For best results, use a powerful food processor with a sharp S-blade or a high-speed blender with a tamper.
- Begin Processing: Start processing the bananas. Initially, you’ll notice them breaking down into small, crumbly pieces, resembling coarse flour or tiny pebbles (think “dip and dots” ice cream). Don’t be alarmed; this is a normal part of the process.
- Scrape and Continue: After about a minute or two, the mixture will likely start to stick to the sides of the food processor bowl. Stop the machine, scrape down the sides with a spatula, pushing the banana pieces back towards the blade. This ensures even blending.
- The Transformation: Continue processing, stopping to scrape down the sides every 30-60 seconds. You’ll observe a gradual transformation: from crumbly, to slightly mashed, then to a thicker, paste-like consistency, and finally, into a smooth, creamy, soft-serve texture. The mixture will lighten in color and become fluffy as air is incorporated. This entire process typically takes between 3 to 5 minutes, depending on the power of your equipment and the size of your banana chunks.
- Achieving Perfection: Keep blending until there are no large chunks remaining and the texture is completely smooth, airy, and resembles perfectly whipped soft-serve ice cream. The key is patience; resist the urge to add liquid unless absolutely necessary, as this can make it icier. If your mixture is struggling to blend and seems too thick, add a tiny splash (1-2 teaspoons) of dairy-free milk, water, or even orange juice to help it along.
- Serve Immediately: For the best soft-serve experience, serve your banana whip immediately after processing. Enjoy it plain to savor the pure banana flavor, or customize it with your favorite toppings!
This simple method ensures you get a consistently smooth and delightful dairy-free dessert every single time. It’s a testament to the fact that healthy eating can be both easy and incredibly delicious.
Tips for the Perfect “Nice” Cream Every Time
While making banana whip is incredibly simple, a few tips can elevate your experience and ensure a perfectly creamy result:
- Use Ripe Bananas: As mentioned, the riper the banana, the sweeter and more flavorful your “nice” cream will be. Green or slightly yellow bananas won’t have the same sweetness or smooth texture.
- Freeze in Chunks: Cutting bananas into 1-inch chunks before freezing helps them blend more easily and quickly. Whole frozen bananas are harder on your equipment and take longer to break down.
- Don’t Overfill Your Processor: Process in batches if you’re making a large quantity to ensure even blending and prevent your food processor from overheating.
- Patience is a Virtue: The process takes a few minutes, and you’ll see different stages (crumbly, then chunky, then creamy). Keep scraping down the sides and processing until it’s completely smooth and soft-serve-like.
- Avoid Adding Too Much Liquid: If the mixture is too thick to blend, add liquid sparingly – 1-2 teaspoons at a time. Too much liquid will make your nice cream icy and less creamy.
- Serve Immediately: For that perfect soft-serve consistency, serve the banana whip right after making it. If it sits out, it will melt into a puree.
- Chill Your Serving Bowls: For an extra special touch, chill your serving bowls or glasses in the freezer for a few minutes before serving. This helps keep the “nice” cream colder for longer.
Storing Your Delicious Banana Whip
The best way to enjoy your fresh banana whip “nice” cream is immediately after it’s made, when it has that dreamy soft-serve consistency. However, if you find yourself with leftovers, or if you prefer a firmer, scoopable “nice” cream, proper storage is essential.
You’ll want to store any leftover banana whip in an airtight, freezer-safe container. This prevents freezer burn and keeps it fresh. If you leave your banana whip out at room temperature for too long, it will quickly melt into a banana puree. While still perfectly edible and delicious as a smoothie base or a topping for pancakes, it loses its “ice cream” appeal.
When stored in the freezer, your banana whip will harden significantly, much like traditional ice cream. If you want to enjoy it again with a soft-serve texture, simply remove it from the freezer and let it thaw on the counter for 10-20 minutes, or until it’s slightly softened. Then, return it to your food processor and blend again for a minute or two, scraping the sides as needed, until it regains its creamy, smooth consistency. This re-processing step brings back the aeration and fluffiness that makes “nice” cream so enjoyable.
Properly stored, your frozen banana whip can last in the freezer for up to 1-2 weeks, though its texture is best when consumed within a few days of preparation and re-blending.
How Do I Store Frozen Bananas for Future “Nice” Cream and Other Treats?
Having a stash of frozen bananas in your freezer is a game-changer for quick desserts, smoothies, and baking. It’s an excellent way to prevent food waste and always be prepared for a healthy treat. Here’s how to properly store them for optimal freshness and usability:
- Choose the Right Ripeness: Only freeze ripe bananas (yellow with brown spots). Green bananas will not offer the same sweetness or blend into a creamy texture.
- Peel Them First: Always peel your bananas before freezing. Trying to peel a rock-solid frozen banana is a frustrating task you’ll want to avoid!
- Slice or Chunk: For easier blending, especially if you have a less powerful food processor or blender, it’s best to slice the bananas into 1-inch coins or break them into chunks. This also helps with portion control.
- Prevent Sticking: To prevent the banana pieces from freezing into one giant, solid clump, arrange the peeled, sliced, or chunked bananas in a single layer on a parchment paper-lined baking sheet. Freeze for 1-2 hours until solid.
- Transfer to Storage: Once the banana pieces are individually frozen, transfer them to a freezer-safe, airtight ziptop bag or a rigid container. This step ensures they won’t stick together and you can easily grab just the amount you need.
- Label and Date: Always label your bag or container with the date. Frozen bananas are best used within 3 months for optimal flavor and texture, though they can remain safe to eat for longer.
These frozen banana pieces are not only perfect for this banana whip recipe but are also incredibly versatile for other culinary uses. They are fantastic in refreshing frozen smoothies like a Tropical Green Smoothie Bowl, a vibrant Cranberry Smoothie Bowl, or a comforting Apple Pie Smoothie Bowl. You can also use them in baking, adding natural sweetness and moisture to muffins, bread, or pancakes. Keeping a supply on hand means you’re always just moments away from a wholesome and delicious creation!
Creative Variations and Topping Ideas for Your Banana Whip
While the classic 1-ingredient banana whip is a masterpiece on its own, its simplicity makes it an ideal canvas for culinary creativity. Here are some fantastic ways to customize your “nice” cream and take it to the next level, transforming it into an even more exciting dessert:
Flavor Variations (Add to the food processor with bananas):
- Chocolate Banana Whip: Add 1-2 tablespoons of unsweetened cocoa powder or cacao powder for a rich, chocolatey twist.
- Peanut Butter Banana Whip: Swirl in 1-2 tablespoons of natural peanut butter (or almond butter, cashew butter) during the last minute of blending for nutty goodness.
- Berry Banana Whip: Add a handful of frozen berries (strawberries, blueberries, raspberries) with the bananas for a fruity, vibrant “nice” cream.
- Tropical Banana Whip: Blend in a few chunks of frozen mango or pineapple for an exotic flavor. A splash of coconut milk can enhance the tropical feel.
- Mint Chocolate Chip Banana Whip: A few drops of peppermint extract and some mini chocolate chips make for a refreshing treat.
- Spiced Banana Whip: A pinch of cinnamon, nutmeg, or a dash of vanilla extract can add warmth and depth to the flavor profile.
- Coffee Banana Whip: A teaspoon of instant espresso powder will give your nice cream a delicious mocha kick.
Delicious Toppings (Add after serving):
- Classic Chocolate Drizzle: A simple drizzle of melted dark chocolate or a homemade chocolate sauce is always a winner.
- Fresh Fruit: Sliced fresh bananas, berries, kiwi, or mango add texture and complementary flavors.
- Nuts and Seeds: Chopped walnuts, pecans, almonds, peanuts, or a sprinkle of chia seeds, hemp seeds, or granola for a satisfying crunch.
- Coconut Flakes: Toasted or untoasted coconut flakes offer a lovely texture and tropical aroma.
- Caramel Drizzle: A healthy date caramel sauce or a traditional caramel drizzle can elevate the indulgence.
- Whipped Cream: A dollop of dairy-free whipped cream or classic whipped cream for extra richness.
- Sprinkles: A fun and colorful addition, especially for kids (or the young at heart!).
Experiment with these combinations to discover your favorite version of this incredibly versatile and healthy frozen banana dessert. The possibilities are truly endless!
Beyond Delicious: The Health Benefits of Bananas
Choosing bananas as the sole ingredient for your “nice” cream isn’t just about taste and convenience; it also comes with a significant nutritional upside. Bananas are a powerhouse of essential vitamins and minerals, making this dessert a truly wholesome choice.
- Rich in Potassium: Bananas are famously high in potassium, an electrolyte crucial for maintaining healthy blood pressure, heart function, and fluid balance.
- Good Source of Fiber: They provide dietary fiber, which aids digestion, promotes feelings of fullness, and helps regulate blood sugar levels.
- Vitamin C and B6: Bananas are a good source of Vitamin C, an antioxidant that supports immune health, and Vitamin B6, which is important for brain health and metabolism.
- Natural Energy Boost: The natural sugars (fructose, glucose, sucrose) in bananas, combined with their fiber content, provide sustained energy, making this a great post-workout snack.
- Antioxidants: Bananas contain various antioxidants, including dopamine and catechins, which help protect the body from free radical damage.
By transforming this nutrient-dense fruit into a delightful frozen treat, you’re not just indulging your sweet tooth; you’re also fueling your body with vital nutrients in a delicious and enjoyable way.
Love This Easy-to-Make Banana Whip “Nice” Cream? Discover More Banana Delights!
If you’ve fallen in love with the simplicity and deliciousness of this 1-ingredient banana whip, you’re in for a treat! Bananas are incredibly versatile, and their natural sweetness and texture make them a fantastic base for a wide array of recipes, from comforting baked goods to refreshing smoothies. Here are a few more of my favorite banana-centric recipes that I think you’ll adore:
- Sourdough Discard Banana Bread: Looking for a creative way to use up both sourdough discard and ripe bananas? This recipe combines the tangy depth of sourdough with the moist sweetness of banana bread for an irresistible twist on a classic.
- Banana Bread Crisp: Imagine all the comforting flavors of banana bread, but in a warm, bubbly dessert crisp topped with a crunchy oat streusel. It’s pure comfort in a bowl, perfect with a scoop of… you guessed it, banana whip!
- Coconut Rum Lime Glazed Banana Bread: Take your banana bread on a tropical vacation! This recipe infuses the classic with exotic coconut and a zesty lime glaze, all with a hint of rum for an adult-friendly treat.
- Banana Bread Granola: Enjoy the comforting taste of banana bread every morning with this wholesome granola. It’s packed with oats, nuts, and the warm spice of banana, making it perfect for breakfast or a healthy snack.
- Old Fashioned Banana Pudding Ice Cream: For a fun twist on a Southern classic, try this homemade ice cream that captures all the creamy, vanilla-wafer goodness of banana pudding in a frozen form.
Banana Whip Recipe
By: Brandy O’Neill – Nutmeg Nanny
Servings: 2 servings
Prep Time: 5 mins
Total Time: 5 mins
Share by Email
Print Recipe
This fresh and easy banana whip only uses 1 ingredient and tastes like creamy banana ice cream. You won’t believe how easy this dessert is to throw together!
Equipment
- Vitamix Blender (or similar high-speed blender)
- Food Processor
Ingredients
- 2 frozen ripe bananas, peeled and sliced into chunks
Instructions
- Add the frozen banana chunks to your food processor and begin processing.
- After about a minute or so, stop the processor to scrape down the sides, especially if the banana pieces start to stick.
- Initially, the banana will resemble small dots or crumbs. Continue processing and scraping until the mixture comes together and starts to resemble creamy soft-serve ice cream. Ensure it’s smooth with no large chunks remaining. This entire transformation should take between 3 and 5 minutes.
- Serve immediately, plain, or drizzled with chocolate sauce, fresh fruit, or your favorite toppings.
Nutrition (Approximate per serving)
Calories: 105 kcal
Carbohydrates: 27g
Protein: 1g
Sodium: 1mg
Fiber: 3g
Sugar: 14g
Nutrition information is automatically calculated and should only be used as an approximation.
Additional Info
Course: Dessert
Mention @NutmegNanny or tag #nutmegnanny!