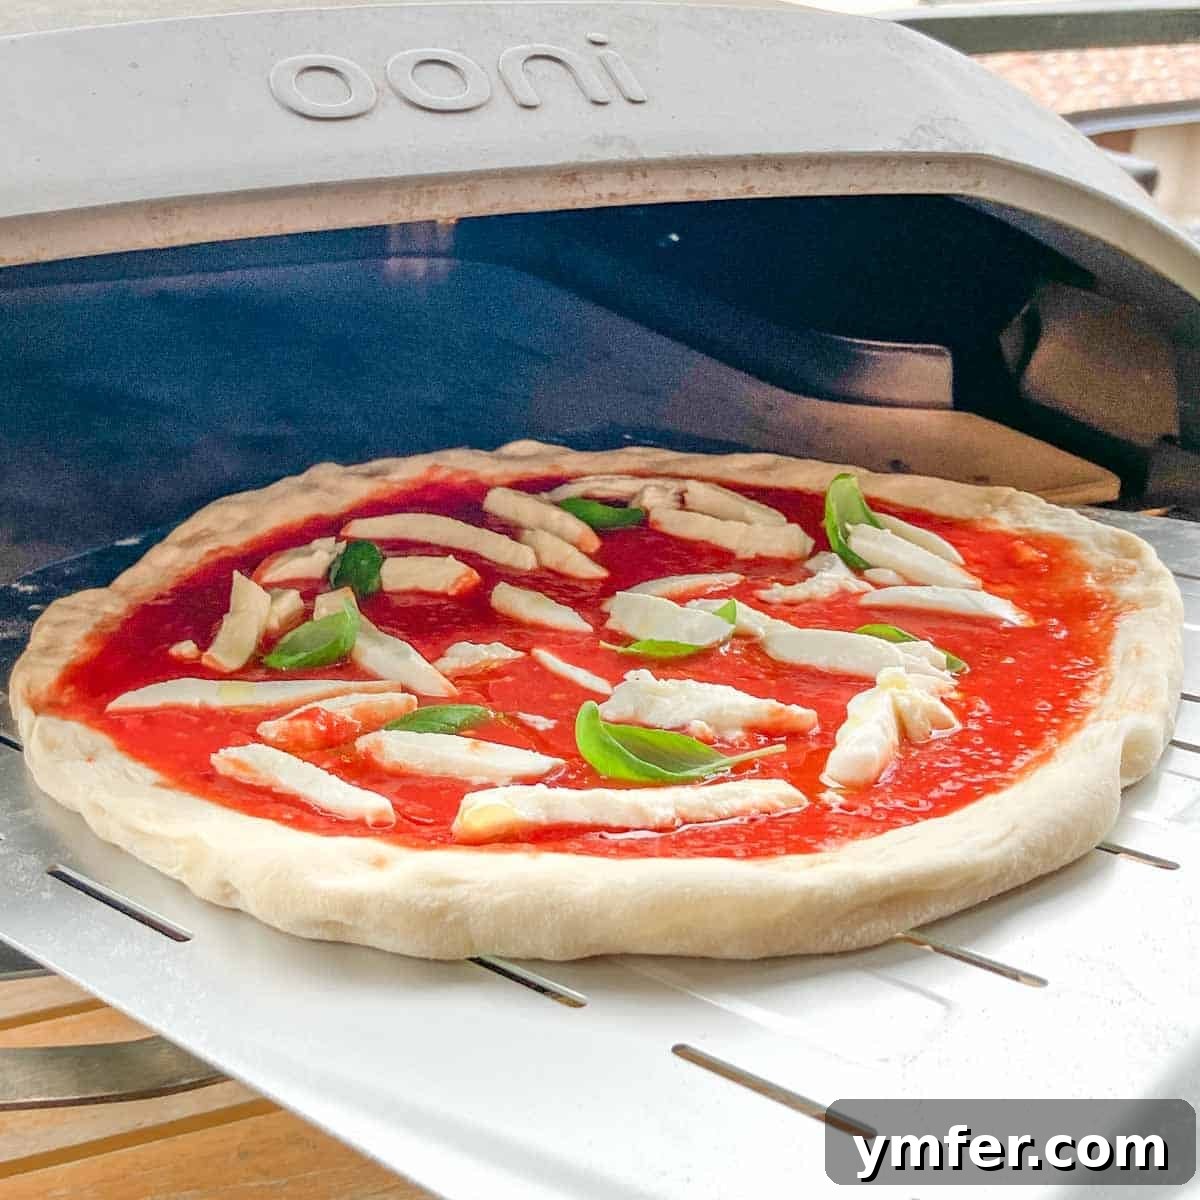
Unlock the secret to perfect homemade pizza with our meticulously crafted Ooni pizza dough recipe! This tried-and-tested recipe is specifically designed to excel in high-temperature pizza ovens like your Ooni, reaching blistering heats of 750°F (400°C) and beyond. Whether you dream of a classic Neapolitan-style pizza with a puffy, airy crust or a crispy New York slice, our versatile dough recipe empowers you to create your favorite pizza masterpieces right in your backyard.
Forget complicated techniques and endless searching. This simple, step-by-step guide is all you need to finally master your Ooni pizza game, delighting friends, family, and even those curious neighbors with truly authentic and delicious homemade pies. Prepare to transform your pizza nights and become a true pizzaiolo!
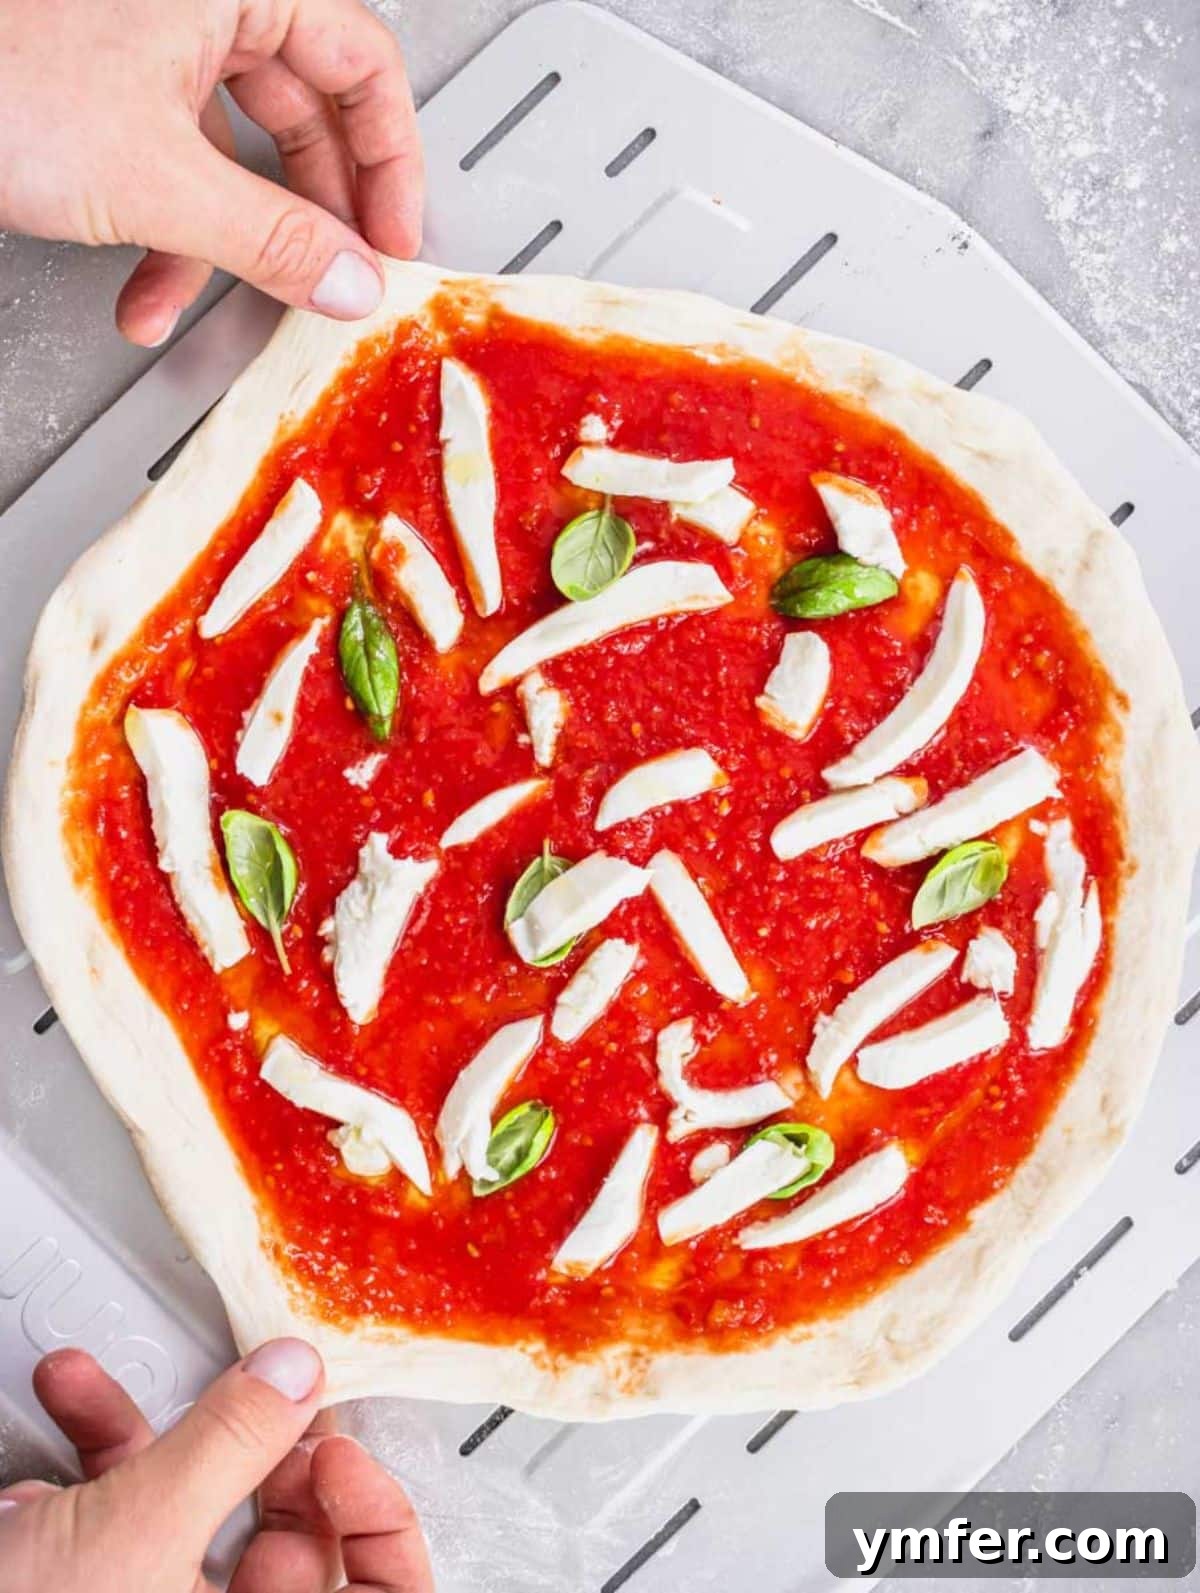
Table of Contents
- What is Ooni Pizza Dough?
- Essential Ingredients & Equipment for Ooni Pizza Dough
- How to Make Ooni Pizza Dough + Expert Tips
- Ooni Pizza Dough Variations
- Irresistible Pizza Toppings for Your Ooni
- Storage & Make-Ahead Tips
- Final Considerations for Perfect Pizza
- More Pizza & Bread Ideas
- Ooni Pizza Dough Recipe Card
Dietary Note: This Ooni pizza dough recipe is completely suitable for both vegetarian and vegan diets.
Short on time? JUMP DIRECTLY TO THE RECIPE CARD HERE!
What is Ooni Pizza Dough?
At its heart, Ooni pizza dough refers to a specific type of dough meticulously formulated for ovens that reach incredibly high temperatures—typically around 750°F (400°C) and above. These specialized conditions are crucial, as they mimic the intense heat found in traditional Italian pizzerias, especially those known for authentic Neapolitan pizza.
Ooni pizza ovens are revolutionary in the home pizza-making world because they empower you to achieve professional-grade results in your own backyard. By reaching these extreme temperatures, an Ooni oven can cook a pizza in a mere 60 to 90 seconds. This rapid cooking time isn’t just about speed; it’s about creating that coveted “leopard-spotted” crust and a beautifully charred, flavorful exterior that is the hallmark of truly great pizza. The intense heat causes the dough to puff up almost instantly, creating a light, airy, and chewy crust that is simply unparalleled.
To withstand and thrive in such extreme heat, this specific type of dough requires a precise flour-to-water ratio and careful ingredient selection. While it might sound complex, the beauty of this dough is its fundamental simplicity. It typically relies on just five core ingredients: water, yeast, flour, salt, and perhaps most importantly, patience.
You’ll notice that sugar and oil are deliberately omitted from our core Ooni pizza dough recipe. This is not an oversight! In the scorching temperatures of an Ooni oven, sugar and oil can cause the pizza to brown and burn far too quickly, long before the dough has a chance to fully cook and develop its exquisite texture. By sticking to the basics, we ensure a perfectly cooked, flavorful crust every time.
Important to Note: Crafting the perfect pizza is an art form that demands practice and patience. While this recipe provides an excellent foundation and clear guidance, true mastery of Ooni pizza making comes through repetition and learning to understand your dough and oven. Embrace the process, learn from each bake, and as our friends across the pond wisely say, “Keep calm and carry on!”
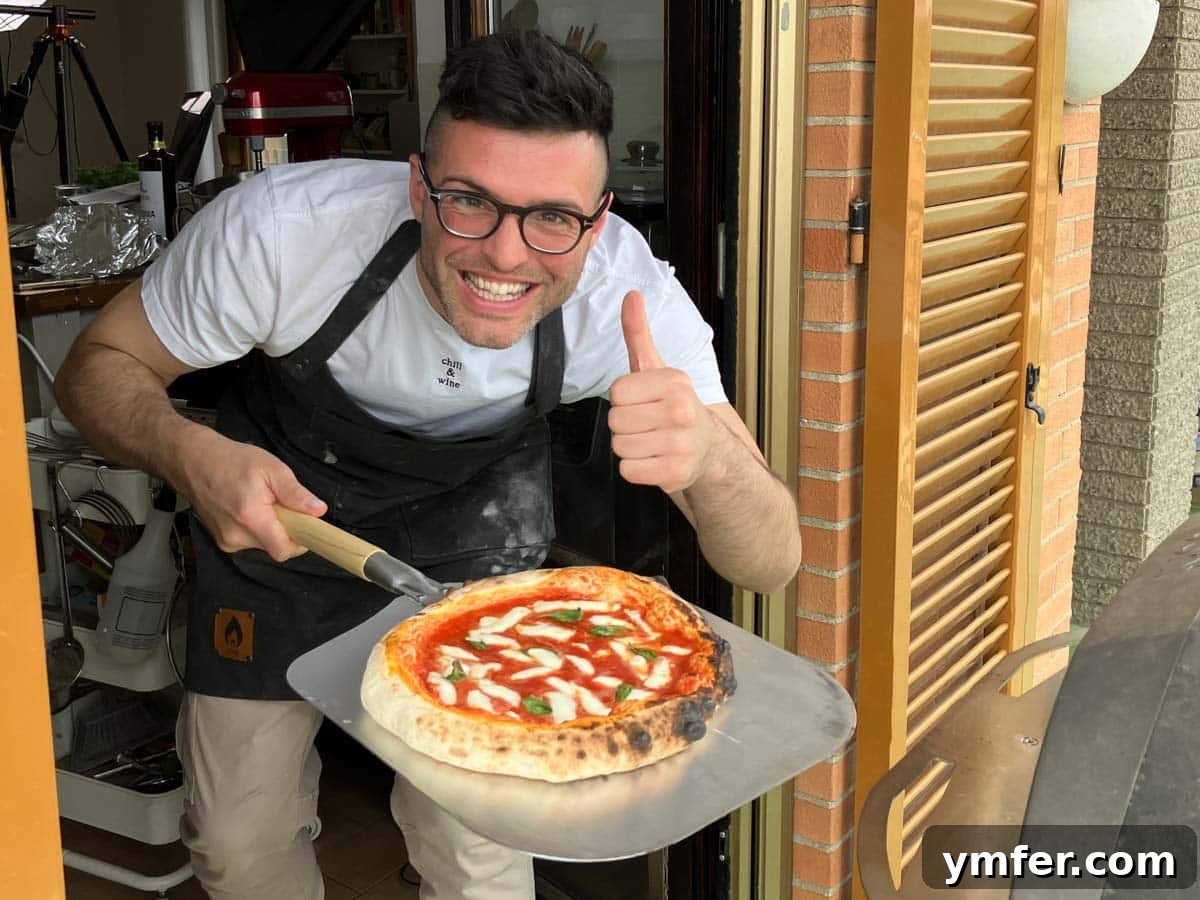
Essential Ingredients & Equipment for Ooni Pizza Dough
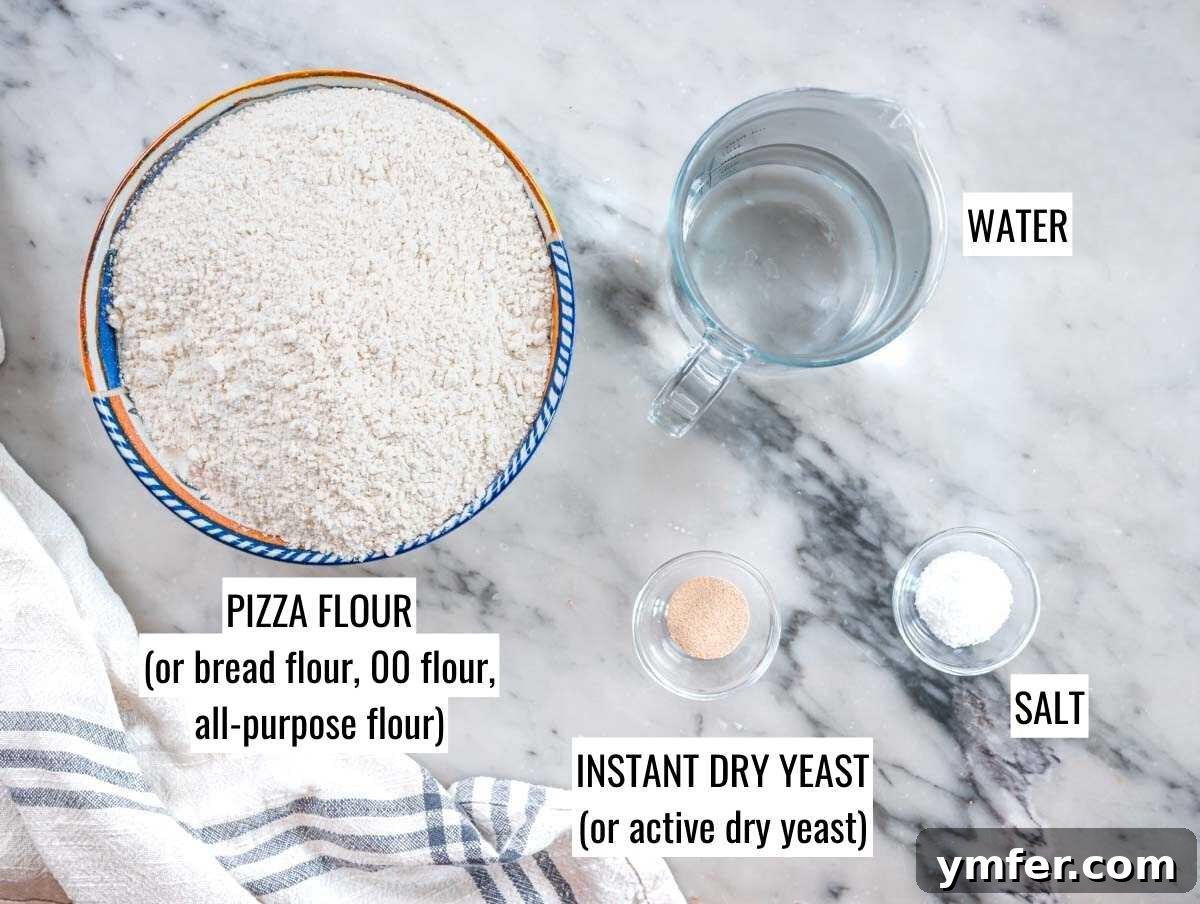
Find precise, adjustable quantities in the recipe card at the bottom of this page.
Flour: The Foundation of Flavor and Texture
For superior Ooni pizza dough, we highly recommend using pizza flour, often labeled as “Tipo 00” or similar. This finely milled wheat flour, with its specific protein content and gentle grinding, is designed to produce a soft, elastic dough that develops beautiful gluten and achieves that characteristic airy, chewy texture with a perfectly blistered crust in high-temperature ovens. Look for reputable brands like Caputo Pizzeria, Caputo 00, or Caputo Nuvola. King Arthur 00 Pizza Flour is another excellent choice.
While you *can* substitute all-purpose flour or bread flour, be aware that the results won’t be identical. All-purpose flour might yield a slightly less elastic and chewier dough, and bread flour, with its higher protein, can make the dough stiffer and harder to stretch without tearing. Think of it like driving a high-performance car with standard tires – it works, but you won’t get the optimal experience.
Yeast: The Living Element
We prefer and recommend using either active dry yeast or instant dry yeast. Both are reliable and readily available. Our trusted (and unsponsored) brands include Caputo dry yeast, Red Star active dry yeast, Red Star Saf Instant, and Dr. Oetker instant yeast. These brands consistently deliver stable and predictable results, which is key for successful pizza dough.
While fresh yeast can be used, it requires careful handling and precise measurement (you’ll need roughly three times the amount compared to dry yeast). For consistency and ease, especially for those new to Ooni pizza making, dry yeast is the way to go.
Water: The Hydrator
Good quality, plain tap water is perfectly suitable, provided it’s safe for drinking. If your tap water has a strong taste or isn’t potable, use still bottled water instead. The temperature of the water is crucial: it should be lukewarm, ideally around 25°C or 77°F. Water that is too cold will inhibit yeast activity, while water that is too hot can kill the yeast, preventing the dough from rising.
Salt: The Flavor Enhancer and Dough Strengthener
We recommend using fine sea salt or kosher salt. Salt plays a vital role beyond just flavoring the dough; it also helps control the rate of fermentation and strengthens the gluten network, contributing to a more elastic and manageable dough.
Important: Due to the incredibly high temperatures achieved in Ooni ovens, we strongly advise against adding oil or sugar to this dough recipe. These ingredients accelerate browning, causing the pizza to burn externally before it’s fully cooked internally, compromising both texture and taste.
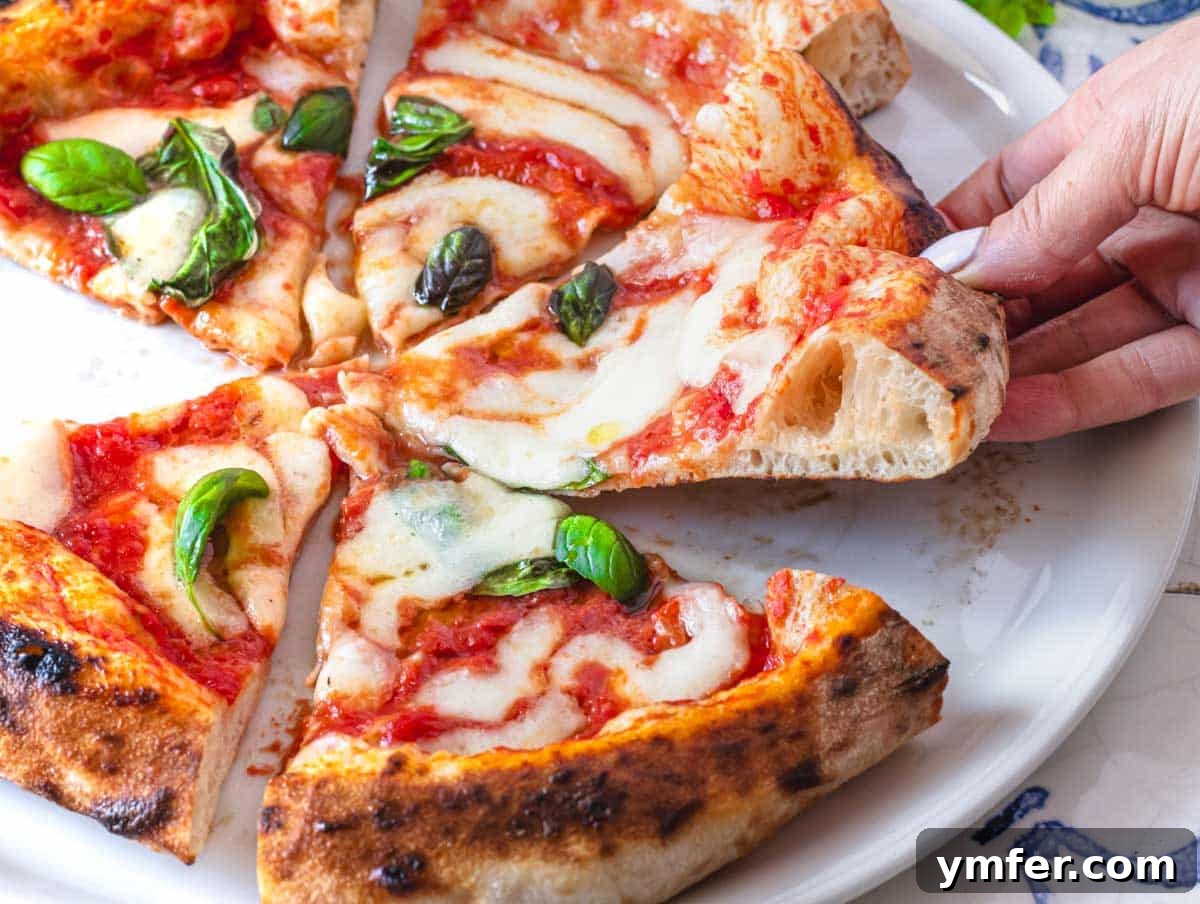
Essential Equipment for Ooni Pizza Success
Having the right tools can make a significant difference in your Ooni pizza-making journey:
PIZZA PEELS: For optimal efficiency and ease, we highly recommend owning two pizza peels. Designate one for launching your pizza into the scorching hot oven and the other for turning the pizza during cooking and retrieving it once it’s done. Why two? The launching peel should always remain cool to prevent the fresh dough from sticking to it. The second peel will naturally warm up as it goes into the oven. Using a warm peel for launching subsequent pizzas dramatically increases the chance of sticking. Tip: Perforated pizza peels are often easier to work with, as the holes allow excess flour to fall away, reducing friction.
DIGITAL SCALE: While measuring cups and spoons can be used, a digital scale offers unparalleled precision and consistency, especially when dealing with smaller quantities like yeast and salt. Precision is paramount in baking. Ideally, use two scales: a regular digital kitchen scale for larger quantities like flour and water, and a precision scale (often called a jewelry or herb scale) for accurate measurements of yeast and salt down to the gram or tenth of a gram. Both are inexpensive and widely available online.
LASER THERMOMETER: This tool is almost indispensable for Ooni pizza making. A laser thermometer allows you to accurately measure the temperature of your pizza stone, ensuring it has reached the optimal heat for cooking. Consistent stone temperature is key to preventing undercooked or burnt bases and achieving that perfect leopard-spspotted crust.
How to Make Ooni Pizza Dough + Expert Tips
Refer to the recipe card at the bottom of the page for exact US cup and gram measurements.
1. Precise Ingredient Measurement
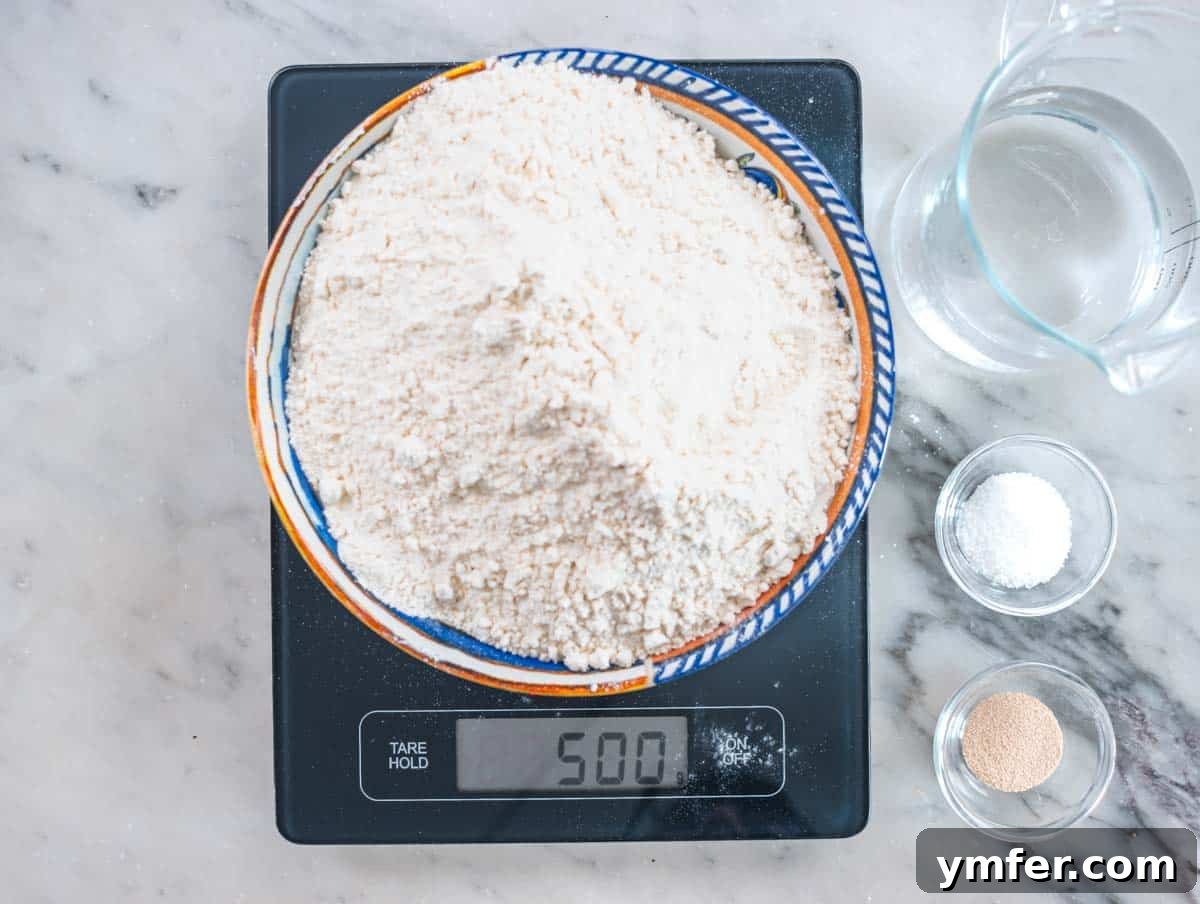
This recipe is designed to yield three individual pizzas, each weighing approximately 265 grams (9.3 ounces). Begin by accurately measuring 3 ⅓ cups or 500 grams of pizza flour, 1 ¼ cups or 300 grams of water, ¾ teaspoons or 2 grams of dry yeast, and 1 ½ teaspoons or 10 grams of fine sea salt.
For the best results, using a digital kitchen scale for gram measurements is highly recommended. It offers far greater accuracy than volume measurements, which can vary. For yeast and salt, a precision scale ensures you hit the mark perfectly, preventing issues with fermentation.
Expert Tip: Embrace the digital scale! It’s not only more precise but also cleaner, reducing the number of measuring cups and spoons you’ll need to wash. Simply place an empty bowl on the scale, press “TARE” to zero it out, and add your ingredient. For minuscule amounts of yeast, a precision scale is a game-changer.
2. Activating the Yeast
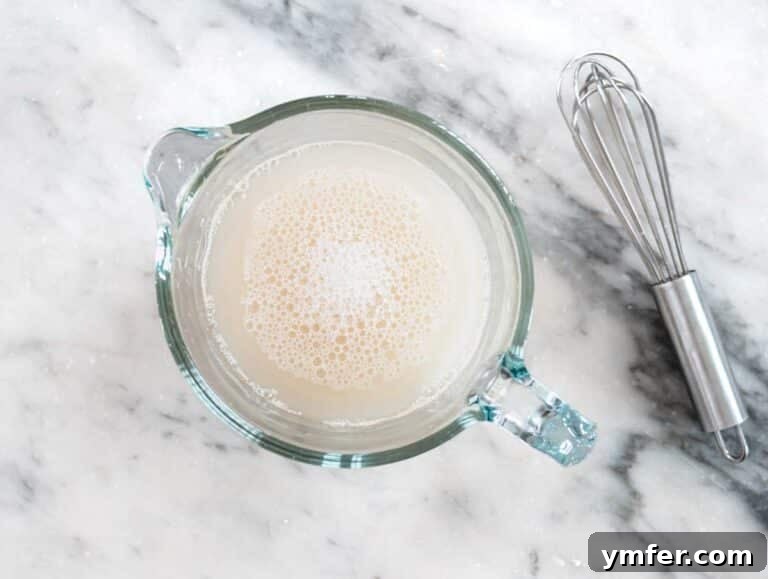
In a small, separate container, combine the lukewarm water with the dry yeast. Whisk vigorously and continuously until the yeast is completely dissolved and no granules remain. This ensures even distribution and activation of the yeast throughout the dough.
Expert Tip: If your yeast fails to dissolve or activate, it’s likely expired or “dead.” There’s no salvaging it; you’ll need to start fresh with new yeast. Remember, “lukewarm” means gently warm to the touch, ideally around 25°C or 77°F – too hot will kill it, too cold will keep it dormant.
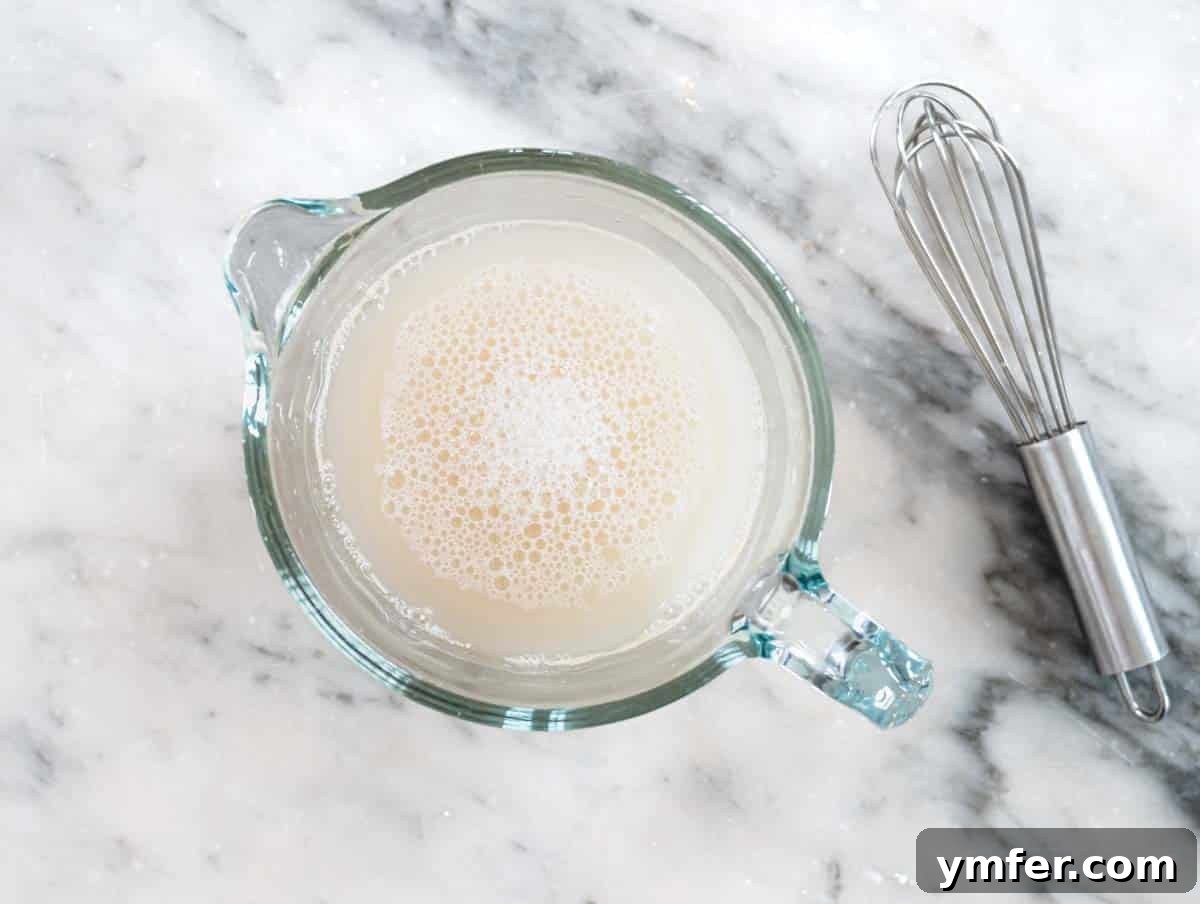
3. Crafting the Dough
MIXING BY HAND
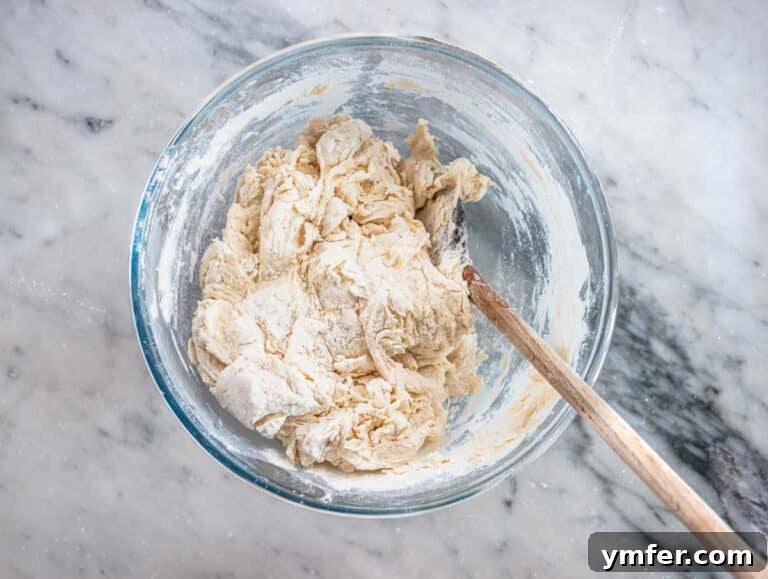
In a large mixing bowl, combine the pizza flour and salt. Stir them together thoroughly with a wooden spoon to ensure the salt is evenly distributed before adding any liquids. Next, pour in all the water-yeast mixture. Continue mixing with the spoon for about 1 minute, or until the flour and water are fully incorporated and the dough begins to form a cohesive, shaggy mass.
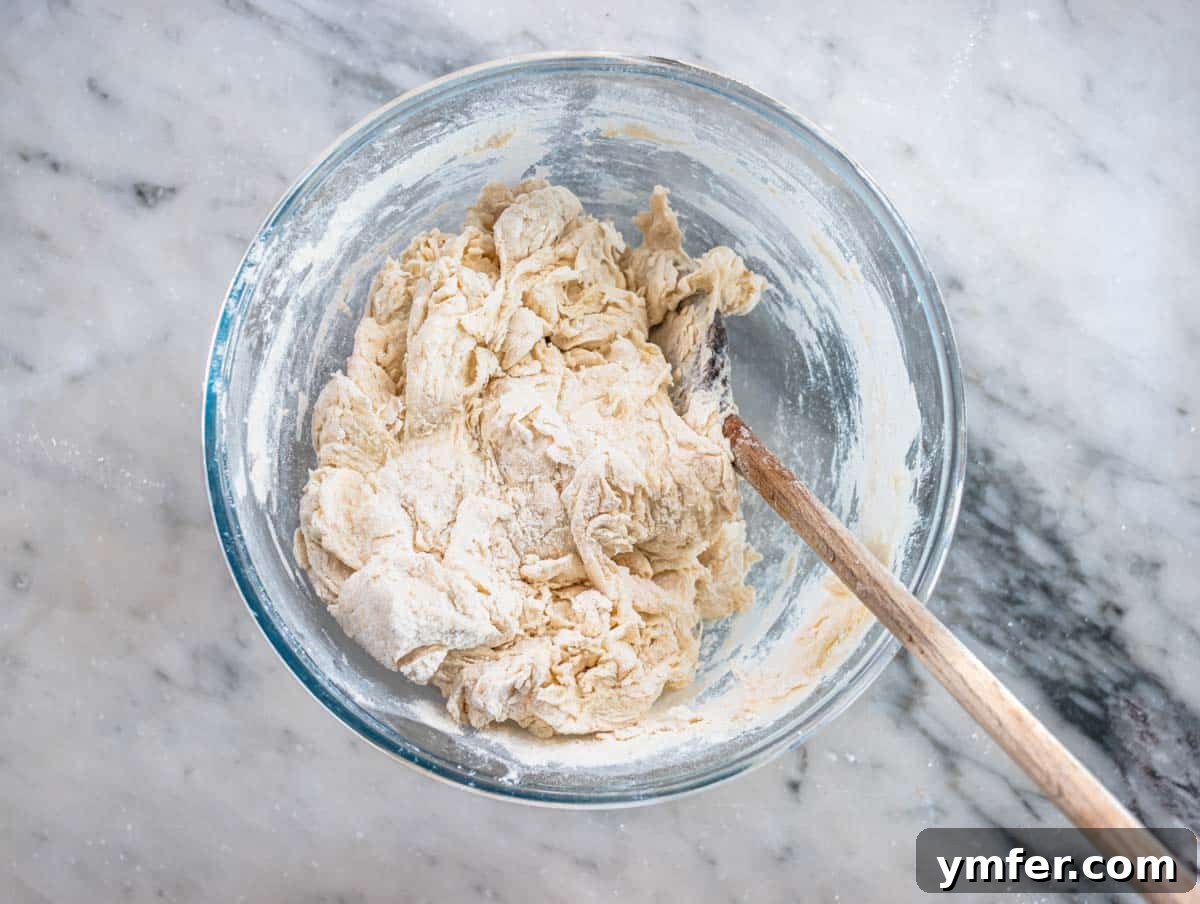
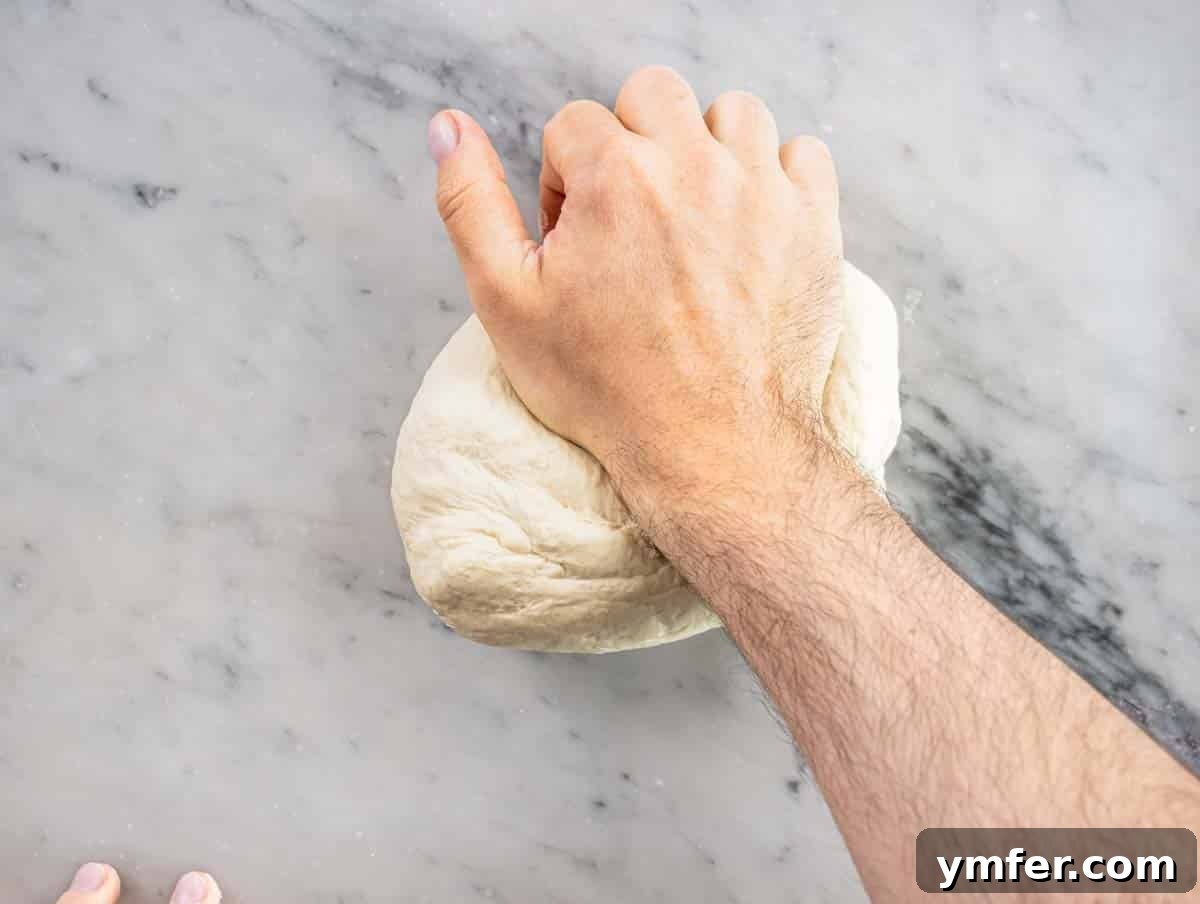
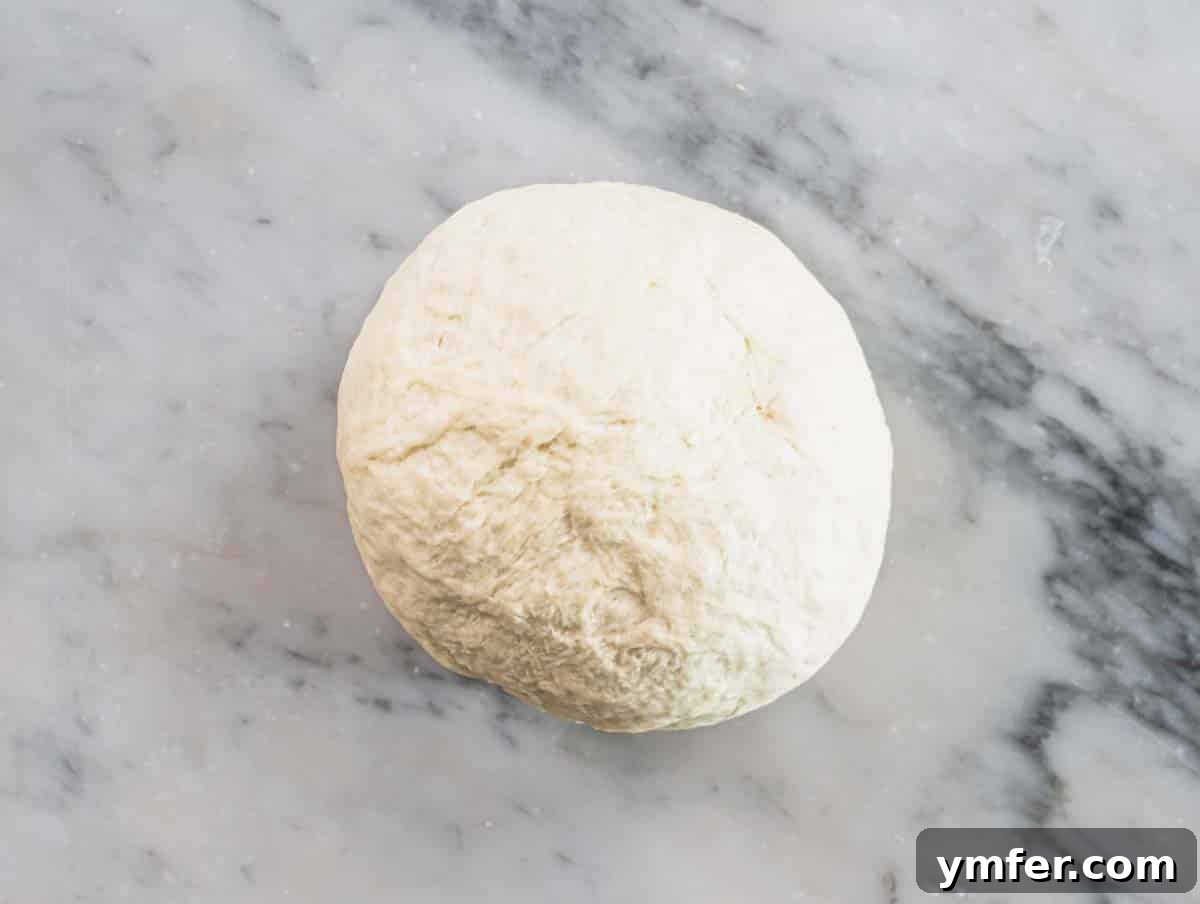
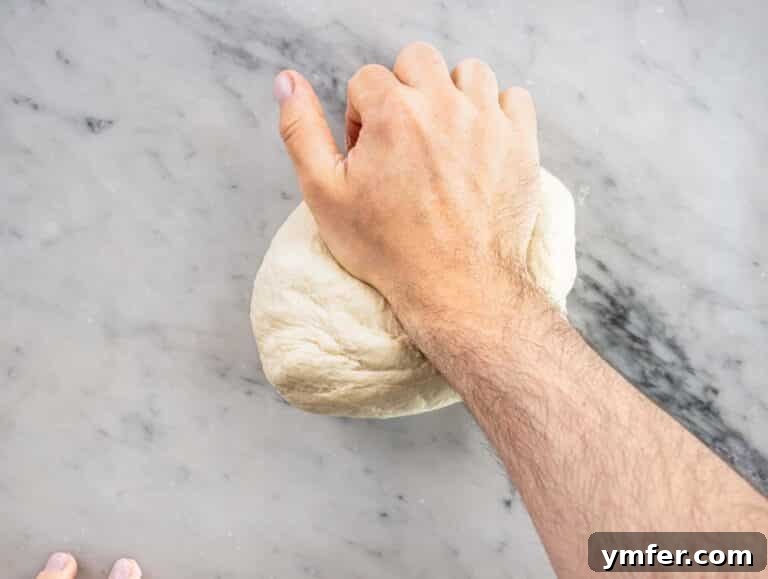
Transfer the dough to a clean, lightly floured worktop. Begin kneading vigorously for approximately 3 minutes. To knead, use the heel of your hand to firmly press the dough down and away from you, sliding it forward across the surface. Then, use your other hand to pull the dough back to its starting position, rotating it 45 degrees as you bring it in. This push-and-pull motion, combined with rotation, helps develop the gluten structure. Continue this rhythmic kneading until the dough transforms from a shaggy mass into a smooth, elastic, and more uniform ball.
Expert Tip: For optimal dough handling, avoid wooden worktops if possible, as dough tends to stick to them. Surfaces like marble, granite, or stainless steel are ideal because they remain cooler, preventing the dough from overheating and becoming overly sticky during kneading.
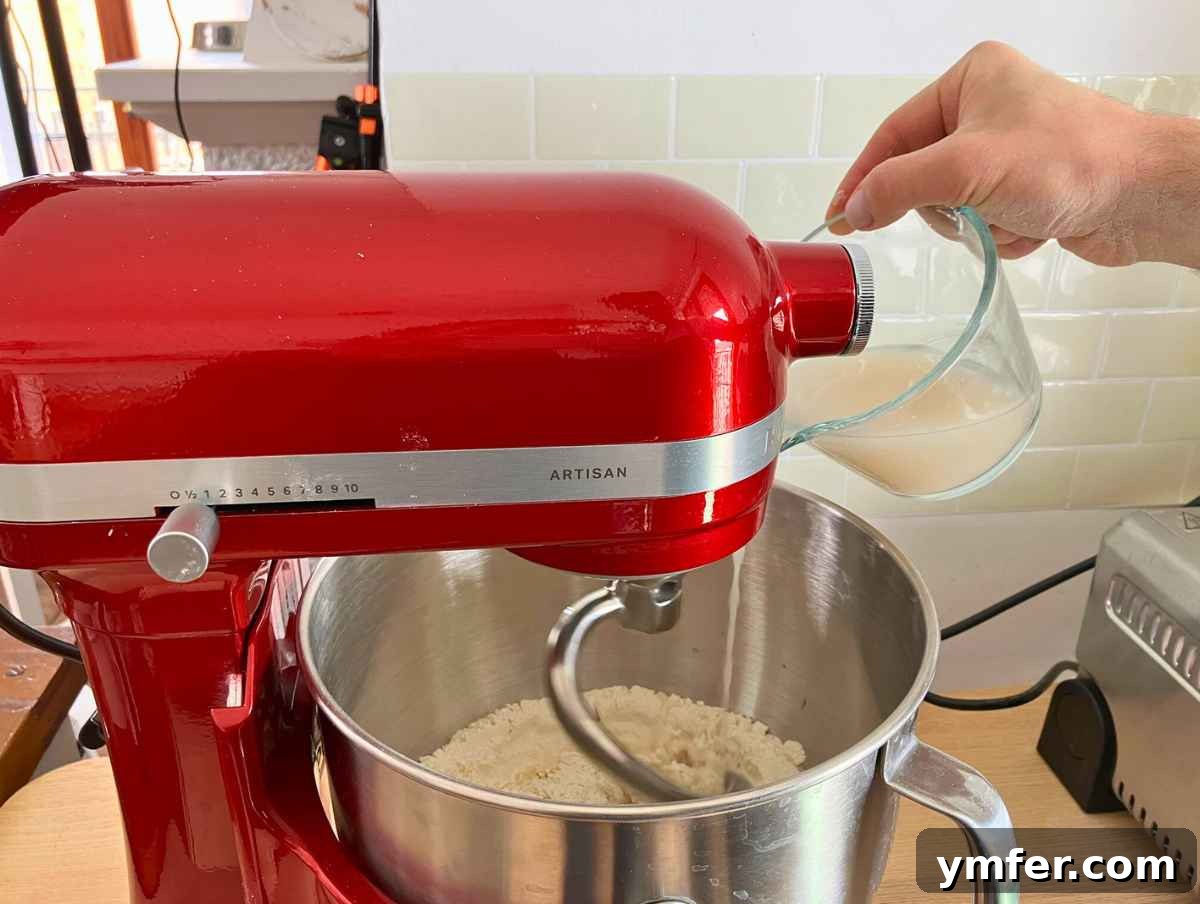
MIXING WITH A STAND MIXER
For convenience, a stand mixer equipped with a dough hook attachment is an excellent alternative. Add the flour and salt to the mixer bowl. With the mixer set to its second lowest speed (e.g., speed 1 on a Kitchen Aid Artisan), slowly but continuously stream in the water-yeast mixture. Allow the machine to work for approximately 1 minute, or until all the ingredients are combined and a rough dough forms around the hook.
Stop the mixer briefly. Use your hands to carefully remove any dough clinging to the hook and press it down to the bottom of the bowl, ensuring all loose flour is incorporated. Restart the machine at the same second lowest speed and let it knead for an additional 3 minutes.
Expert Tip: You’ll know the dough is properly kneaded by the machine when it begins to pull away cleanly from the sides and bottom of the bowl, forming a coherent ball around the dough hook.
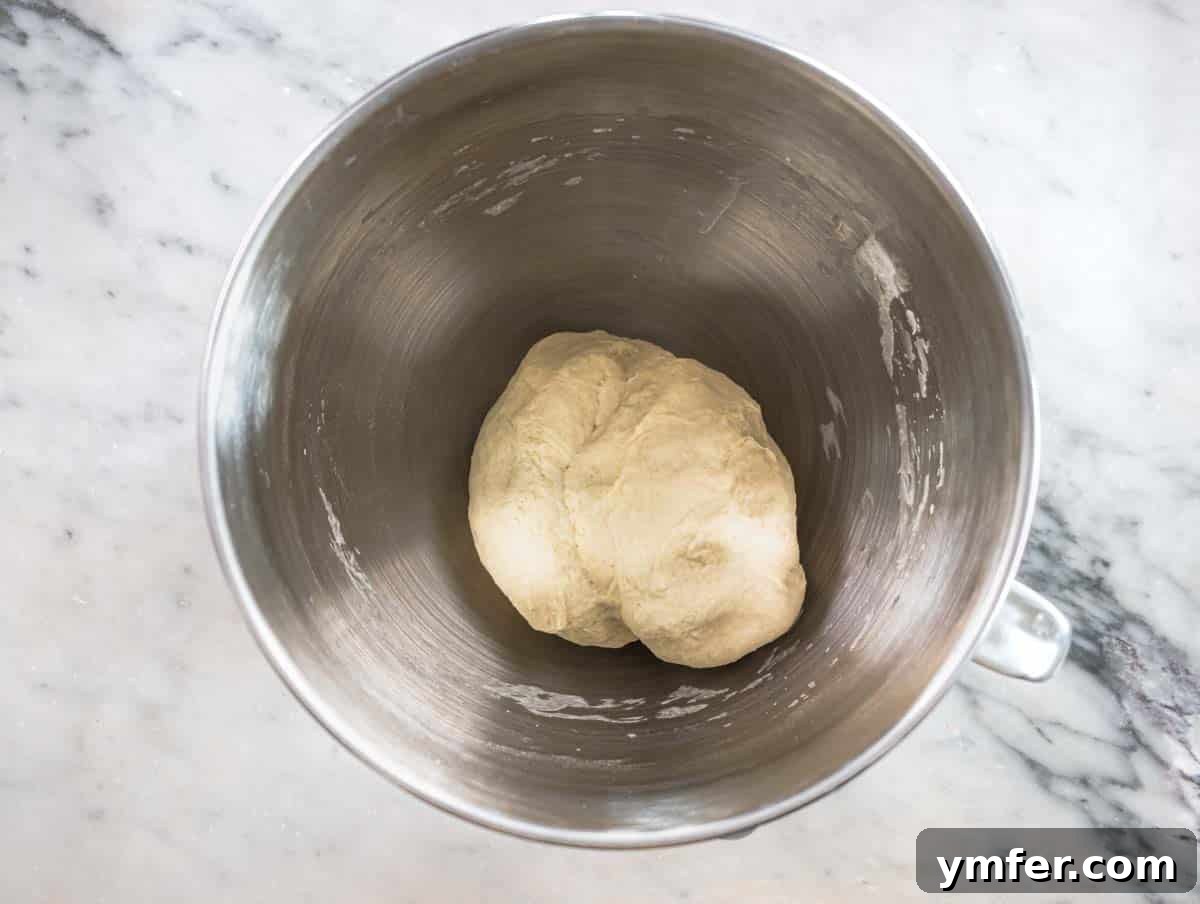
Once the machine has finished, transfer the dough to a clean worktop and give it a final hand-knead for 1 minute. This short burst of hand-kneading helps you feel the dough’s texture and ensures a perfectly smooth finish.
4. Folding the Dough for Strength
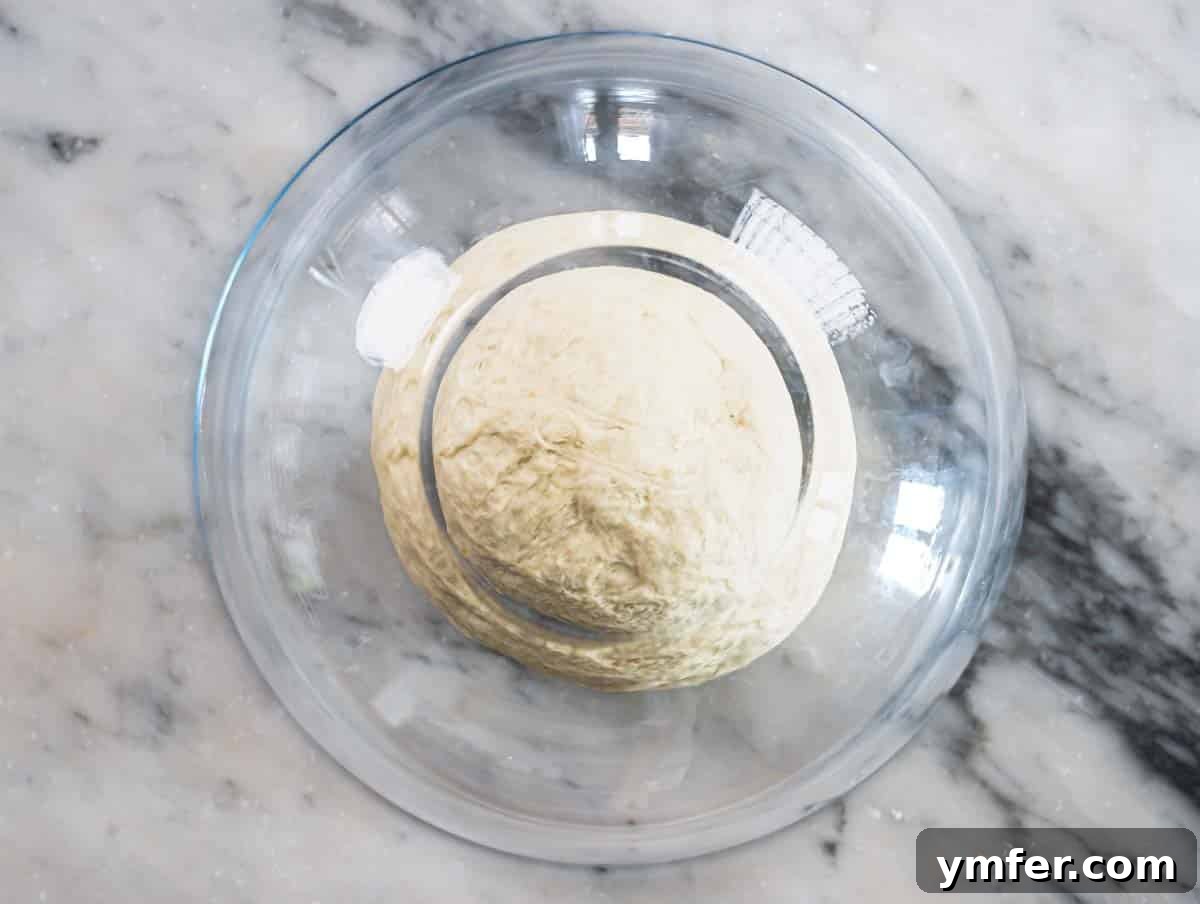
After kneading, cover the dough with an inverted bowl and allow it to rest for 15 minutes. This brief resting period is critical; it allows the gluten network to relax and strengthen, making the dough more pliable and easier to work with in the next steps.
Expert Tip: Don’t skip this resting time! It’s a simple step that significantly improves the dough’s texture and elasticity, leading to a better final product.
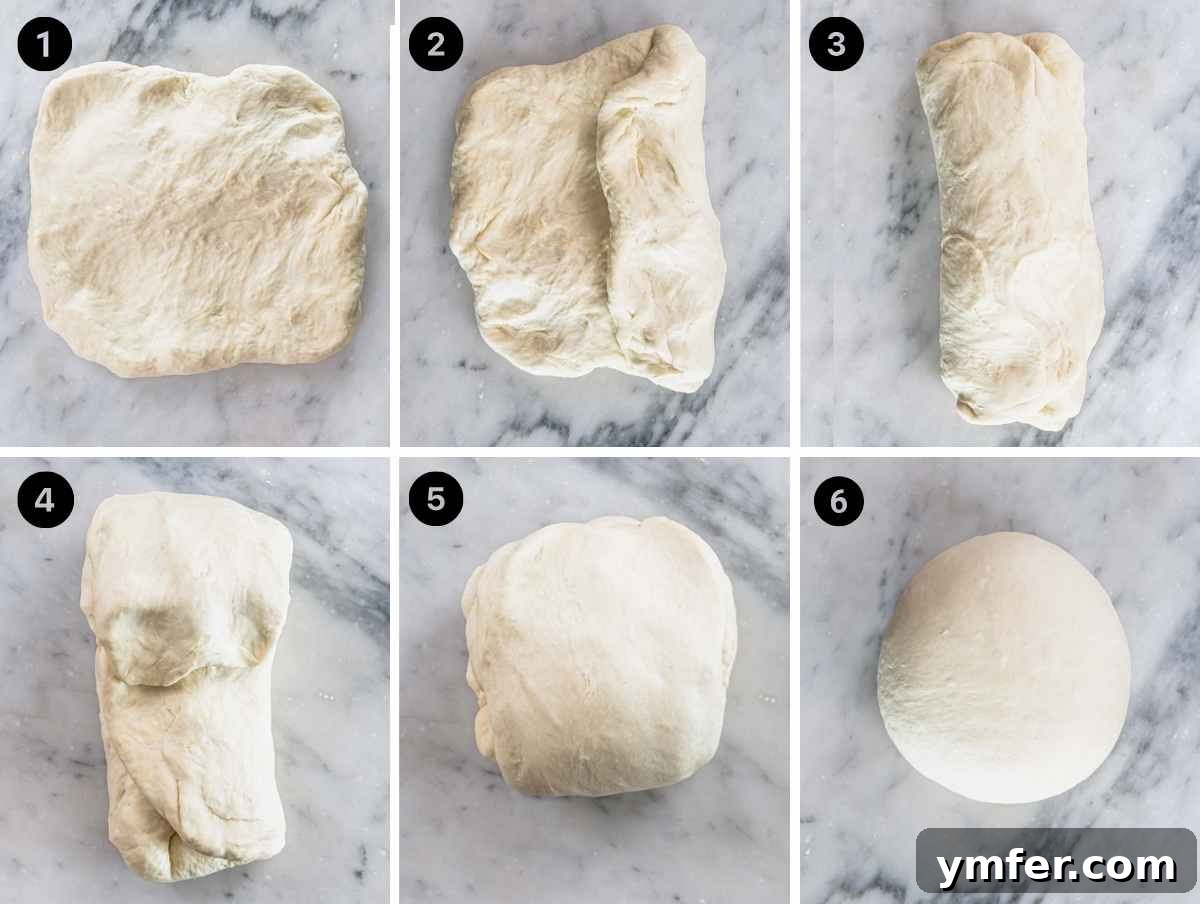
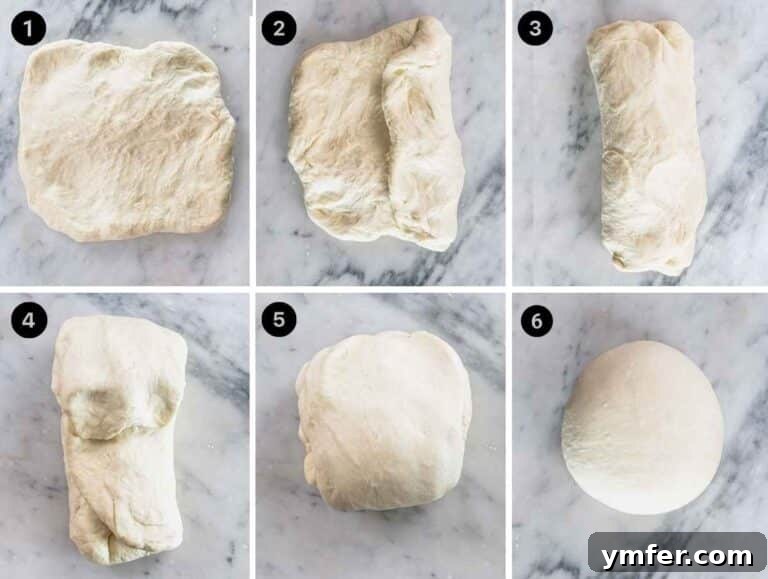
Gently press the dough down slightly and stretch it out into a rough square shape (1). Now, perform a series of folds: fold the right side of the dough towards the center (2), then the left side to the center (3), followed by the top to the center (4), and finally the bottom to the center (5). This technique, known as “stretch and fold,” helps build additional strength and structure within the dough, creating those desirable internal air pockets.
Repeat this folding sequence one to two more times. After the last fold, gently shape the dough into a smooth, taut ball by rotating it against the worktop, creating tension on the surface. This tight surface tension is key for a good rise during fermentation.
5. Bulk Fermentation: The Flavor Development Stage
Transfer the shaped dough ball to a large bowl that has been lightly brushed with olive oil. This prevents sticking and makes it easier to remove later. Gently brush the top of the dough ball with a thin layer of olive oil as well; this forms a protective barrier, preventing the surface from drying out and forming a tough skin. Cover the bowl with a damp cloth, a large inverted plate, or plastic wrap, ensuring there’s enough space for the dough to expand without touching the cover.
Expert Tip: Ample space under the cover is crucial to allow the dough to double in volume unimpeded.
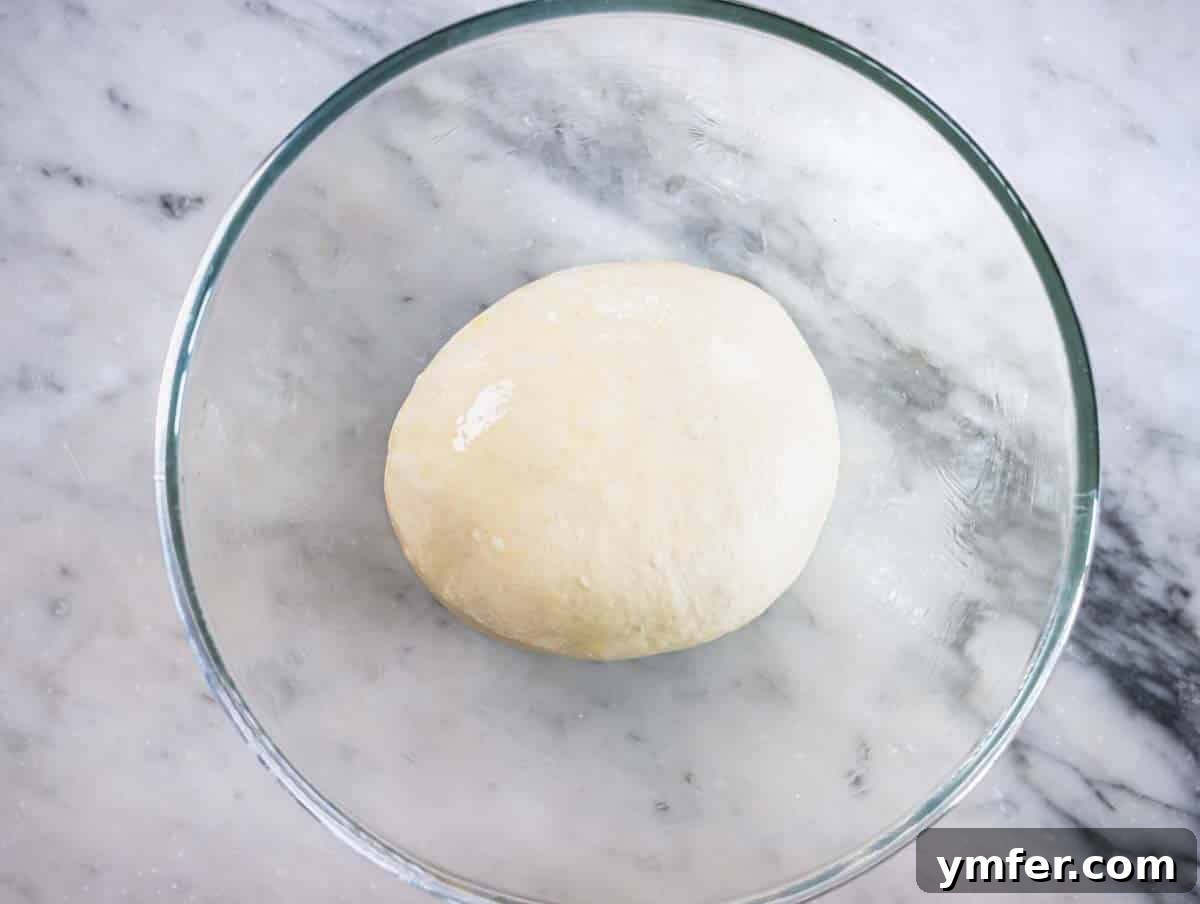
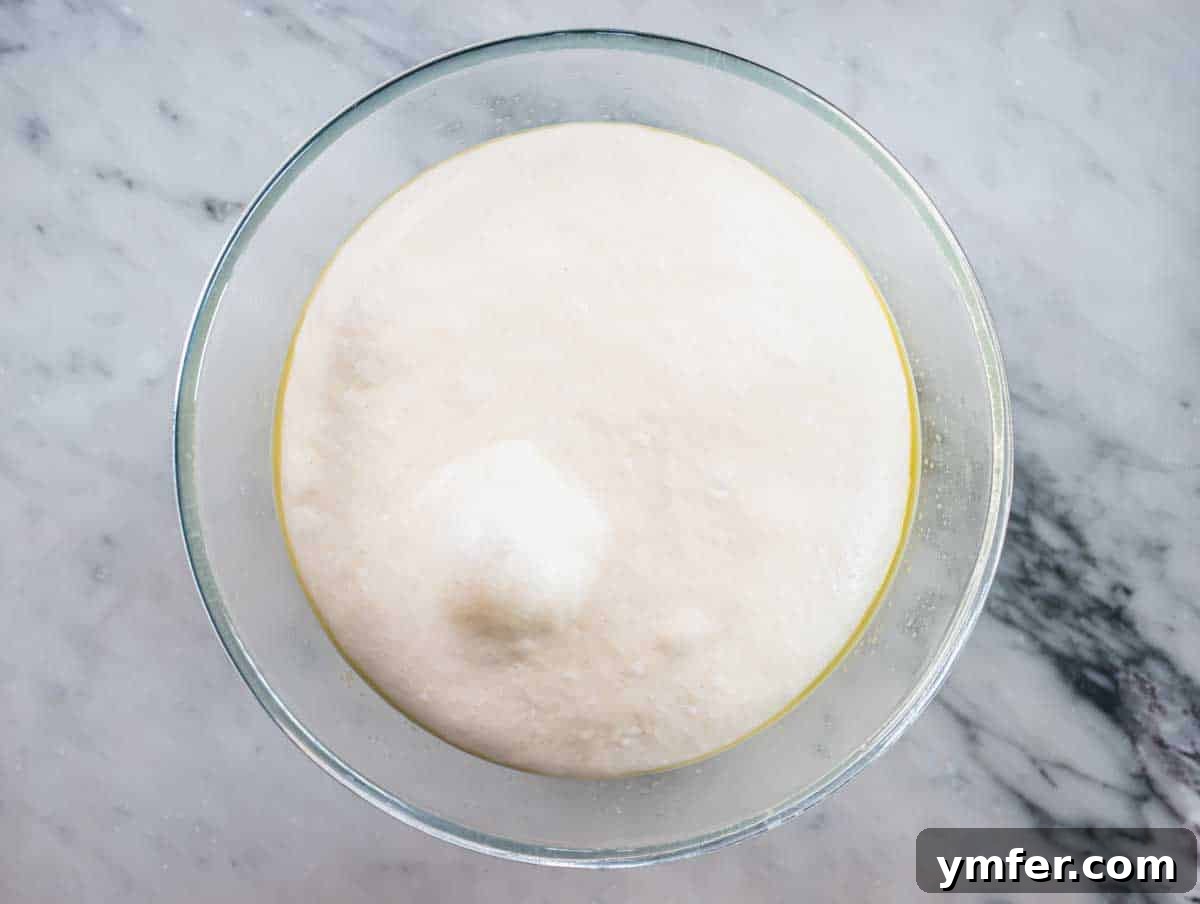
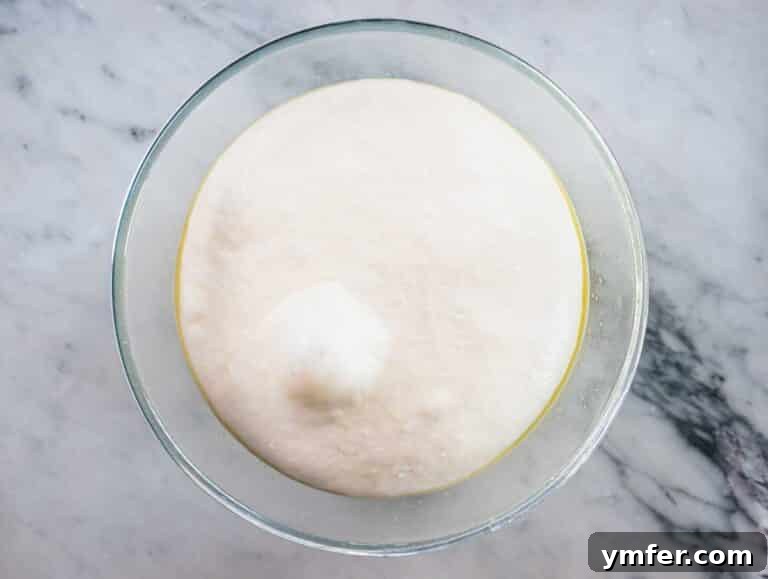
Place the covered bowl in a warm, draft-free corner of your kitchen for approximately 4 to 6 hours. The dough is ready when it has visibly doubled in volume. This bulk fermentation (or first rise) is where much of the flavor and complexity of your pizza dough develops.
Expert Tip: The ideal proofing temperature is around 80°F (27°C). For the most consistent and reliable results, we highly recommend using your kitchen oven (turned OFF, of course!) with just the light on. The gentle warmth emitted by the oven light creates a perfect, stable environment to help your dough proof beautifully within 4 to 6 hours.
Climate Considerations: Yeast activity is highly sensitive to temperature. In warmer climates (above 86°F or 30°C), you might need to reduce the yeast by half or shorten the proofing time significantly to prevent over-proofing. Conversely, in colder environments (below 68°F or 20°C), yeast works slower; applying the “oven light” tip becomes even more beneficial to achieve the desired rise.
Visual Cue: While temperature and time are guidelines, the most reliable indicator that your dough is ready is its appearance: it should have clearly doubled in size. Don’t be afraid to trust your eyes!
6. Preparing Your Perfect Toppings
For this guide, we’ll focus on a classic Margherita pizza—a timeless favorite that showcases the dough’s quality. It’s best to prepare your toppings a few hours before you plan to bake and store them in the fridge. However, remember to remove the toppings from the refrigerator at least 1 hour before you intend to assemble your pizzas. This allows them to come to room temperature, which is crucial for even cooking and preventing the cold toppings from lowering the pizza stone’s temperature when launched.
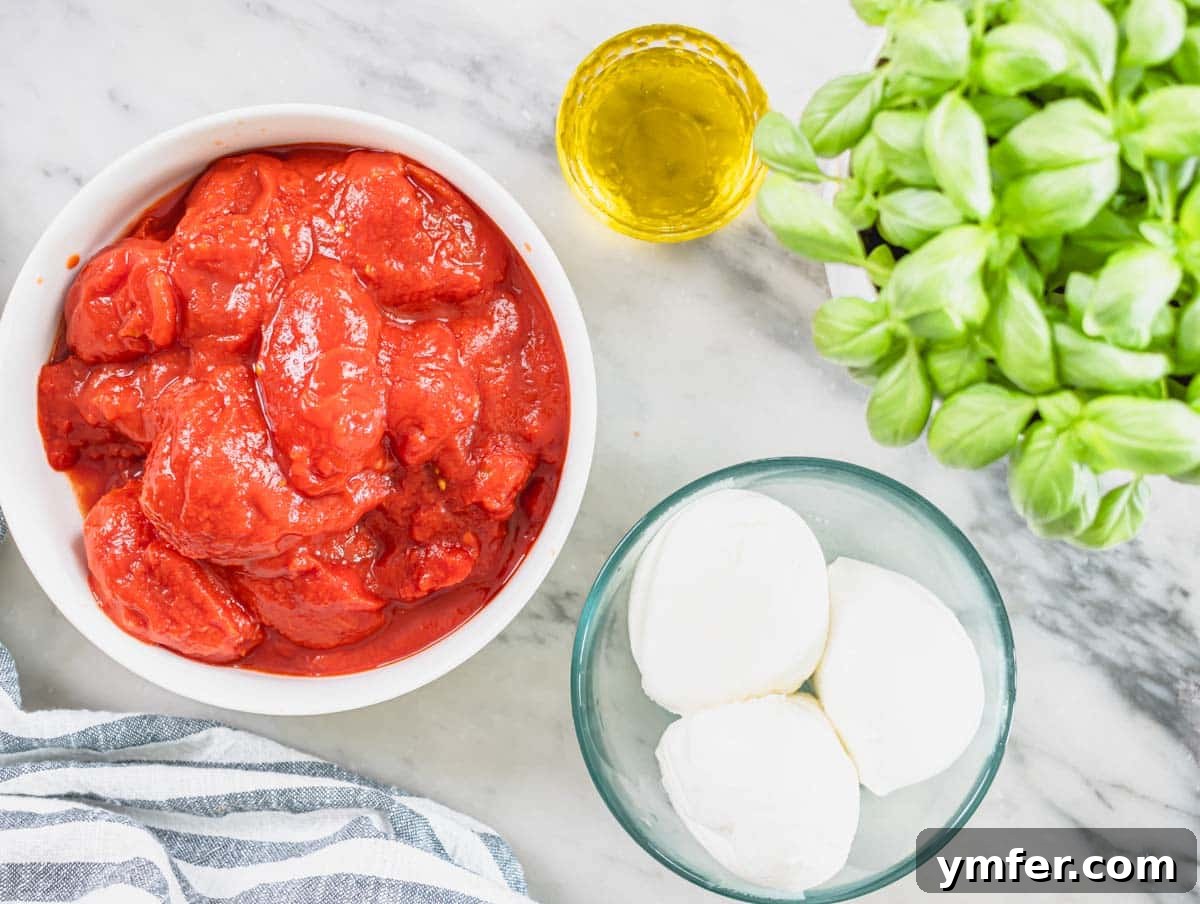
For three delicious Margherita pizzas, you will need:
- San Marzano Tomatoes: 1 large can (28 ounces/800 grams) of authentic San Marzano or good quality whole peeled tomatoes. You will likely have some leftover sauce.
- Extra Virgin Olive Oil: 1 tablespoon for the sauce, plus additional for drizzling over the finished pizza.
- Fresh Mozzarella: 11 ounces or 300 grams. Italian-style “fior di latte” is ideal for its moisture content and melt. For vegans, opt for a high-quality vegan mozzarella that is known to melt well.
- Grated Parmesan Cheese (Optional): About ½ cup, 1.7 ounces, or 50 grams. This adds a salty, umami depth. Vegans should omit or use a plant-based alternative.
- Fresh Basil Leaves: A generous handful for vibrant flavor and aroma.
- Sea Salt: To taste, for seasoning the tomato sauce.
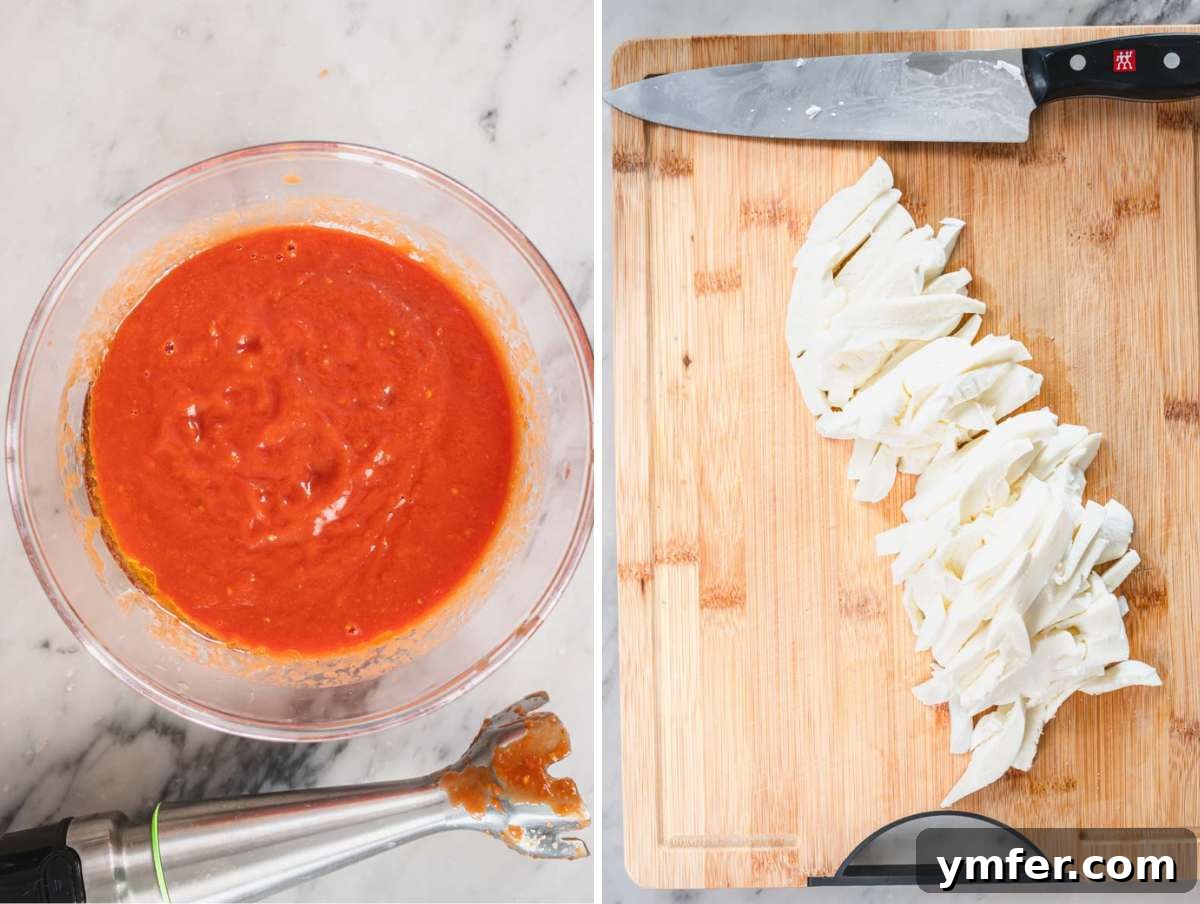
To make the sauce, empty the San Marzano tomatoes into a bowl. Use an immersion blender to achieve your desired consistency (we prefer it smooth) or crush them by hand for a rustic texture. Season with about ¾ teaspoon of salt and a tablespoon of olive oil. Stir well. For the mozzarella, chop it into small sticks or cubes and place it in a sieve over a bowl to drain excess liquid. This prevents a soggy pizza. Store both the sauce and drained mozzarella in the fridge, then bring them to room temperature one hour before baking.
7. Balling the Dough
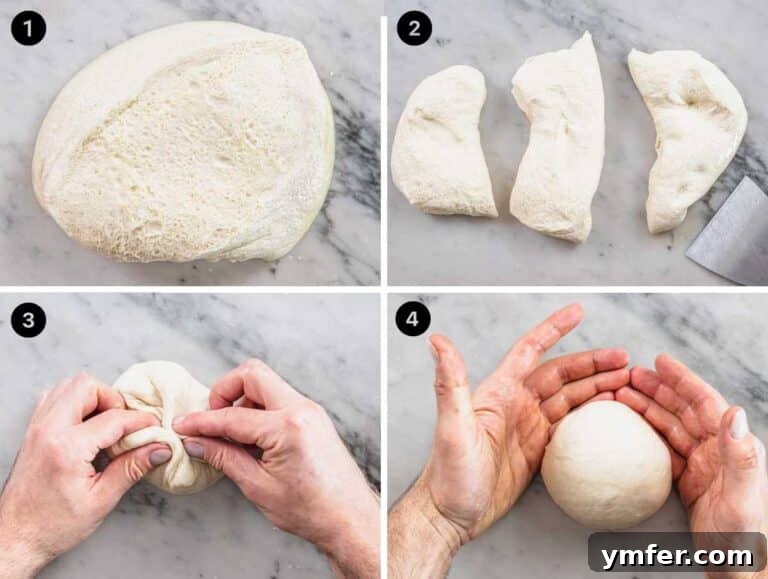
Once the bulk fermentation is complete, gently transfer the proofed dough to a clean, unfloured worktop. The easiest way to do this is to invert the bowl and allow the dough to slowly release and fall out under its own weight.
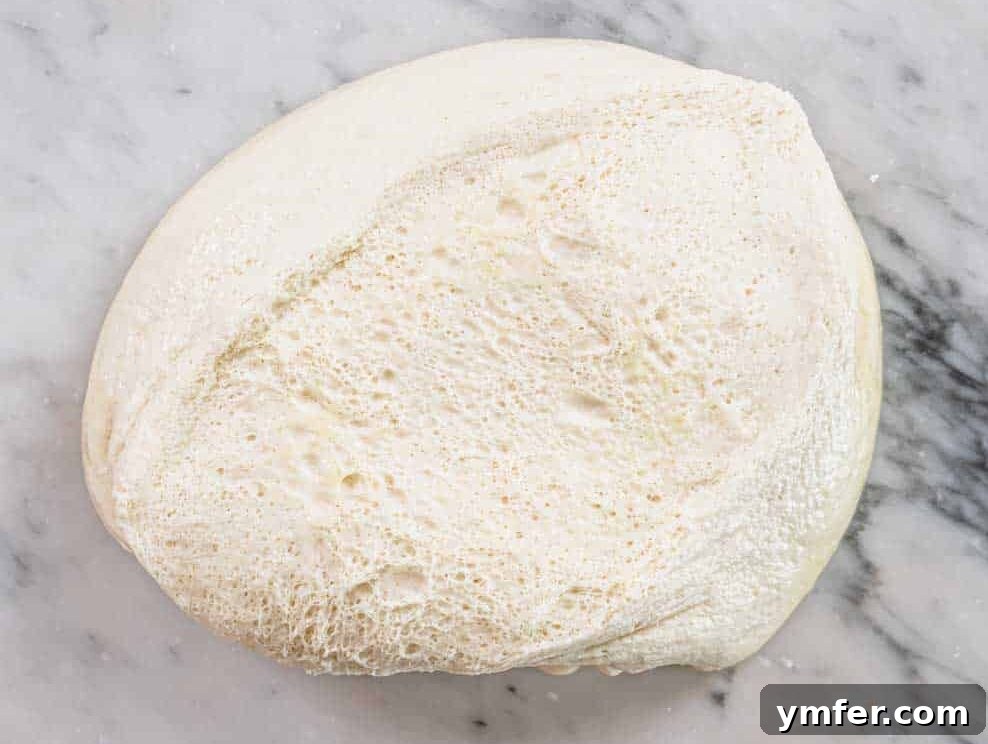
Carefully divide the dough into three equal pieces, each weighing approximately 9.3 ounces (265 grams). There’s no need to use flour at this stage, as the dough should be manageable enough.
Expert Tip: This portion size yields a standard Neapolitan-style pizza, which is typically sufficient for one person in Italy.
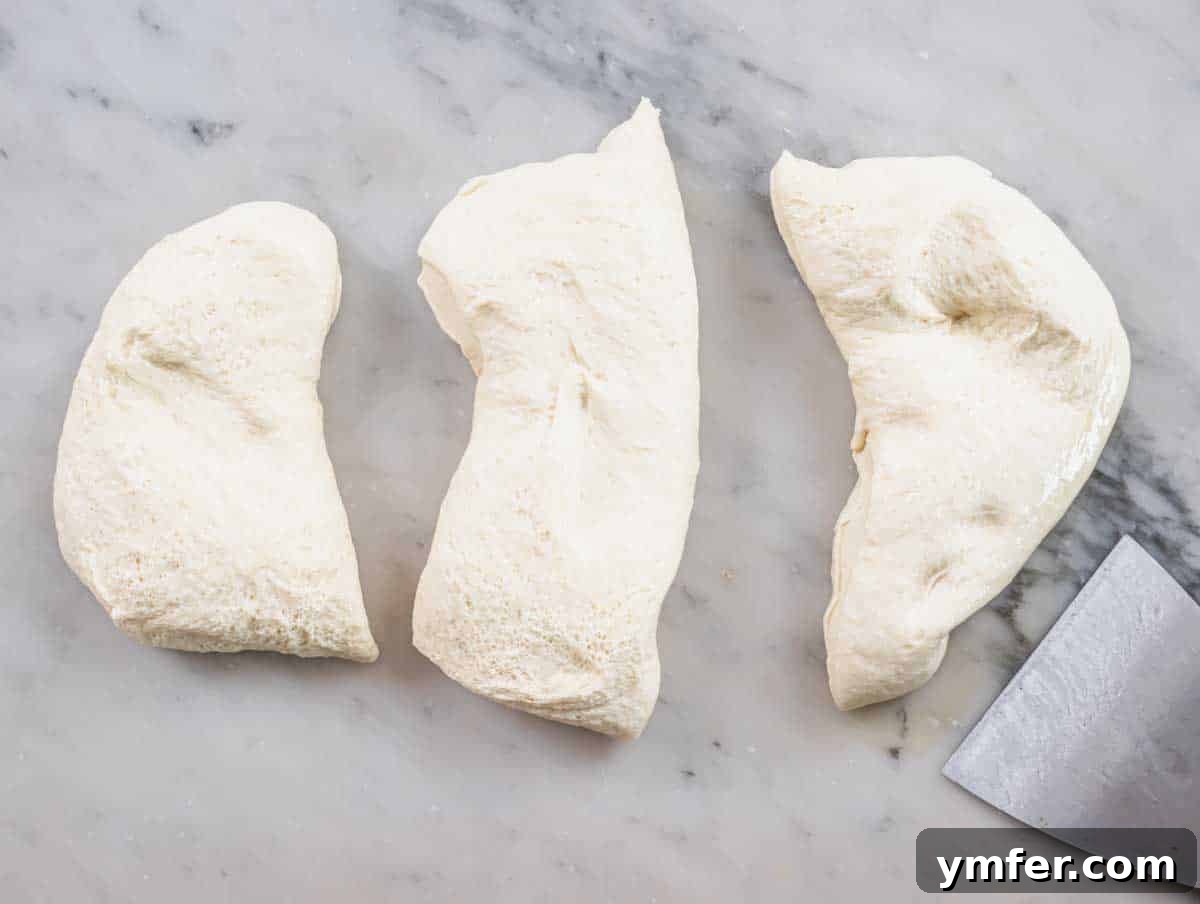
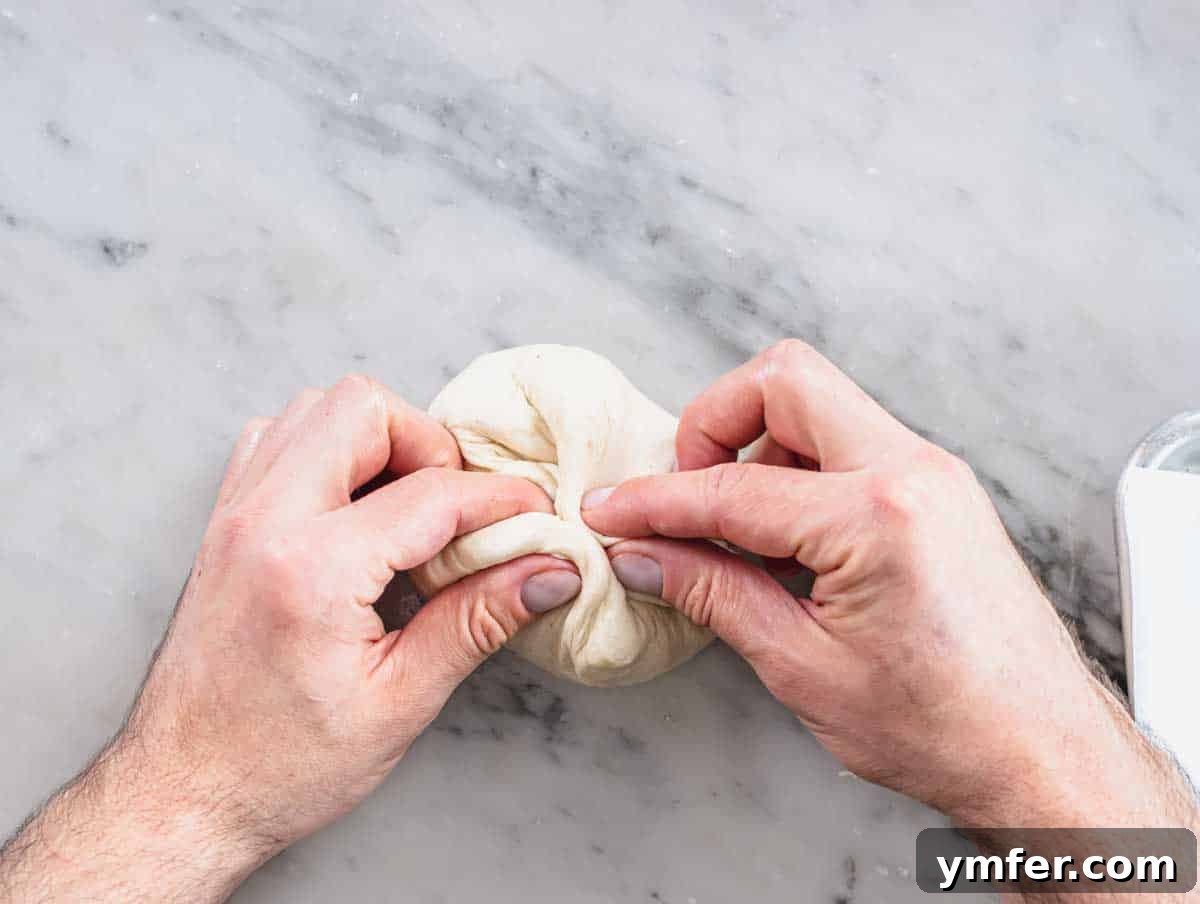
Now, gently stretch and fold each piece of dough onto itself, pulling the edges towards the center. As you fold, rotate the dough ball 45 degrees. Repeat this process several times until you achieve a tight, smooth ball with a consistent surface tension. Ensure you pinch the seams firmly together at the bottom to seal the ball and prevent it from unfolding.
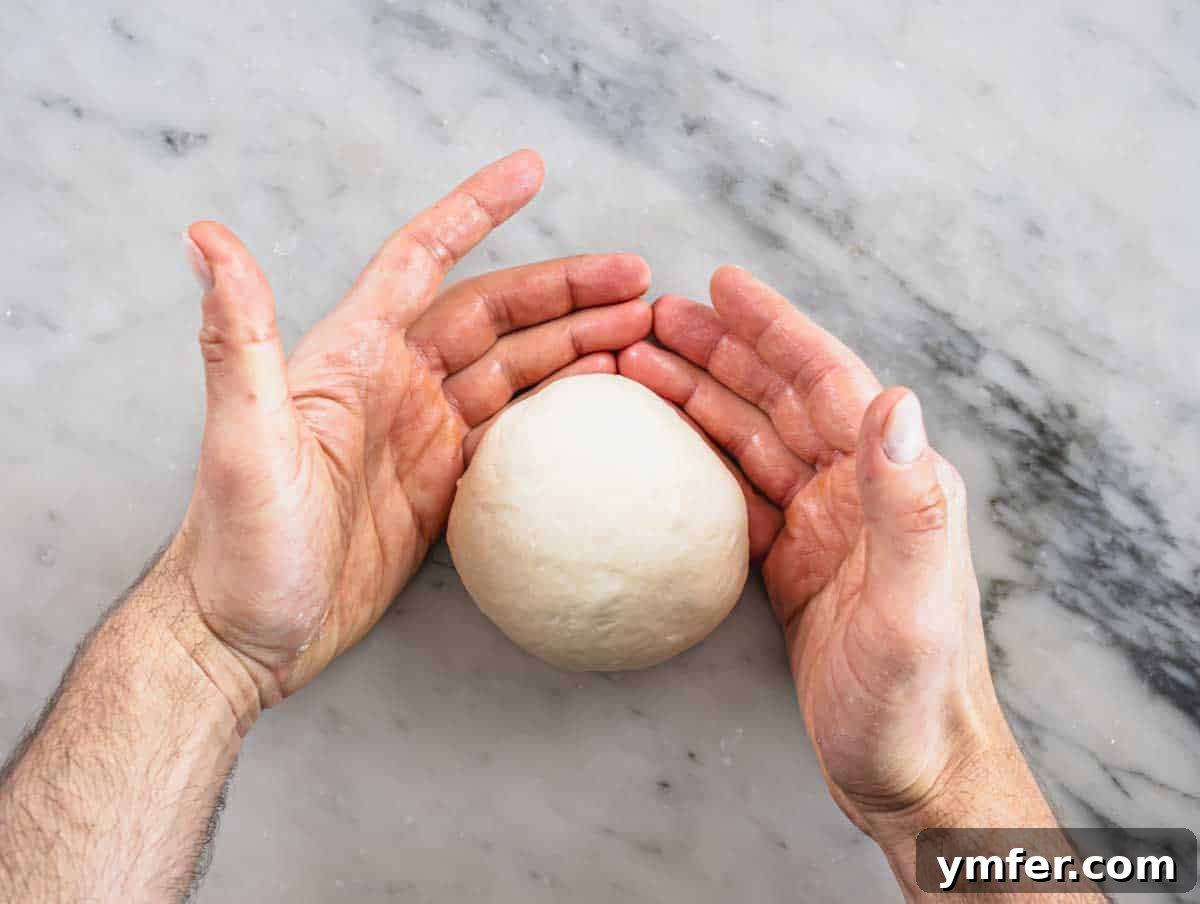
Finish by gently rolling each ball on the worktop to further smoothen its surface and ensure a perfect seal. The goal is a perfectly round, taut, and smooth dough ball, ready for its final proof.
8. Final Rest and Ooni Preheat
We’re almost there! This stage involves allowing the dough balls to relax, making them easier to stretch, while you concurrently preheat your Ooni oven and prepare your toppings.
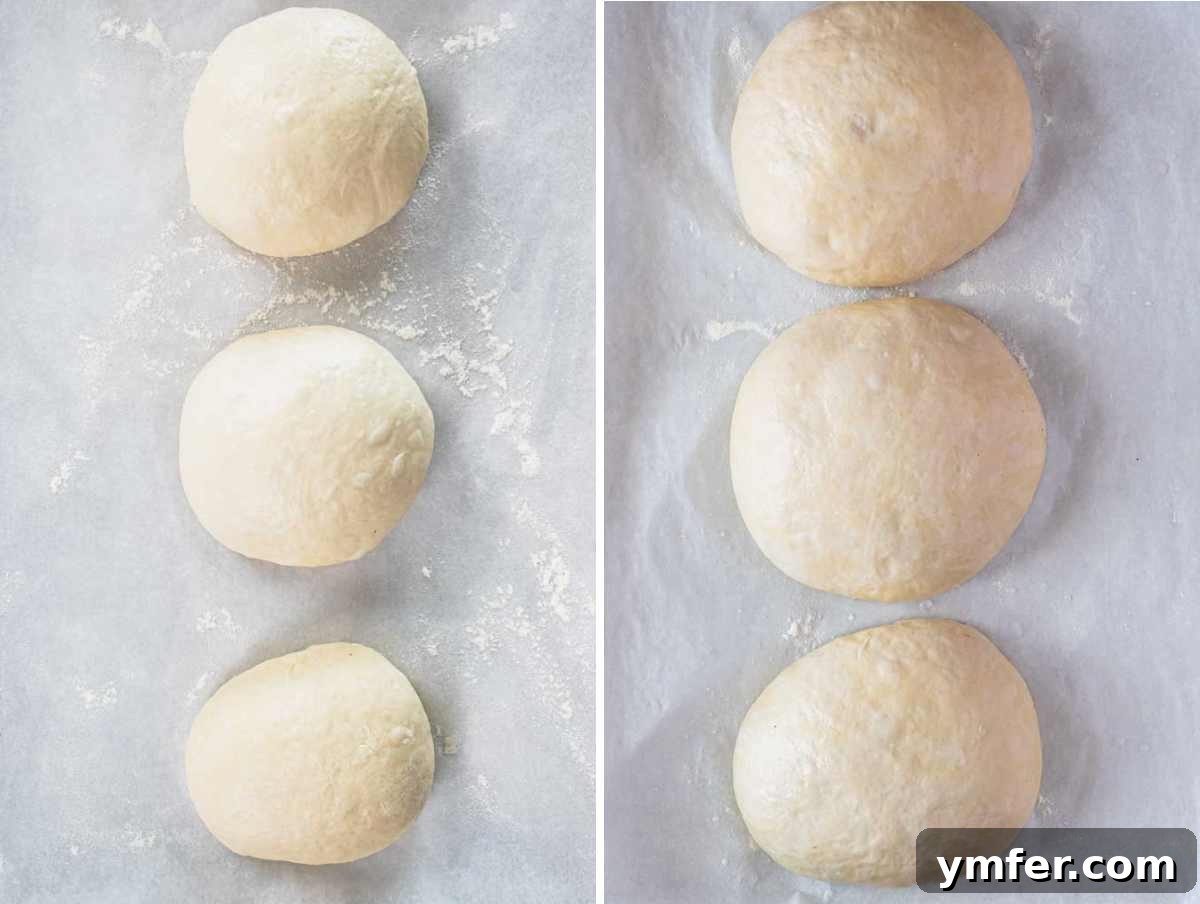
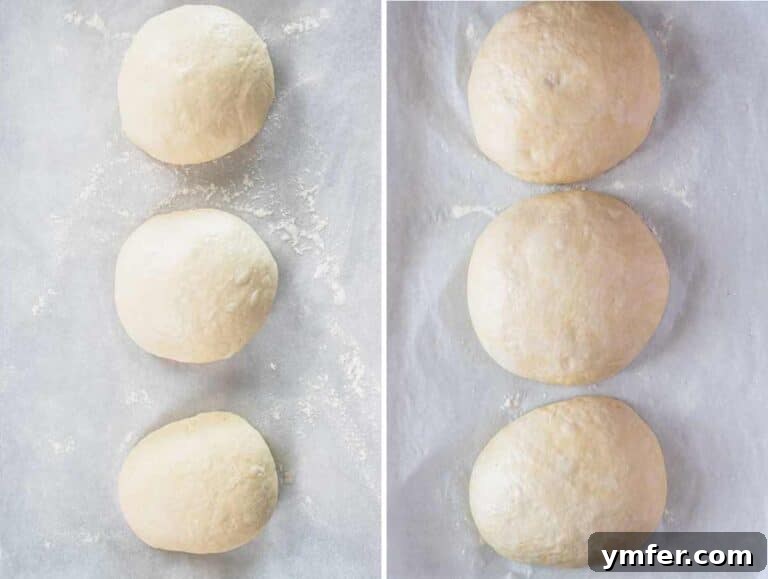
First, line a baking sheet with parchment paper and generously sprinkle it with flour to prevent sticking. Arrange the dough balls on the tray, ensuring ample space between each, as they will expand by about 25% during this final proof. Cover the tray with a damp kitchen cloth or plastic wrap to prevent drying, and let them rest in a warm kitchen corner for 30 to 60 minutes. During this time, the dough will become soft and pliable, ready for stretching.
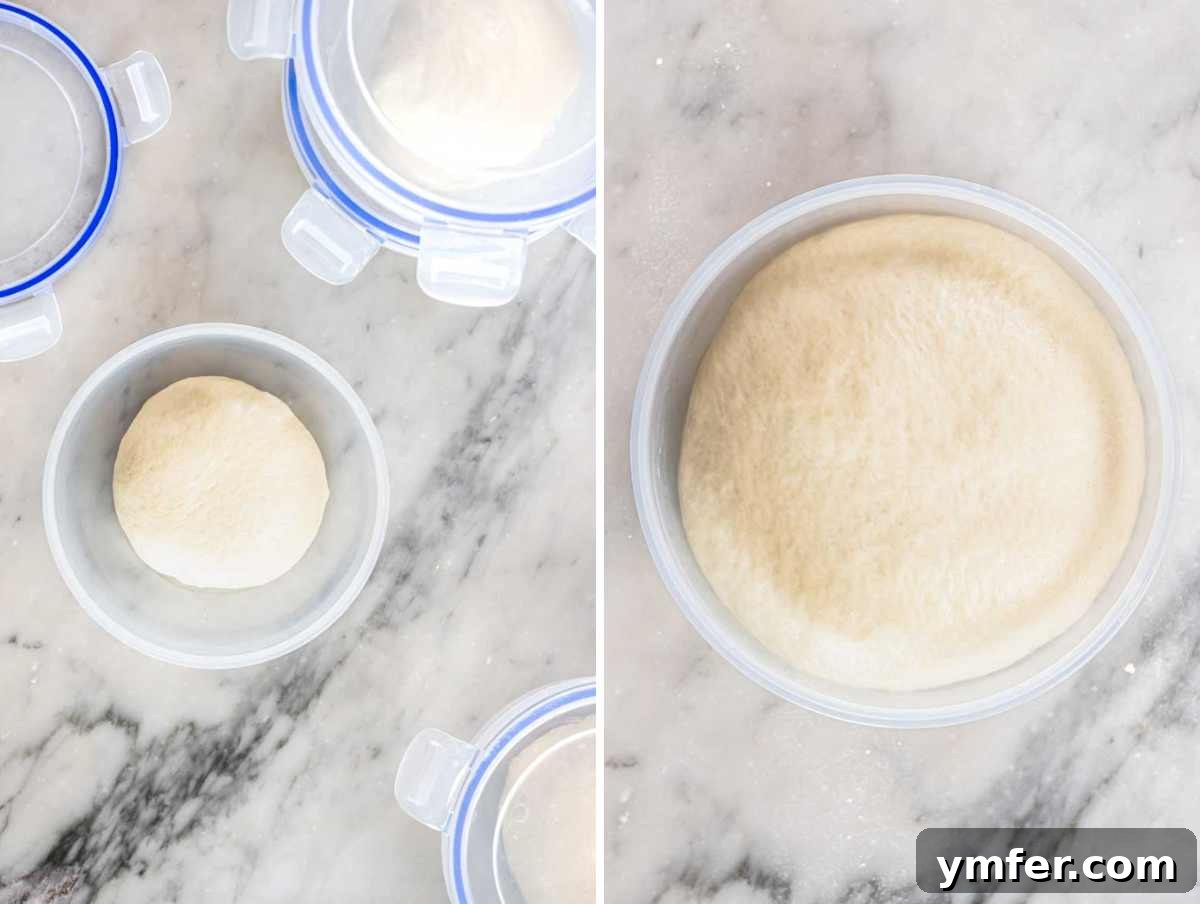
Alternatively, and often more conveniently, you can place each dough ball into an individual airtight container. Lightly brush the containers with olive oil, add the dough balls, seal them, and let them proof for the same 30 to 60 minutes. Meanwhile, ignite your Ooni oven and allow it to preheat fully to its target temperature of at least 750°F (400°C) – this typically takes 15-20 minutes, though can be up to 30-45 minutes depending on the model and external conditions. Also, ensure your prepared toppings are brought out of the fridge to reach room temperature.
9. Stretching the Dough for Neapolitan Style Perfection
Expert Tip: Only begin stretching your dough once all your toppings (sauces, cheeses, fresh vegetables) are prepared and at room temperature, and your Ooni oven has achieved its optimal temperature of at least 750°F (400°C). This synchronized timing is critical for a smooth pizza-making flow.
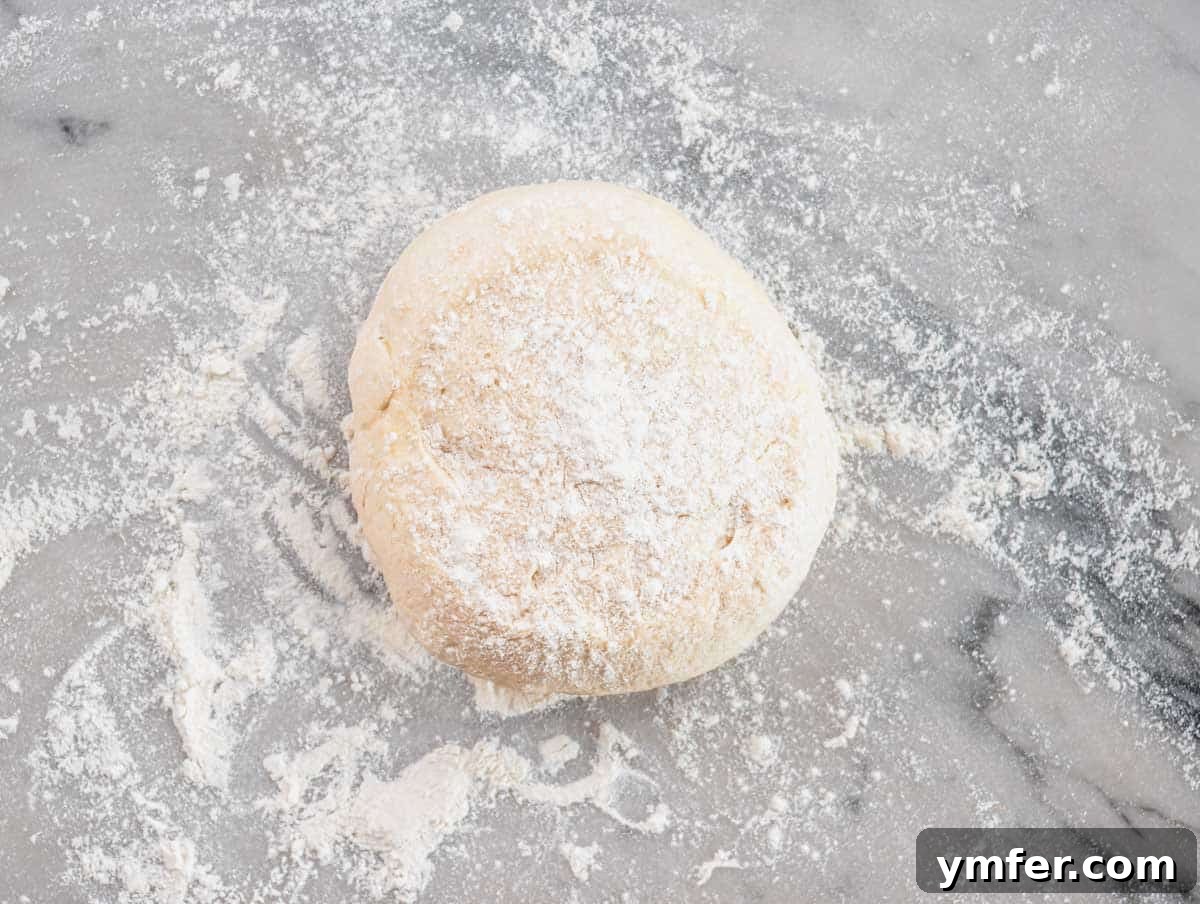
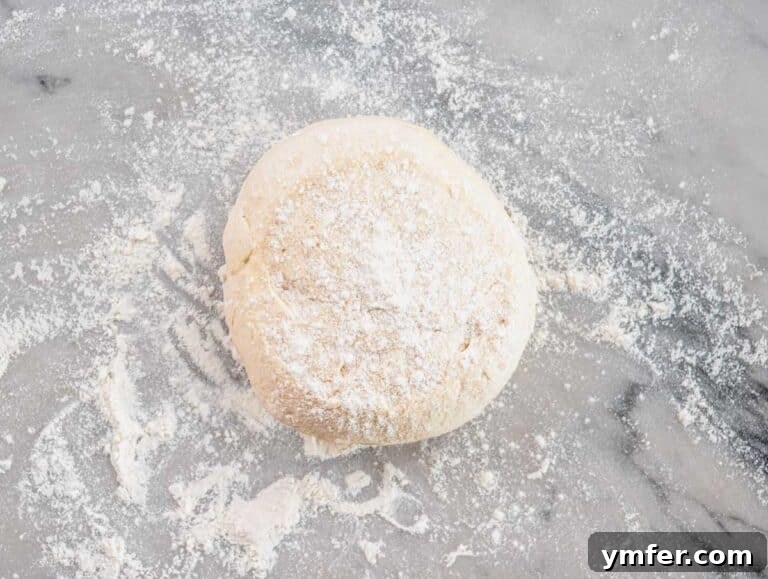
Generously dust your worktop with flour. Position your pizza peel conveniently nearby and dust its surface with two pinches of flour. Carefully uncover just one dough ball – keep the others covered to prevent them from drying out. Using a flat spatula, gently lift the dough ball from the tray and carefully invert it onto your floured worktop.
If your dough is in an airtight container, simply invert the container, allowing the dough to gently release onto your floured countertop. At this stage, the dough is incredibly soft and delicate; handle it with extreme care to preserve its round shape and all the precious air bubbles developed during fermentation. Sprinkle the top of the dough with a generous dusting of flour.
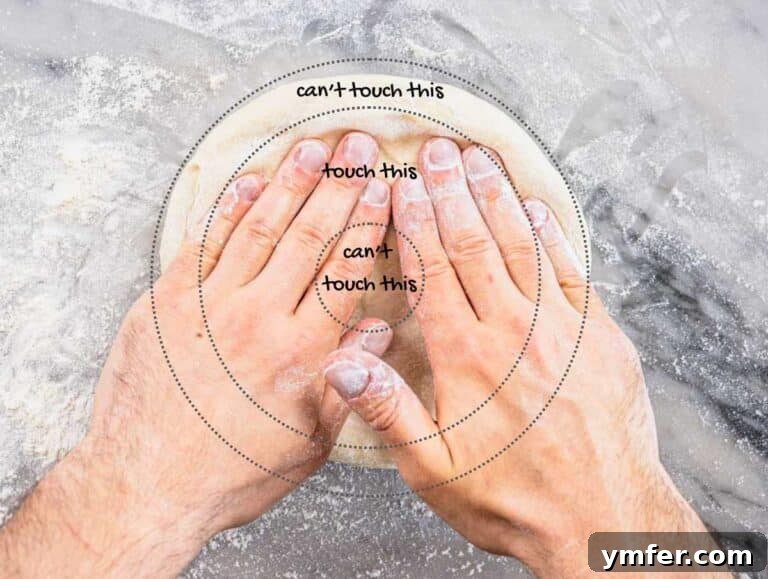
Gently flip the dough over so it’s right side up again. Extend your fingers, placing your hands together with index fingers touching. Begin to flatten the disc using the pads of your fingertips, keeping them flat. Press down from just off the center of the disc, carefully leaving a border of about ¾ inch or 2 cm around the edges untouched—this will become your beautiful “cornicione” or rim. Avoid excessively pressing the very center of the dough, as you want to maintain a thin base.
Now, gently press down on the dough (refer to the second inner circle in the provided picture) and use a light pushing/sliding motion away from the center to gently stretch the dough outwards.
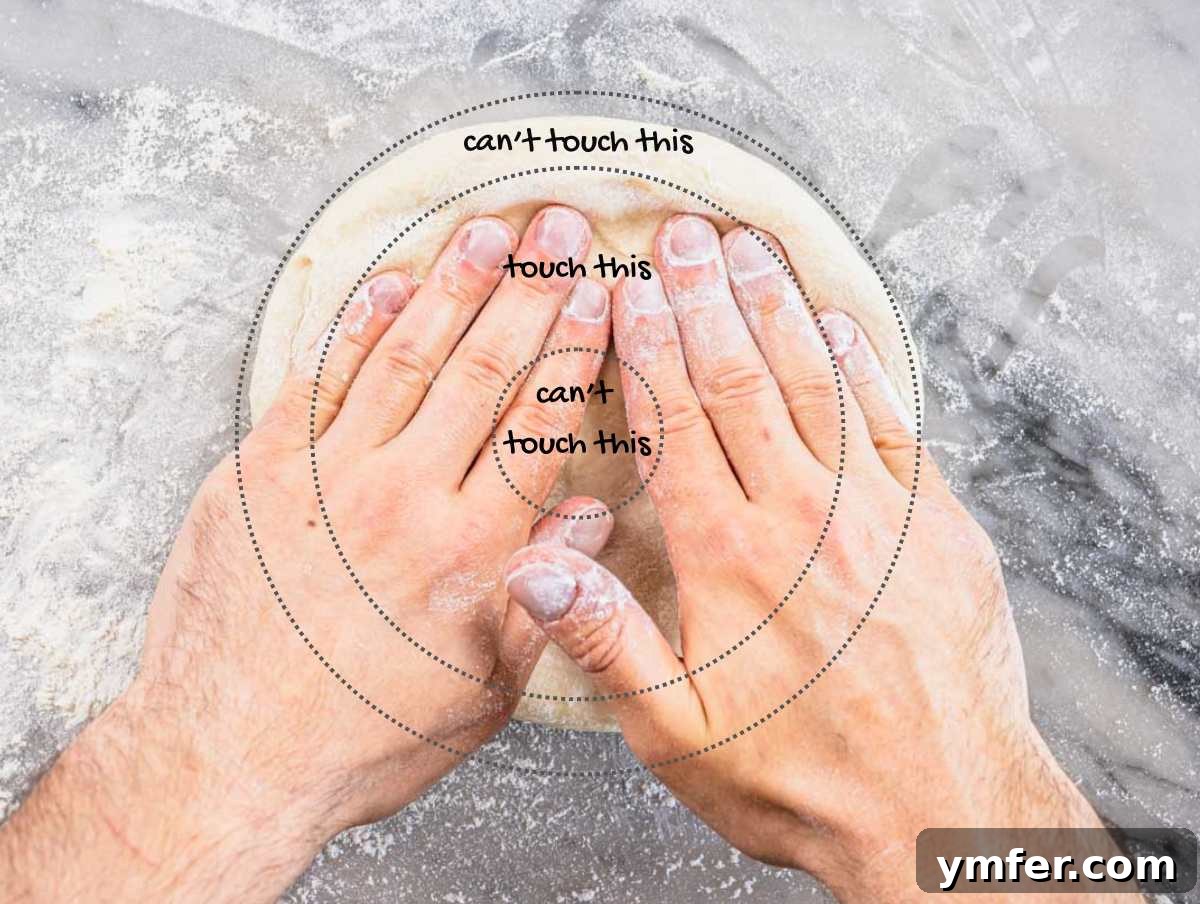
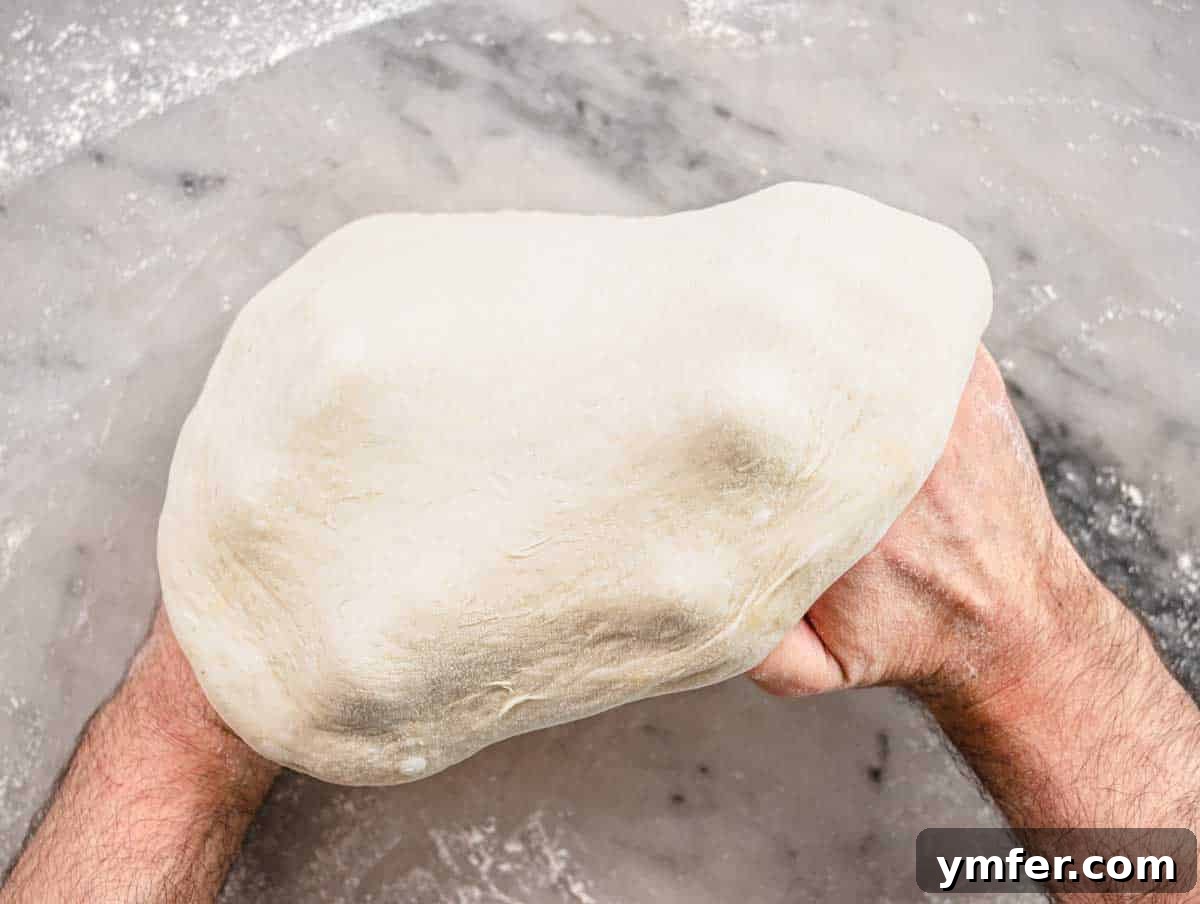
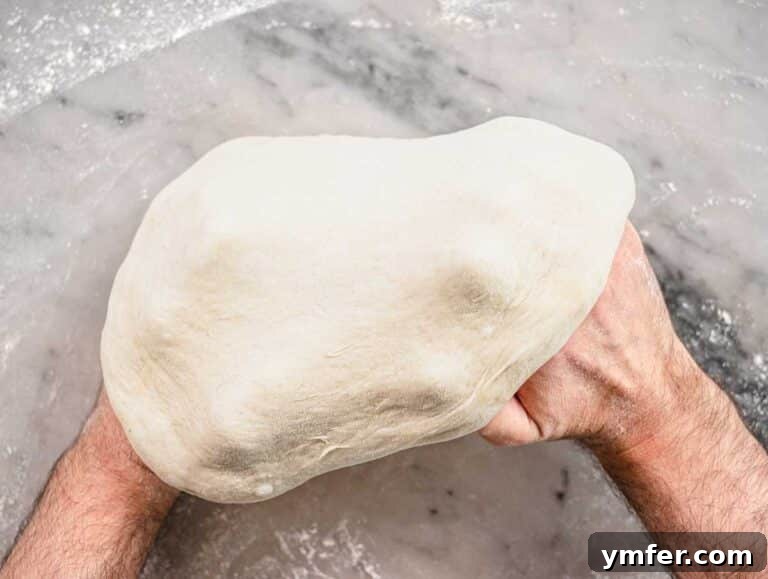
Rotate the dough slightly and repeat the flattening and gentle pushing motion until you achieve a circle approximately 10 inches (25 cm) in diameter. Next, gracefully lift the dough and drape it over your knuckles. Again, avoid touching the delicate rim and the center too much. Work swiftly yet gently, allowing gravity and the weight of the dough to assist you. Slowly pull your hands away from each other while gently stretching and rotating the dough. Aim to extend it to a final diameter of 12 to 13 inches (30 to 33 cm).
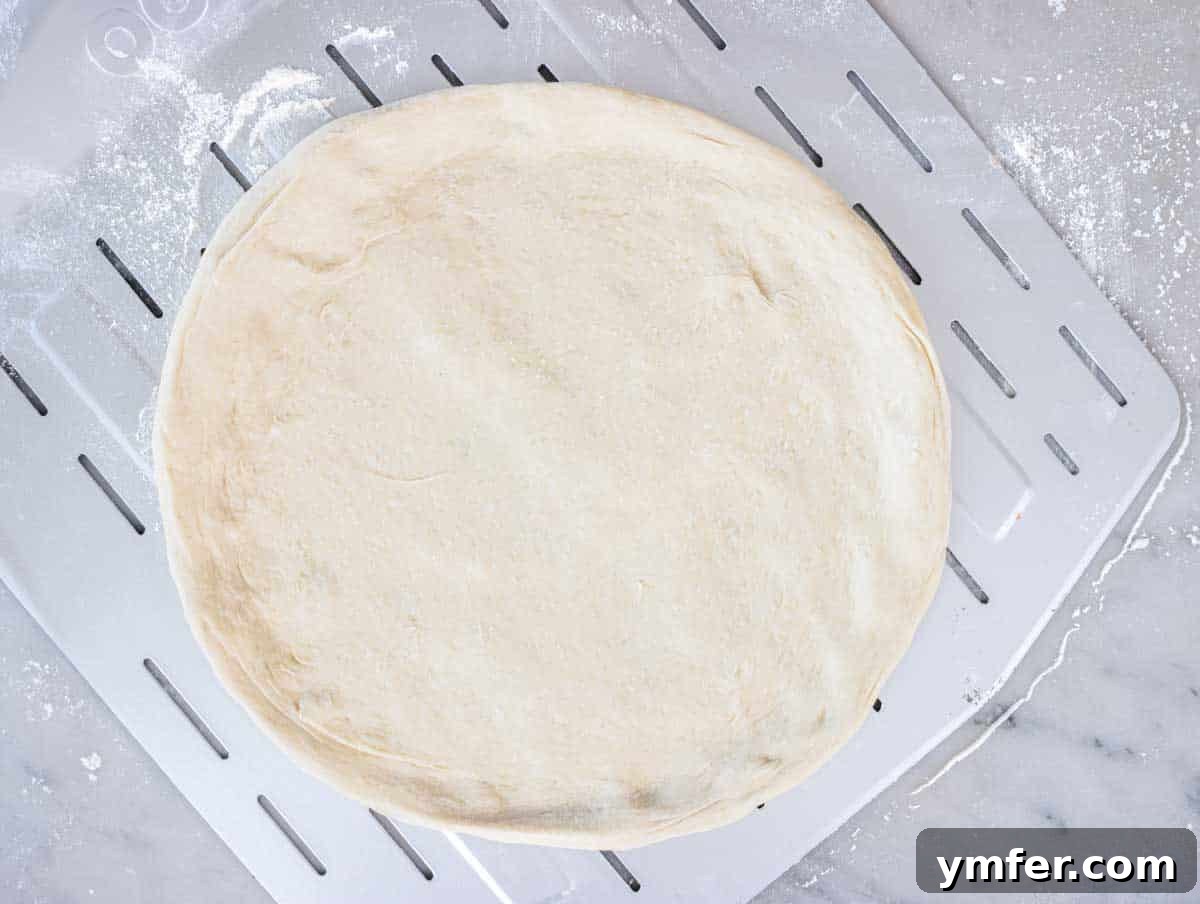
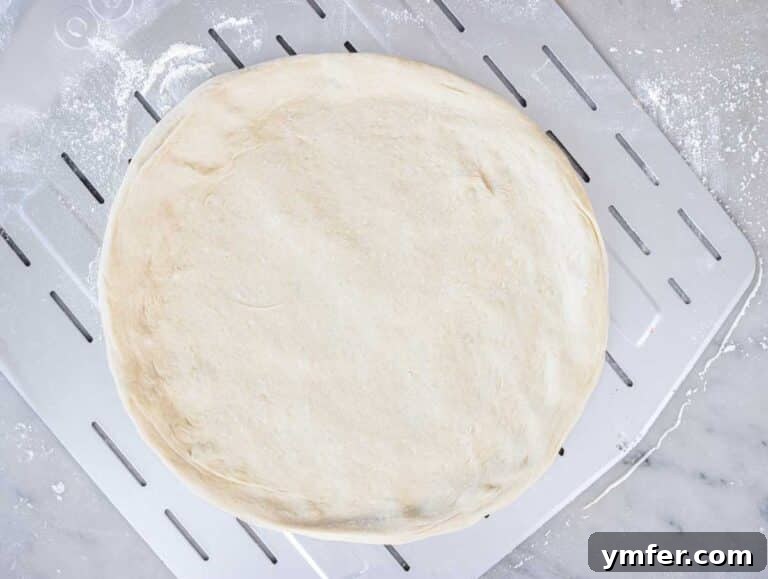
Carefully transfer the stretched Ooni pizza dough onto your lightly floured pizza peel.
Expert Tip: Don’t fret if the pizza isn’t perfectly stretched at this point or if it pulls back a little. We’ll give it a final gentle stretch once the toppings are on, using their weight to help maintain the desired shape.
10. Topping Your Ooni Pizza Dough
Important Disclaimer: This topping method describes our preferred way of enjoying Ooni pizza dough, resulting in a Neapolitan-style pizza with an incredibly thin crust and a thick, light, and wonderfully puffy rim (cornicione). This pizza emerges from the oven soft, almost melting in your mouth, with a delightful wetness and subtle chewiness – pure heaven! If you prefer a crispier pizza base, you can achieve this by using a rolling pin to flatten the dough all the way to the edges before topping.
Before adding any toppings, gently rock the pizza peel back and forth a few times to ensure the dough is loose and will slide easily. If it feels stuck, quickly lift the dough, dust the peel with a little more flour, and reposition the dough. This prevents heartbreaking pizza disasters!
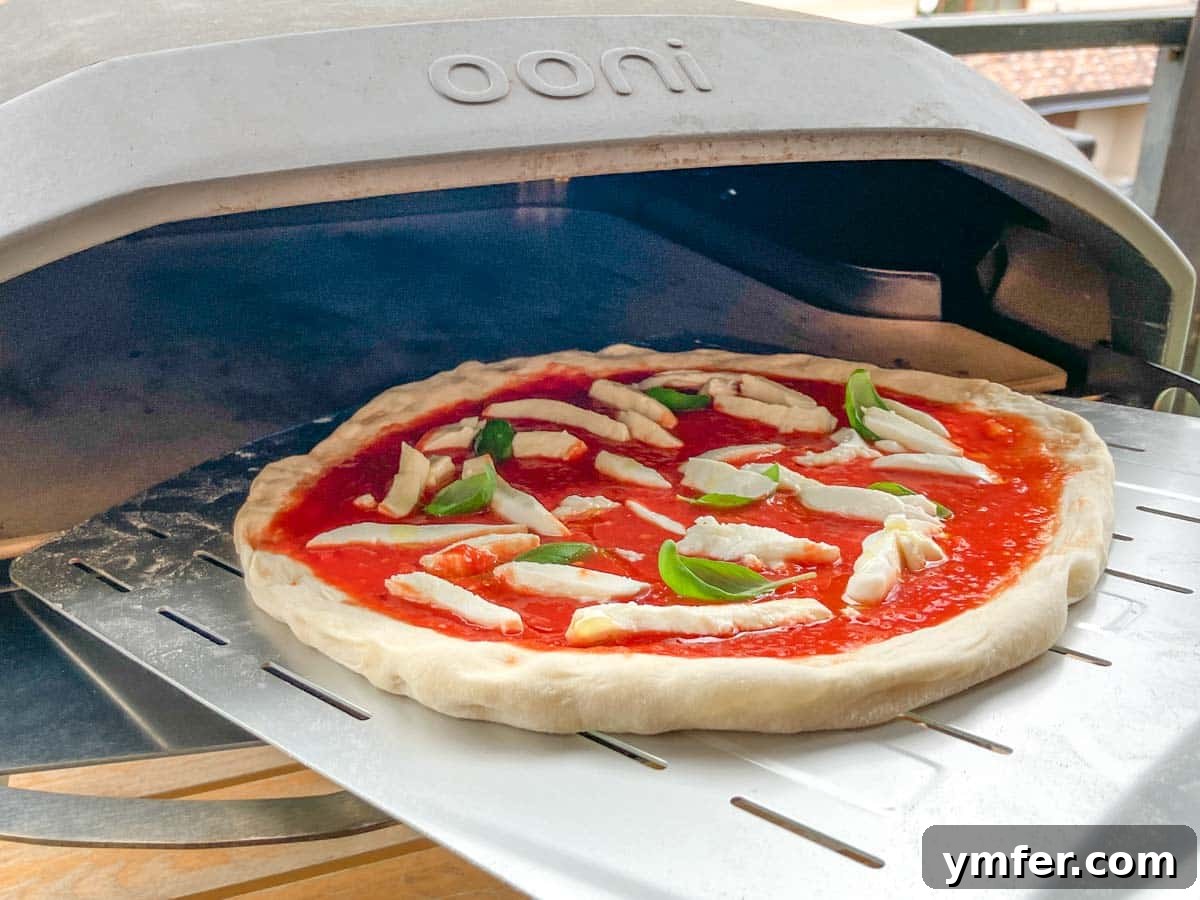
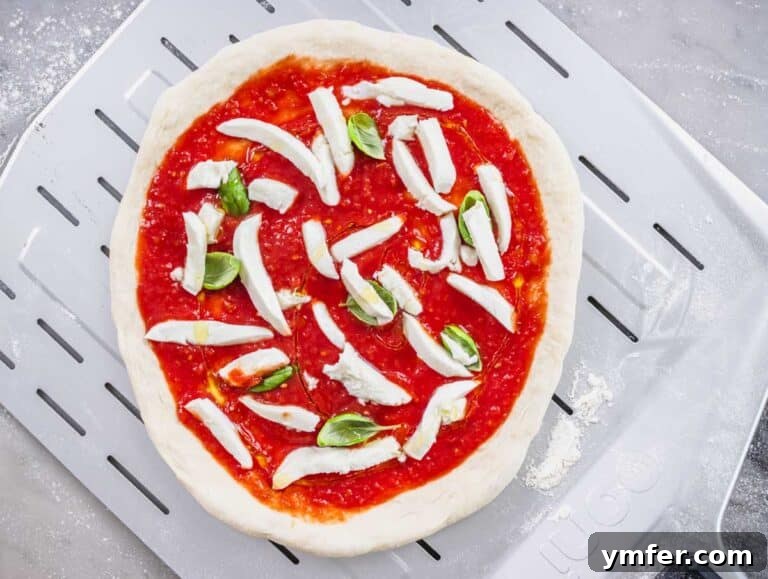
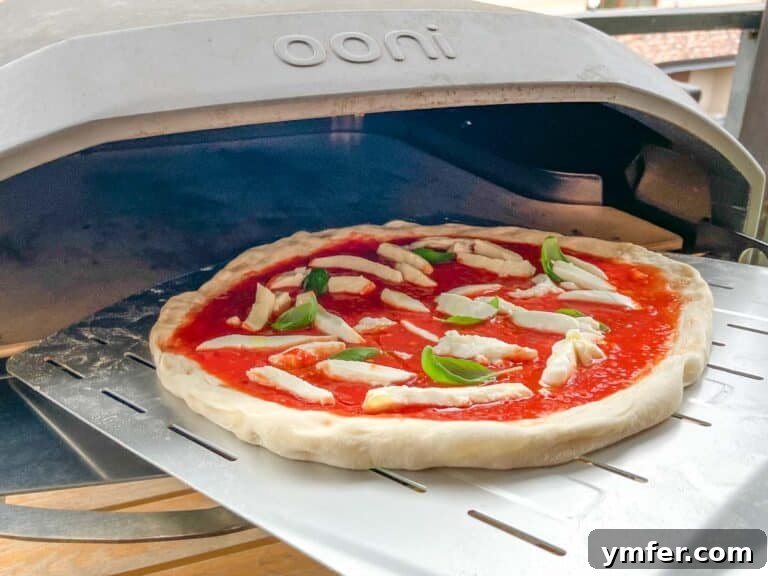
Now, working swiftly, spread a couple of tablespoons of your prepared tomato sauce evenly over the dough, using the back of a spoon. Add a few fresh basil leaves, then scatter about 3.5 ounces (100 grams) of your drained mozzarella. Finish with an optional sprinkle of grated Parmesan cheese and a generous drizzle of extra virgin olive oil. Remember, speed is key here to prevent the dough from adhering to the peel.
Expert Tip: When topping, less is always more, especially for your first few pizzas. Overloading the pizza, particularly with wet ingredients like sauce and mozzarella, is the most common cause of sticking and tearing, leading to toppings spilling onto the hot pizza stone. Be disciplined – I warned you!
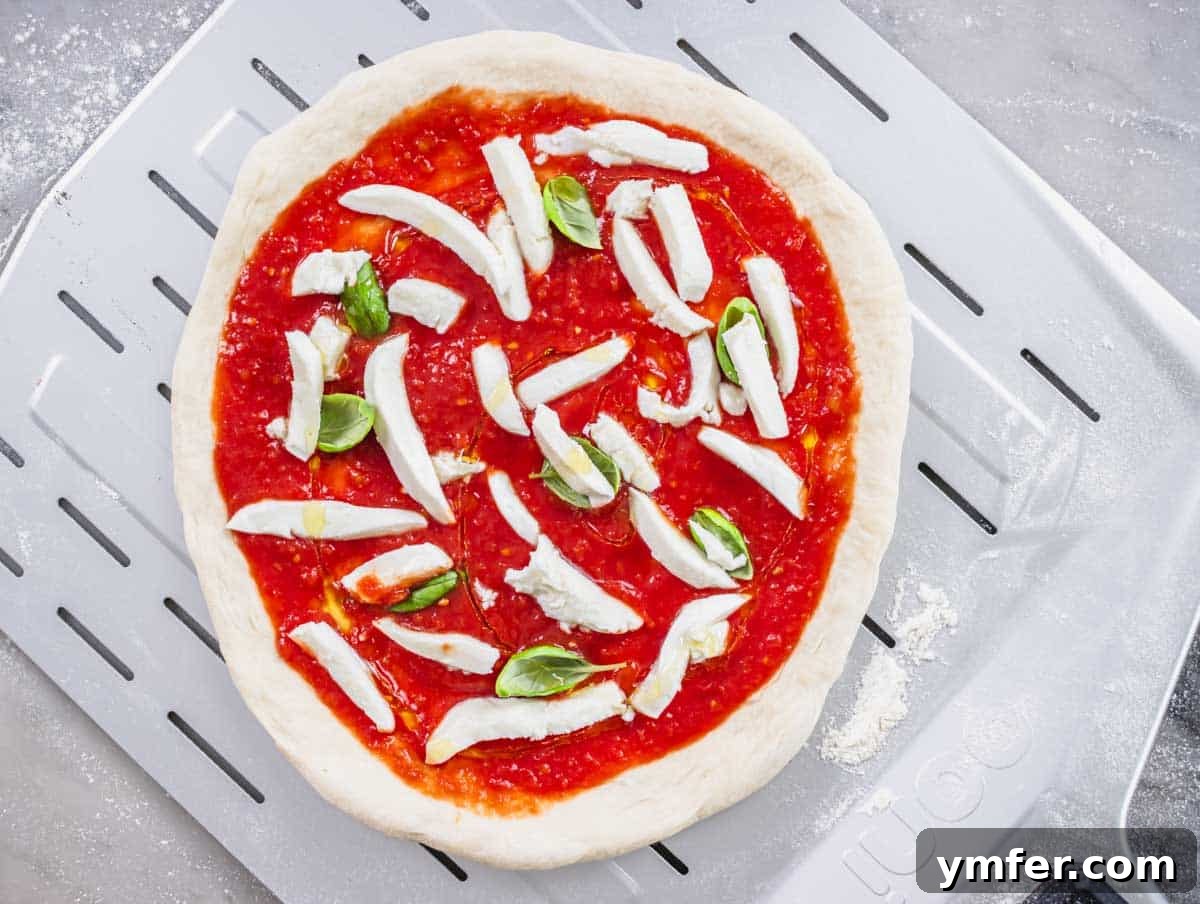
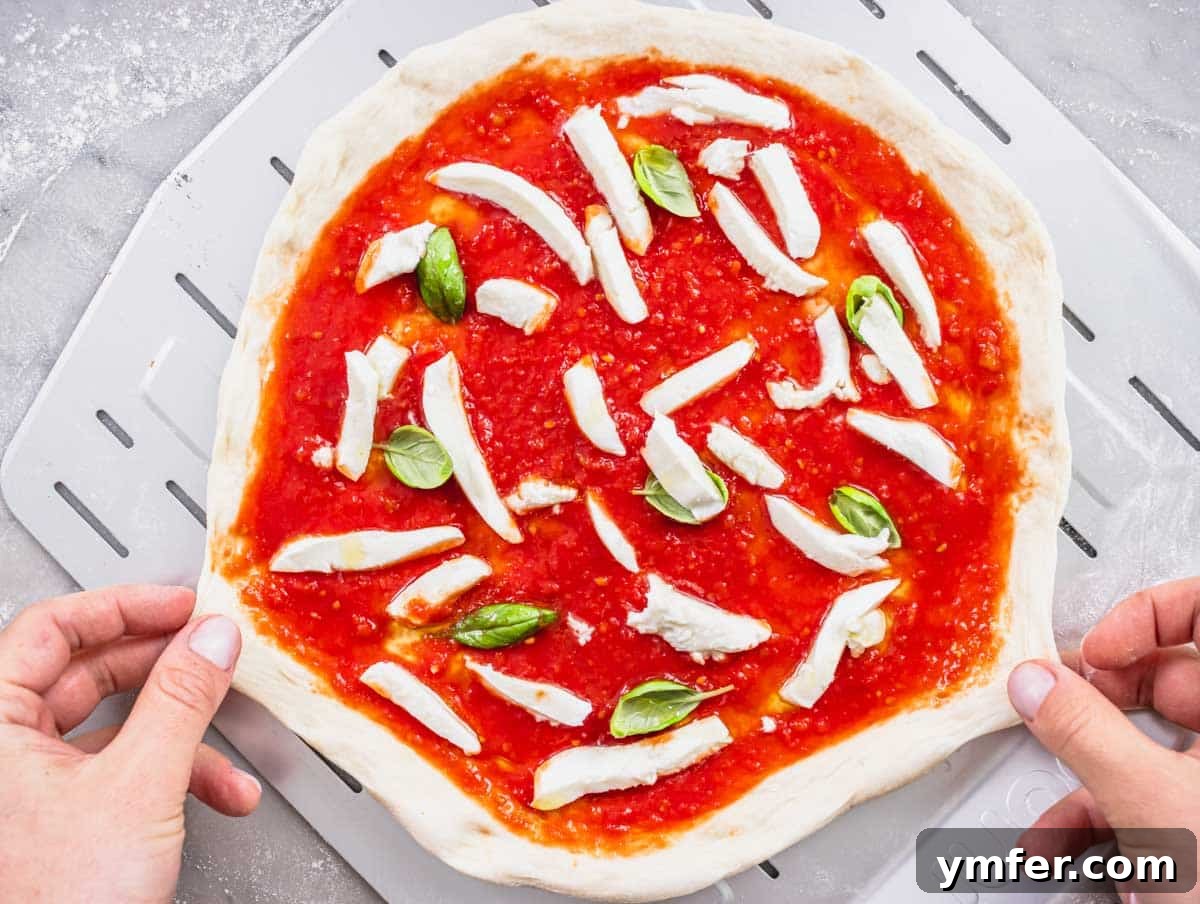
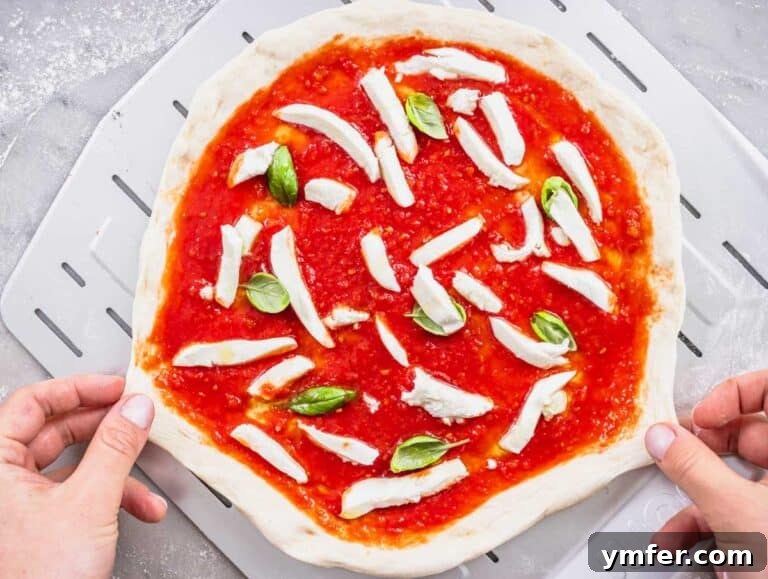
With the toppings in place, gently pull the edges of the pie outwards a little to widen it to its full size. The slight weight of the toppings will help hold the pizza in place as you perform this final stretch.
11. Cooking Your Ooni Pizza to Perfection
Note on Style: This guide focuses on Neapolitan-style cooking, which involves a lightning-fast bake of 90 to 120 seconds at extremely high temperatures. If your preference leans towards a crispier pizza, reduce the Ooni’s temperature to around 550°F (290°C) and cook the pizza for 3 to 4 minutes on a lower flame, rotating it frequently to achieve an even, crispy finish.
Using your laser thermometer, confirm that the center of your pizza stone has reached the desired temperature of approximately 750°F (400°C). With a quick, confident motion, slide the pizza into the center of the Ooni oven’s pizza stone. To do this, angle your pizza peel about 15 degrees downward, touch the stone, and then swiftly pull the peel back from under the pizza.
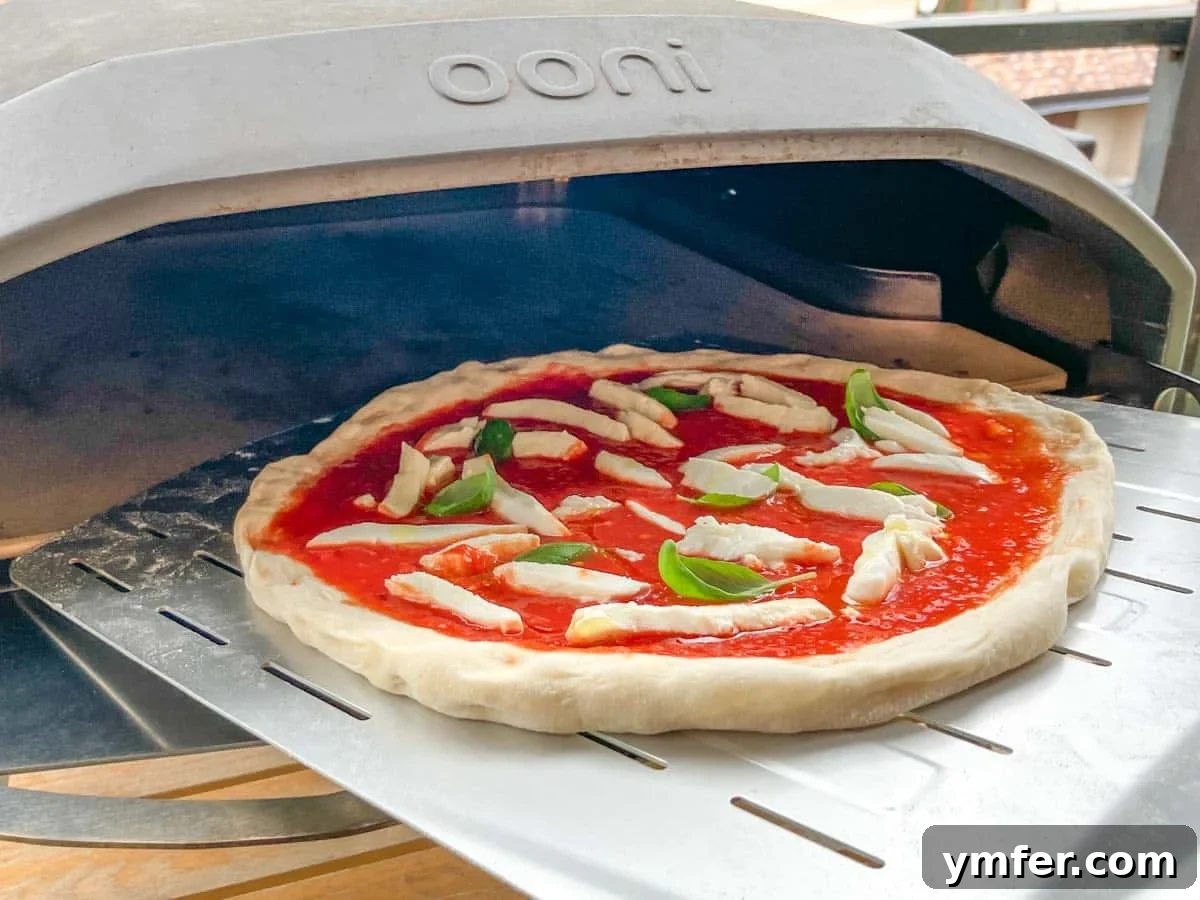
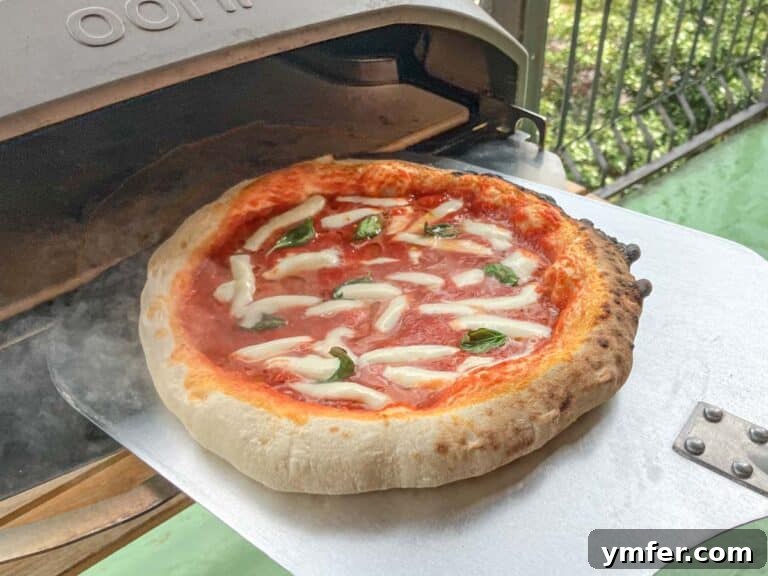
After about 60 seconds, it’s crucial to rotate the pizza. Use your second, cooler pizza peel to carefully turn the pizza, ensuring it cooks evenly on all sides and develops that characteristic blistering. This prevents one side from burning while the others remain undercooked. Monitor the crust closely; if you notice it cooking too rapidly, slightly lower the oven’s flame. External factors like wind and ambient temperature can influence cooking speed, so active observation is key.
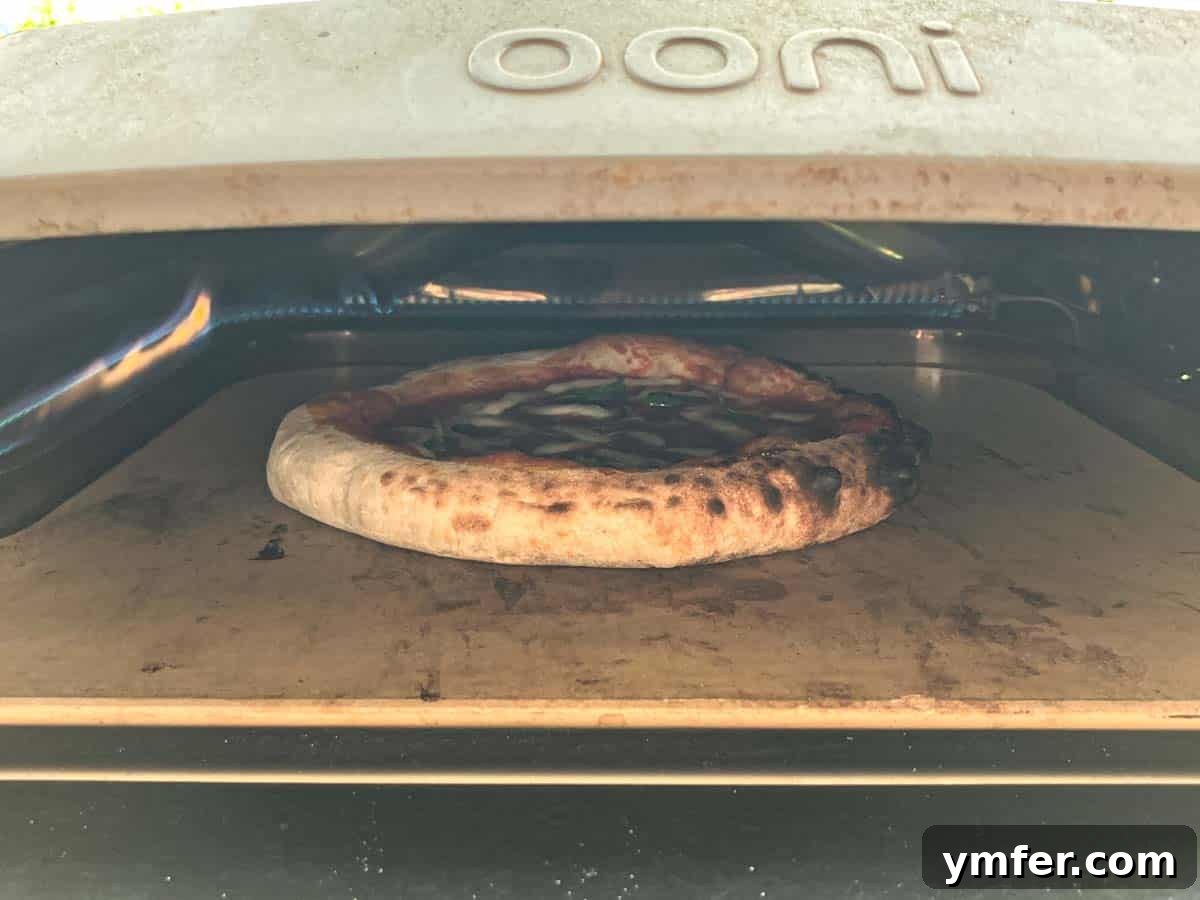
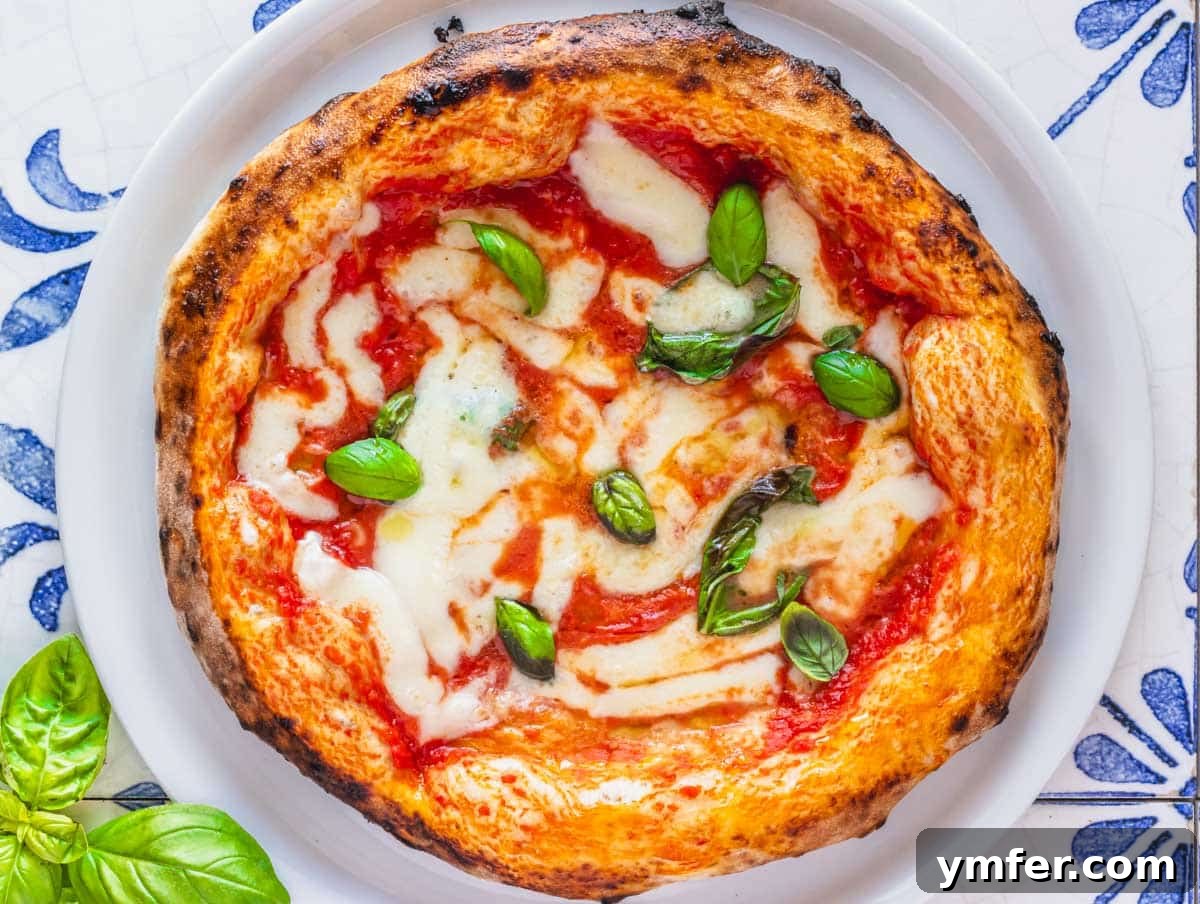
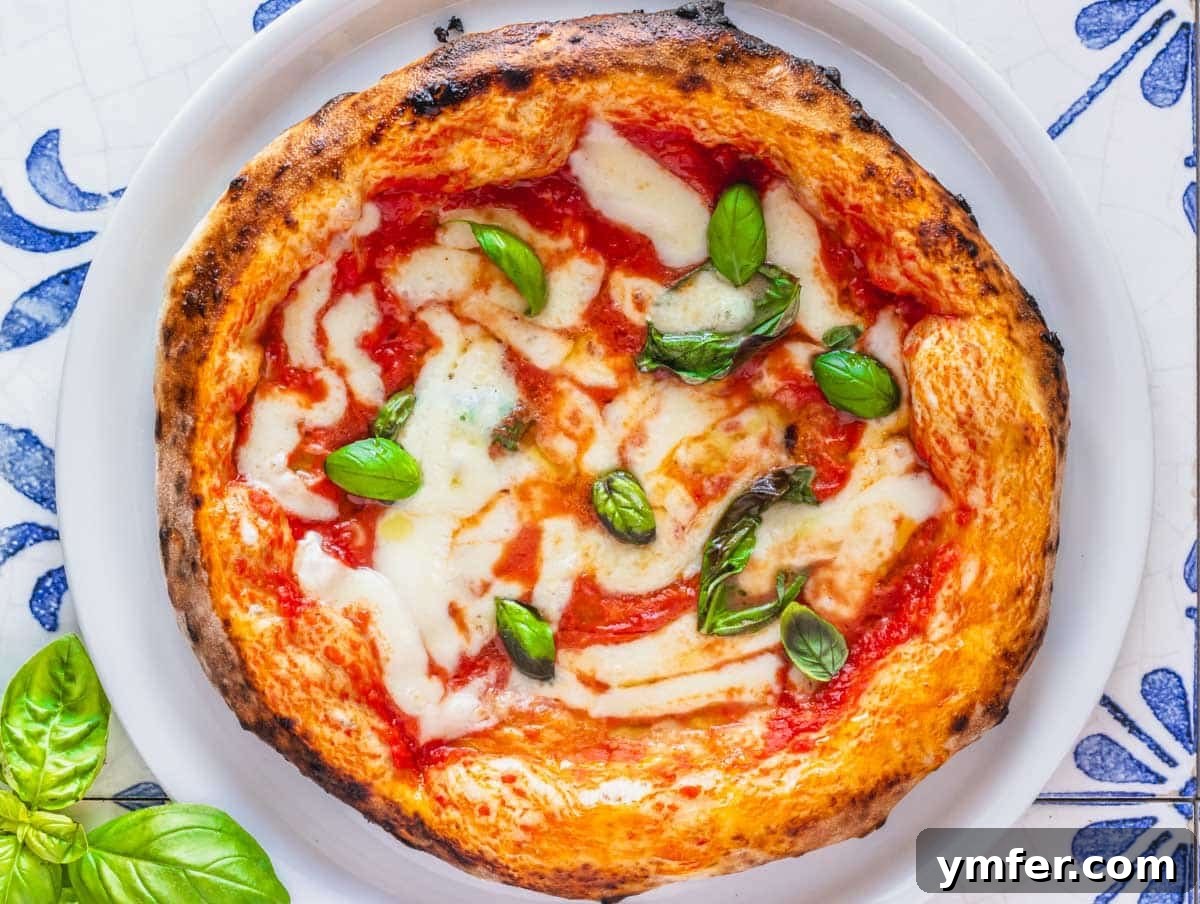
Your pizza should typically be fully cooked in 90 seconds to 2 minutes, depending on the precise temperature of your Ooni oven and desired char level. Look for a visibly puffed-up cornicione, melted and bubbly cheese, and a beautifully cooked base.
12. How to Enjoy Your Ooni Pizza
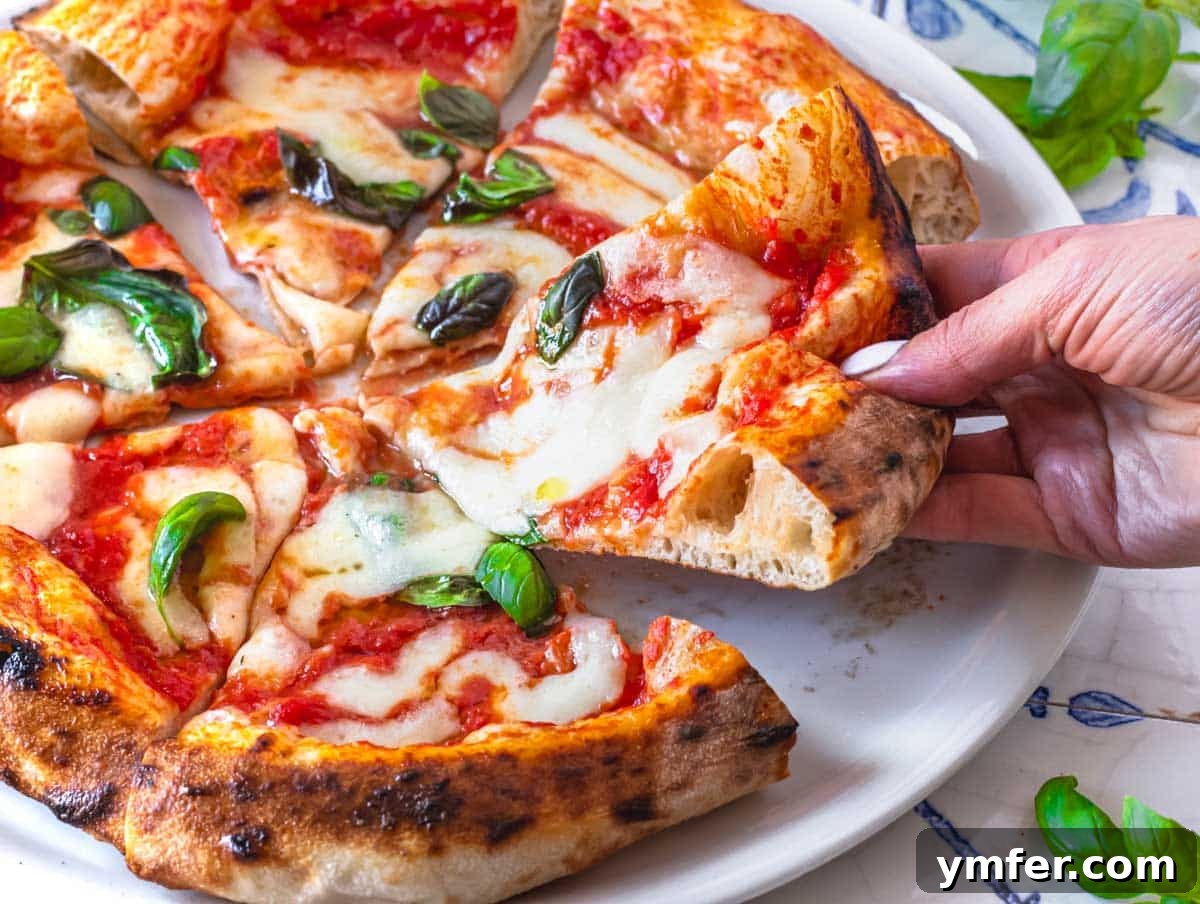
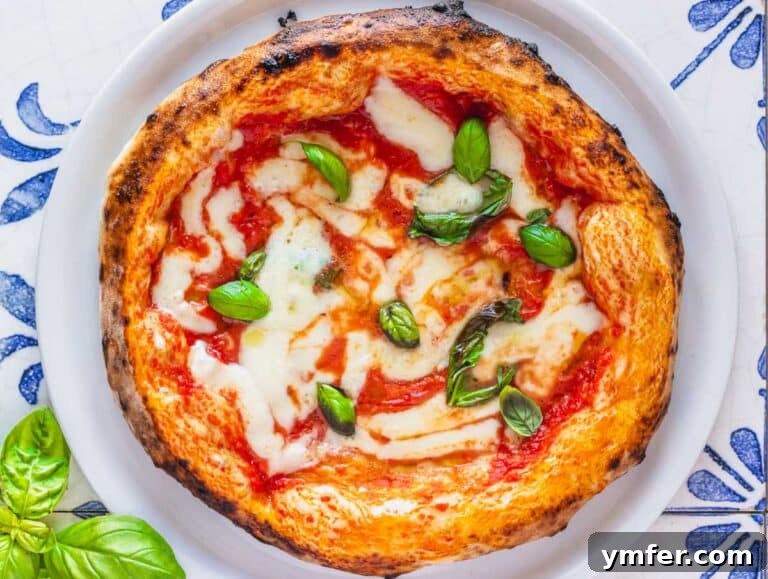
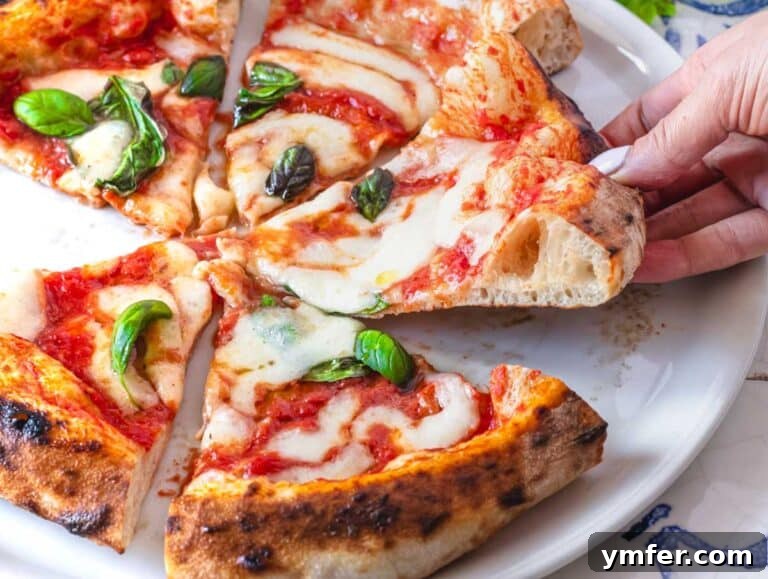
If you’ve followed these steps, your homemade Ooni pizza should emerge from the oven as a culinary triumph! The mozzarella should be perfectly melted and glistening, without being overly browned. The rim, or “cornicione,” should have transformed into a gorgeous, puffy frame that beautifully highlights the other ingredients, boasting a mouthwatering caramelized brown color punctuated with delicate charred spots for enhanced flavor.
For an extra touch of gourmet flair, finish your pizza with a final drizzle of high-quality extra virgin olive oil over the rim and a scattering of fresh basil leaves. Traditionally, authentic Neapolitan pizza is cut into six wedges using scissors. For the ultimate enjoyment, fold each wedge in half lengthwise – this classic method allows you to savor all the flavors and textures in every bite. Buon appetito!
Ooni Pizza Dough Variations
Quick Ooni Pizza Dough for Faster Bakes
While patience often yields the most flavorful results, sometimes you need pizza in a hurry! You can significantly reduce the proofing time to just 1 to 2 hours by adjusting the ingredient ratios. Here’s how you can make a quicker Ooni pizza dough:
- Pizza Flour: 3 1/3 cups | 500 grams
- Water: 1 1/4 cups | 300 grams
- Yeast: 2 teaspoons | 7 grams (a notable increase from the standard recipe)
- Salt: 2 teaspoons | 10 grams
- Sugar: 2 teaspoons | 10 grams (added to the water-yeast mixture to activate the yeast faster)
The process for mixing and kneading remains the same as our main Ooni pizza dough recipe. The primary difference is the bulk proofing time, which will be approximately 1 to 2 hours, or until the dough has doubled in volume. To further accelerate the proofing, place the dough in your kitchen oven, turned off but with the light on. The mild heat generated by the light creates an ideal warm environment for rapid yeast activity.
Important Note: It’s worth remembering that a pizza dough allowed more time to mature, with less yeast, typically develops a richer, deeper flavor profile, and is often lighter and easier to digest. The quick dough is excellent for convenience, but the standard recipe offers superior taste and texture.
Irresistible Pizza Toppings for Your Ooni
The true versatility of this Ooni pizza dough recipe shines when you explore different pizza styles and toppings. Our detailed guide above focused on the Neapolitan style, which we believe is perfectly suited for Ooni ovens, almost as if the designers had this classic Italian pizza in mind. The high temperatures achieved replicate the conditions of the finest pizzerias, allowing you to create a pizza as delicious as any you’d find in Naples!
Pizza Bianca with Rosemary and Olive Oil
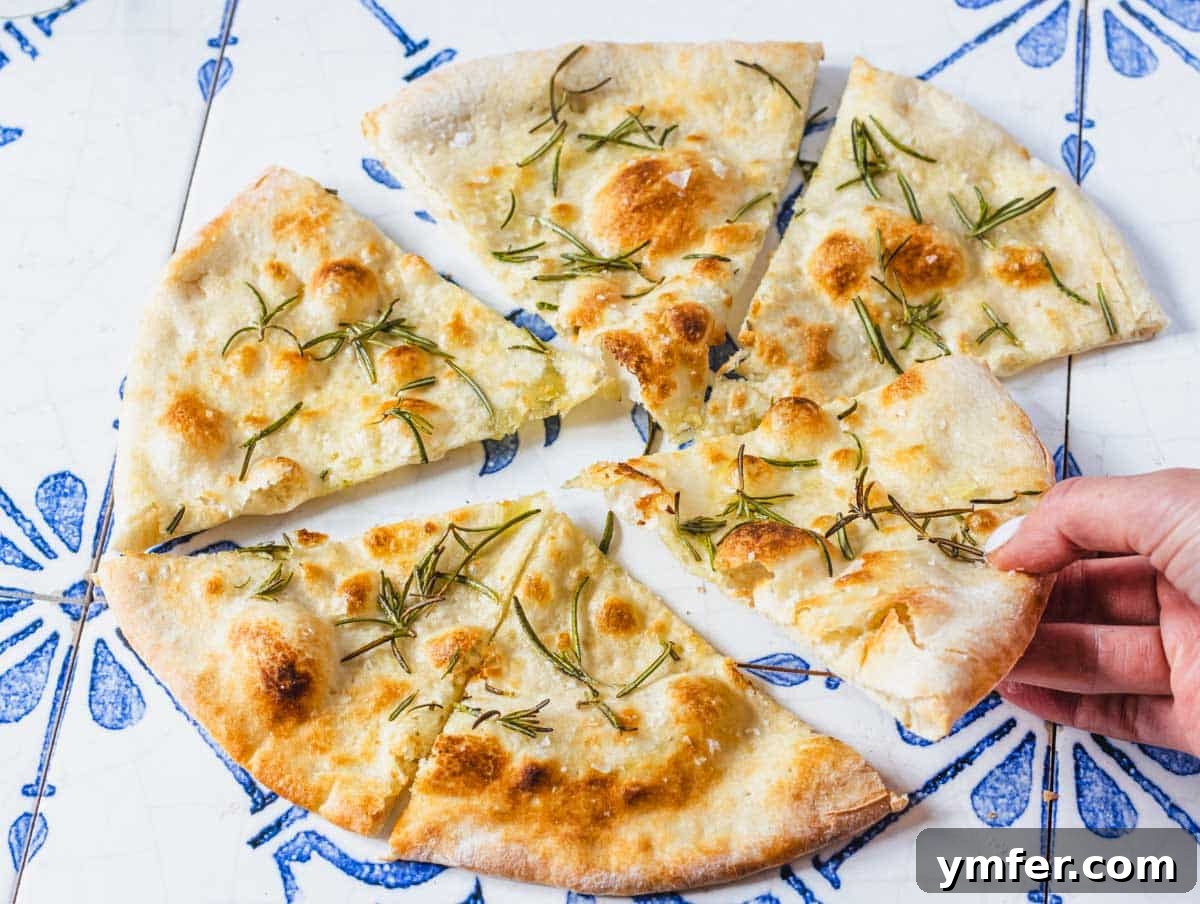
If you’re new to baking with an Ooni oven, or simply want a perfect appetizer, our top recommendation is to start with Pizza Bianca. This “white pizza” is exceptionally forgiving and the easiest to slide off the pizza peel, making it a great confidence-builder. It’s also a wonderfully delicious starter – deliciously crunchy yet chewy, it’s perfect for whetting appetites while your guests anticipate the main pizza event.
Slice it into wedges and serve with an array of complementary sides: savory olives, various cheeses, cured meats, creamy hummus, or your favorite dips and spreads. It’s a fantastic communal dish!
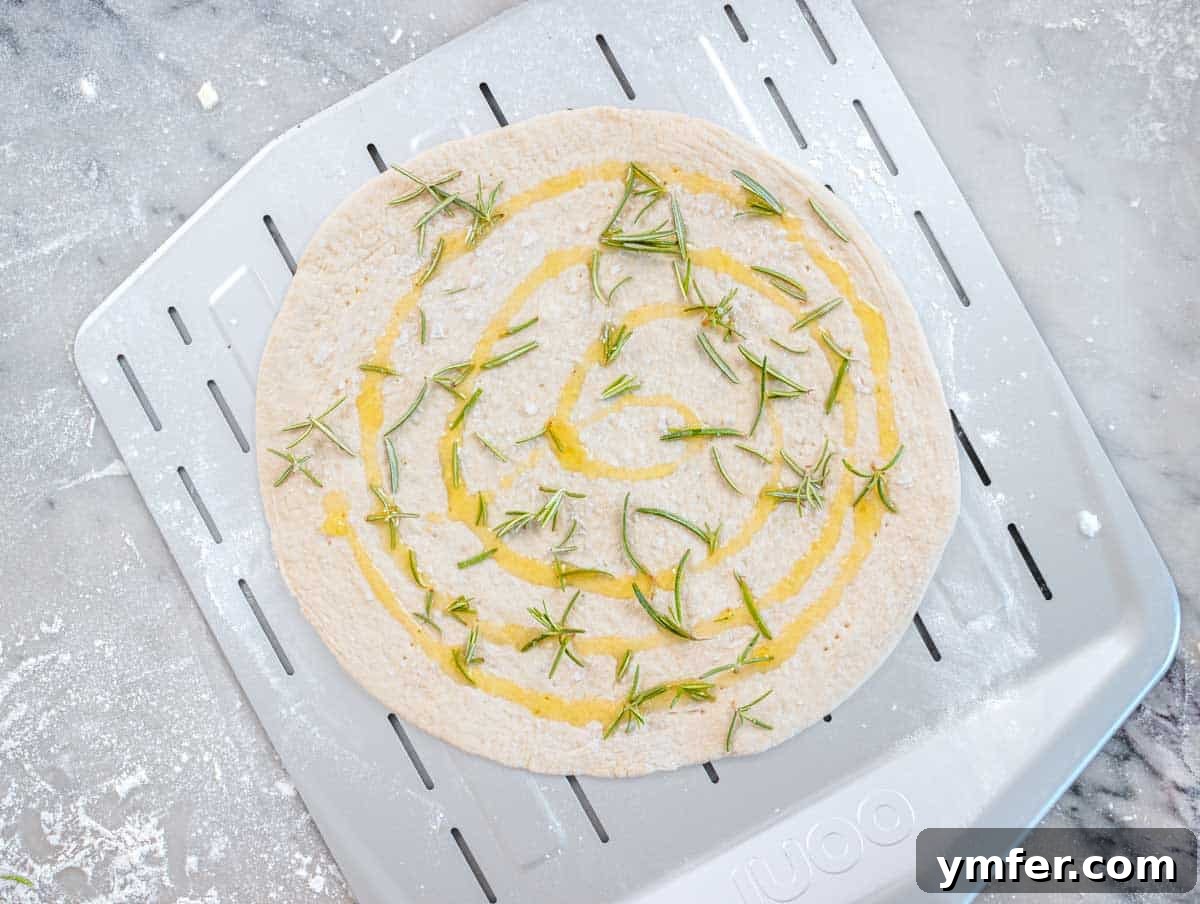
To prepare, either gently flatten the dough with your hands for a softer, chewier texture, or use a rolling pin for a distinctly crunchier result. Prick the entire surface with a fork to prevent large air bubbles. Drizzle generously with extra virgin olive oil, scatter fresh or dried rosemary needles, and finish with a liberal pinch of sea salt or flaky salt. Bake for 90-120 seconds at approximately 660°F (350°C), rotating frequently to ensure even cooking and a beautiful golden crust.
New York Style Pizza: The Classic Foldable Slice
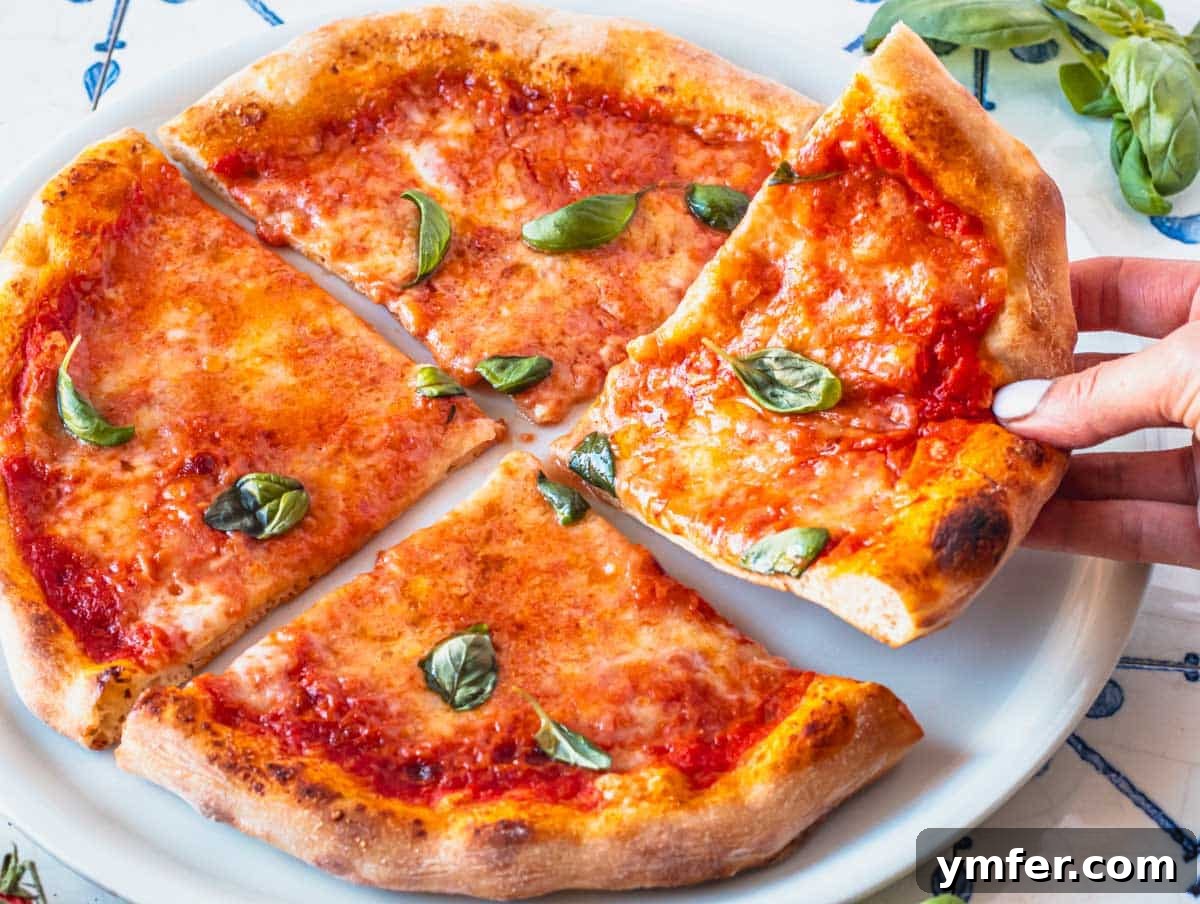
Our versatile dough recipe is also perfectly suited for creating a classic New York-style pizza. To achieve this, divide your dough into four smaller balls, each weighing about 150 grams (5.2 ounces). You may have a small amount of dough leftover, which can be saved or used for a mini pizza.
Unlike Neapolitan, a New York-style pizza doesn’t feature a thick, puffy rim. Instead, you’ll want to flatten the dough all the way to the edges. Start by tapping it gently with your hands, then stretch it over your knuckles as demonstrated previously, ensuring an even thickness across the entire disc. Top with a robust marinara sauce and a generous layer of dry, grated mozzarella cheese. Dried oregano is an optional but classic addition.
For New York-style pizza, the optimal Ooni oven temperature should be around 550°F (300°C), allowing for a slightly longer bake time of approximately 3 to 5 minutes. This extended cook time at a lower heat helps create the signature crispy-chewy crust.
Roman Style Pizza: The Crunchy Delight (Pizza Scrocchiarella)
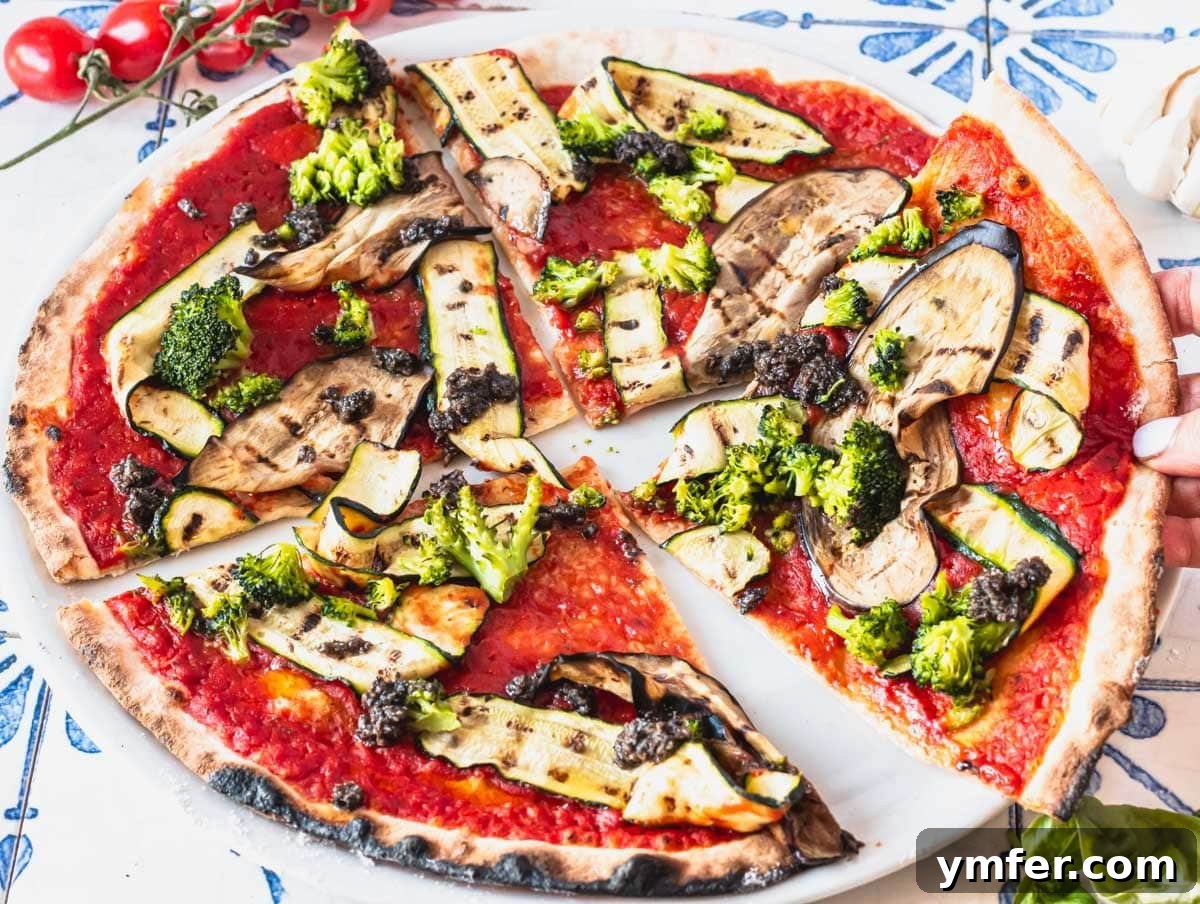
Beyond the famed Neapolitan, Roman-style pizza holds a special place in Italy, often called “pizza scrocchiarella” (the crunchy one). This distinct style, characterized by its thin and crispy crust, can also be masterfully achieved with this same dough recipe. For Roman-style, aim for smaller dough balls, around 130 grams (4.5 ounces) each. This will likely leave you with some extra dough, perfect for making a smaller pizza or even delicious pita bread.
To prepare, use a rolling pin to flatten each dough ball. This is the traditional method for Roman pizza, creating a very thin, uniform base without any puffy rim. You can top your Roman pizza with virtually anything you desire, but remember the golden rule: don’t overload it! Too many wet toppings will prevent the crust from achieving its desired crunchiness. As an example, we baked this one with a simple marinara pizza sauce and added grilled vegetables during the final minute of baking.
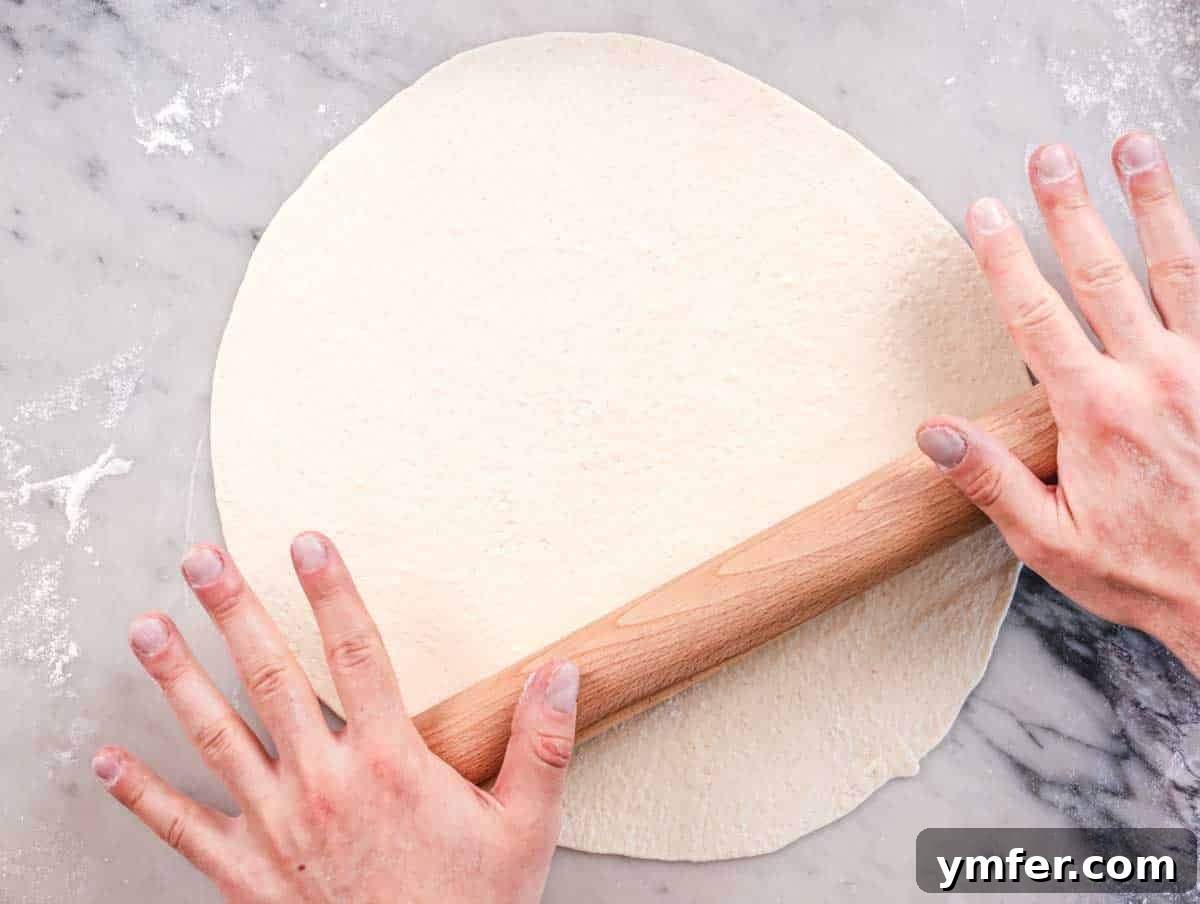
For Roman-style pizza, your Ooni oven should be set to a temperature of approximately 520°F (270°C). The baking time will be around 4 minutes. Cook on a low flame and rotate the pizza frequently to ensure even crisping and prevent burning, giving you that delightful “scrocchiarella” texture.
Storage & Make-Ahead Tips for Ooni Pizza Dough
Planning ahead can make your pizza night even more enjoyable. Our Ooni pizza dough is excellent for making in advance, and cold fermentation can even enhance its flavor!
Refrigerator Storage: To prepare the dough ahead of time, allow it to complete its initial bulk fermentation for 1 hour at room temperature. After this, transfer the entire dough ball (lightly oiled and covered) to the refrigerator. Here, it can undergo a slow maturation process for 12 to 24 hours. This cold fermentation develops more complex flavors and improves the dough’s texture and digestibility.
If you wish to store the dough for longer than 24 hours (up to 72 hours), you’ll benefit from using a flour with a higher protein content (12.5% or more) and a higher “W” value (a measure of flour strength, typically 300 and up). You could also consider adding a small amount of honey or diastatic malt to the dough – about 2 teaspoons should be sufficient – as these act as food for the yeast, supporting longer fermentation.
When you’re ready to bake, remove the dough from the fridge and let it come to room temperature for about 1 to 2 hours. Then, proceed with the balling, second proofing, and stretching instructions as outlined in the recipe.
Freezer Storage: You can also freeze the dough after its first bulk proofing. Shape the dough into individual balls, lightly oil each, and place them into separate freezer-safe bags or airtight containers. The dough can be frozen for up to 3 months without significant loss of quality.
To use frozen dough, transfer it to the refrigerator the night before, or thaw at room temperature for several hours. Once thawed, let it reach room temperature, then proceed with the balling, second proofing, and subsequent steps of the recipe.
Final Considerations for Perfect Pizza
Making pizza, particularly with a high-temperature Ooni oven, is one of the most rewarding culinary experiences you can embark on. However, it’s essential to understand that it’s more than just following a recipe. There’s a significant amount of “tacit knowledge” involved – the subtle nuances you learn through doing, feeling, and observing that are challenging to capture fully in writing.
It demands practice and patience to truly get to know your dough, understand how it reacts to different flours, varying room temperatures, and the intense heat of your Ooni oven. Learning how these simple ingredients interact with time and heat to create this magical food is a journey, not a destination.
So, take your time with this Ooni pizza dough recipe. Read through it multiple times before you begin, visualize each step, and be prepared to make mistakes. Every imperfect pizza is a valuable lesson. We genuinely believe in your ability to master this craft; you can absolutely do this! 💪❤️🍕
More Pizza & Bread Ideas to Explore
- No-Knead Focaccia Bread: Effortlessly delicious and aromatic.
- Focaccia Pizza: A thicker, soft crust that’s incredibly satisfying.
- Vegan Flatbread Pizza: A quick and customizable option.
- Pita Bread: Surprisingly easy and puffs up beautifully in an Ooni!
- Homemade Naan Bread: Perfect for dipping and serving with curries.
Looking for the perfect accompaniment to your homemade pizza? Discover our curated collection of 25 delicious side dishes to eat with pizza.
Bread Recipes
Focaccia
Bread Recipes
Focaccia Pizza
Recipes
Flatbread Pizza
Bread Recipes
Pita Bread
Ooni Pizza Dough Recipe
★
★
★
★
This versatile dough can be transformed into a wide array of your favorite pizza styles, from classic Neapolitan to robust New York-style pizzas.
Share
Equipment
-
1 Ooni pizza oven or another high-temperature pizza oven
-
2 Pizza peels one for launching, one for rotating/retrieving
-
1 Laser thermometer (optional but recommended)
-
1 Digital scale (optional for larger quantities)
-
1 Precision scale (optional for smaller quantities)
Ingredients
- 3⅓ cups pizza flour (we recommend Caputo pizza flours. All-purpose or bread flour can be substituted, but results may vary.)
- 1¼ cups lukewarm water (ideally around 77°F or 25°C)
- ¾ teaspoons dry yeast (we recommend Red Star active dry yeast, Red Star Saf Instant, Caputo dry yeast, or Dr. Oetker instant yeast.)
- 1½ teaspoons salt
Instructions
-
For comprehensive step-by-step instructions and detailed tips, please refer to the “How to Make Ooni Pizza Dough” section above.
1. ACTIVATE YEAST: In a small container, combine 1¼ cups lukewarm water and ¾ teaspoons dry yeast. Whisk quickly until the yeast is fully dissolved.

-
2. MIX DOUGH: In a large mixing bowl, add 3⅓ cups pizza flour and 1½ teaspoons salt. Stir to combine thoroughly. Add the water-yeast mixture and mix with a wooden spoon for about 1 minute until a shaggy dough forms.
-
3. KNEAD & REST: Transfer the dough to a clean worktop and knead for 3 minutes until it becomes smooth and elastic. Cover the dough with an inverted bowl and let it rest for 15 minutes.
-
4. FOLD DOUGH: Gently flatten and stretch the dough into a square. Fold it from right to center, left to center, top to center, and bottom to center. Repeat this folding sequence one more time. Then, shape the dough into a smooth, taut ball by rotating it against the worktop.
-
5. BULK PROOF: Transfer the dough ball to a large bowl brushed with olive oil. Lightly brush the dough surface with oil, cover the bowl with a plate or plastic wrap, and place it in a warm, draft-free kitchen corner for about 4 to 6 hours or until it has visibly doubled in volume.
Tip: For consistent results, proof the dough in your oven (turned off, but with the light on) to provide gentle warmth.
-
6. BALL DOUGH: Gently transfer the proofed dough to a clean worktop. Divide it into 3 equal pieces. Gently stretch and fold each piece onto itself, turning it 45 degrees with each fold. Repeat several times until you have a tight, smooth ball. Pinch the seams together to seal, then roll the ball on the worktop to smoothen the surface.
-
7. SECOND PROOF & PREHEAT: Line a baking sheet with parchment paper and dust with flour. Arrange the dough balls on the tray, leaving space between them. Sprinkle with flour and cover with plastic wrap. Set aside in a warm kitchen corner for 30 to 60 minutes. Meanwhile, preheat your Ooni oven to 750°F (400°C) (this takes 15-45 minutes) and bring prepared toppings to room temperature.
-
8. PREPARE WORK AREA: Generously dust your worktop with flour. Place your pizza peel nearby and dust it with two pinches of flour. Uncover one dough ball, lift it gently with a spatula, and turn it upside down onto the floured worktop. Alternatively, invert the container if using. Sprinkle the dough with more flour.
-
9. SHAPE DOUGH: Gently flip the dough right side up. With fingers extended and index fingers touching, flatten the disc from near the center, leaving about ¾ inch (2 cm) untouched at the edges for the rim. Gently press and push/slide the dough away from the center to stretch it slightly.
-
10. STRETCH DOUGH: Rotate the dough slightly and repeat the flattening and stretching until it forms a 10-inch (25 cm) circle. Now, lift the dough and drape it over your knuckles, gently pulling your hands away from each other and rotating the dough to stretch it to a 12 to 13-inch (30 to 33 cm) disc. Excess flour should fall off.
-
11. LOAD PEEL: Place the stretched Ooni pizza dough on your lightly floured pizza peel. Before adding toppings, gently rock the peel back and forth to ensure the pizza is loose and slides easily. If it sticks, remove, re-flour the peel, and reposition the dough.
-
12. TOP PIZZA (Margherita): Working swiftly, top with a couple of tablespoons of tomato sauce, spreading with the back of a spoon. Add a few basil leaves, then 3.5 ounces (100 grams) of mozzarella, followed by a handful of optional grated Parmesan cheese and a drizzle of extra virgin olive oil.
-
13. FINAL STRETCH: Gently pull the edges of the topped pizza outwards to widen it to its full size on the peel. The weight of the toppings will help hold it in place.
-
14. BAKE: Confirm the oven stone is around 750°F (400°C) with a laser thermometer. Slide the pizza into the center of the Ooni oven. Angle the peel at 15 degrees, touch the stone, and swiftly pull back the peel from under the pizza.
-
15. ROTATE: After 60 seconds, use your second pizza peel to rotate the pizza to ensure even cooking on all sides. Monitor the crust and lower the oven’s flame if it’s cooking too fast.
-
16. FINISH BAKE: The pizza should cook for a total of 90 seconds to 2 minutes, depending on your oven temperature and desired crust.
-
17. SERVE: Finish the pizza with a drizzle of extra virgin olive oil on the rim and fresh basil leaves. Cut into six wedges with scissors, fold each wedge in half, and enjoy immediately!
Notes
MARGHERITA TOPPING PREPARATION
Ideally, prepare your topping ingredients a few hours before baking your pizza and store them in the refrigerator.
For best results, allow the toppings to reach room temperature by removing them from the fridge at least 1 hour before baking.
For three margherita pizzas, you will need:
- San Marzano tomatoes or whole canned peeled tomatoes: 1 large can (28 ounces/800 grams). Expect some leftovers.
- Extra virgin olive oil: 1 tablespoon for the sauce + more for drizzling on the baked pizza.
- Fresh mozzarella (ideally Italian-style fior di latte): 11 ounces or 300 grams. For vegans, use a plant-based cheese that melts well.
- Grated parmesan cheese (optional). Use about ½ cup, 1.7 ounces, or 50 grams. Vegans should omit.
- Fresh basil leaves.
- Sea salt to taste.
To make the sauce, place the San Marzano tomatoes in a bowl and blend with an immersion blender until smooth, or crush by hand for a rustic texture. Season with a generous pinch of salt and a tablespoon of olive oil.
Chop the mozzarella into small sticks or cubes and place it in a sieve over a bowl to drain excess liquid.
EXPLORE MORE ON THIS PAGE:
- What is Ooni Pizza Dough?
- Essential Ingredients & Equipment for Ooni Pizza Dough
- How to Make Ooni Pizza Dough + Expert Tips
- Ooni Pizza Dough Variations
- Irresistible Pizza Toppings for Your Ooni
- Storage & Make-Ahead Tips
- Final Considerations for Perfect Pizza
- More Pizza & Bread Ideas
Nutrition Facts
Hey all, we hope you had a fantastic time making this Ooni pizza recipe!
Since you’ve read this far down the page, here’s a special tip if you ever find yourself in Berlin, Germany. Our absolute favorite pizzeria is called The Grain – it truly is a slice of heaven. We highly recommend visiting!